



September 12, 2020
Confirmed! Launch X431 V+ diagnose Hyundai Kia etc Korean cars, even to the 2020 year.100% works
Firstly, Launch X431 V+ Hyundai function list:
http://qcar.x431.com/newqcar/
Click on "Passenger car seriesâ€;
Click on the letter "Hâ€;
Click on "Hyundaiâ€;
Select "Model†-> "Year†-> "System†-> "Functionâ€.
X431 V+ can work with Hyundai from 1989 – 2020 year.
You will see X431 V+ support Hyundai cars even to 2020 year [for Accent / Solaris (HCR), Elantra(AD), G90(HI), Grandeur /Azera (IG), H-1/iMax/iLOAD(TQ), Kona(OS), Nexo (FE), Palisade(LX2), Reina(CB), Santafe(TM), Santro(AH2), Veloster (JS), i30 (PDE), i30N(PDEN).
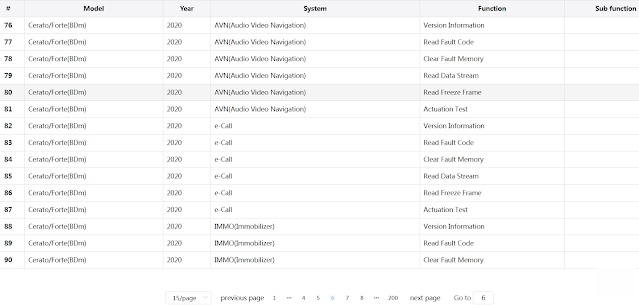
Attach one screenshoot:
Then, Launch X431 V+ Kia function list:
Back to click on "Kâ€;
Then "Kiaâ€;
Select "Model†-> "Year†-> "System†-> "Functionâ€.
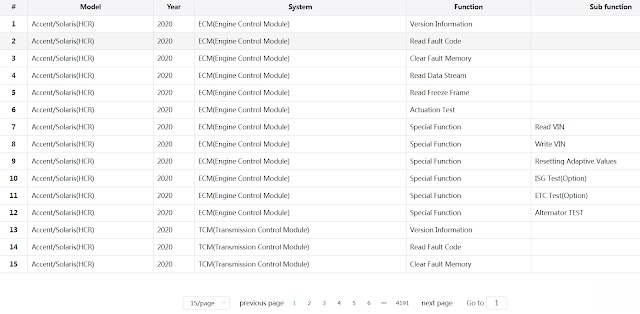
X431 V+ can work with Kia from 1990 – 2020 year.
For the following Kia models, it can cover to 2020 year:
Cerato/Forte(BDm), K900 (RJ), Optima Hybrid (JF HEV), Optima PHEV (JF PHEV), Optima (JF), Optima (JFA) – For Central and South America, Pegas /Soluto (AB), RIO (SC), RIO (YB), Sedona (YP), Sorento (UM), Soul EV (SK3 EV), Soul EV (SK3 EV) – For Mexico, Soul (SK3), Soul (SK3) – For Mexico, Sportage (QL), Stonic (YB CUV), Telluride (ON)
Launch X431 V+ diagnose Kia
Posted by: youobd2 at
07:18 AM
| Comments (1)
| Add Comment
Post contains 207 words, total size 2 kb.
September 08, 2020
 .Communicating ï¼›
9).Choose “Yesâ€ï¼›
10).Turn off the ignitionï¼›
11).Make sure ignition openedï¼›
12).Press “Yes†to clear all DTC;
14).Turn off the igintionï¼›
16).Switch on the iginitionï¼›
.Communicating ï¼›
9).Choose “Yesâ€ï¼›
10).Turn off the ignitionï¼›
11).Make sure ignition openedï¼›
12).Press “Yes†to clear all DTC;
14).Turn off the igintionï¼›
16).Switch on the iginitionï¼›
Posted by: youobd2 at
03:18 AM
| Comments (1)
| Add Comment
Post contains 69 words, total size 1 kb.
August 25, 2020
When you replace tire pressure sensors,you need to program it for your car.So here i want to show this instruction on how to use Launch X431 to program tire pressure sensor for Lexus ES250 2014.And here is a collection for TMPS projects:Tire Pressure Sensor Trouble Repair.
What You Need?
Launch X431 V+ pro3
Operation Procedure:
1.Switch on the ignition.
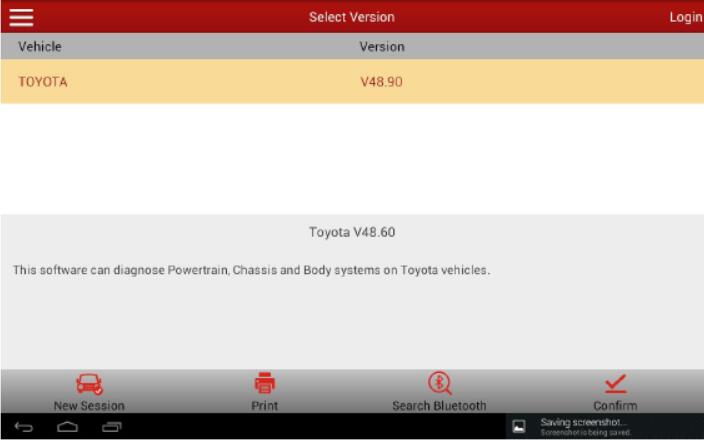
2.Select the Toyota Version V48.50.
3.Select "16PIN Diagnostic Socket (Euro&RoW)â€.
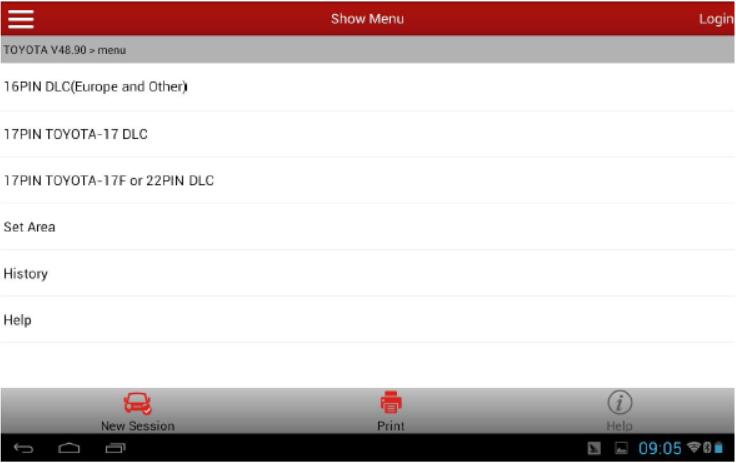
4.Select "Automatic Searchâ€.
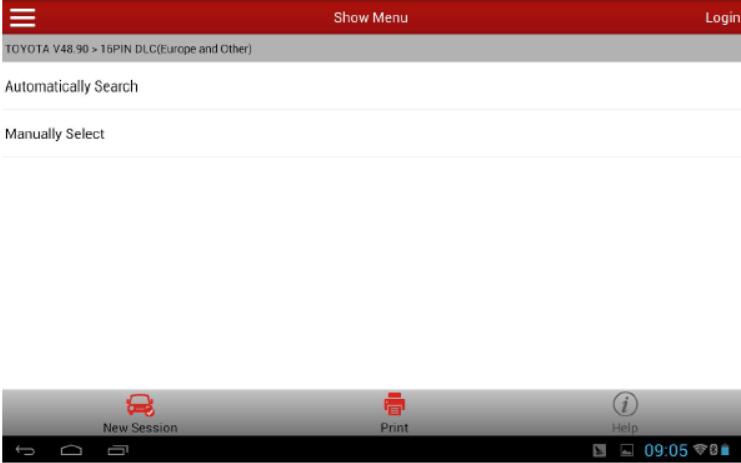
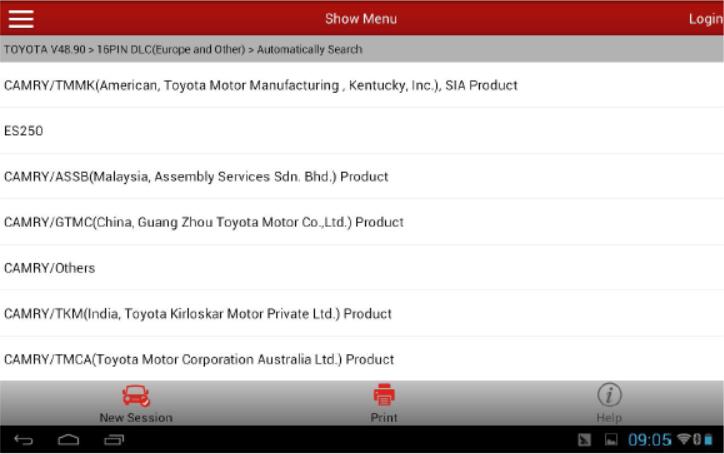
5.Select corresponding car model ES250.
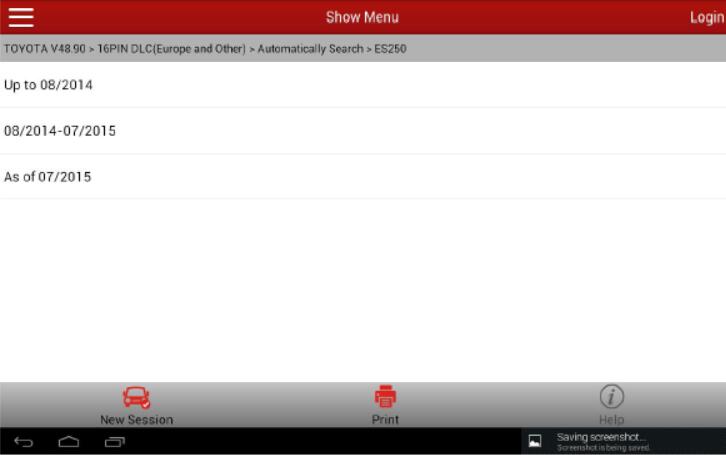
6.Select "Up to 08/2014â€
7.Displayed car model information is as below.
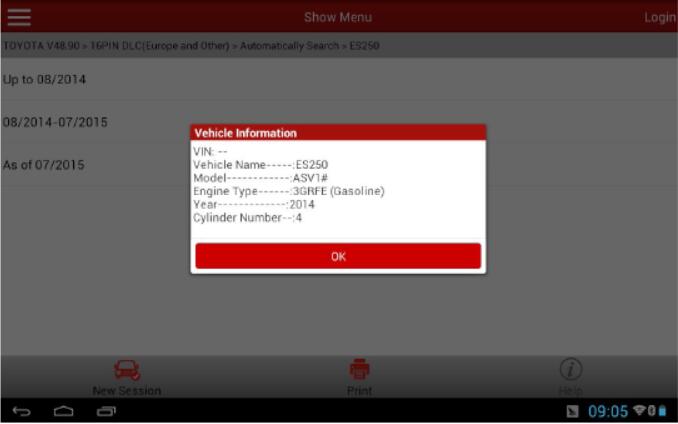
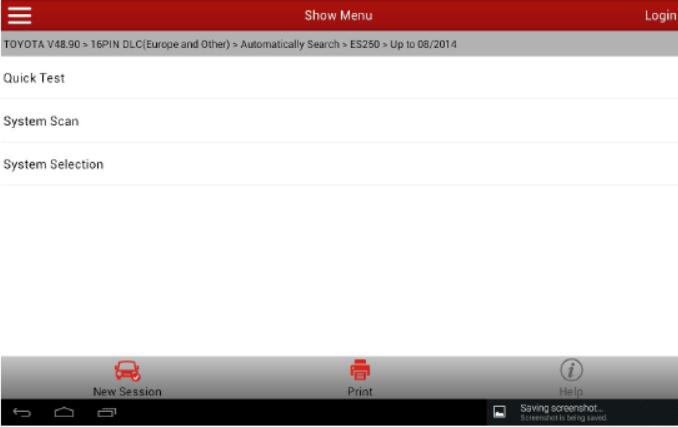
8.Select system selection.
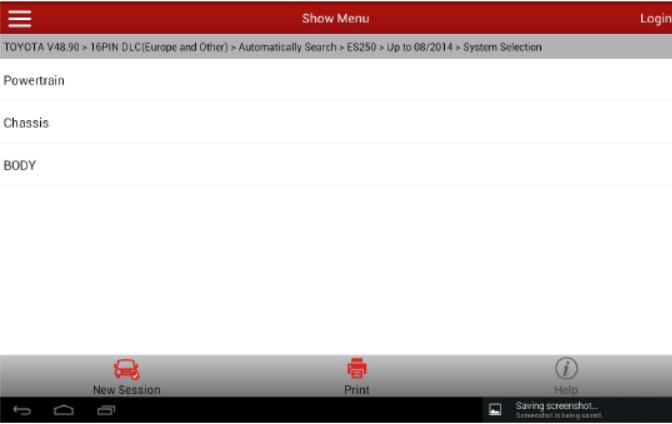
9.Select chassis.
10.Select †ABS/VSC/TRC ".
11.Select "Read Data Streamâ€.
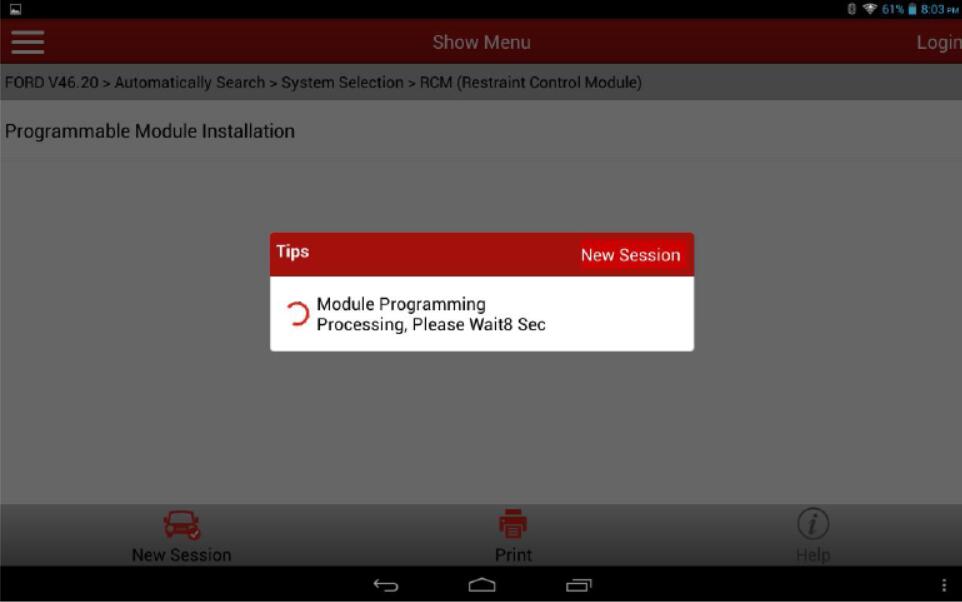
12.Select manual selection.
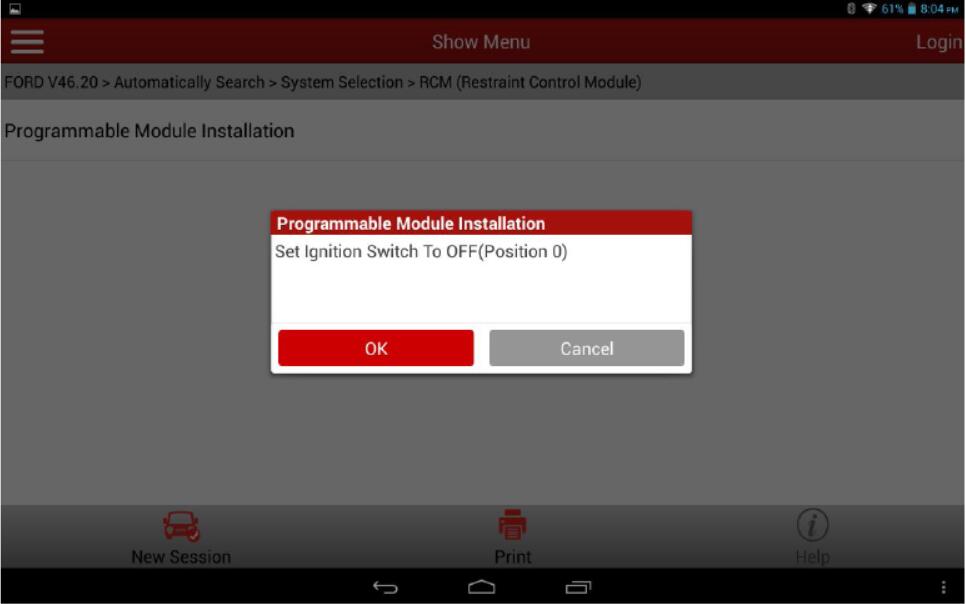
13.Select registered ID1 Code-ID5 Code (5 data streams) to read.
14.Write down the code value you read for later entry.


15.Select special function.
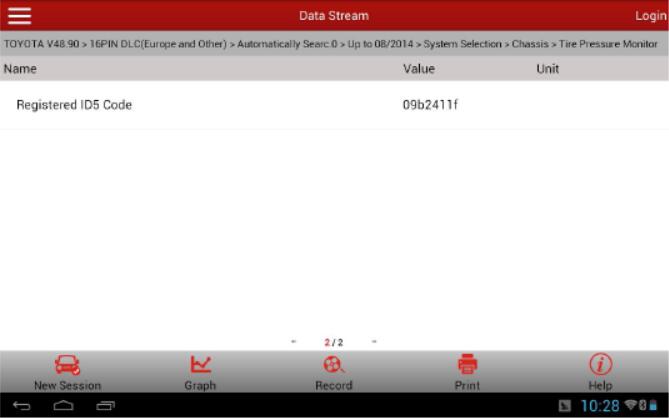
16.Select automatically scan the special function.
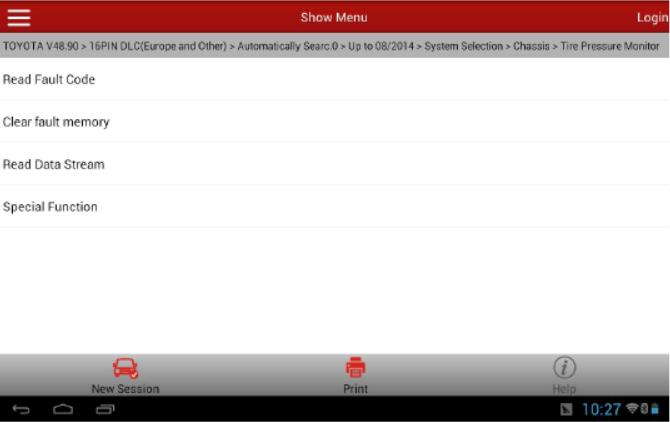
17.Select identification registration.

18.Select master tires and follow the prompts. Note, this vehicle requires to input 5 tire pressuresensor IDs.
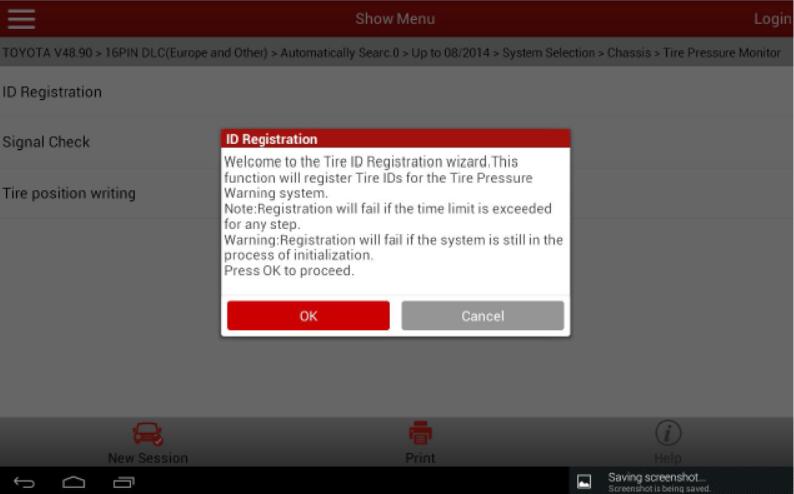
19.Select Main Set
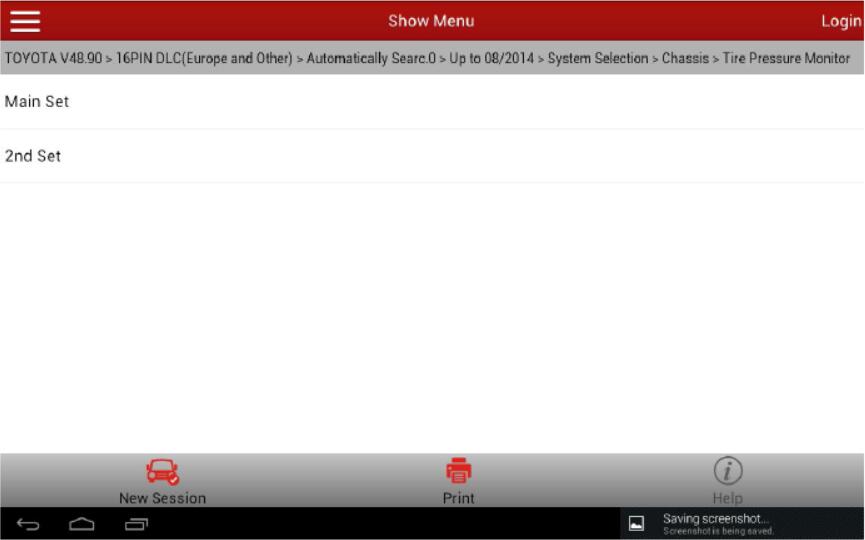
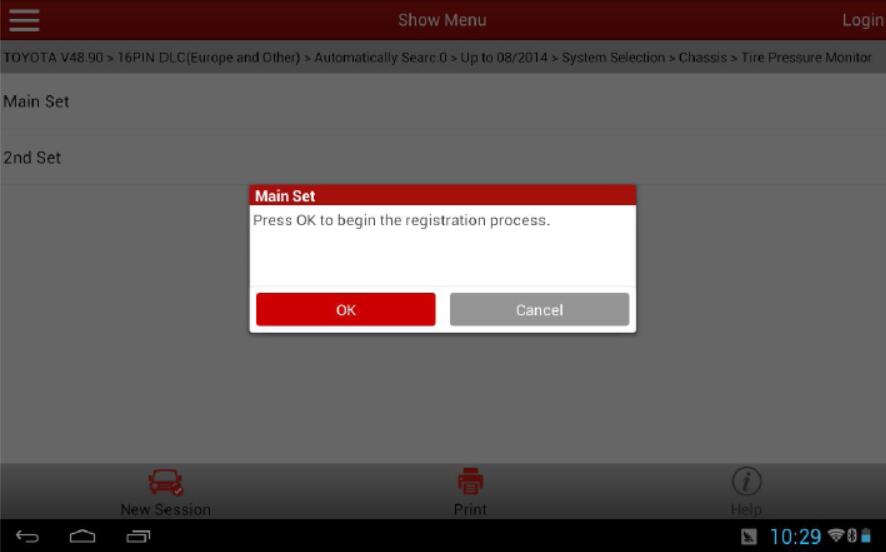
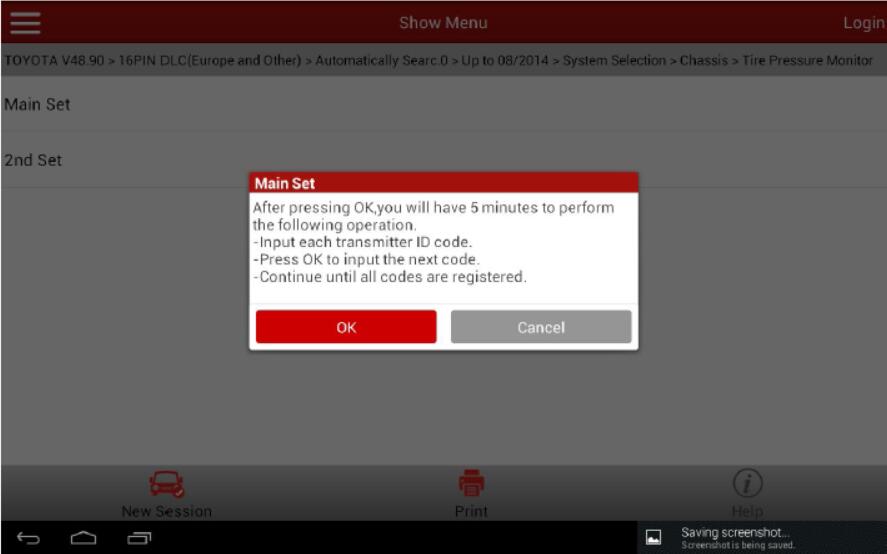
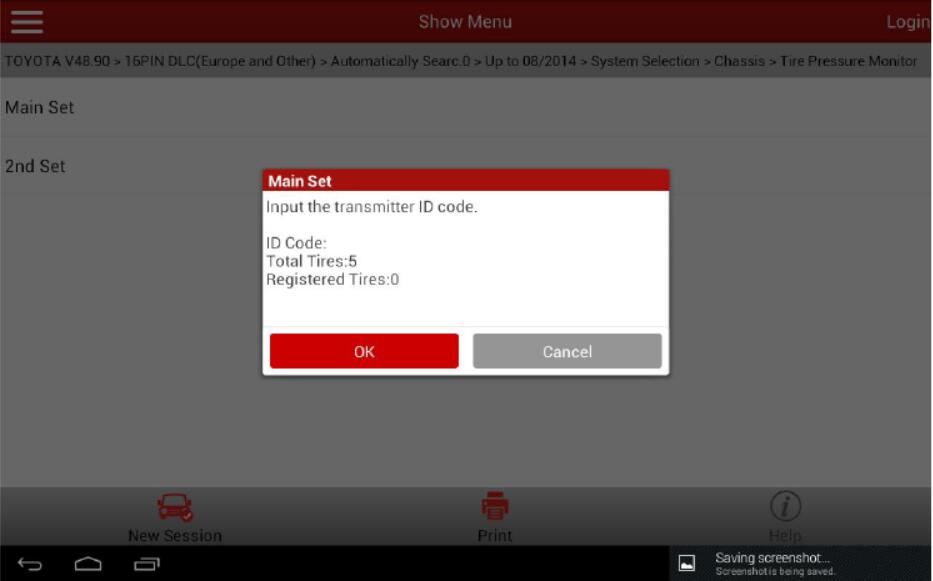
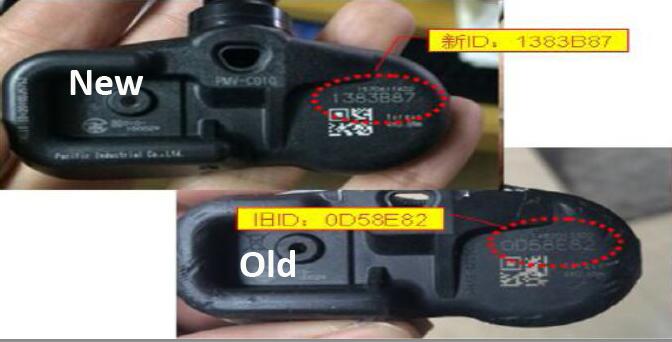
20.Input the ID1-ID5 codes according to the replacement of the tire pressure sensors. As ID1 is not replaced, input the original ID1 code "1234567â€.
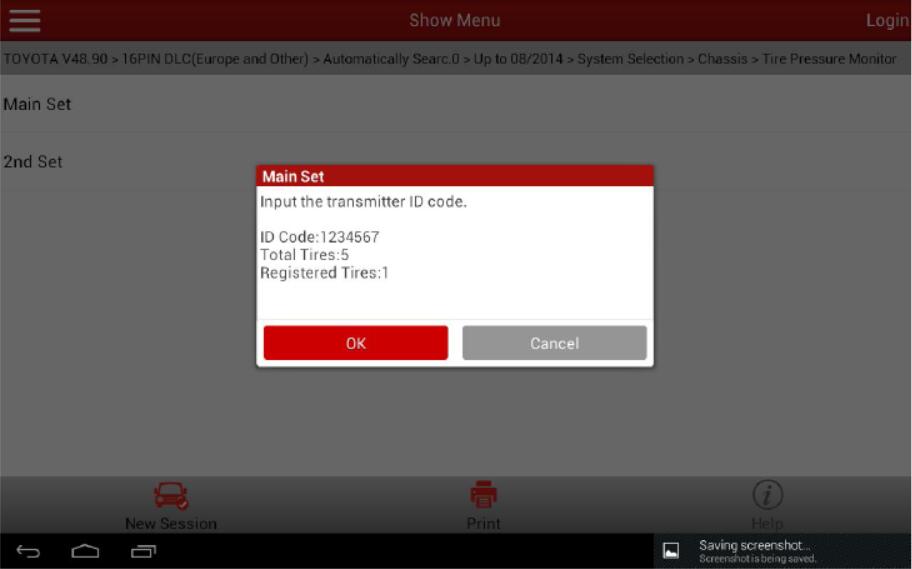
21.Input the ID2 code. As the ID2 tire pressure sensor is replaced, input the new code "1234567â€.For the new code and Picture 11 for the operation interface.


22.Input the original ID3 code "07654321â€.
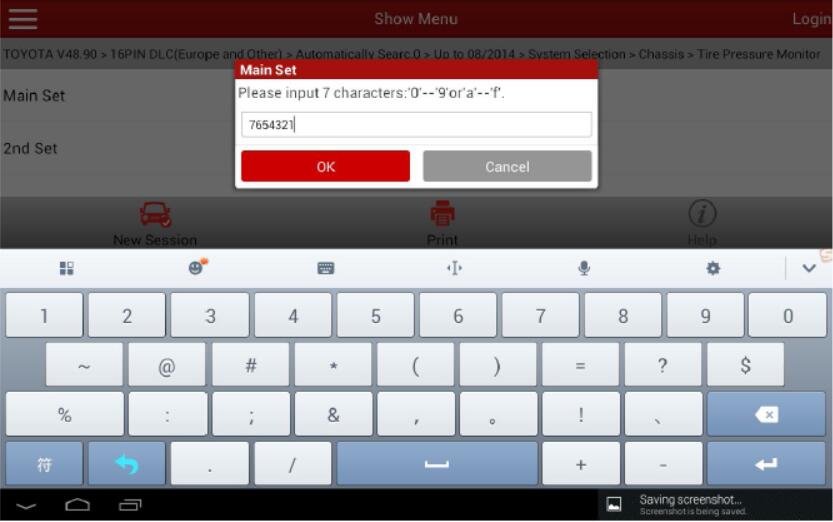
23.Input the original ID4 code "9fedcbaâ€.
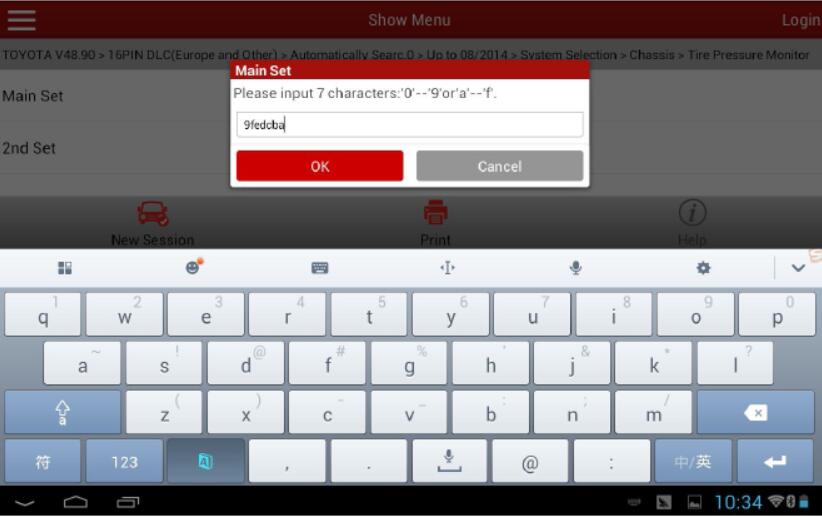
24.Input the original ID5 code "1234abcâ€.
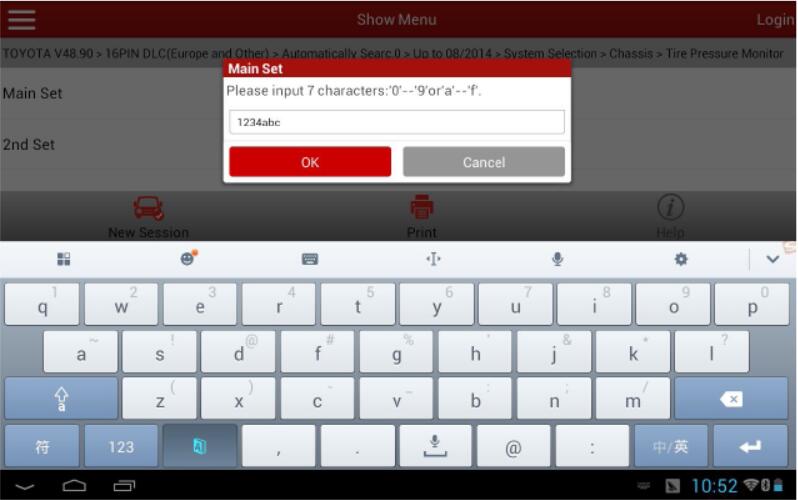
25.After successful entry, it prompts "ID login completedâ€.
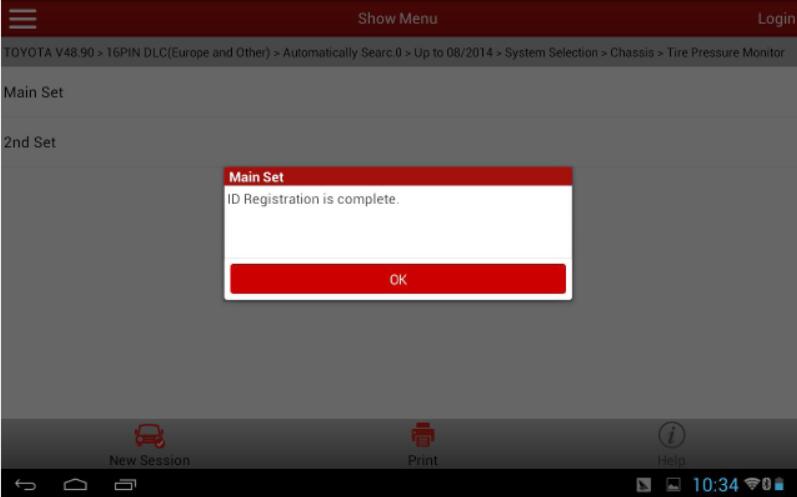
26.Read the data streams of ID1-ID5 again to confirm each ID code has been successfully written.
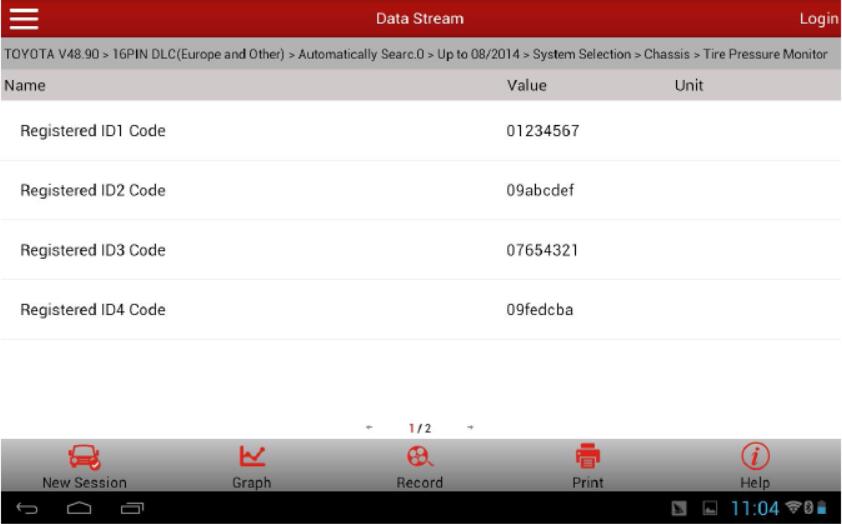
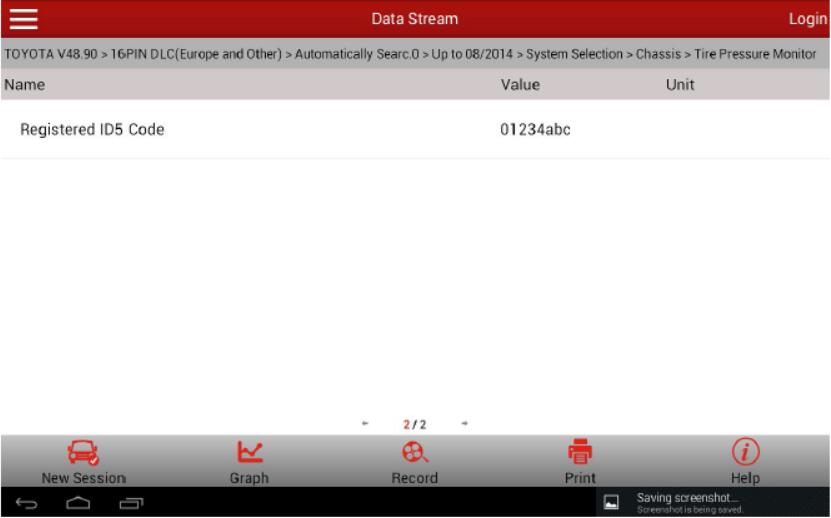
27.Drive the vehicle, everything is normal. Problem has been solved.
Posted by: youobd2 at
11:01 AM
| Comments (1)
| Add Comment
Post contains 269 words, total size 14 kb.
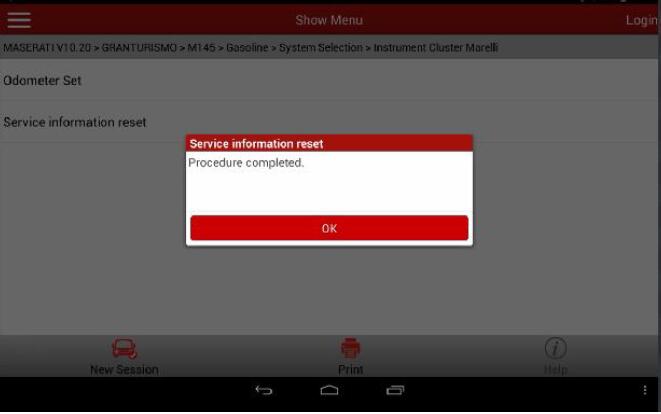
This instruction show you guide on how to use Launch X431 device to reset service light for Maserati Granturismo M145 2012.

What You Need?
Precautions:
1.Park the vehicle on a level surface. The installed sensor is very sensitive to the tilt of the vehicle, otherwise an incorrect measurement error will be displayed because the vehicle is not level.
2.The gear selector must be in P position.
3.After the engine runs, wait 10 minutes for making various vehicle operating indexes stable. After this time, the used individual sensor signal will give out the correct output.
Operating Instructions:
1.Turn the ignition to ON;
2.Select Europe;
3.Select the Maserati V10.03;
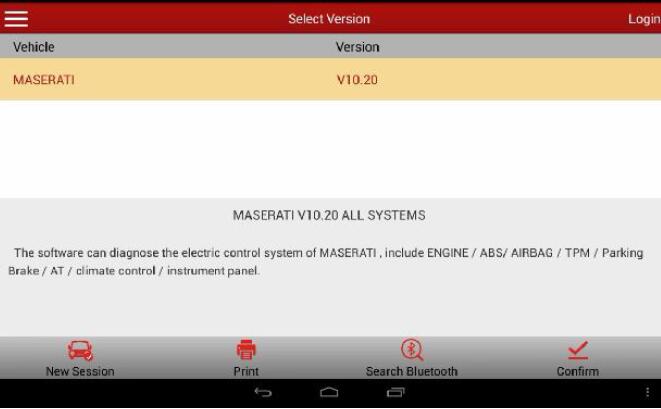
4.Select the GRANTURISMO model;

5.Select the M145;
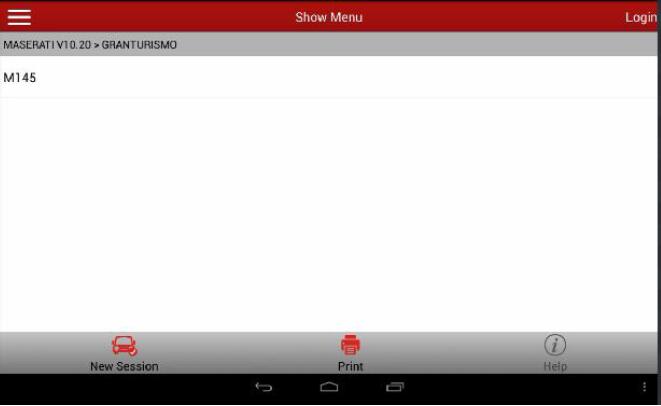
6.Select the Gasoline;
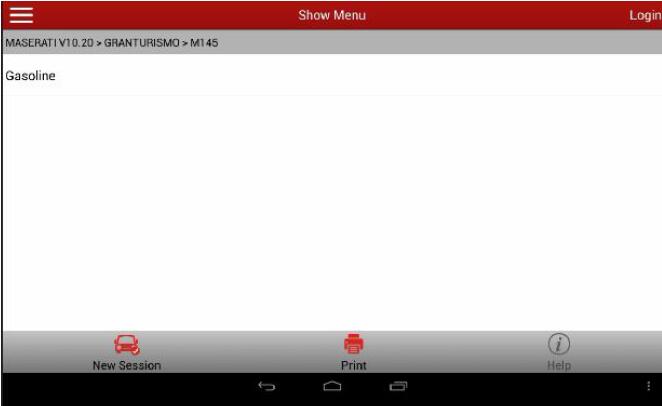
7.Select the System Scan;
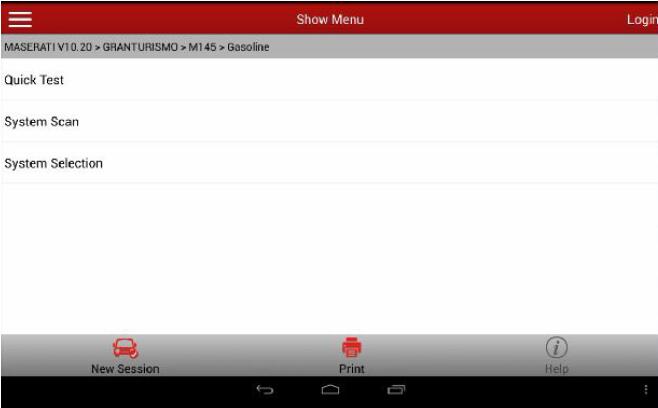
8.Select the Marelli Instrument Cluster;
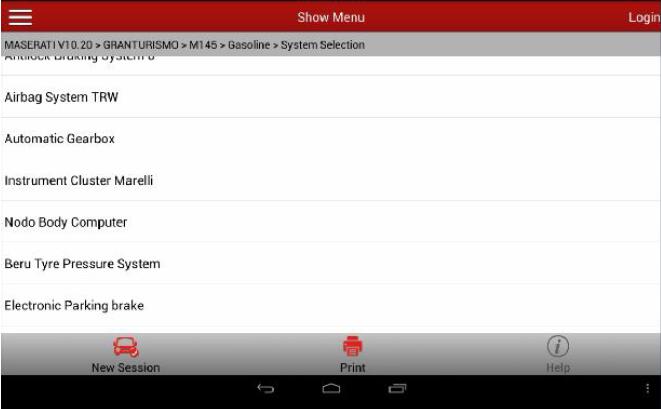
9.Read out the ECU ID, and select Confirm;
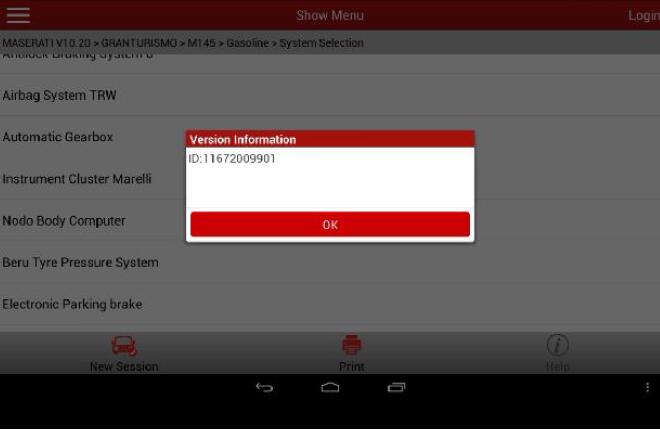
10.Select the Special Function;
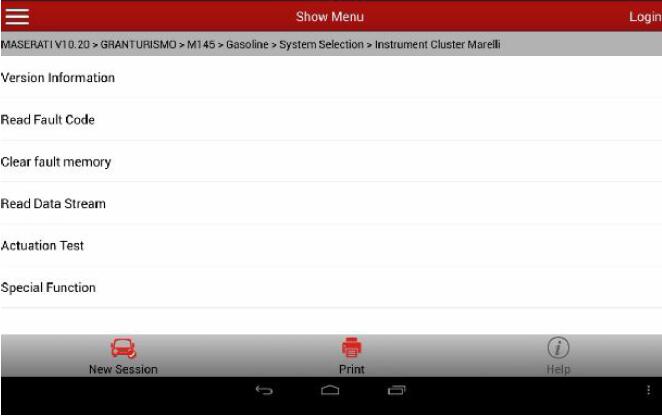
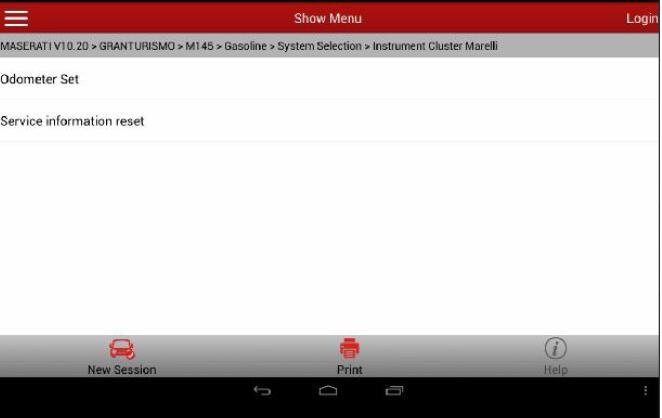
11.Select the Service Info Reset;
12.Pay attention to the reset service hints to ensure the date on the instrument cluster is set correctly;
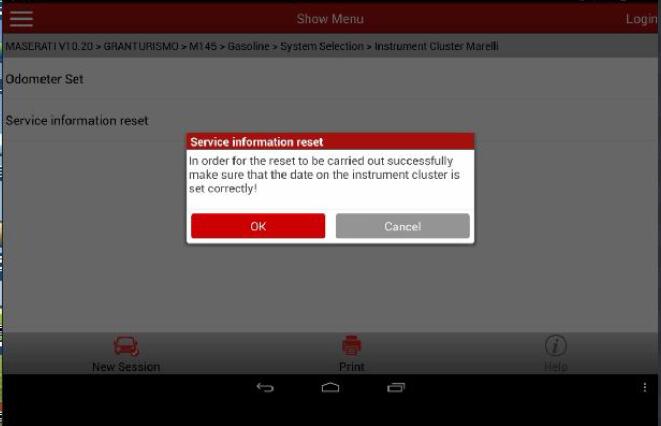
13.After confirmed, it indicates "Procedure completedâ€, then the operation ended.
Posted by: youobd2 at
10:43 AM
| Comments (1)
| Add Comment
Post contains 184 words, total size 6 kb.
August 22, 2020
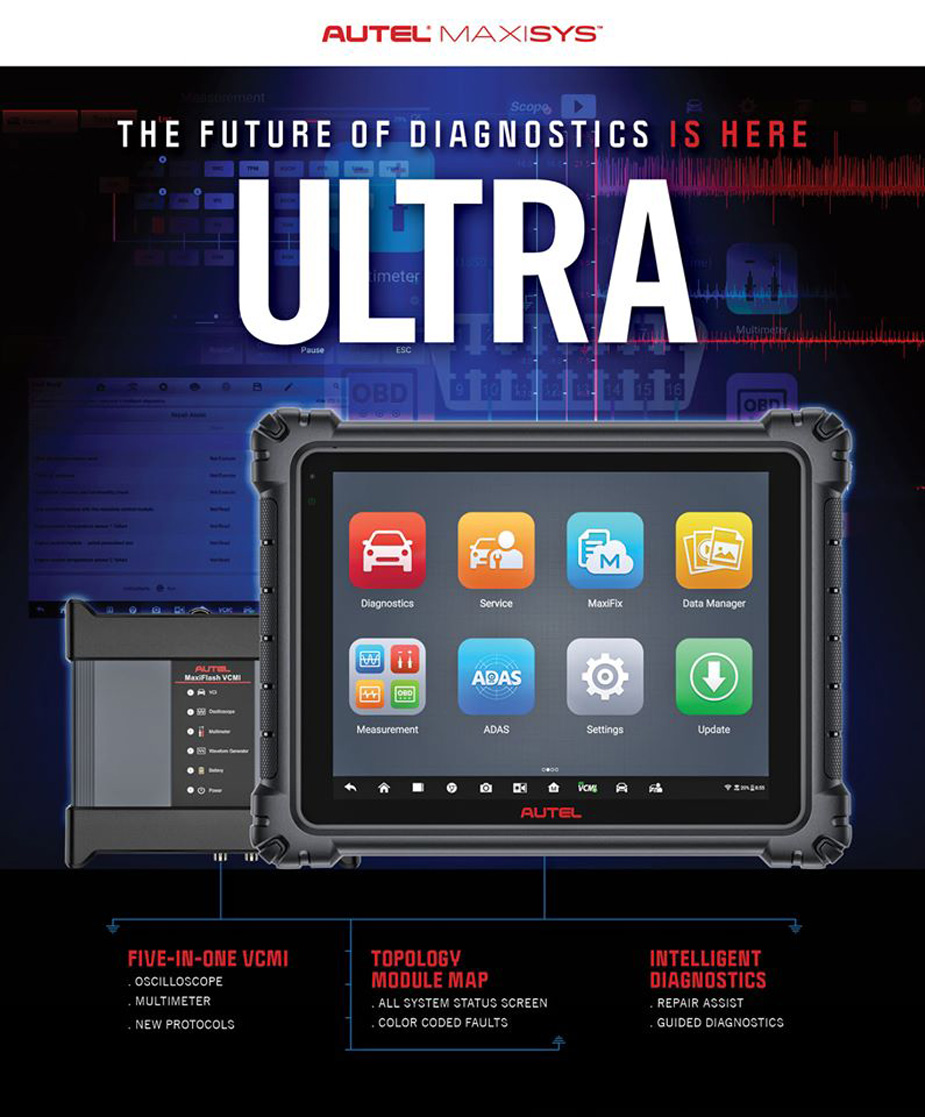
Autel US is proud to announce the release of its largest, most powerful and most solution-driven automotive diagnostics tablet in its history, the MaxiSYS Ultra.
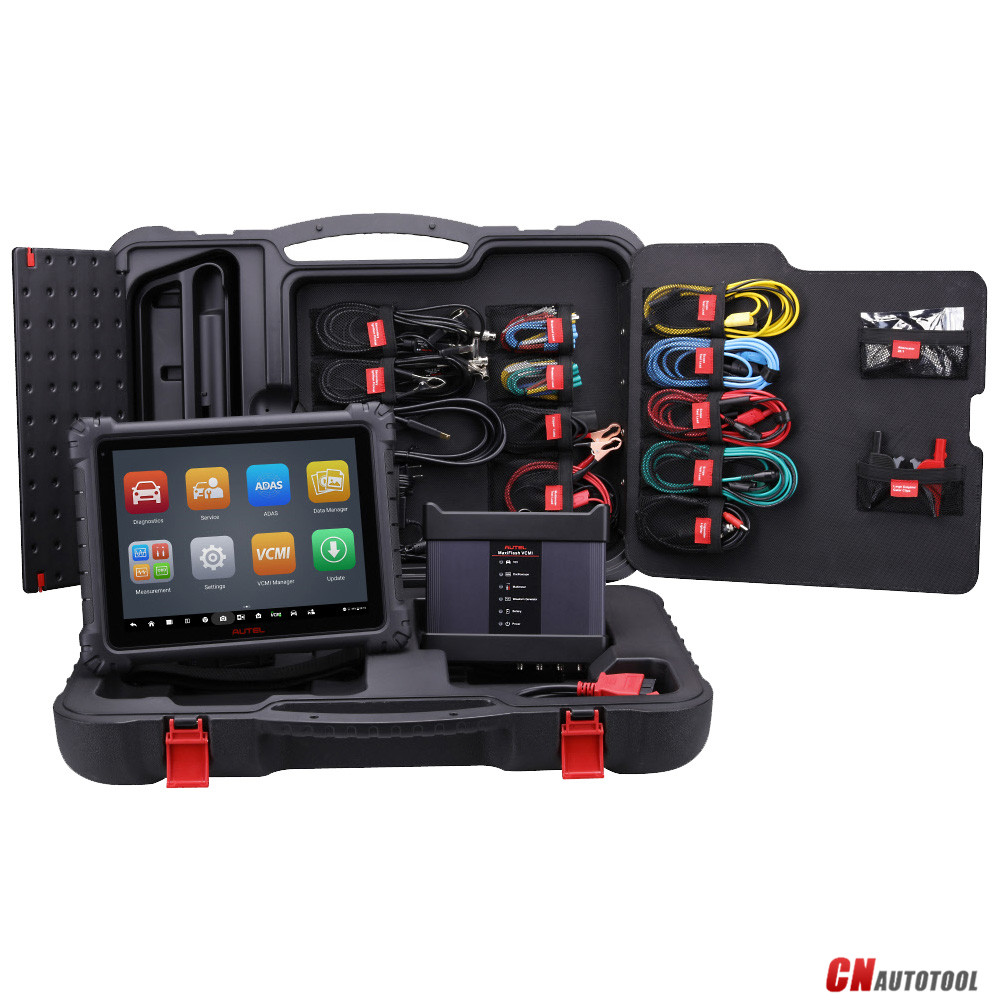
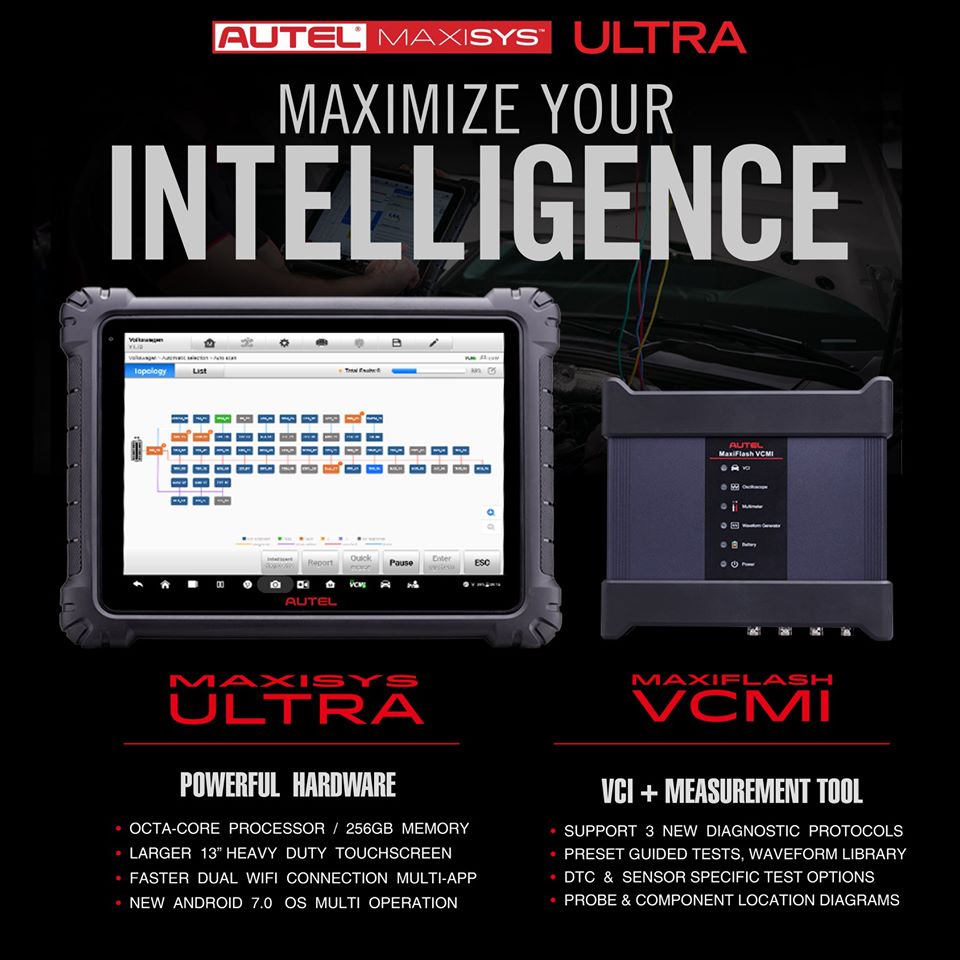
The Ultra is an impressive 12.9-inch, touchscreen tablet powered by an Octa-core processor (2.3GHz Quad + 1.7GHz Quad) with substantial 256GB built-in memory and features the MaxiFlash VCMI, a 5-in-1 communication and testing tool providing wireless vehicle communications between the vehicle and tablet and supporting the latest DoIP, D-PDU and Mega CAN vehicle communication protocols. The dynamic VCMI also functions as a 4-channel oscilloscope, waveform generator, multimeter and CanBUS tester.
MaxiSys UltraDescriptions :
1. Autel updates provide latest OE level coverage for more than 80 US Domestic, Asian and European vehicles, including supercar
2. Exceptional OE-Level functionality from comprehensive OBDII diagnostics & services to advanced ECU coding and programming
3. Automatic system and software updates with real-time push message notifications via internet
4. Interactive Data Logging sessions enable direct contact with Autel
Support for first-hand troubleshooting of diagnostic bugs and errors
5. One-stop multitasking designed for ideal management of workshop
operations to keep all data files, customer info, and vehicle records
well organized
6. Cloud-based Data Manager saves customer and vehicle records, scanner data and technician notes
Posted by: youobd2 at
01:59 PM
| Comments (1)
| Add Comment
Post contains 208 words, total size 3 kb.
August 11, 2020
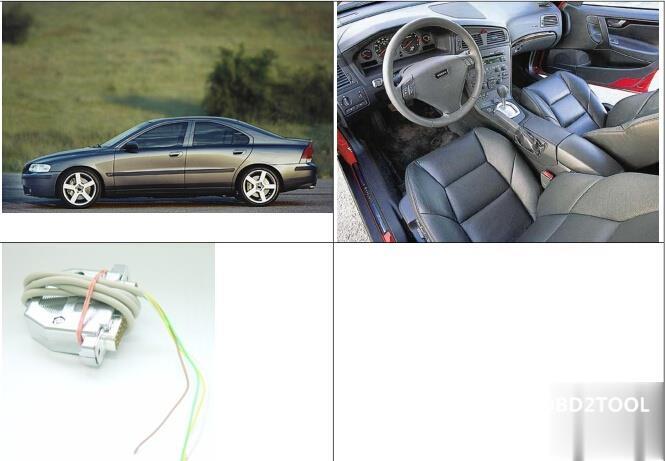
It is possible to change change KM in Volvo V60 cluster. Depend of what tool you have. Here are instructions and pinouts provided.
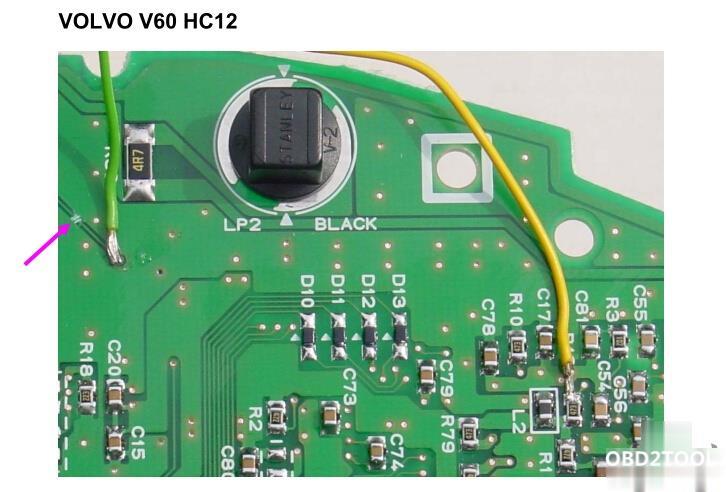
VOLVO V60 HC12
Connector 51 is required
VOLVO V60 HC12
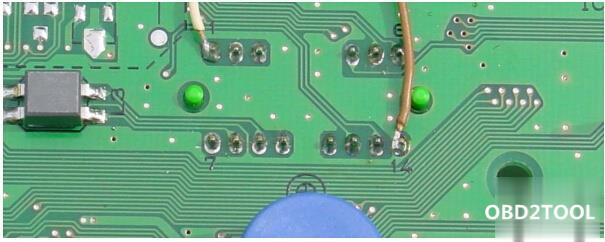
Remove the instrument cluster and remove the back cover.
Solder from connector 51 the colors at the marked same color
Soldering points. Disconnect the conductor (pink arrow)
(PICTURES ON THE FOLLOWING)
Connect the plug to the Digiprog III odometer correction tool.
Select the program:
Car / Truck – VOLVO V60 HC12.
The Digiprog 3 v4.94 shows the old / wrong CM reading.
The new / correct KM stand program and ready.
After confirmation, the process is completed.
Solder all connections.
FINISHED.
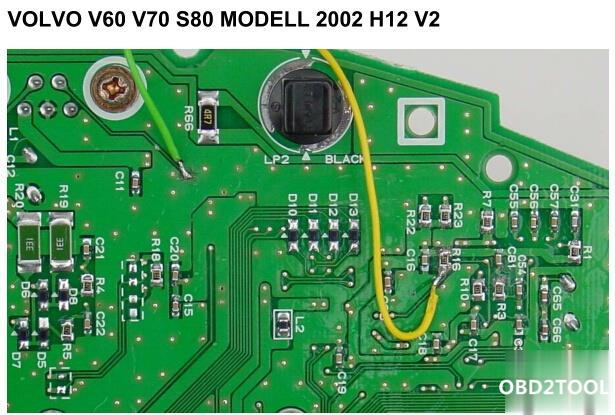
VOLVO V60 V70 S80 MOD. 2002 H12 V2
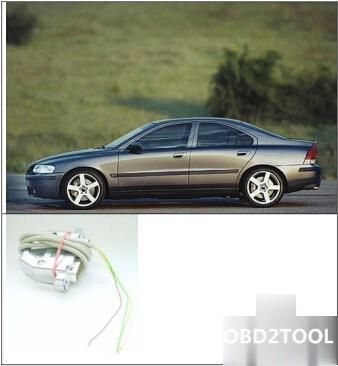
Connector 51 is required
VOLVO V60 V70 S80 MODEL 2002 H12 V2
Remove the instrument cluster and remove the back cover.
Solder from connector 51 the colors at the marked same color
Soldering points.
Connect the plug to the Digiprog3 V4.94.
Select the program: Car / Truck – VOLVO V70 HC12 V2.
The Digiprog shows the old / wrong CM reading.
The new / correct KM stand program and ready.
After confirmation, the process is completed.
Solder all connections.
FINISHED.
Posted by: youobd2 at
03:17 AM
| Comments (1)
| Add Comment
Post contains 210 words, total size 3 kb.
Here is success and failure experience of Audi TT 2003 KM change, using different odometer correction tools.
Car:Audi TT 8n 2003 D73
Super VAG:
I got connection but I only get error message from the device when I want to enter the mileage option.
It is very recommended tool to do that. So I bought one of it but with that tool nothing change.
It seems to work ok. I enter the mileage and continue. Then car-display restart and the Digiprog 3 says to remove fuse but nothing changed, still the same mileage. I tried also to disconnect the battery but it also not help, or did I removed the wrong fuses^^ I used 11 and 15 which are both for the speedometer. I also tried it separate, so only to remove one fuse.
Suggestion:
Regarding your cluster, it probably contains a MC912DG128ACPV MCU that contains the mileage data so you need a tool that can read and write that to that chip. Quite a few of the more well known tools can’t read and write to it over OBD (Chinese clones are some of the well known ones for corrupting this chip and causing the 999999 error). You should avoid taking risks with writing to this chip as it could corrupt your immobiliser/key data and then cause your car not to start, the immobiliser cutting the engine off.
If you want change mileage with a cheap tool, go to a man of his words to trust in.
Vag Tacho Pro U2008 HQ clone orDigimaster 3odometer correction master can be a good investment
Connection:
Note that: Different tools might have diff connections and colours of wires
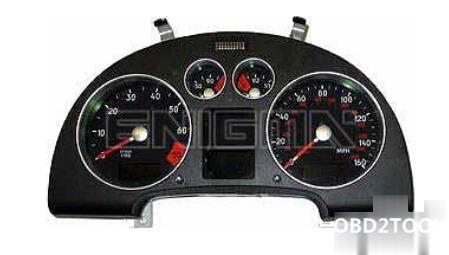
Dashboard:
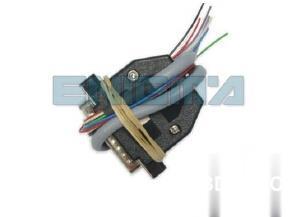
Required cable – C12:
How-to’s & connection:
1.Remove the dashboard and open it carefully.
2.Remove the back side of the dash to get to the main board and identify it.
3.Solder cable C12 to the points on the back of the dash mainboard
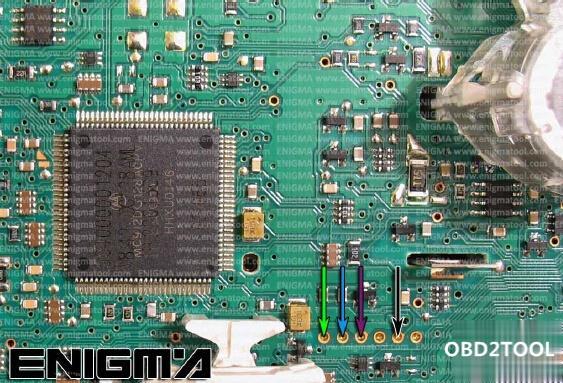
4.Make sure that the connection you made is secure.
5.Use the EDITOR to save memory backup data.
6.Press the READ KM button and check if the value shown on the screen is correct.
7.Now you can use the CHANGE KM function.
TRY ON YOUR OWN RISK!
GOOD LUCK!
Posted by: youobd2 at
03:12 AM
| No Comments
| Add Comment
Post contains 383 words, total size 4 kb.
August 10, 2020
How to Restore BMW ICOM Scanner? This post will show an obd2eshop customer’s solution to BMW ICOM Next restore when you has red LEDs turn on issue when running firmware upgrade. In order to solve your incident, please apply the following 12 steps:
Note: DO NOT UNPLUG the BMW ICOM Next emulator from the {OBD II} jack after an update via {ISTA}, a web interface or an emergency software update.
The {ICOM Next} starts with flashing green SYSTEM {LED}s. After about 10 seconds it shows red {LED}s for about 2 minutes. After this, the {ICOM Next} reboots due to a firmware update.
If the {ICOM Next} {LED}s remain red for more than 10 minutes, or if the {ICOM Next} is unplugged directly after an update, please carry out the following procedure:
1. Please ensure that ALL of the following prerequisites are satisfied:
1.1. You require a USB 2.0 or USB 3.0 flash drive. {USB 1.x flash drives are not supported).
1.2. The USB flash drive must be formatted with a FAT32 file system.
1.3. A minimum of 60 MByte free space is required on the USB flash drive.
2. Navigate to "C:\ProgramData\BMW\ISPI\data\TRIC\ICOMNext\ICOM-Image-03-14-08â€.
ProgramData folder is hidden by default. In that case, you have two options in order to access the file or the folder:
– change the settings directly in the Windows Explorer ("Tools => Folder Options => View => Show hidden files, folders or drivesâ€)
– or enter the whole path into the Windows Explorer’s address bar and press enter.
3. Copy "{ICOM_Next-rootfs-010002.tar.gz}†to the root directory of the {USB} flash drive.
4. Copy "{ICOM_Next-app-010008.tar.gz}†to the root directory of the {USB} flash drive.
5. Disconnect the {ICOM Next} from the power supply.
6. Plug the {USB} flash drive into the {ICOM NEXT}.
7. Press and hold the button pressed on the {ICOM Next} and connect the {ICOM NEXT} to the {OBD II} jack of a vehicle.
8. Keep the button pressed. The {ICOM NEXT} starts with all {LED}s glowing red. The {LED}s stay red; some may flicker orange/yellow. Keep the button pressed.
9. Keep the button pressed. After about 4 seconds, all {LED}s turn orange/yellow. All {LED}s now glow in the same colour.
10. Release the button and then press it three times within five seconds. The {LED}s glow or flash red and orange/yellow again.
11. Wait: This procedure may take several minutes. Do not disconnect the {ICOM NEXT} as long as any {LED} glows red.
12. After about 5 minutes the SYSTEM {LED} turns green again. The {ICOM NEXT} has been updated and is ready for use.
IMPORTANT: When the software update is complete, the {ICOM NEXT} needs to be connected to the dealer’s network in order to be reconfigured.
All previous settings are lost during the update. If there is a "{user.settings}†file on the {USB} flash drive, it will be applied after the firmware update.
BMW ICOM A2+B+C Diagnostic & Programming TOOL BMW Scanner 2020.08 Engineers Version Cheapest Price
If you want know more information about BMW ICOM, please click on it.
Posted by: youobd2 at
06:41 AM
| Comments (1)
| Add Comment
Post contains 535 words, total size 4 kb.
August 07, 2020
Autel Maxisys Elite (Upgraded Version of MS908P Pro) with Wifi Bluetooth OBD Full Diagnostic Scanner with J2534 ECU Programming
Coming from a snap on verus decided to look for a new diagnostic tool that would not break my wallet and decided to take it for a spin. I could do everything the verus can do and more since it comes with the passthrough, performs bi directional tests even turn on the wippers or honk the horn. Every test imaginable can be made with the maxisys pro or elite for 1/3 of the price of a new verus. Ive had a maxisys pro since it can out it has performed flawlessly , perfect. I own a small repair shop ranging from american to import vehicle from gas to diesel (ford powerstroke & dodge cummins) and have never had problems.
When you buy it new you will get 1 year of unlimited updates to new tests or new vehicle info after registering your scan tool on the autel pro page . After that year you will go to the pro autel page and simply pay the fee for another year update. For the pro its 1,299 yearly but its up to you. You dont have to pay it for the scan tool to continue to work. I havent updated mine in almost 2 years and performs neat everyday. Now i have acquired the new elite version of the pro with a new android better camera and with a faster processors. It just works. In all my 12 years as a tech ive used different scan tools and had never seen one as good as the maxisys pro and elite. Now that i have both i will be giving the pro to my employee and the elite for me. Thank Autel for making such great products.
So i received my elite scanner very quickly. Customer services contacted me by email to see if their product had met my expectation. I like the fact that they contacted me and i havent seen that before.
Now continuing on the scanner i post photos of the differences between the new Elite and the Pro (which i use everyday on my shop CnAutotool.com)
The screen is brighter because is retina display (much like an ipad).
The bootup process is very very faster than the pro. The pro aprox 30 secs of boot up and 5-8 secs on the elite.
It has one more usb that is very usefull for connecting a mouse or a keyboard.
On
the outside you will see is much thinner, lighter and rubber protection
(feels more like hard plastic but its rubber) on the sides not on the
corners like the pro (which are real rubber).
On the top right
corner there is a led light that indicates the battery life which is
great when you have the screen off. On the pro you have to turn the
screen on to see battery life.
The Autel Scanner elite come with a docking station where you can charge it of leave it out of harms way. Im very impressed with my purchase. I hope this helps because when i purchased my pro the lack of information made me hold of a little bit but tool a leap of faith.
MaxiSys UltraDescriptions :
1. Autel updates provide latest OE level coverage for more than 80 US Domestic, Asian and European vehicles, including supercar
2. Exceptional OE-Level functionality from comprehensive OBDII
diagnostics & services to advanced ECU coding and programming
3. Automatic system and software updates with real-time push message notifications via internet
4. Interactive Data Logging sessions enable direct contact with Autel
Support for first-hand troubleshooting of diagnostic bugs and errors
5. One-stop multitasking designed for ideal management of workshop
operations to keep all data files, customer info, and vehicle records
well organized
6. Cloud-based Data Manager saves customer and vehicle records, scanner data and technician notes
Posted by: youobd2 at
10:02 AM
| No Comments
| Add Comment
Post contains 662 words, total size 5 kb.
August 05, 2020
Launch X431 V+ is full system auto diagnostic scan tool which is the update version of X431 V Pro. It support all systems diagnostics, ecu coding, key programming,resetting services,active test (Bi-directional control) and more. Is it worth to buy one? Let’s check the reviews of Launch X431 V+ by the users.
Mickie:
I have Snap On, Matco, and other scanners, and when I was recommended to the Launch X431 V+ for doing module programming, I was at first hesitant. But as all of my other scanners couldn’t program a wireless module and keys, so I ordered this scanner. What a machine! The launch X431 V+ handled the programming in a flash. Easy to use, and understand. I am looking forward to using this as my go-to scanner.
Tolay: Really useful, easy to use
I need this scanner for my shop, and definitely is a great tool, it has a lot of features, I think I got the best value for my money, I was between buying this or a way more expensive Snapon scanner, Im glad I decided for the Launch, I definitely recommend this.
Levis: This scan tool will more than handle the challanges you run into on a day to day basis
like the bi-directional features, lets me do some programing, covers most manufacturers and models. I also bought the campanion HD Truck module with this scan tool since I do my own work on a 39 ft motorhome with CAT engine, also advise friends who have Cummins. Well worth the money, I can’t justify a really high end unit since I use it for a hobby.However, my expierence in Auto Electric class shows it will handle most scaning, re-sets, as well as some programing chors.
Kapita: Best bang for the buck
I was torn between the Autel vs the V+… being in the automotive business, I was fortunate to play with both models and decided to order myself the v+ due to what it offers. You cant beat the cost per satisfaction factor amd for what it does, its more than enough for a mid sized shop like mine. 2 years of free update and with the current updates including the current year models, this easily beats our snap-on solus and modus. For those reviews bashing "chinese made†well think again when you are using other brands because their programs are done so well.
Dilly: Does more than I even know how
I have only used this x431 v+ a few times so far. I can tell from the little I have dont that this Diagnostic Tools is very capable of doing everything I would ever need to do and then some. I just need to work through the learning curve.
Posted by: youobd2 at
08:57 AM
| No Comments
| Add Comment
Post contains 458 words, total size 3 kb.
July 31, 2020
Test the Connection to the ECM Caterpillar Engines using CAT Communication Adapter 3 Toolkit

Use Heavy Duty Diagnostic CAT Communication Adapter 3 Toolkit to test the connection between the
CAT Communication Adapter 3 and the ECM Caterpillar Engines.
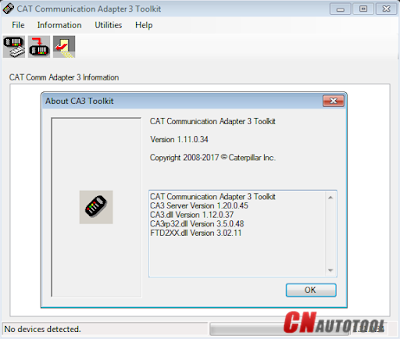
-Download Driver for CAT Comm Adapter 3 here:
CAT Comm Adapter 3 – v2.0
CAT Comm Adapter 3 – v4.4
Preparing to use the CAT Communication Adapter 3 Toolkit
1. Prepare your PC, and connect CAT Comm Adapter 3 to Diagnostic Port/Connector to the ECM.
2. Click "Start†– "All Programs†– "Caterpillar Comm Adapter 3†– "Comm
Adapter 3 Toolkitâ€, or through shortcut "Comm Adapter 3 Toolkit†on
desktop.
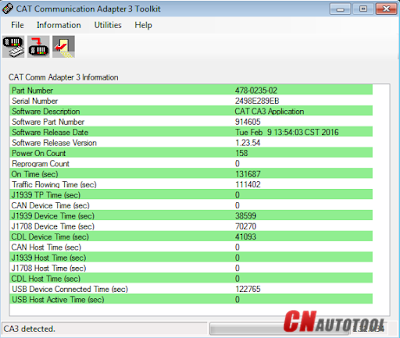
3. Once CA3 was detected, close the CAT Communication Adapter 3 Toolkit and open the CAT ET Software.
-The Connection message box is displayed while the service tool attempts to establish communications with the data link.

-To cancel all attempts to communicate with the ECM, click the "Stop
Connect†button on the Connection message box. All functions that
require an active data link connection are disabled. The service tool
displays a blank main screen. The status bar is updated with the message
"Disconnected.â€
4. When communications are successfully established and a single ECM
is found, the "ECM Summary†screen displays. When communications are
successfully established and multiple ECMs are found, the ECM Selector
dialog box displays. If the service tool connects to an ECM that is not
supported by the subscription, the service tool displays a message and
immediately disconnects.
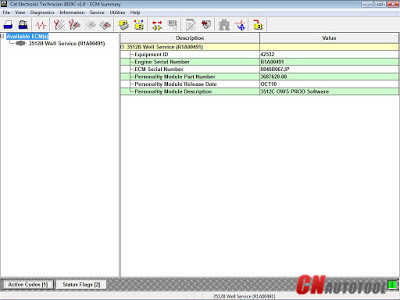
5. If any problems while trying to Initializing communications to the
ECM, it will displays "Cat Electronic Technician†message to provides
information for correcting the problems as example below.
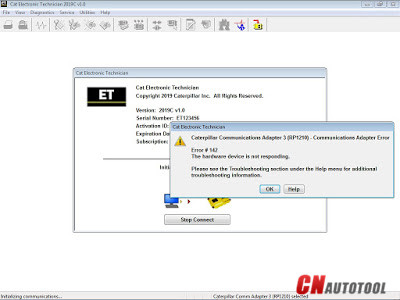

Click "Help†button
Troubleshooting Guide
Posted by: youobd2 at
02:53 AM
| No Comments
| Add Comment
Post contains 292 words, total size 4 kb.
July 24, 2020
From CnAutotool.com Mercedes Benz C6 OEM Xentry diagnosis VCI DOIP Pass thur interfac is the latest interface for For Mercedes & SMART vehicles can replace Star C4/C5. XENTRY Diagnosis VCI acts as a Pass-through Interface, also called Mercedes-Benz VCI C6, For Benz C6 multiplexer to provide complete communication between a vehicle and the XENTRY software loaded on a PC.
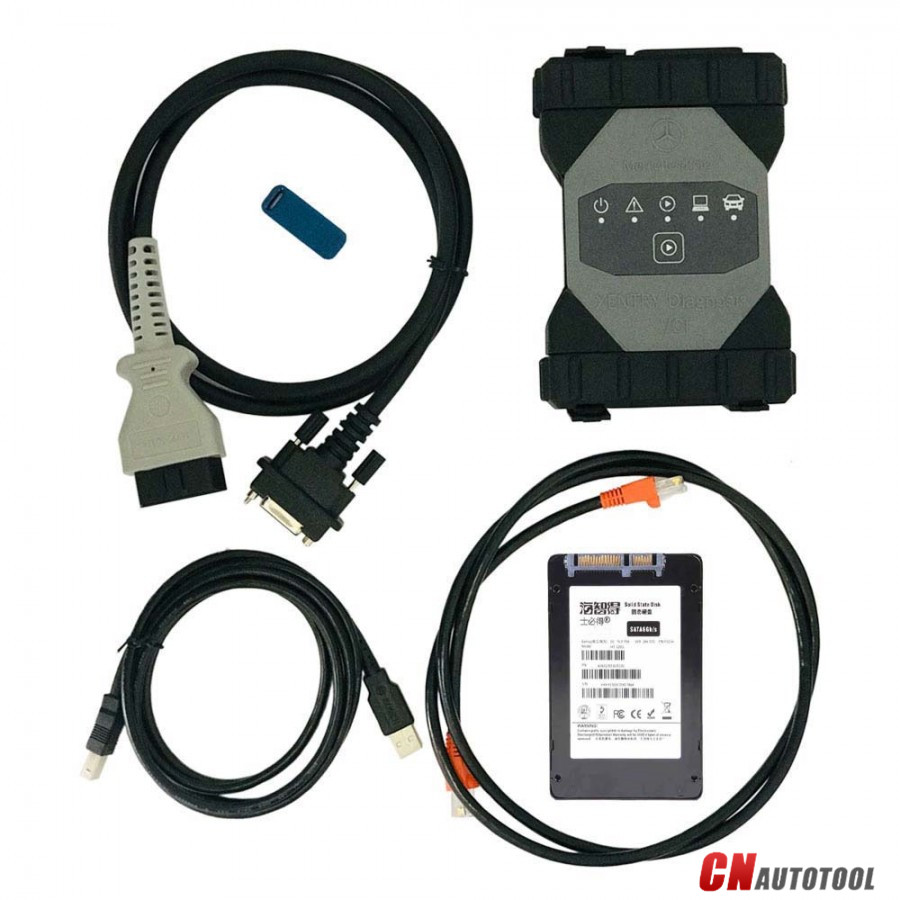
Mercedes Benz Xentry diagnosis VCI DOIP Pass thur interfaceMB SD Connect C6 DOIP Overview:
Compatible Software: VXDIAG For XENTRY/Das Software
Support Vehicle: Mercede For Benz & Smart vehicles
DoIP: Support DoIP
Functions: Star Diagnostic & programming (SCN Coding)
Software version: V2019.9
What is DOIP?
DOIP is ISO 13400 diagnostic protocol
ISO 13400-1:2011 describes the general use cases and communication scenarios which are covered by an Internet Protocol-based vehicle communication standard. Each use case drives specific communication capabilities of the vehicle communication interface, for instance in order to be interoperable in an existing computer network.
The diagnostic communication over Internet Protocol (DoIP) protocol supports the standardized service primitive interface as specified in ISO 14229-2.
The descriptions in ISO 13400-1:2011 cover different application layer implementations, such as:
enhanced vehicle diagnostics (system diagnostics beyond legislated functionality, non-emissions-related system diagnostics);
WWH-OBD (World-Wide Harmonized On-Board Diagnostics) as specified in ISO 27145-2 and ISO 27145-3.
The mercedes Land Rover JLR all use this new Diagnostic Protocol now.
Where need DOIP device?
when we test mercedes new car like w222 w205
In Audio\Comand section you can find DoIP test page.
If cable is DoIP you will see green mark that DEVICE is Ok.
Xentry will prompt you that other device must carry yellow marks.
Mercedes Benz Xentry diagnosis VCI DOIP Pass thur interface C6 Features:
Can be used for all model series of For Mercedes For Benz vehicles
Support DoIP, cover more functions during SCN Coding than SD C4/C5
Functions including diagnosing, programming, simulation studying, repair
information, automotive maintenance, technical service bulletin and so
on
Diagnosis updates no longer necessary – firmware updates required on rare occasions
Does not need a power supply unit for external power supply
Dandy multiplexer with a small, sturdy construction (no PC core, battery, fan, or display)
Engines (All Gasoline & Diesel Systems)
Transmissions and Electronic Selector Modules
Airmatic and Active Body Control Suspension Systems
Traction Systems: ESP / ASR / ETS / ABS / BAS / SBC braking systems
Supplementary Restraint Systems (SRS) / Airbag, All body modules OCP / UCP / LCP / SCM / SKF / KFB / RCM / DCM’s
Drive Authorisation System
Sam (Signal Acquisition) Modules
Electronic Ignition System (EIS)
Pneumatic System Equipment and ATA functions
Air Conditioning / climate control Systems
Instrument Cluster
Tyre Pressure Control
Parktronic System
Keyless Go
D2b Command & Audio Gateway (D2B and MOST networks)
TV Tuner
Headlamp Range Adjustment
Seat Electronics
Rvc, RST & Vario Roof modules
Automatic Clutch System ACS
M-Class Body Modules (AAM / EAM / DAS / SEM / VG Transfer Case)
Assyst & ASSYST + systems
Mercedes Benz Xentry diagnosis VCI DOIP Pass thur interface C6 Summary:
Mercedes Benz Xentry diagnosis VCI DOIP Pass thur interface C6 (Vehicle Communication Interface) multiplexer serves as the interface to the vehicle when performing diagnosis and repairs, and programming electric and electronic on-board vehicle systems.
The Mercedes Benz Xentry diagnosis VCI DOIP Pass thur interface C6 does not have its own PC core, battery, fan, or display. It is operated using the VXDIAG For XENTRY Diagnosis Pad via WLAN or a USB cable connection.
Notice
1.Please use the 500GB HDD on laptop above 4GB Memory and I5 CPU,
and use it on one laptop only. If change laptop, software may get broken
and need to ship HDD back to us to copy software again.
2.This Mercedes Benz Xentry diagnosis VCI DOIP Pass thur interface C6 can/’t support All Key Lost,needs one key at least.
3. Please note: C4, C5 software cannot be used for this product, this product must be used with our C6 software.
Posted by: youobd2 at
10:02 AM
| Comments (1)
| Add Comment
Post contains 661 words, total size 6 kb.
July 13, 2020
Support Languages: English, French, German, Italian, Portuguese, Russian, Spanish.
John Deere Service Advisor Agriculture workshop service manual, repair manual, electrical wiring
diagram, hydraulic diagram, diagnostic, assembly and disassembly engine,
transmission.
John Deere AG Management Solutions, Attachments,
Backhoes, Combines and Headers, Cotton Harvestings, Excavators,
ForkLifts, Hay and Forages, MAte Hand Cut and Shredderses, Plantings and
Seedings, Skid Steers, Sprayers, Sugar Cane Harvesters, Tillages,
Tractors, Worksite Pro Attachments.
John Deere Service Advisor CF
(Construction and Forestry), workshop service manual, repair manual,
diagnostic, electrical wiring diagram, hydraulic diagram John Deere.
John Deere Service Advisor CCE (Commercial and Consumer
Equipment)dealer technical assistance, diagnostics, connection readings,
calibrations, interactive tests, specification, tools, assemble and
disassemble presented all models John Deere Construction Equipment and
some models Hitachi, Euclid, Bell and Timberjack.
JOHN DEERE diagnostic adapter for construction equipment, agriculture, engines John Deere.
Please select the correct version which you need before make the order
1. John Deere Service Advisor V5.2 AG Supports vehicles to 2018
2. John Deere Service Advisor V5.2 CF Supports vehicles to 2018
3. John Deere Service Advisor V5.2 CCE Supports vehicles to 2018
Operating System:Windows XP 32 bit, Windows 7 32 bit, Windows 7 64 bit, Windows 8/8.1 32 bit, Windows 8/8.1 64 bit, Windows 10 32 bit, Windows 10 64 bit
Posted by: youobd2 at
07:21 AM
| Comments (1)
| Add Comment
Post contains 217 words, total size 2 kb.
July 07, 2020
Possible to have a Launch tool for heavy duty trucks or buses?
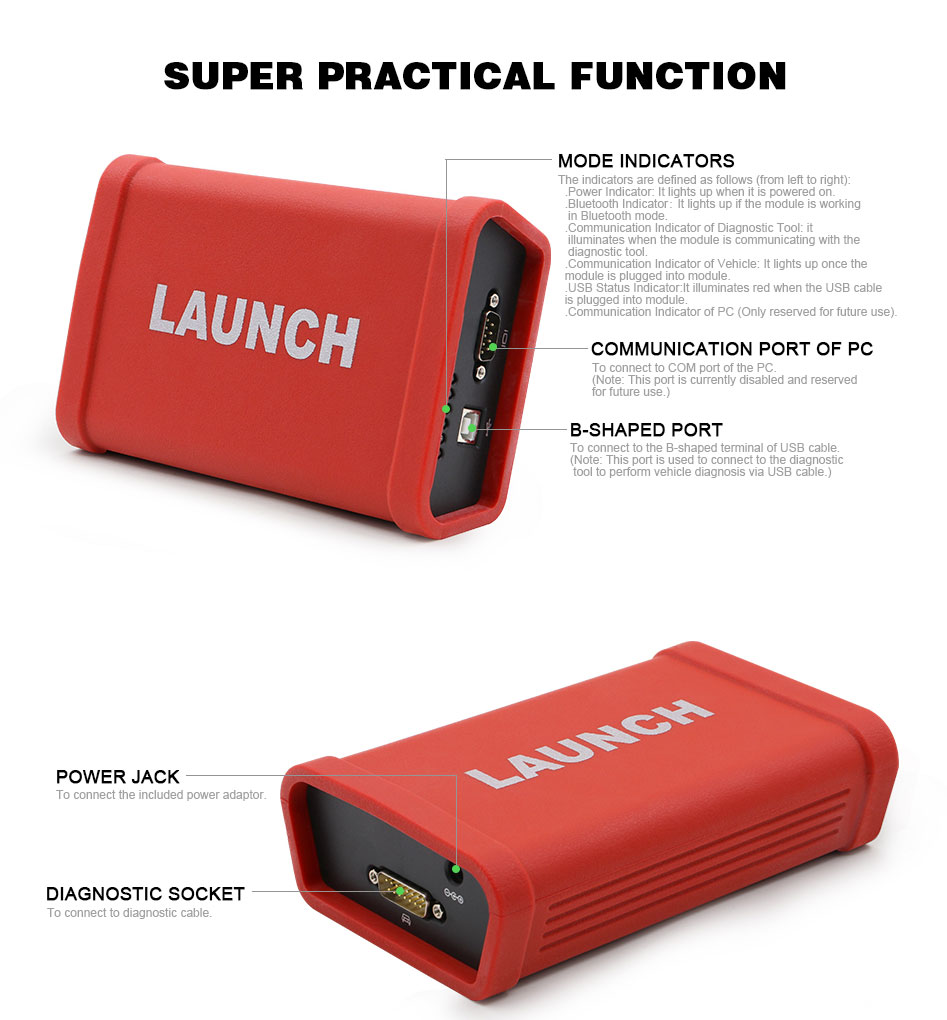
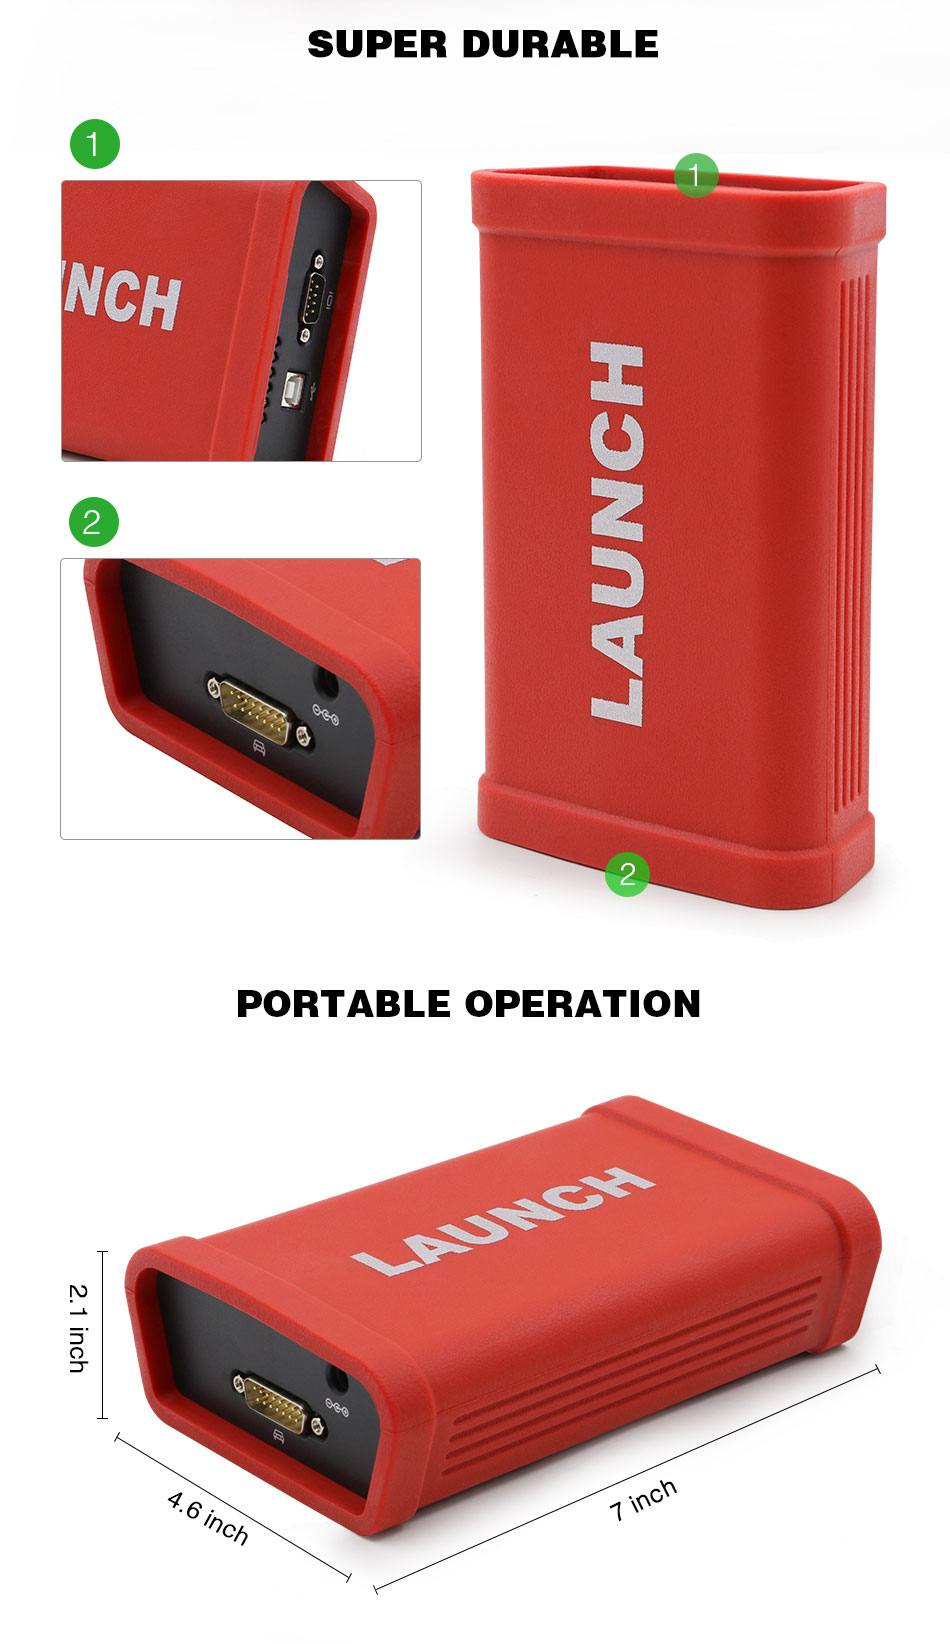
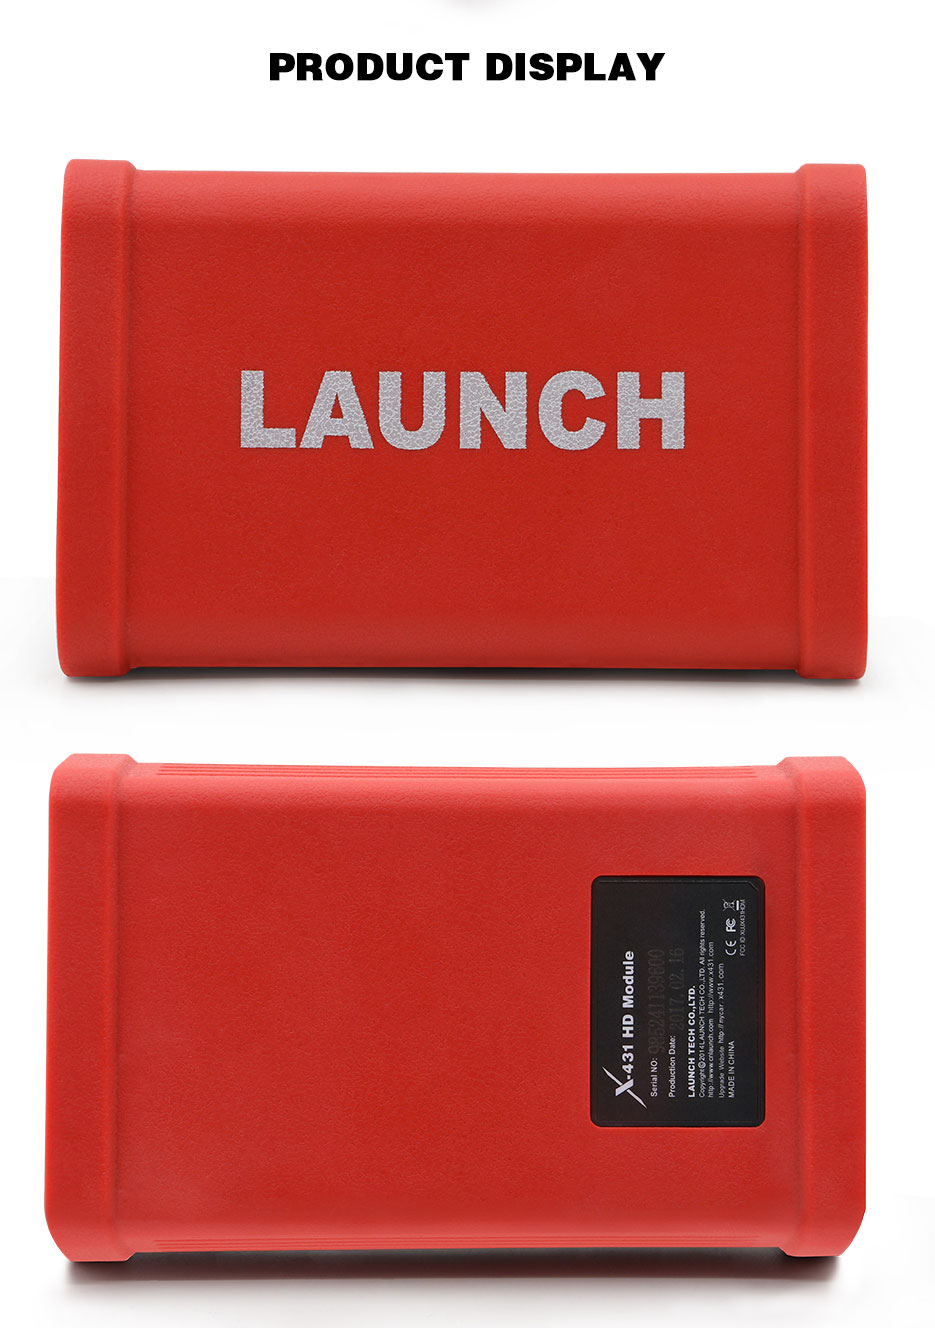
Definitely yes. But you should have a LAUNCH X431 HD Heavy Duty Adapter to work with.
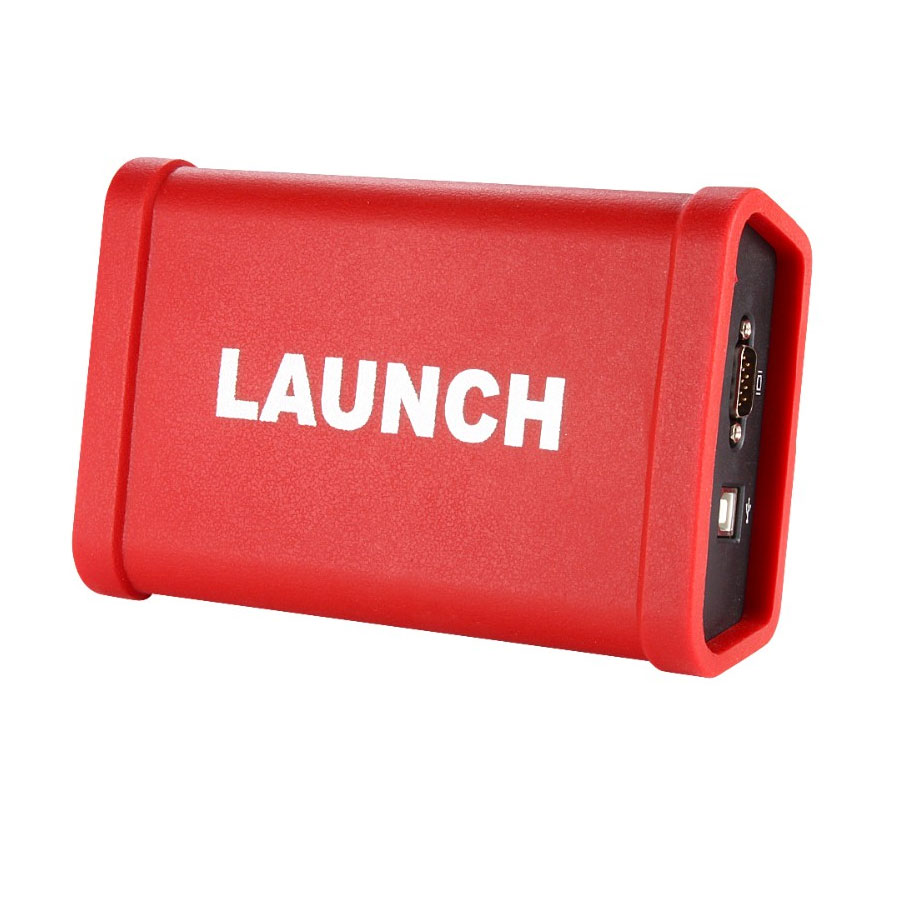
With the X431 HD module, you can make your Launch X431 v scan tool to work on:
JMC, ASTRA, BREMACH, DAF, ERF, FUSO, MACK, MAN, SCANIA, WP Diesel Car, X431 Diesel Car, CREDO Heavy Duty, IRISBUS Heavy Duty, IRIZAR Heavy Duty, NEOPLAN Heavy Duty, SETRA Heavy Duty, SITCAR Heavy Duty, UD Truck 2F JP Diesel, Bonluck Bus, Mitsubishi Heavy Duty, Renault Truck, Sunlong Bus, Sunwin Bus, Zhongtong Bus, Mercedes Benz Heavy Duty, Foton Auman, Volvo Heavy Duty, Cummins Engine Vehicles, , Hino Motors, Isuzu Heavy Duty, Hyundai Heavy Duty, IVECO Heavy Duty, China Heavy Duty, etc.
Here are questions and answers frequently asked, which may help how to use Launch X431 HD pad for trucks or buses.
Question: Can you verify if this does most diesel as well like toyota, isuzu, and mitsubishi mostly japanese models.
Answer: Here is the vehicle coverage: if you need to confirm , please tell us the VIN ,car model and year for confirmation.
Ford, Chrysler, GM, Mercedes Benz, BMW, Fiat, Peugeot, Saab, GMSA, EOBD2 Cars, Jaguar, Renault, Smart, Sprinter, VAZ, VW, Dacia, Land Rover, Romeo, Porsche, Volvo, AUDI, Citroen, Lancia, Acur… see more
Question: Does this tool offer super car diagnostics?? ferrari, maserati, lamborghini??? clutch pid, service reset etc
Answer: This tool can test ferrari, maserati but not lamborghini, it can not only do clutch pid, service reset these basic function on your ferrari, maserati, but also can do such as battery reset, brake reset, oil reset, ABS bleeding, throttle adaptation, TPMS reset, DPF regeneration, gear learning and IMMO, etc.
Question: Does it give full diagnostic on diesel vehicles?
Answer: Dear friend, this diagnostic tool can work on some 12V diesel vehicles, if you need to confirm, please email us your car model, year and VIN, we will tell you the result.
Question: Can this scanner perform crank position relearn and idle relearn and can it do a crank position relearn on a 2007 subaru 2.5
Answer: sure, of course, still it can do key match, battery match, throttle match, epb reset, tpms reset, sas reset ,oil light reset, injector program, and this red outlook version is with 2 years free update, very economical, and now we are conducting promotion, please don’t hesitate, have any problem just contact us.
Question: this Launch Scanner includes an automotive Labscope?.
Answer: It doesn’t have a lab scope but does have graphing capabilities of the sensor inputs. .
Question: will this product do cylinder cutout test and functional test for most ford 6.0 diesels and other diesel engines alike?
Answer: yes, it can work well on the function.
Question: Why launch tech usa don’t offer me after-sale service?
Answer: A mi me an atendido muy bien, cualquier duda que tengo le pregunto a launch teach y me responden rapidamente.
Question: Will this scanner work on a ford 7.3 diesel motor?
Answer: i have the x431 v plus with the heavy duty and I use it on the ford with the cummings I can use it on the 7.3 but like I said I have the x431 plus with heavy duty for me the little extra coast for the heavy duty was worth it
Question: The scanner has new updates on a day to day basis? and it will work in brazil vehicles?
Answer: sorry,sir.the scanner has two years free to update.
Question: What is the difference between the V+ and 2.0?
Answer: V2.0 is the advanced version with more software coverage, better than X431 V+.
Question: Is this launch usa model ?
Answer: Yes, it is US veriosn from LAUNCH
Question: how is it different global version (x-431 pro 3) and this?
Answer: Both product from Launch.
They are with the same function but different outlook
That’s all FAQs of Launch X431 HD, updated on 15-05-2018
Posted by: youobd2 at
10:19 AM
| Comments (1)
| Add Comment
Post contains 668 words, total size 6 kb.
Newest Update Launch X431 V 8 inch, improve hardware and newly add more vehicles, with better features, work more faster. And it is stock in uk warehouse, free shipping via ups standard to EU country no tax, the delivery usually need 2-3 working days.
Here lets us check the key features of 2018 New Model Launch X431 V 8Inch:
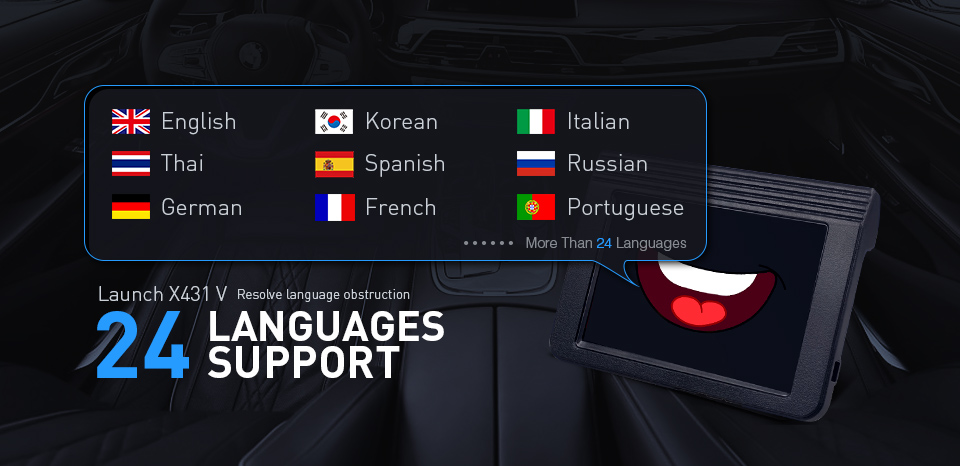
1.Support multi-languages: English, German, Japanese, Russian, French, Korea, Arabic, Spanish, Italy, Portuguese, Polish, Turkish, Dutch, Greek, Hungarian, Arabic, Danish, Persian, Romanian, Serbian, Finnish, Swedish and Czech(available to almost world-wide customers)
2. Update Online two years for free, update cost is 499.00USD/Year, after first two year. If you do not update it two years later, you still can use it, just not support new update car models
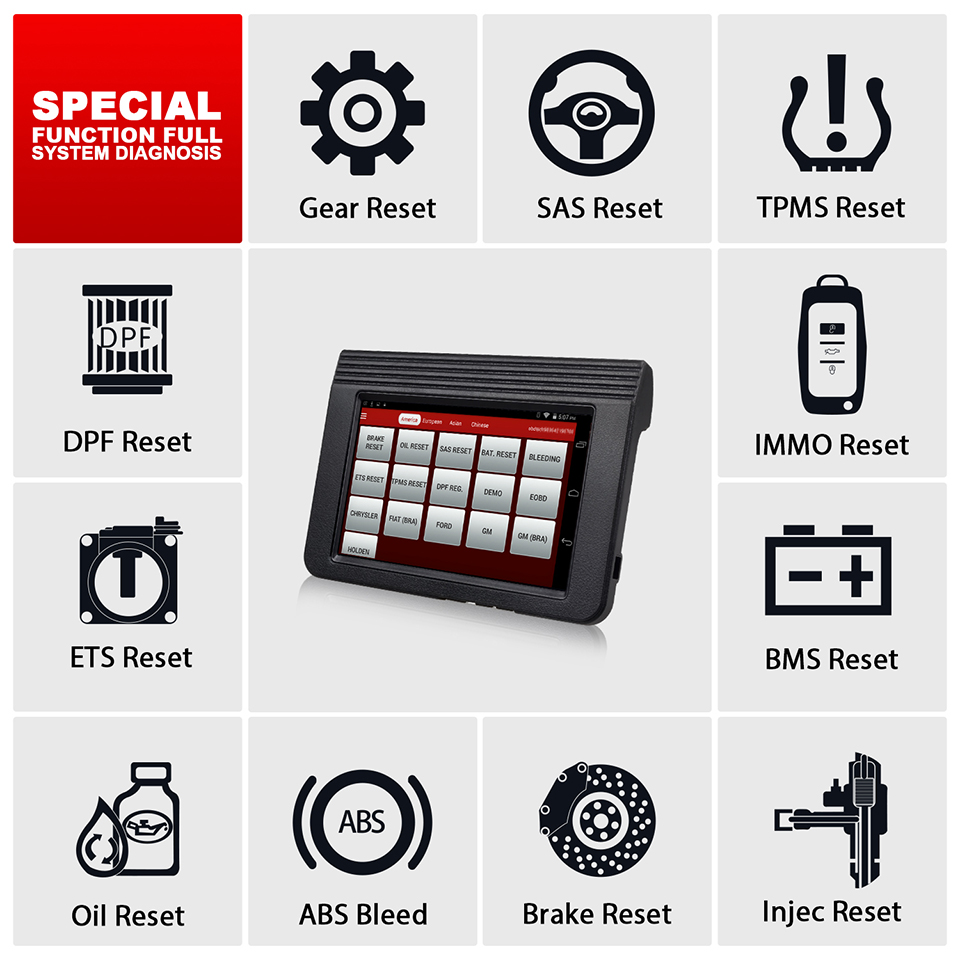
3. Support many Special function, it is very powerful for Garge : AUTOSEARCH(AutoSearch),Reset SAS, Reset Brake, Reset Gear, Reset Oil, Reset IMMO, Reset Injec, Reset TPMS, Reset BMS, Reset ABS Bleed , Reset ETS, Reset DPF, DEMO, EOBD2,ECUAID
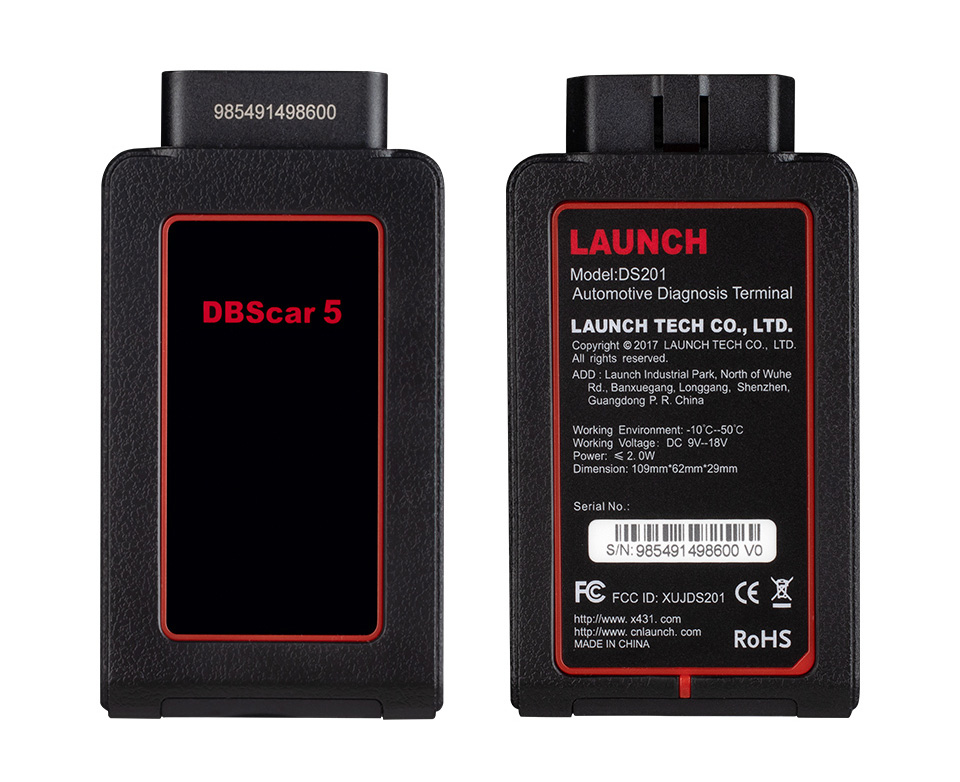
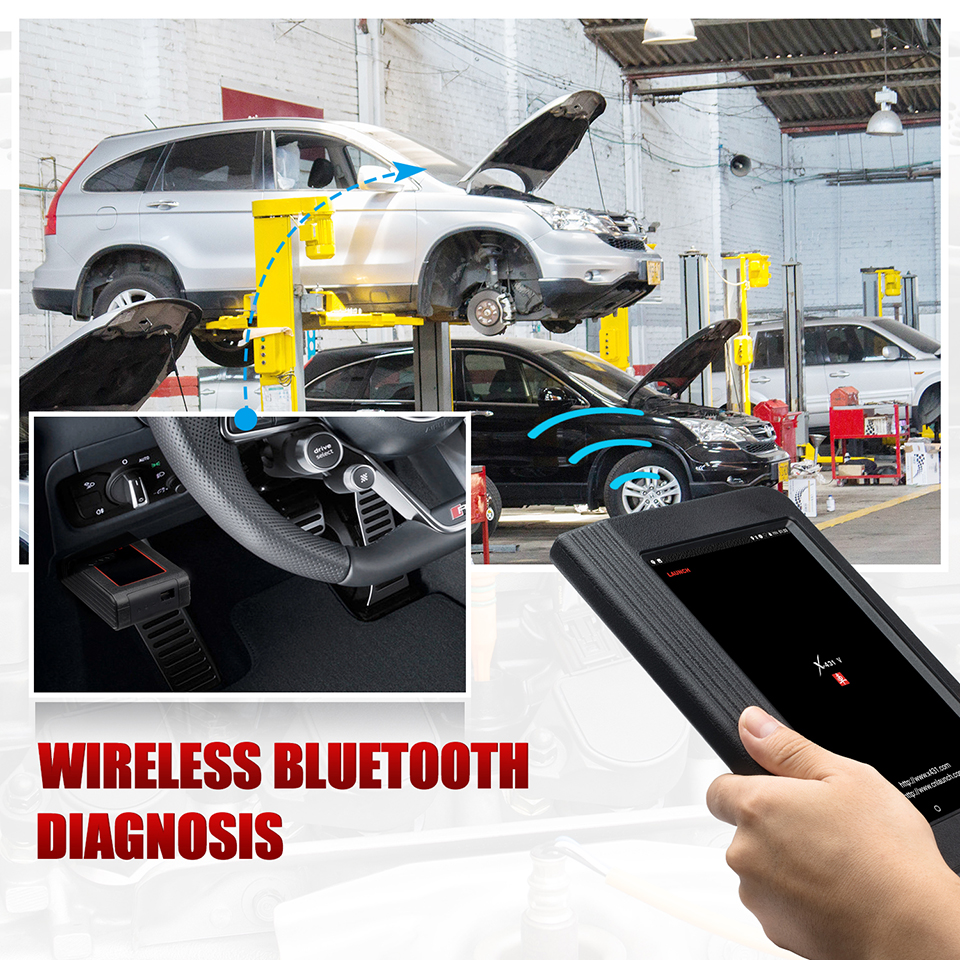
4. Support Bluetooth Connection, come with newest DBSCAR 5 Bluetooth Connector, Bluetooth Distance: 10M (Without Obstacle)

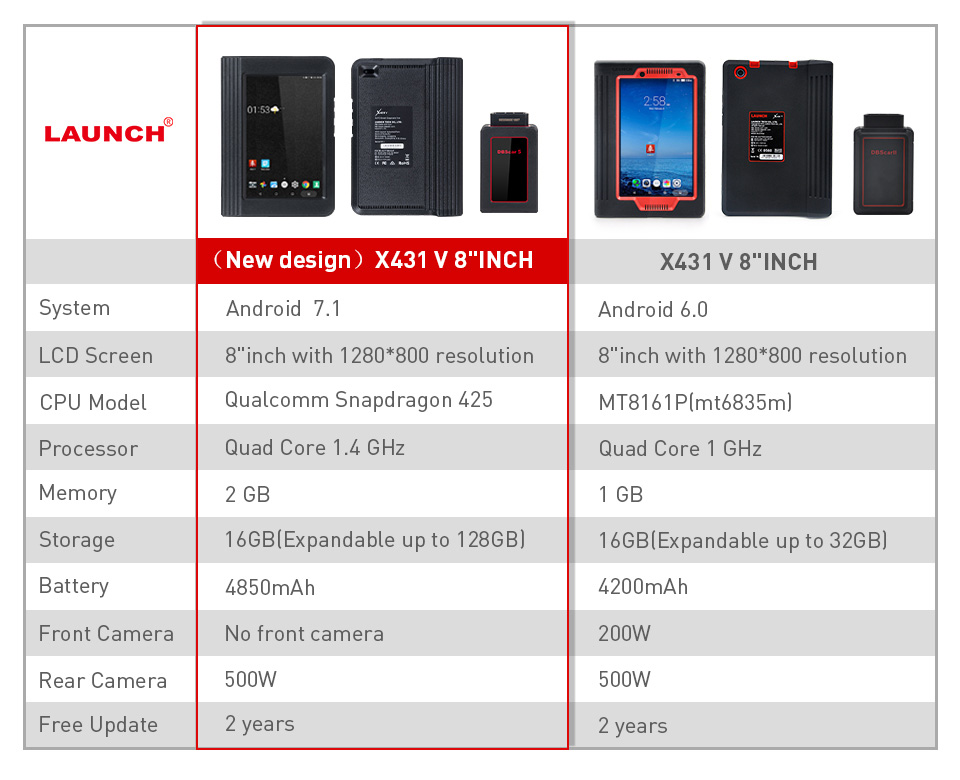
5. 2018 New Design X431 V 8 Inch with higher configuration
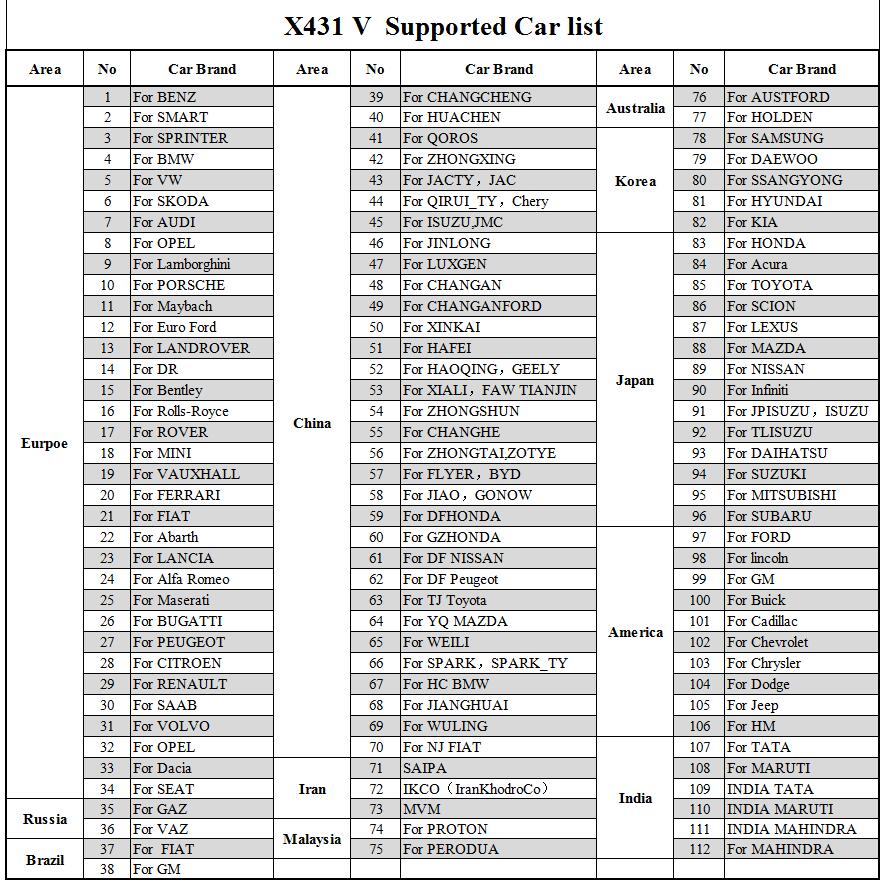
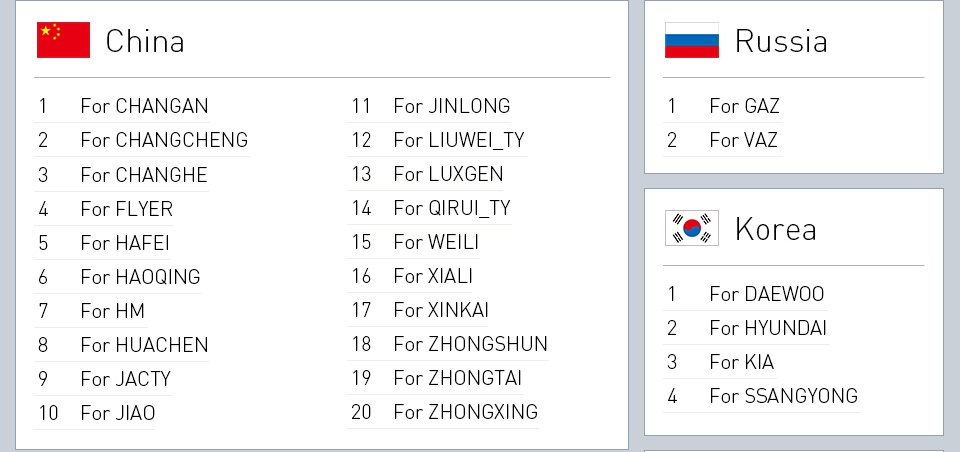
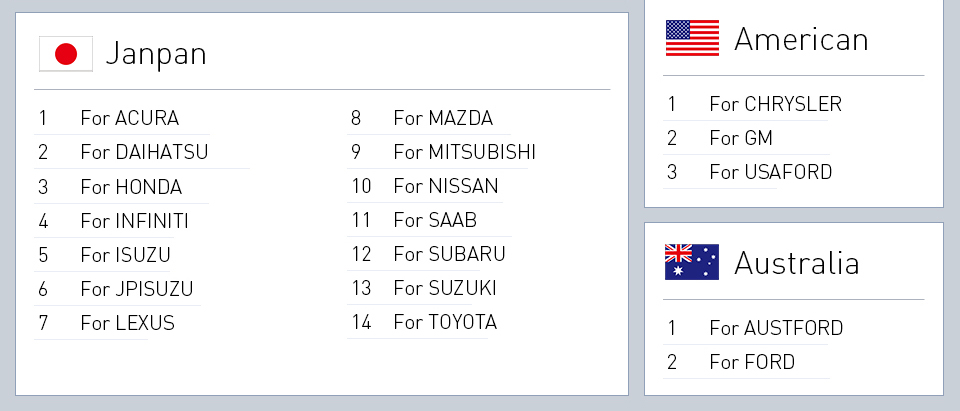
6. Support more and new models
2018 new design X431 V 8 inch support following models
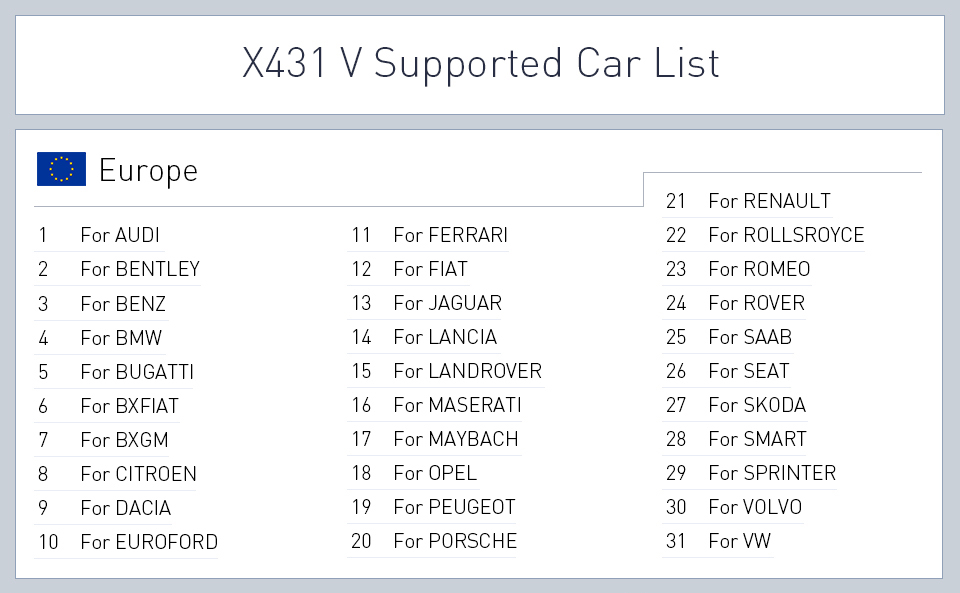
X431 V 8 Inch only support following models:
Posted by: youobd2 at
10:06 AM
| No Comments
| Add Comment
Post contains 221 words, total size 5 kb.
Problem:
I got the OEM Porsche tester iii with 128G PIWIS SSD. There was something wrong with the Dell laptop.
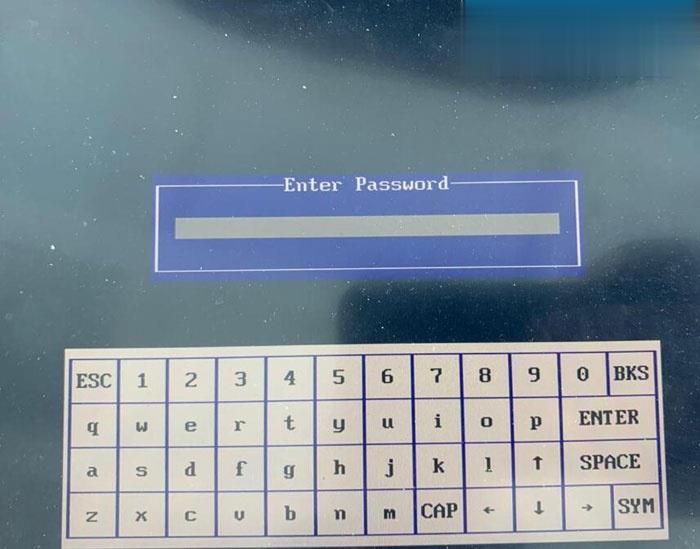
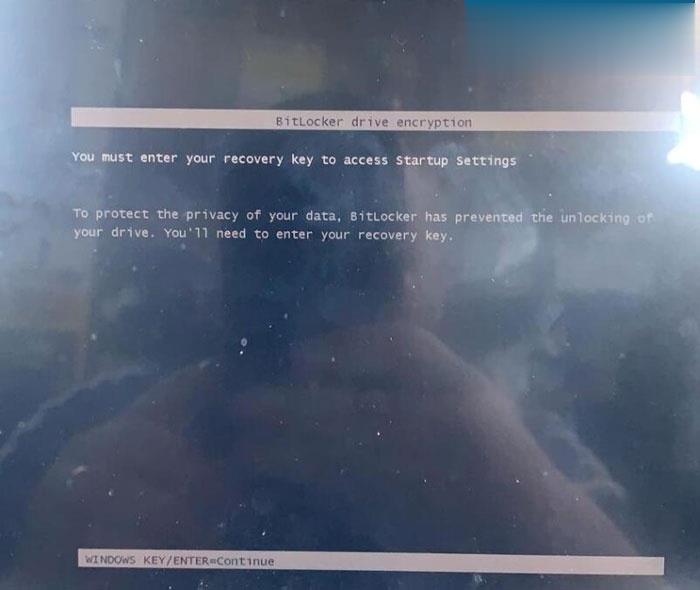
So i changed my own laptop and insert SSD. But the system display BitLocker driver encryption error page and require to enter recovery key to access Startup Settings.
What is the recovery key?
Possible reason:
The OEM Porsche PIWIS3 should only work with the DELL E7450 Laptop in default. Because each PIWIS III Tester is registered with each E7450 Laptop before delivery. Once you change a new laptop, the SSD is decrypted and formatted. In this case, you cannot use the SSD anymore nor send back laptop for repair. SSD is not for sale alone.
Solution:
If dell laptop has problem , don’t change laptop, get the laptop fixed by local dealership or send back the laptop to us to repair.
If you have changed a new laptop, contact your seller to buy a U disk.
Contact factory to authorized the piwis 3 account and download PIWIS iii to the U disk. Then install the disk to Dell computer.
Posted by: youobd2 at
08:50 AM
| Comments (1)
| Add Comment
Post contains 191 words, total size 2 kb.
Obd2tool.com here provides some coding procedures using Porsche PIWIS Tester.
To code you need to be in development (E) mode, which is unfortunately in German. I’ve made a start at doing some translations courtesy of Google Translate below.
How to Enable OEM Porsche Tester III Developer Mode?
If you play around in simulation mode, the car it uses is a 991 coupe. Whilst not exactly the same as the 981, it’s very close. It’s a good start at poking around the software to see where things are without having to be connected to the car.
Some general phrases
Codierung Anpassungen
Coding adaptations
Keine Eintrage gesetzt
No value set
Codierwert or kodierwert
Coding value
Wert
Value
Verbaut
Installed
Geandert
Changed
aktiv
Active
Inaktiv
Inactive
Einheit
Unit
Geandert
Changed
Schreiben
Save
Ja
Yes
Nein
No
MCR = Machine-readable Coding Rules
Manuelle Codierung ohne MCR Regeln (Entwicklung)
Manual coding without MCR rules (development)
Manuelle Codierung von Bin?rdaten (Entwicklung)
Manual coding of binary data (development)
Manuelle Codierung mit MCR Regeln
Manual coding with MCR rules
Automatische codierung
Automatic coding
Rucksetzen auf werkeinstellungen
Reset to factory settings
geben sie bitte fahrzeugdaten ein
Please enter vehicle data
werte andern und mit speichern
change values and save with
weiter zum nachsten screenmit
continue to the next screen with
coderung lauft
coding is running
codierung von steuerger?ten
coding of control units
Control Module names
waehlebel
Gear selector lever
kombiinstrument
instrument cluster
kombilenkstockschaltermodul
steering wheel module
stoppuhr
stopwatch
audio verst?rker
audio amplifier
bedien und klimaeinheit
operation and climate
parkbremse
park brake
reifendruckkontrolle
tyre pressure control
d?mpfersteuerung
damper control
servolenkung
power steering
verdeck synchronisation
convertible top
BCM vorne
Front Body Control Module
BCM hinten
Rear Body Control Module
scheinwerfer links
Left headlight
scheinwerfer rechts
Right headlight
spurwechselassistent
lane change assistant
sitz fahre
driver seat
sitz beifahrer
passenger seat
tuer vorne links
left front door
tuer vorne rechts
right front door
soundaktuator innen
inside sound actuator
DME coding translations
Manual coding without MCR
Bestelltyp
ordered type
getriebetyp
transmission type
innenausstattung
interior decoration
kodierung kodierbyte
coding coding byte
tempomat
cruise control
start/stopp aktiv
start stop active
allradantrieb
all wheel drive
abgasklappen
exhaust flap
getriebedrehzahlsensor
transmission speed sensor
kraftstoff brasilien
fuel brazil??
Gerauschtypisierung Asien
Noise typing Asia
Tankleckdiagnose Feinstleck
Tank leak diagnosis
Kraftstoffmarkt
Fuel market
Kodierung gultig
Coding valid
Landercode
Country code
Nummern
Numbers
Ruckrufaktion
Product recall
Seriennummer Wegfahrsperre
Serial number immobilizer
Tester Produktionsmodul
Tester production module
Verbauvorschrift
Building regulations
Wagen und Verdeckfarbe
Car and top color
Wartungsdienste
Maintenance services
Manual coding with MCR
Landercode
Country code
Modelljahr
Model year
Produktschlussel
Product key
Bordcomputer
On board computer
Anzeigendonfiguration
Show configuration
schlussel
Key
fahrzustand
driving state
Last Mode coding DIY
This is a Porsche PIWIS DIY to recode the car so that it keeps the last driving modes set. I used this primarily to ensure that start/stop initialises OFF each time I start the car rather than me having to push the button each time I start the car.
I don’t know what other modes it keeps for the next time your start the car. It seems to keep the last PASM and seat heating settings, but not SPORT or SPORT PLUS.
Note: Development mode is in German. English translations are after each step to show what you are doing.
I can’t take credit for the procedure. I won’t name who it was, but they know who they are, and thanks for the help.
If you are worried about doing this for the first time on your car, it’s the same in simulation mode, so have a practice here first. Being simulation mode, it won’t let you save it.
To make the coding changes, do the following.
Change the PIWIS mode to E (development)
Open the diagnostics for the car type, then make the following selections.
1. BKE (bedien und klimaeinheit)
operation and climate
2. Codierung Anpassungen
Coding adaptations
3. Manuelle Codierung ohne MCR Regeln (Entwicklung)
Manual coding without MCR rules (development)
4. Select both kodierwert:kodierwert default fahrzustand and kodierwert:kodierwert default fahrzustand last mode
codeword default driving state
5. In Wert (value) dropdown
Change …fahrzustand to "last modeâ€
Change …fahrzustand last mode to "jaâ€
6. Click schreiben (save) at bottom.
Coding complete. Exit and change the settings back to V (aftersales) mode if desired.
Posted by: youobd2 at
08:38 AM
| Comments (1)
| Add Comment
Post contains 706 words, total size 7 kb.
July 01, 2020
Description:
Everything you need to diagnose and repair heavy & medium-duty vehicles.
JPRO Professional truck scanner is the most comprehensive and powerful all makes, all models diagnostic tool available in the industry today. In one, easy annual subscription, JPRO provides a complete & unparalleled diagnostic service & repair solution with bi-directional functionality.
Next Step Service Information module helps speed up repair times by providing users with detailed engine repair information and troubleshooting guides for ABS and Transmissions – with the click of a button.
Noergon’s DLA+ 2.0 adapter is a diagnostic communication device
designed to interface between a vehicle and PC via USB cable for
diagnostic and vehicle information, re-programming or parameter
adjustments.
JPRO Professional can support DPF Regeneration for Cummins,Detroit,International,MACK,Paccar,Volvo and more. So here CnAutotool.com show you guide on how to use JPRO Professional to perform DPF Regen.
Preparations:
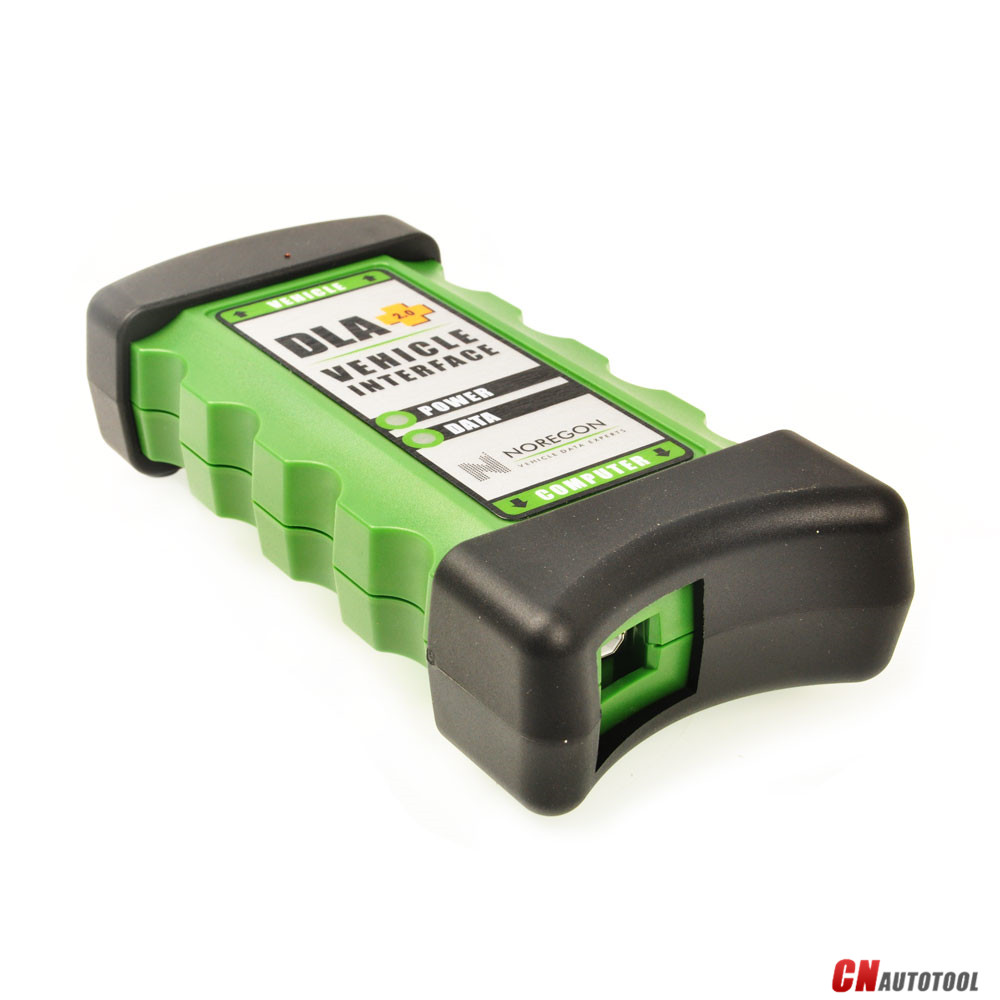
JPRO Professional Heavy Duty Diagnostic Software Download
Note:Please ensure you have followed all necessary safety precautions BEFORE performing a forced regen.
Procedures:
In the top left corner,vehicle health indicators may alert that you need to perform a DPF regen.
Click the "DPF Regen Needed†button
Then it will show the Aftertreatment Diagnostics screen.Notice in the top right,buttons indicate a needed OR inhibited regen.To initiate a DPF regen,simply click the "Start DPF Regen†button
Alternatively,click the "Aftertreatment Diagnostics†button from the toolbar will also launch the Aftertreatment screen
Additionally,you can access a DPF Regen from the Bi-Directional Test screen.Click the "Bi-Directional†button from the main toolbar.
Select the "DPF service Regen†test and click the "Start†button to launch the Aftertreatment screen
And for those who hold NextStep can access a DPF regen from the NextStep screen.
Click the "Bi-Directional†button on the right hand side.
Posted by: youobd2 at
07:32 AM
| Comments (1)
| Add Comment
Post contains 294 words, total size 3 kb.
June 30, 2020
The new Mercedes Benz diagnostic tool MB SD Connect C5 isverified working great. Here are customer feedback to Benz C5 SD Connect (not original Xentry Connect C5).
1."Mercedes Sprinter year 2006 and 2014 works, both the
diagnosis All the personal cars also works, no problemâ€
2."All the trucks including euro6 also works, no problem.Bus Mercedes
Tourismo euro5 year 2010-2012 test works, BUT year 2014 euro6 does NOT
work, it says that the license is invalid. Both sd c4 and sd c5, we have
tested both on the same cars, to be sure.â€
3.SD Connect C5 this one
customer has test, works good, in function it no difference with SD C4,
but performance it is better. So you can buy MB SD C5 if you want buy
new MUX. CnAutotool.com SD C5 use the same software as MB SD Connect C4.
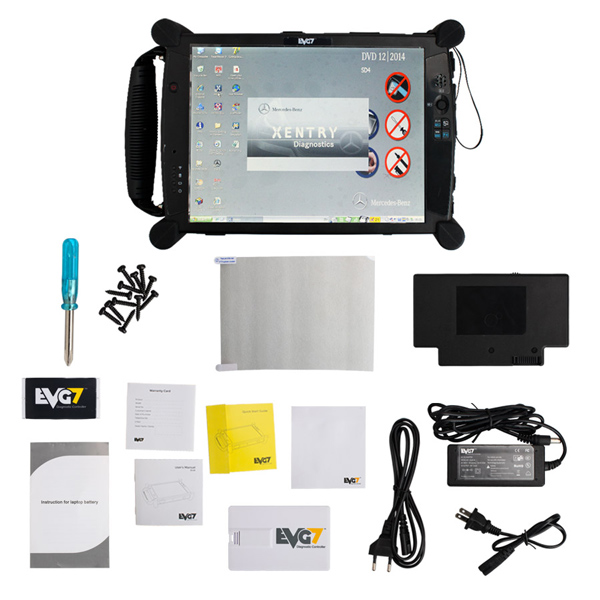
SD Connect C5 with necessary cables and EVG7 Tablet:
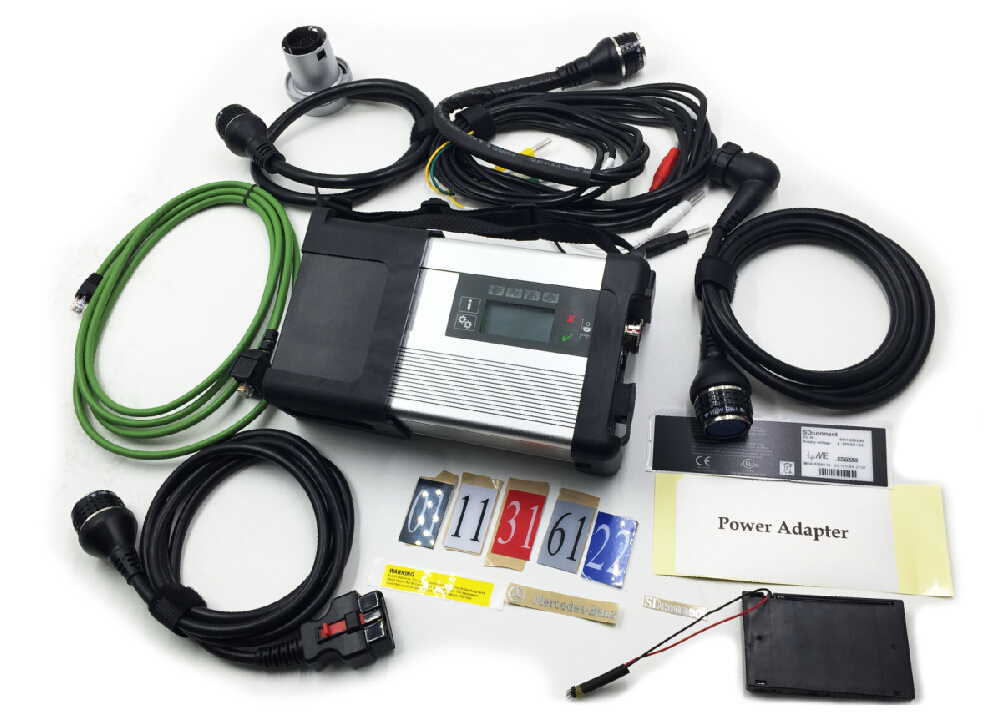
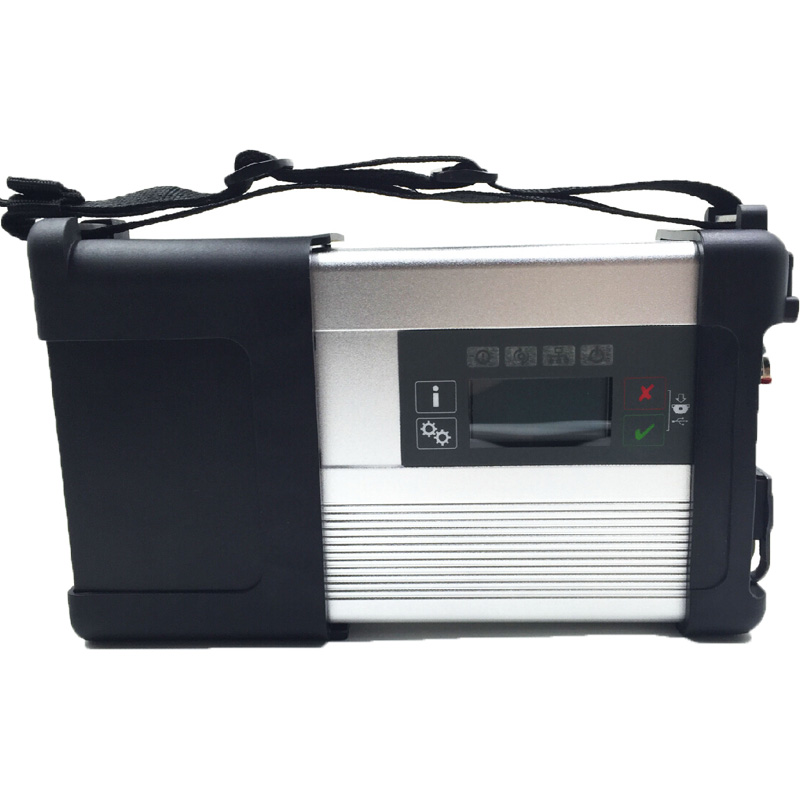

MB SD Connect Compact 5 Supported Vehicle List:
MB SD C4 Support Mercedes Benz Cars After Year 2000
Passenger Car Support List:
A(176),
A(169), A(16
, B(246), B(245), CLC(117), C(204) C(203),
C(202), 190(201), E(212), E(211), E(210), 124(124), S(222),
S(221), S(220), S(140), S(126), E(207), CLK(209), CLK(20
,
CLS(21
, CLS(219), CL(216), CL(215), CL(140) SLK(172), SLK(171),
SLK(170), SL(231), SL(230), SL(129), SL(107), SLS(197), M(166),
M(164), M(163), G(463), G(461), E(212), E(211), E(210),
124(124), S(222), S(221),S(220), S(140), CLK(209), CLK(20
,
CLS(21
, CLS(219), CL(216), CL(215), CL(140), SLK(172), SL(231),
SL(230), SL(129), SL(107),SLS(197), M(166), M(164), M(163),
G(460), GL(164), GLK(204), R(251)
Van Support List:
MB 100(631), T1, SprinterIII, SprinterII, SprinterI, Sprinter900,
Citan, Vito(639), Vito(63
, V(63
, Viano(639), T2, Vario,
Vaneo(414)
Truck Support List:
Actros963/4, Actros2,3, AtegoIII, AtegoII, AxorII, Eonic, Zetros, Actros, Atego Light, Atego Heavey, HPN M96, Atron, HPN M2000, SKL, FSK, Further model series
Unimog Support List:
U20, UGN, UHN
Bus Support List:
TRAVEGO, INTOURO, INTEGRO, CITARO, CAPACITY, CITO, TOURISMO, O350/O403, CONECTO, O404, O405-O408,
Minibus, OC500, TOURO, TOURINO, MBC, MULITEGO, O500, O500/OH, OH, OH368, OF, OF384, LO, O400,
FURTHER MODEL SERIES
Super Sports Car Support List:
SLR(199)
MB SD C5 Language: English, Bulgarian, Danish, Greek, Spanish, French,
Italian, Korean, Polish, Romanian, Serbo-Croatian, Turkish, Czech,
German, Finnish, Hungaria, Japanese, Dutch, Portuguese, Russian,
Swedish, Chinese
MB SD C5 Package List:
1pc x C5 Multiplexer (new C5 case)
1pc x OBDII 16PIN Cable
1pc x 38PIN Cable
1pc x 14PIN Cable
1pc x 8PIN Cable
1pc x Lan Cable
1pc x EVG7 DL46
1pc x Li-Ion Battery
1pc x Power Adapter
1pc x User's Manual
1pc x USB memory card for drivers
Posted by: youobd2 at
11:32 AM
| Comments (2)
| Add Comment
Post contains 413 words, total size 6 kb.
June 17, 2020
Heavy Duty Truck Scanner John Deere Service Advisor Languages: EnglishOperating System:4.0AG, 4.0 CCE and 2.8 CF standard software package comes in hard drive (HDD) format, easy to install.HDD comes in default VMware Windows XP system only, supports host machine Win XP,Win 7,Win 8 and Win 10. (If your computer supports WinXP VMware, it should work).Notice:4.0 Software supports vehicles to 2013; ( Free)4.1 Software supports vehicles to 2014-2015; (160USD- additional cost ),4.1 software support 3038E truck4.2 Software supports vehicles to 2016; ( 250USD-additional cost ) 4.2 software supports Multi-language: English, French, Spanish, Portuguese & ItalianQC NO. John Deere 4WD LoaderJohn Deere BackhoeJohn Deere BundlerJohn Deere CompactorJohn Deere CrawlerJohn Deere DelimberJohn Deere ExcavatorJohn Deere Feller BuncherJohn Deere Felling HeadJohn Deere ForkliftJohn Deere ForwarderJohn Deere HarvesterJohn Deere Harvester HeadsJohn Deere Landscape LoaderJohn Deere Log LoaderJohn Deere LoggerJohn Deere Mate. And ShreddersJohn Deere Motor GraderJohn Deere OEM EnginesJohn Deere ScraperJohn Deere Skid SteerJohn Deere SkidderJohn Deere SlasherJohn Deere TractorJohn Deere TractorsJohn Deere Tree HarvesterJohn Deere TruckJohn Deere Utility VehiclesJohn Deere WinchJohn Deere Worksite Pro Attachment. 1.How to solve John Deere Service Advisor Search Engine ErrorThat is for any individual when he/she runs the John Deere Carrier Guide^(heavy responsibility diagnostic device, the machine seems error message that the hunt engine module cannot be loaded after which this system ends.NOTE THAT YOU ARE TRYING ANY TRICK ON YOUR OWN RISK.Not obligatory answers:Resolution 1:Run as machine administrator, roll again laptop date reactivate the use of activator Then roll date again to standard date if error nonetheless renew as soon as once more. Hi, I have two scanner,. EDL connection with service advisor is perfect.
But with usb link, it doesn’t work. The very best solution in the
market is what the dealers use. John Deere dealers use a combination of
PC-based computer with two critical components –
CnAutotool.com John Deere Service Advisor software and the John Deere EDL v2 Adapter.
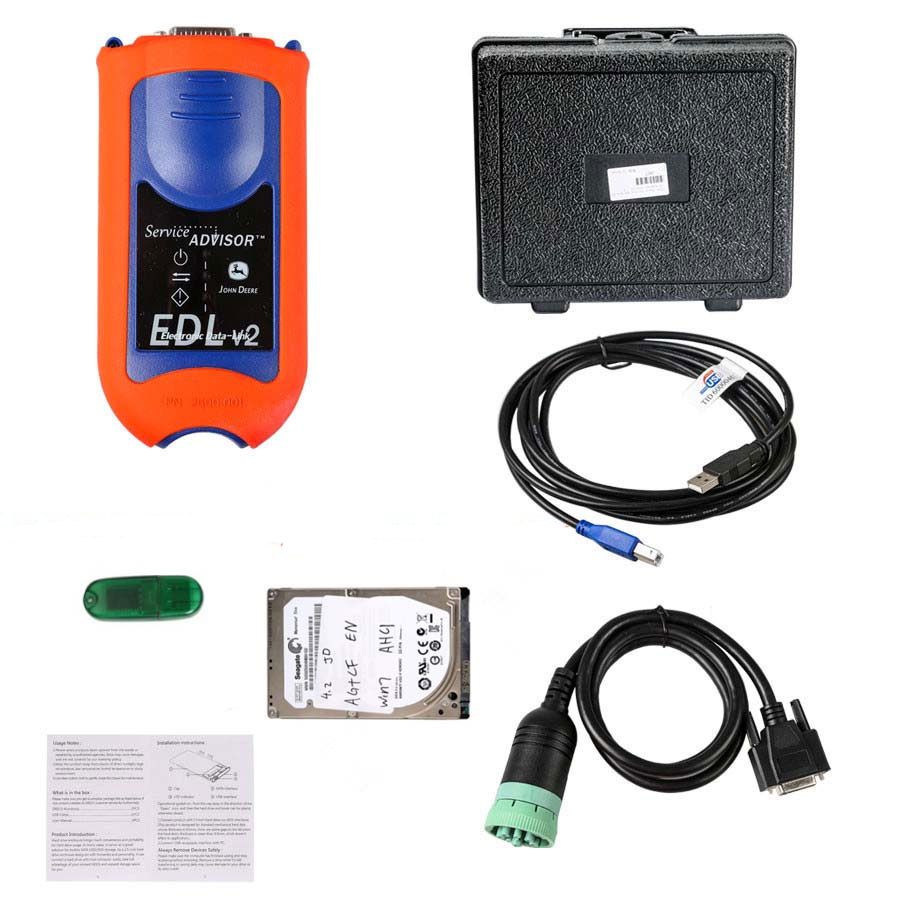
This John Deere Electronic Diagnostic Adapter (EDL) is designed to diagnose John Deere technology and works in conjunction with the Service Advisor EDL software. John Deere Diagnostic Kit EDL allows you to perform diagnostic for service of agricultural, turf, construction, forestry equipment John Deere. Buy Diagnostic Kit EDL v2 (Electronic Data Link v2) for All John Deere Models – Include Service Advisor Software 2017: Code Readers & Scan Tools.
The EDL v2 adapter looks like the picture shown below. It comes with a
hard carry case, the adapter itself, a 9-pin connector, and the USB
cable. This tool is available for purchase from our website as well.The
John Deere EDL Adapter also has a variety of "extra†cables you can
purchase, almost all of which are for some of the much older equipment.
You can see all of the available cables on our website.The problem comes
into the other side of the equation — The diagnostic software. John
Deere dealers refuse to sell this software to anyone.
John Deere Service Advisor Software
This includes owners of the equipment, repair shops, or anyone else
for the matter. The reason for this is simple: Dealers don’t want anyone
besides themselves to perform John Deere diagnostic tests and commands,
since it would in sense be money leaving their own pockets. If there is
no one else that has the software solutions to perform the advanced
diagnostics, the customer has to go to them. However, we were fortunate
enough to have the opportunity to get our hands on this software, so
here are some screen shots showing what this software looks like.
John Deere Service Advisor Free
FYI, Service Advisor 90% works with China clone.Topic 1: John deere
SA possible with Nexiq usb link?It is possible to install Professional
Diagnostic Tools John Deere Service Advisor on your laptop, though the
installation is really complicated. If you have a Lenovo Thinkpad
laptop, the easiest way is to restore the main partition from the image
of my computers’ c: drive. And every time i change my laptop, i just
restore it.Win7 installed and fully updated. It takes hours.The image
will not work on XP, but SA works fine. My suggestion, buy used Lenovo
T400 or T500.
John Deere Service Advisor 2.6
It’s more or less 250 EURO in Europe. Install windows 7 and then can put my image. Takes 10 minutes and u have SA working.Topic 2: How to get Nexiq china worked?I spent a month doing research on this and i managed my Chinese Nexiq to work 90%. The thing is that Nexiq has only 2 channels while EDL has 3. The 3rd one is Powertrain and it is used very seldom. I reprogrammed all the controllers on 6690 premium except two, but found a way around it opening the pld file with pld editor and changing Powertrain channel to Vehicle (channel 1).
Lots of machines don’t even have a 3rd Powetrain channel. Like all 5R; 6115R, 6125R, 7280R. From my experience only the older machines have it and still can be programmed most of the time. Programming controllers is easy, but diagnostics is a bit annoying. Every time you establish the connection u have to remove the USB plug and plug it again for the readings to appear. Connection establishment is taking a long long time and you never see the ECU.
Only all the other controllers. So all the time something doesn’t work. If you are prepared for this here is what you have to do:a) Rewire the the cables as shown in the picture in my post here:I switched places channel 1 with channel 2 (see the pic) with my Chinese version and now it works fine, probably it was possible to do it adjusting the software settings as mentioned above, but i tried a lot, and nothing helped.
Now i can connect, tried with 6125R and 5070M. Works fine!!!
Except one very important thingy. After i establish the connection, all the reading give the same meaningless number.
Then, I discovered accidentally, I pull out the USB cable, get the
message "Connection interrupted†I put it back in, get the message
"Connection resumed†and wuolla, all the readings show up immediately.b)
You don’t have to change the firmware. Both will work pretty much the
same but with different issues.P.S. For diagnostics only, there is a
subprogram of SA that works without any cable rewiring, it doesn’t have a
Program Controller option, and you still need to reinsert the usb after
connection has been established. You just need to select the right port
(which is usually 1939ImplementAutoboud or 1939AppAutoboud depending on
the machine) and model. If you have SA, you will find the software at
c rogram FilesService ADVISORxvdsXJDET.exeJust to let you know, after a
year working like that, i bought another EDL (recommended by a folk in
the forum, much much much more than the old one)So much relief.
rogram FilesService ADVISORxvdsXJDET.exeJust to let you know, after a
year working like that, i bought another EDL (recommended by a folk in
the forum, much much much more than the old one)So much relief.
Posted by: youobd2 at
05:46 AM
| Comments (2)
| Add Comment
Post contains 1135 words, total size 8 kb.
46 queries taking 0.0883 seconds, 180 records returned.
Powered by Minx 1.1.6c-pink.

