



February 02, 2020
Some 2010 Prius and early produced 2011 Prius vehicles may exhibit an abnormal noise when the brake pedal is released. The noise is typically heard when the vehicle is stopped. The ABS Actuator Skid Control Electronic Control Unit (ECU) calibration software has been revised to eliminate this noise.So here is a illustration on how to repair Toyota Prius 2010-2011 abnormal noise when brake pedal released.
Repair Procedures:
1.Confirm the abnormal (squawk/honk) noise when releasing the brake pedal.
2.Connect the GR8 Battery Diagnostic Station to the vehicle and turn it ON, then select Power Supply Mode.
Note:
The GR8 Battery Diagnostic Station MUST be used in Power Supply Mode to maintain battery voltage at 13.5 volts while flash reprogramming the vehicle.
If the GR8 Battery Diagnostic Station is unavailable, the PSC Power Supply Charger /Maintainer (MTRPSC550SKT) may be used.
3.Verify the vehicle’s applicability for recalibration.
A) Connect Techstream and establish a vehicle connection.
B) Click theToyoa Techstream TIS Health Check button on the System Select tab
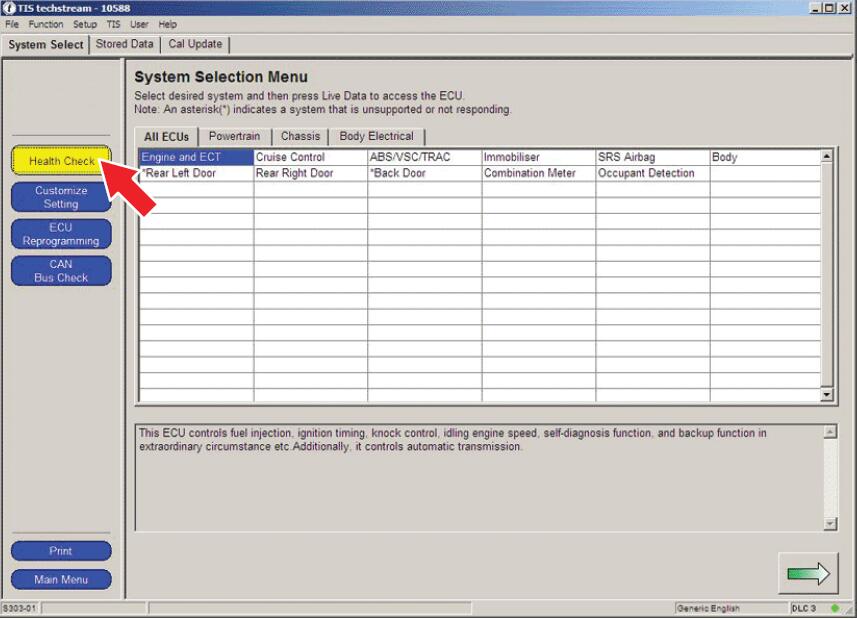
C) Choose Chassis ECU group in the Health Check dialog box.
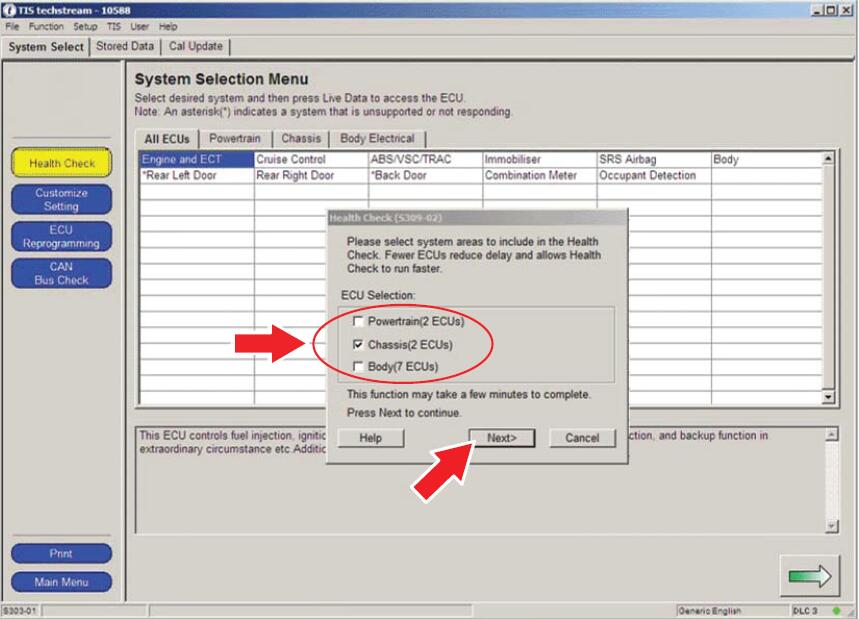
D) Click Next.
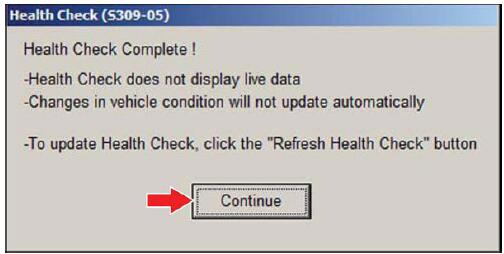
E) Click Continue to view Health Check results.
F) Available calibration updates are indicated by a Yes link in the Calibration Update column.STOP before clicking the Yes link.
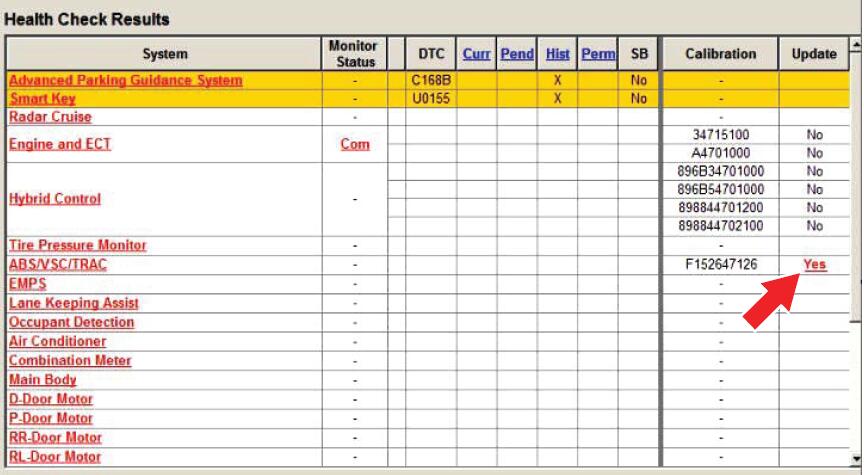
4.Flash reprogram the ABS Actuator Skid Control Computer.
A) Place the car in the "IG-ON†mode (push the Power button twice when the car is OFF –DO NOT depress the brake pedal).
B) Reflash the ABS Actuator Skid Control Computer with the newly designed software (New Calibration ID), following the procedures outlined in TSB No. T-SB-0064-10, "Techstream ECU Flash Reprogramming Procedureâ€. Please refer to the Calibration Information table in this TSB for the NEW Calibration ID.
C) After completing the ABS Actuator Skid Control Computer reflash, disconnect the GR8 Battery Diagnostic Station or PSC Power Supply Charger / Maintainer (MTRPSC550SKT).
5.Using Techstream, check for Diagnostic Trouble Codes (DTCs).
NOTE:If any Pending, Current, and/or History DTCs are set, troubleshoot according to the Repair Manual.
6.Depress the brake pedal while vehicle is stopped to confirm the abnormal noise has been eliminated.
Posted by: youobd2 at
02:08 AM
| No Comments
| Add Comment
Post contains 355 words, total size 4 kb.
This post show you the operations to perform Nissan Maxima 2017 angle sensor adjustment byLaunch X431Throttle.
Steering Angle Sensor Adjustment Related Contents:
Nissan Sentra 2014 Steering Angle Sensor Adjustment by Launch X431 Torque
BMW X3 E83 Steering Angle Calibration by Launch X431
How restore Data Damaged of Toyota Steering Angle Sensor
Nissan Maxima Steering Angle Sensor Adjustment Procedures:
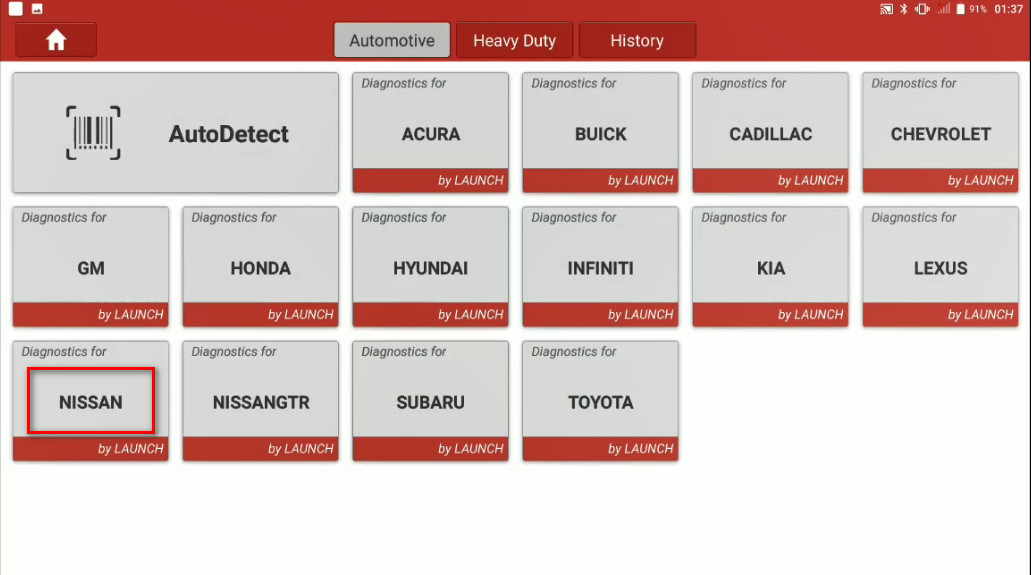
Connect your Launch X431 Throttle to Nissan OBD port,enter menu to select [Nissan] brand
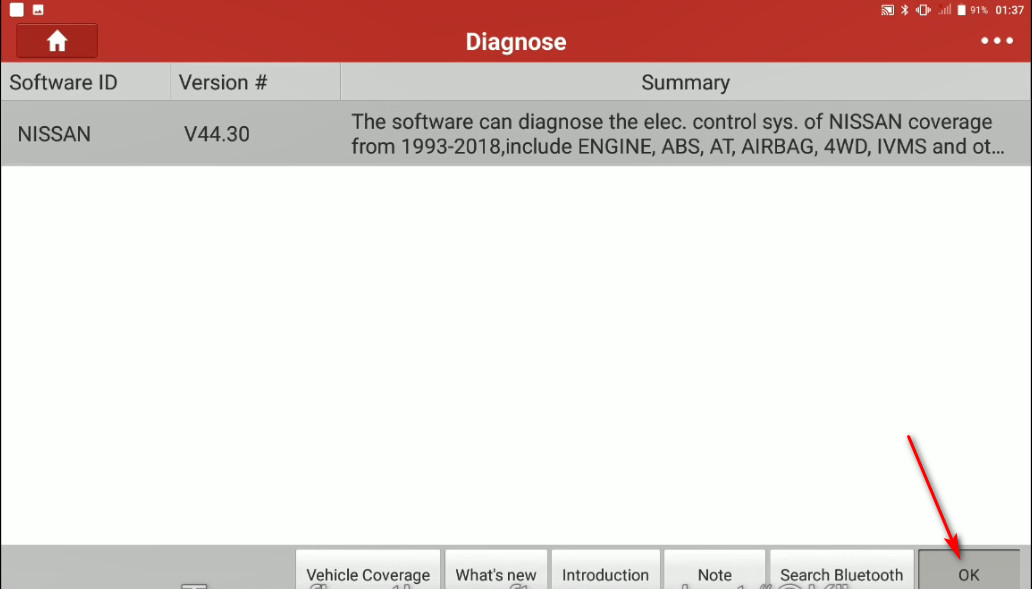
To confirm the software select [OK]
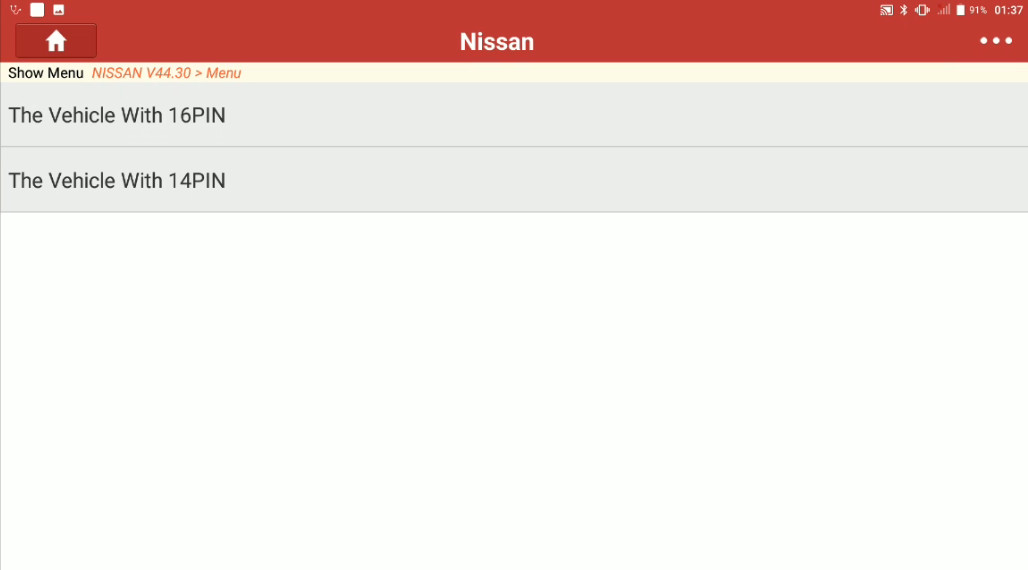
Select [The Vehicle With 16PIN]
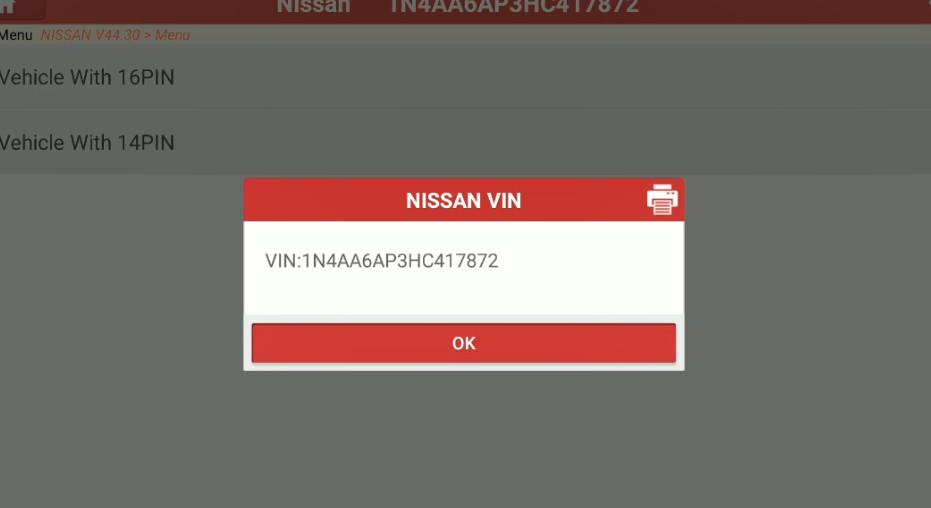
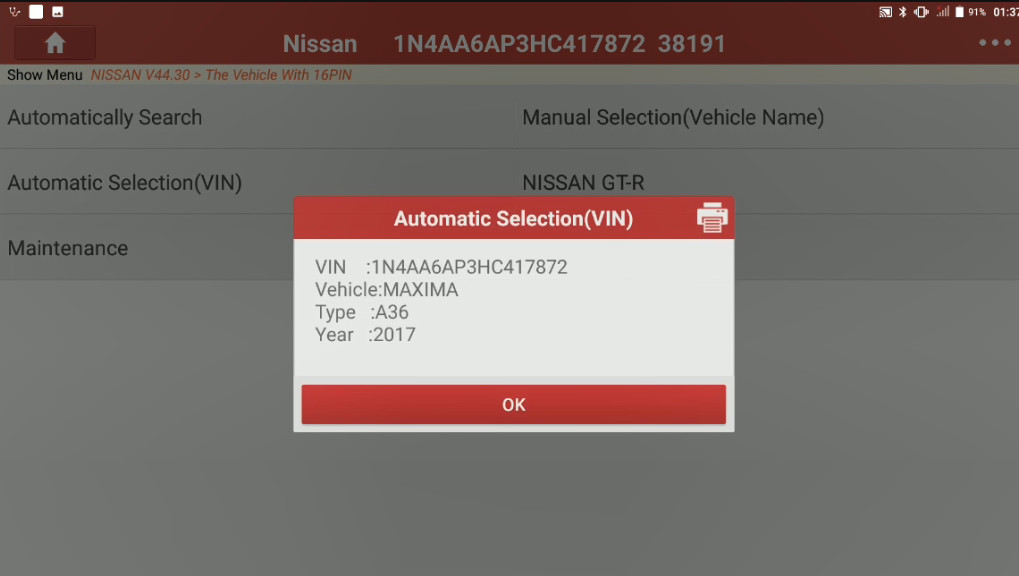
Then confirm VIN
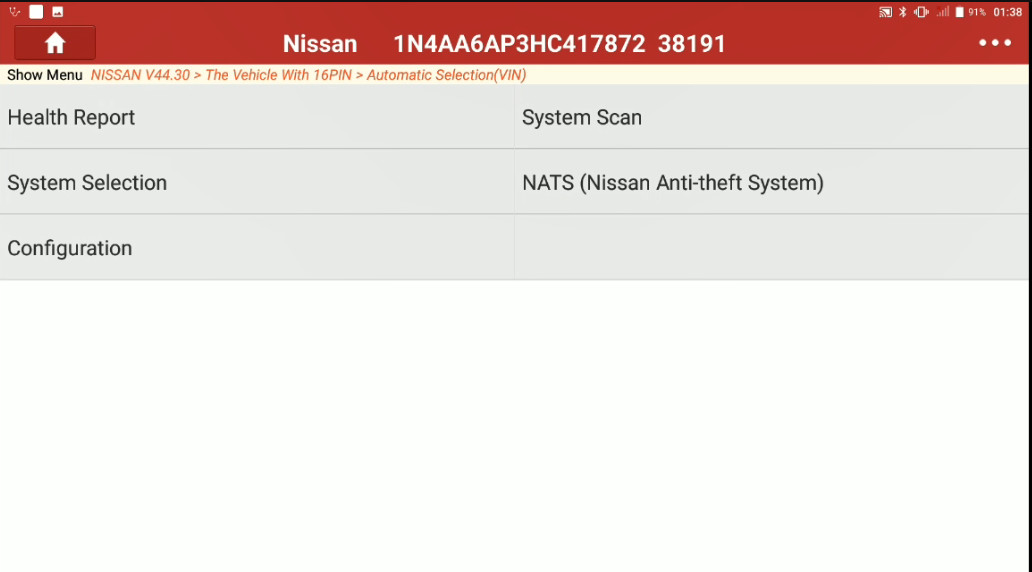
Select [Automatically Selection (VIN)],then confirm vehicle information
Select [System Selection]
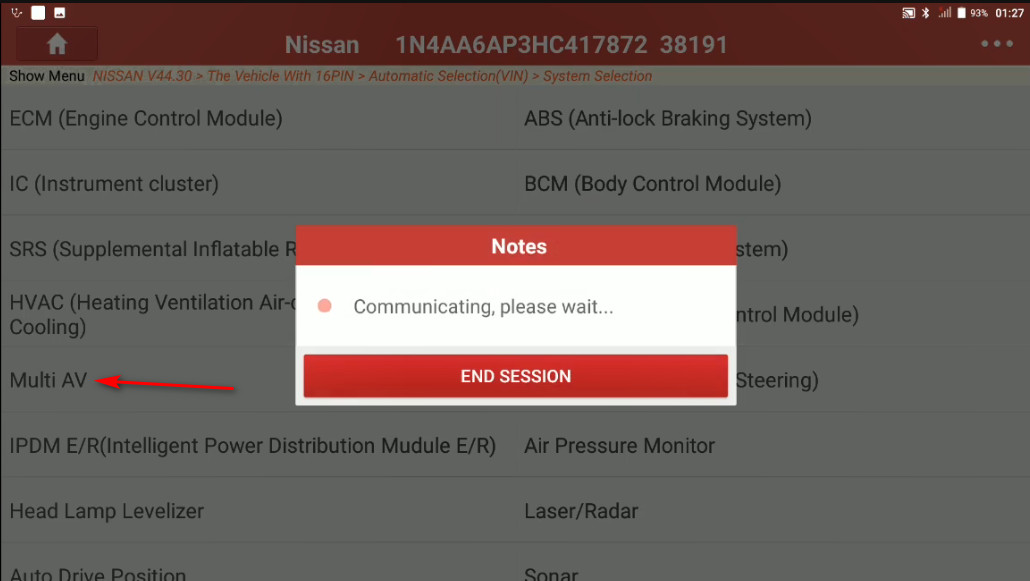
Select [Multi AV]
The it will show you with the system info,select [OK]
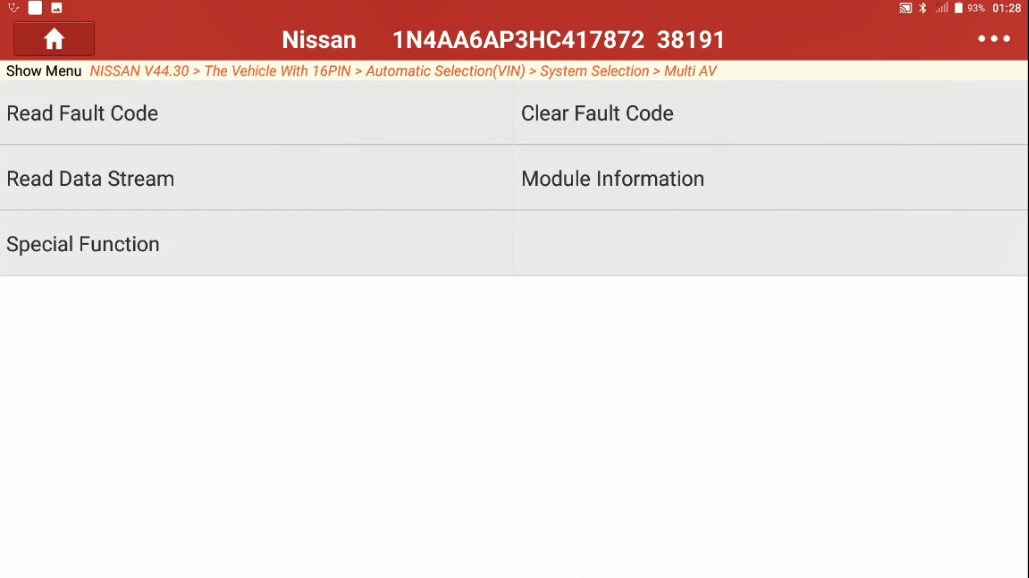
Then select [Special function]
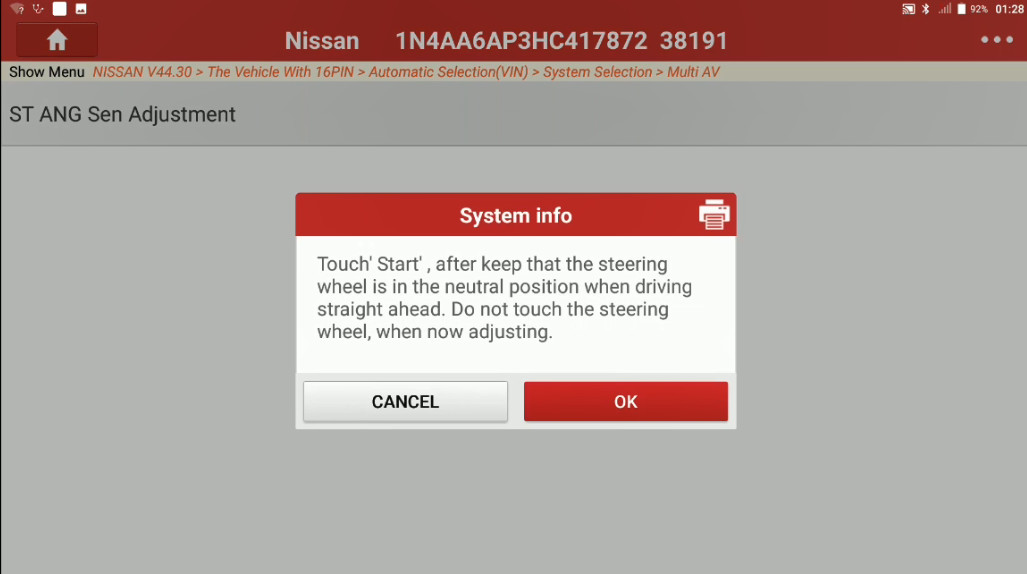
Select [ST ANG Sen Adjustment]
A system info screen will give you instructions,please follow it and select [OK]
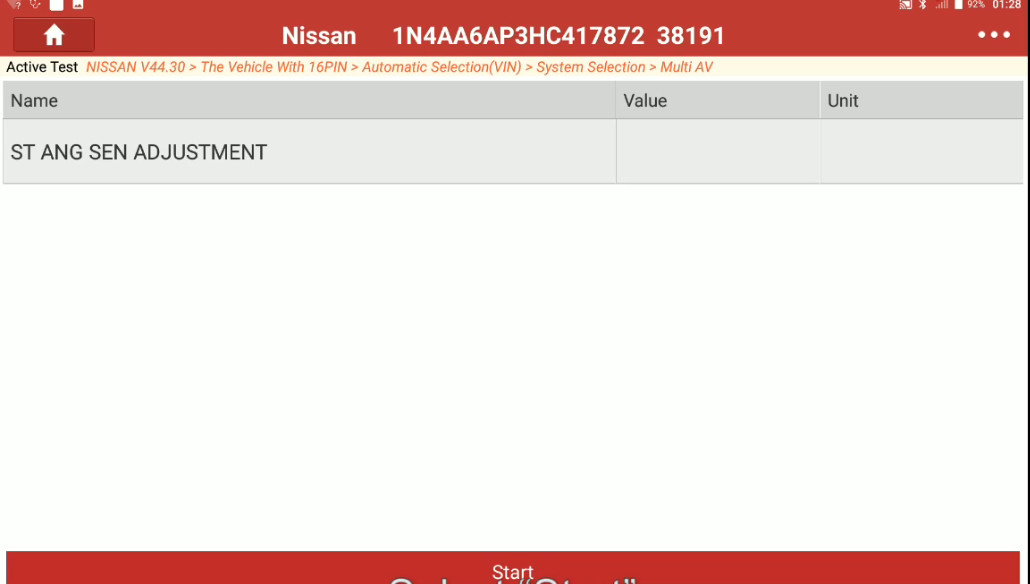
Select [Start]
Once finished the value will change to "Adjustment Completeâ€.
Posted by: youobd2 at
01:58 AM
| No Comments
| Add Comment
Post contains 131 words, total size 6 kb.
32 queries taking 0.0342 seconds, 126 records returned.
Powered by Minx 1.1.6c-pink.

