



July 31, 2020
Test the Connection to the ECM Caterpillar Engines using CAT Communication Adapter 3 Toolkit

Use Heavy Duty Diagnostic CAT Communication Adapter 3 Toolkit to test the connection between the
CAT Communication Adapter 3 and the ECM Caterpillar Engines.
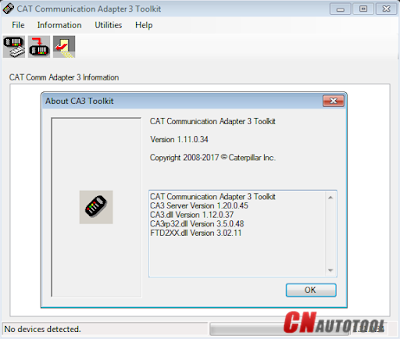
-Download Driver for CAT Comm Adapter 3 here:
CAT Comm Adapter 3 – v2.0
CAT Comm Adapter 3 – v4.4
Preparing to use the CAT Communication Adapter 3 Toolkit
1. Prepare your PC, and connect CAT Comm Adapter 3 to Diagnostic Port/Connector to the ECM.
2. Click "Start†– "All Programs†– "Caterpillar Comm Adapter 3†– "Comm
Adapter 3 Toolkitâ€, or through shortcut "Comm Adapter 3 Toolkit†on
desktop.
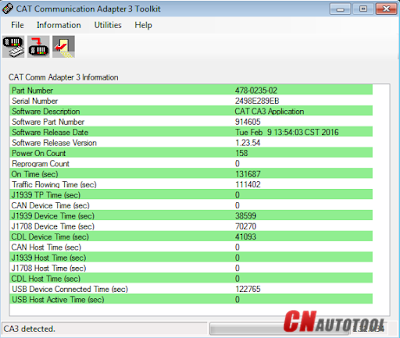
3. Once CA3 was detected, close the CAT Communication Adapter 3 Toolkit and open the CAT ET Software.
-The Connection message box is displayed while the service tool attempts to establish communications with the data link.

-To cancel all attempts to communicate with the ECM, click the "Stop
Connect†button on the Connection message box. All functions that
require an active data link connection are disabled. The service tool
displays a blank main screen. The status bar is updated with the message
"Disconnected.â€
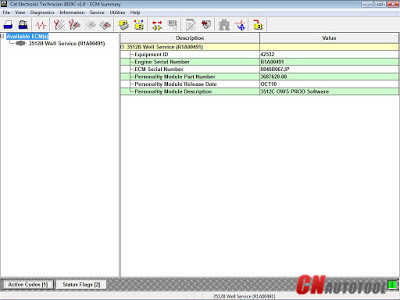
4. When communications are successfully established and a single ECM
is found, the "ECM Summary†screen displays. When communications are
successfully established and multiple ECMs are found, the ECM Selector
dialog box displays. If the service tool connects to an ECM that is not
supported by the subscription, the service tool displays a message and
immediately disconnects.
5. If any problems while trying to Initializing communications to the
ECM, it will displays "Cat Electronic Technician†message to provides
information for correcting the problems as example below.
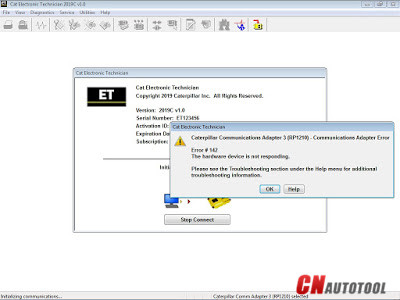

Click "Help†button
Troubleshooting Guide
Posted by: youobd2 at
02:53 AM
| No Comments
| Add Comment
Post contains 292 words, total size 4 kb.
July 24, 2020
From CnAutotool.com Mercedes Benz C6 OEM Xentry diagnosis VCI DOIP Pass thur interfac is the latest interface for For Mercedes & SMART vehicles can replace Star C4/C5. XENTRY Diagnosis VCI acts as a Pass-through Interface, also called Mercedes-Benz VCI C6, For Benz C6 multiplexer to provide complete communication between a vehicle and the XENTRY software loaded on a PC.
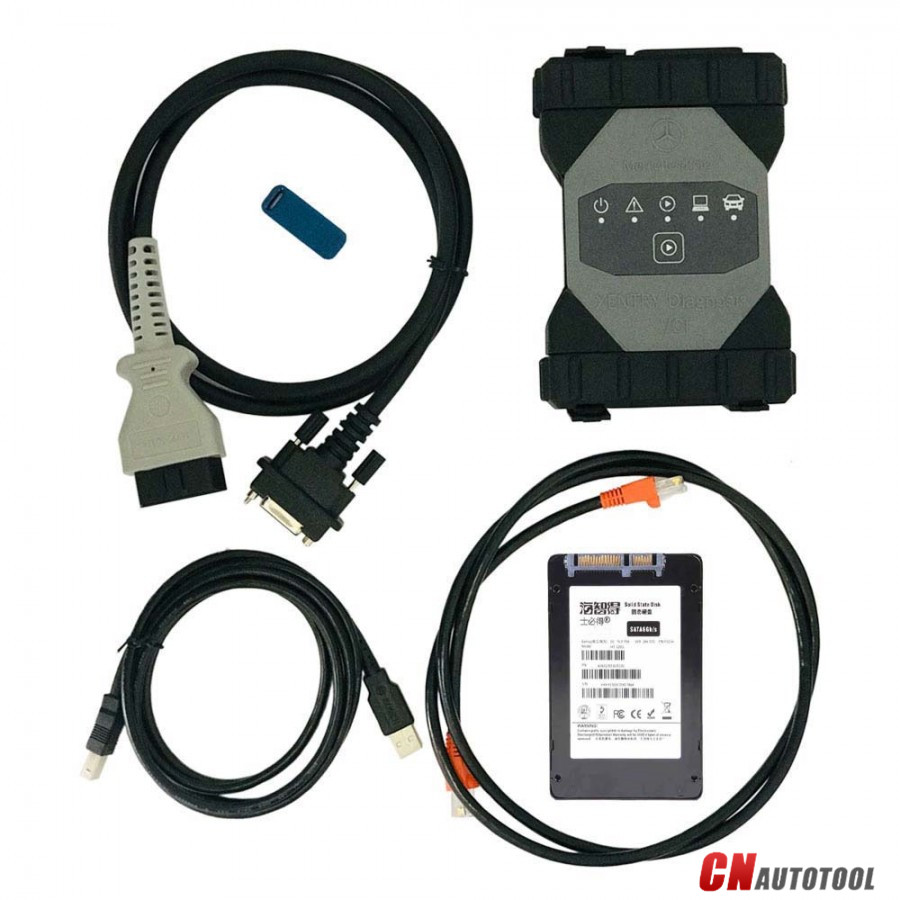
Mercedes Benz Xentry diagnosis VCI DOIP Pass thur interfaceMB SD Connect C6 DOIP Overview:
Compatible Software: VXDIAG For XENTRY/Das Software
Support Vehicle: Mercede For Benz & Smart vehicles
DoIP: Support DoIP
Functions: Star Diagnostic & programming (SCN Coding)
Software version: V2019.9
What is DOIP?
DOIP is ISO 13400 diagnostic protocol
ISO 13400-1:2011 describes the general use cases and communication scenarios which are covered by an Internet Protocol-based vehicle communication standard. Each use case drives specific communication capabilities of the vehicle communication interface, for instance in order to be interoperable in an existing computer network.
The diagnostic communication over Internet Protocol (DoIP) protocol supports the standardized service primitive interface as specified in ISO 14229-2.
The descriptions in ISO 13400-1:2011 cover different application layer implementations, such as:
enhanced vehicle diagnostics (system diagnostics beyond legislated functionality, non-emissions-related system diagnostics);
WWH-OBD (World-Wide Harmonized On-Board Diagnostics) as specified in ISO 27145-2 and ISO 27145-3.
The mercedes Land Rover JLR all use this new Diagnostic Protocol now.
Where need DOIP device?
when we test mercedes new car like w222 w205
In Audio\Comand section you can find DoIP test page.
If cable is DoIP you will see green mark that DEVICE is Ok.
Xentry will prompt you that other device must carry yellow marks.
Mercedes Benz Xentry diagnosis VCI DOIP Pass thur interface C6 Features:
Can be used for all model series of For Mercedes For Benz vehicles
Support DoIP, cover more functions during SCN Coding than SD C4/C5
Functions including diagnosing, programming, simulation studying, repair
information, automotive maintenance, technical service bulletin and so
on
Diagnosis updates no longer necessary – firmware updates required on rare occasions
Does not need a power supply unit for external power supply
Dandy multiplexer with a small, sturdy construction (no PC core, battery, fan, or display)
Engines (All Gasoline & Diesel Systems)
Transmissions and Electronic Selector Modules
Airmatic and Active Body Control Suspension Systems
Traction Systems: ESP / ASR / ETS / ABS / BAS / SBC braking systems
Supplementary Restraint Systems (SRS) / Airbag, All body modules OCP / UCP / LCP / SCM / SKF / KFB / RCM / DCM’s
Drive Authorisation System
Sam (Signal Acquisition) Modules
Electronic Ignition System (EIS)
Pneumatic System Equipment and ATA functions
Air Conditioning / climate control Systems
Instrument Cluster
Tyre Pressure Control
Parktronic System
Keyless Go
D2b Command & Audio Gateway (D2B and MOST networks)
TV Tuner
Headlamp Range Adjustment
Seat Electronics
Rvc, RST & Vario Roof modules
Automatic Clutch System ACS
M-Class Body Modules (AAM / EAM / DAS / SEM / VG Transfer Case)
Assyst & ASSYST + systems
Mercedes Benz Xentry diagnosis VCI DOIP Pass thur interface C6 Summary:
Mercedes Benz Xentry diagnosis VCI DOIP Pass thur interface C6 (Vehicle Communication Interface) multiplexer serves as the interface to the vehicle when performing diagnosis and repairs, and programming electric and electronic on-board vehicle systems.
The Mercedes Benz Xentry diagnosis VCI DOIP Pass thur interface C6 does not have its own PC core, battery, fan, or display. It is operated using the VXDIAG For XENTRY Diagnosis Pad via WLAN or a USB cable connection.
Notice
1.Please use the 500GB HDD on laptop above 4GB Memory and I5 CPU,
and use it on one laptop only. If change laptop, software may get broken
and need to ship HDD back to us to copy software again.
2.This Mercedes Benz Xentry diagnosis VCI DOIP Pass thur interface C6 can/’t support All Key Lost,needs one key at least.
3. Please note: C4, C5 software cannot be used for this product, this product must be used with our C6 software.
Posted by: youobd2 at
10:02 AM
| Comments (1)
| Add Comment
Post contains 661 words, total size 6 kb.
July 13, 2020
Support Languages: English, French, German, Italian, Portuguese, Russian, Spanish.
John Deere Service Advisor Agriculture workshop service manual, repair manual, electrical wiring
diagram, hydraulic diagram, diagnostic, assembly and disassembly engine,
transmission.
John Deere AG Management Solutions, Attachments,
Backhoes, Combines and Headers, Cotton Harvestings, Excavators,
ForkLifts, Hay and Forages, MAte Hand Cut and Shredderses, Plantings and
Seedings, Skid Steers, Sprayers, Sugar Cane Harvesters, Tillages,
Tractors, Worksite Pro Attachments.
John Deere Service Advisor CF
(Construction and Forestry), workshop service manual, repair manual,
diagnostic, electrical wiring diagram, hydraulic diagram John Deere.
John Deere Service Advisor CCE (Commercial and Consumer
Equipment)dealer technical assistance, diagnostics, connection readings,
calibrations, interactive tests, specification, tools, assemble and
disassemble presented all models John Deere Construction Equipment and
some models Hitachi, Euclid, Bell and Timberjack.
JOHN DEERE diagnostic adapter for construction equipment, agriculture, engines John Deere.
Please select the correct version which you need before make the order
1. John Deere Service Advisor V5.2 AG Supports vehicles to 2018
2. John Deere Service Advisor V5.2 CF Supports vehicles to 2018
3. John Deere Service Advisor V5.2 CCE Supports vehicles to 2018
Operating System:Windows XP 32 bit, Windows 7 32 bit, Windows 7 64 bit, Windows 8/8.1 32 bit, Windows 8/8.1 64 bit, Windows 10 32 bit, Windows 10 64 bit
Posted by: youobd2 at
07:21 AM
| Comments (1)
| Add Comment
Post contains 217 words, total size 2 kb.
July 07, 2020
Possible to have a Launch tool for heavy duty trucks or buses?
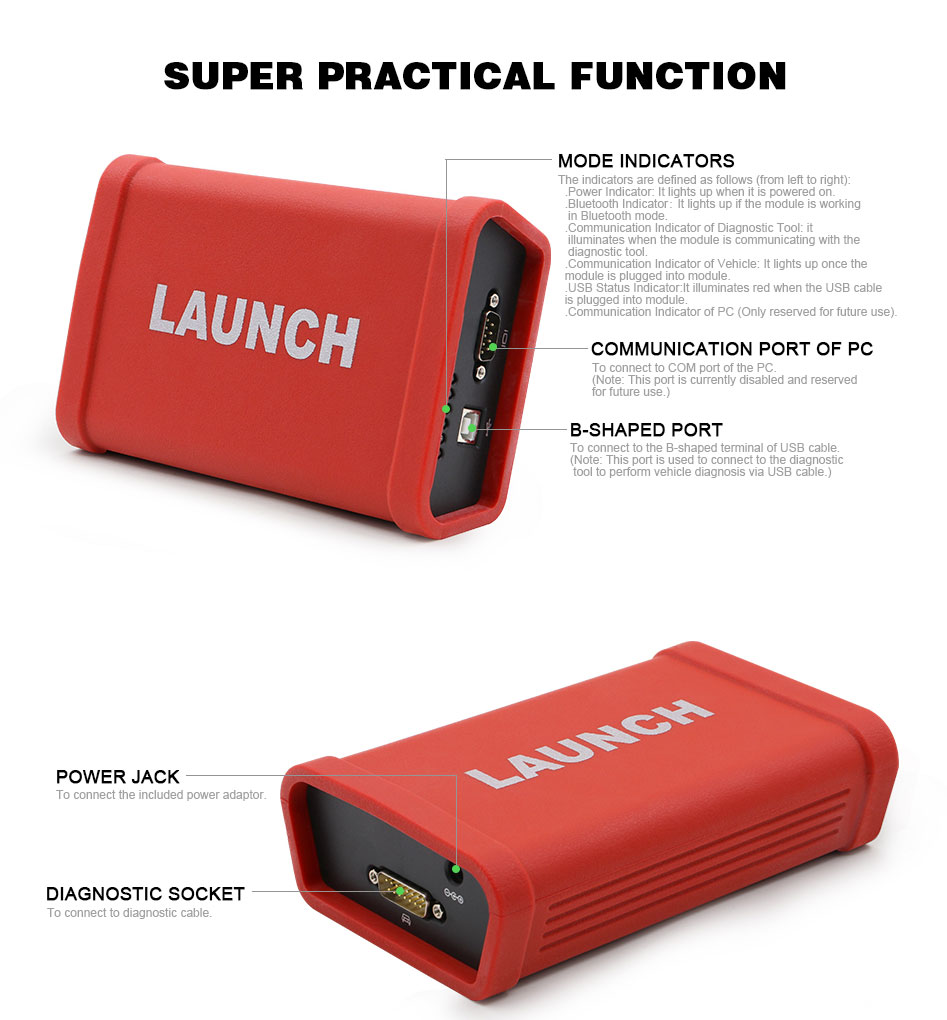
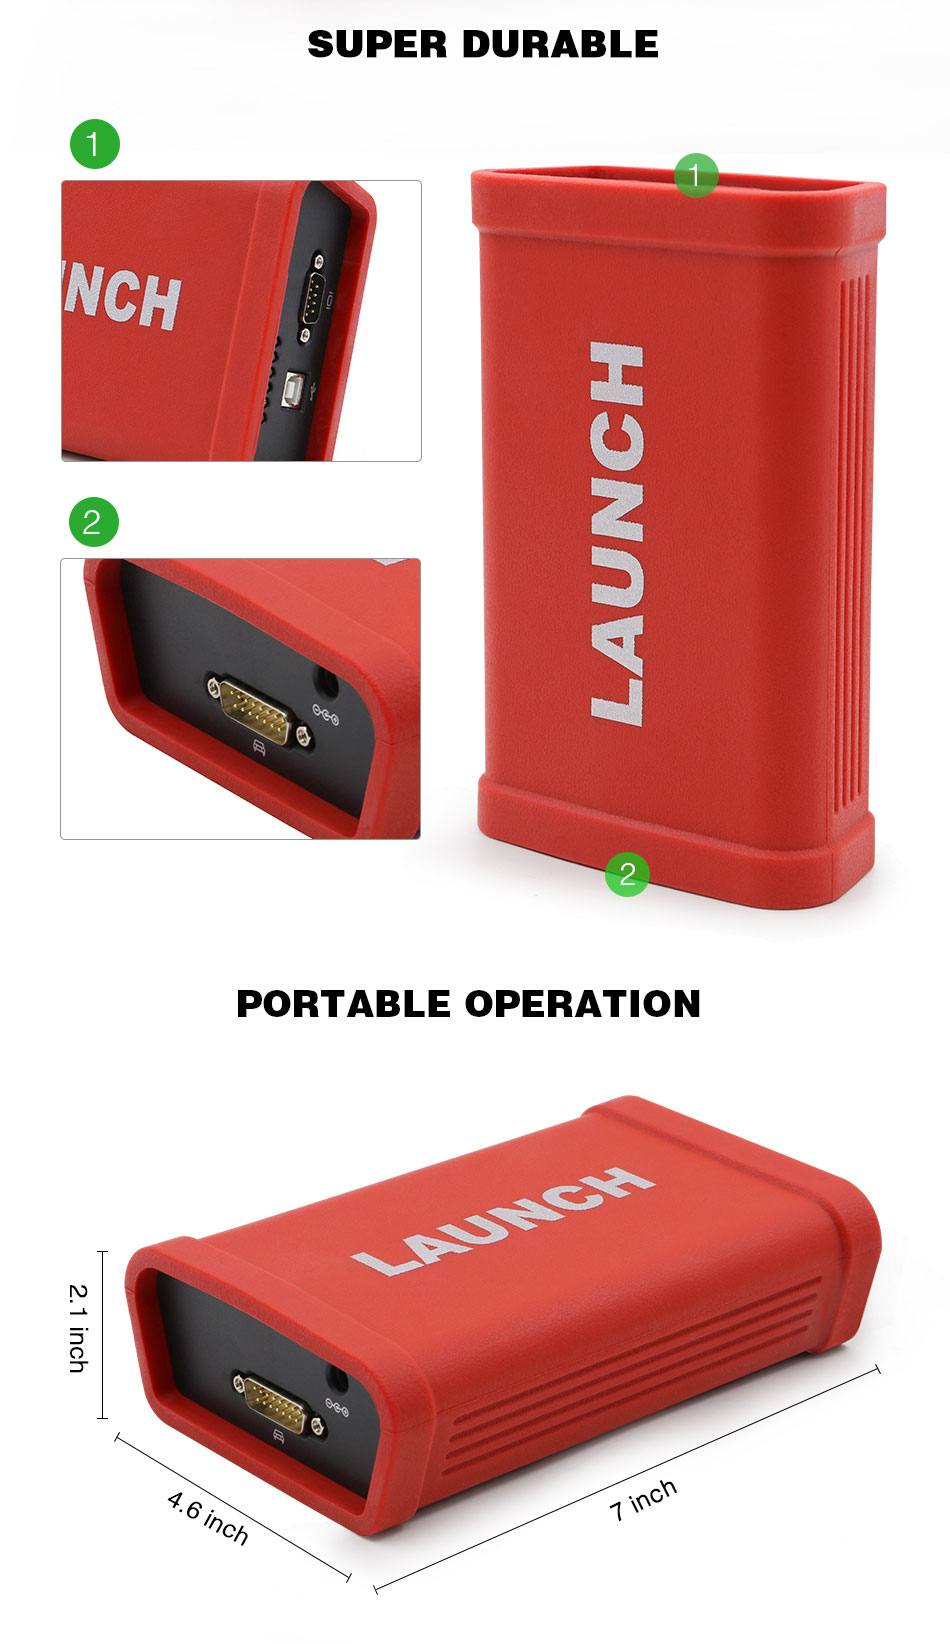
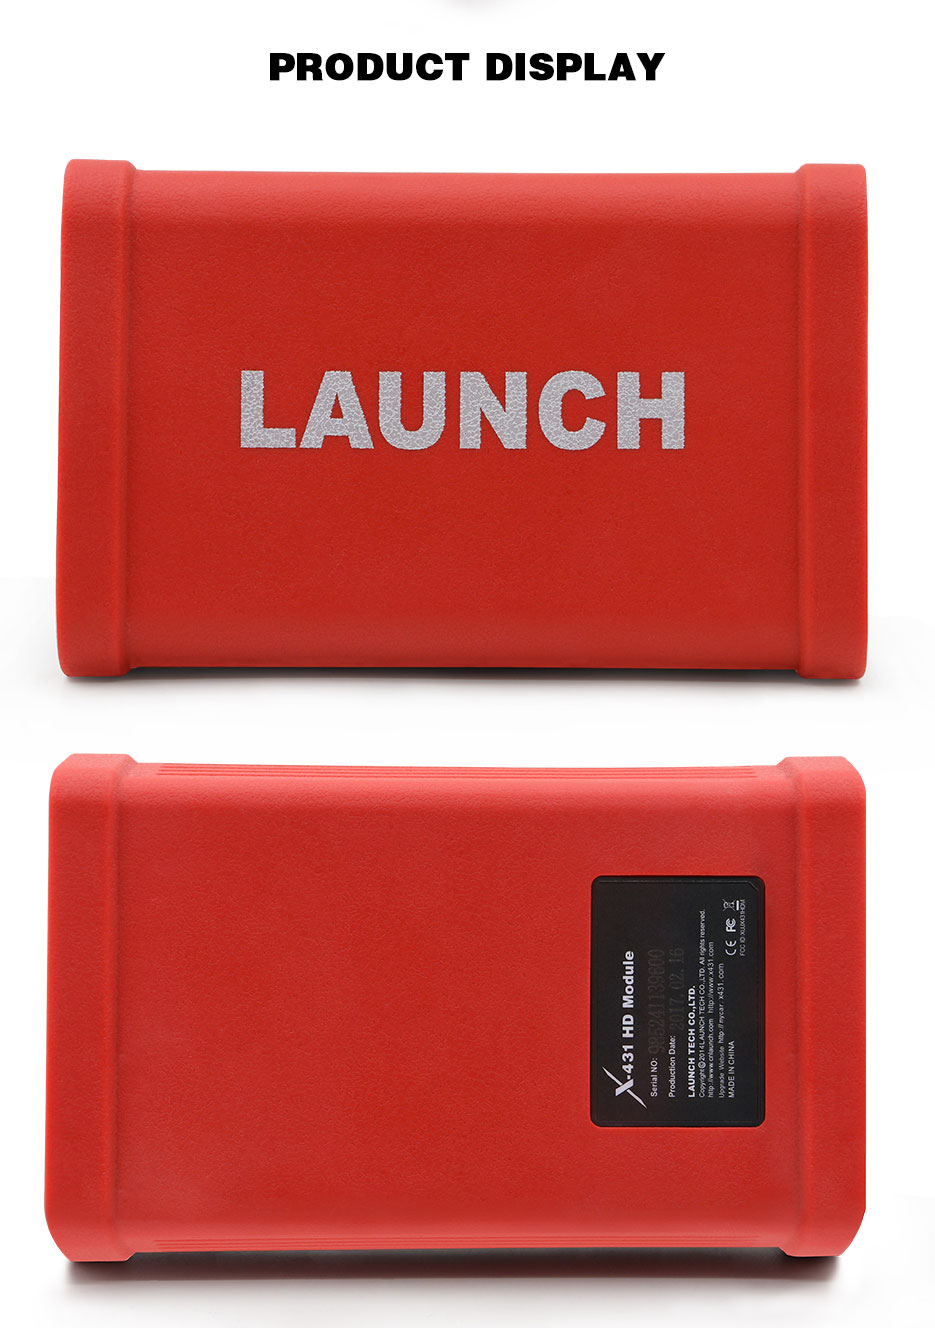
Definitely yes. But you should have a LAUNCH X431 HD Heavy Duty Adapter to work with.
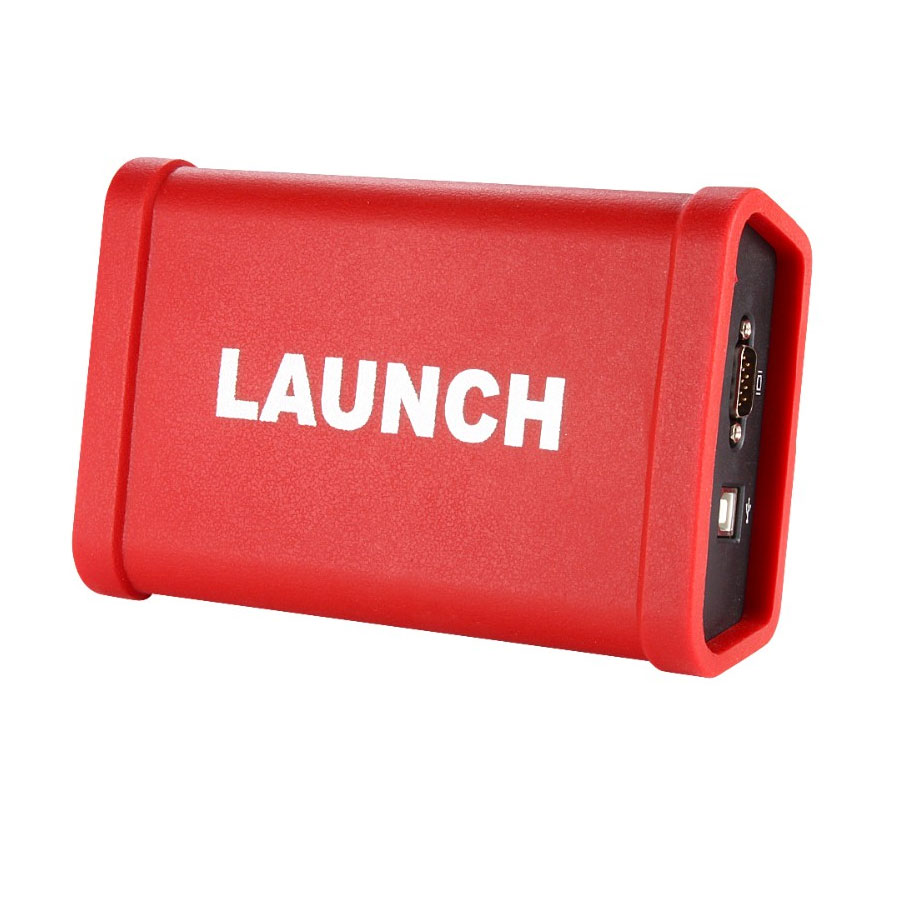
With the X431 HD module, you can make your Launch X431 v scan tool to work on:
JMC, ASTRA, BREMACH, DAF, ERF, FUSO, MACK, MAN, SCANIA, WP Diesel Car, X431 Diesel Car, CREDO Heavy Duty, IRISBUS Heavy Duty, IRIZAR Heavy Duty, NEOPLAN Heavy Duty, SETRA Heavy Duty, SITCAR Heavy Duty, UD Truck 2F JP Diesel, Bonluck Bus, Mitsubishi Heavy Duty, Renault Truck, Sunlong Bus, Sunwin Bus, Zhongtong Bus, Mercedes Benz Heavy Duty, Foton Auman, Volvo Heavy Duty, Cummins Engine Vehicles, , Hino Motors, Isuzu Heavy Duty, Hyundai Heavy Duty, IVECO Heavy Duty, China Heavy Duty, etc.
Here are questions and answers frequently asked, which may help how to use Launch X431 HD pad for trucks or buses.
Question: Can you verify if this does most diesel as well like toyota, isuzu, and mitsubishi mostly japanese models.
Answer: Here is the vehicle coverage: if you need to confirm , please tell us the VIN ,car model and year for confirmation.
Ford, Chrysler, GM, Mercedes Benz, BMW, Fiat, Peugeot, Saab, GMSA, EOBD2 Cars, Jaguar, Renault, Smart, Sprinter, VAZ, VW, Dacia, Land Rover, Romeo, Porsche, Volvo, AUDI, Citroen, Lancia, Acur… see more
Question: Does this tool offer super car diagnostics?? ferrari, maserati, lamborghini??? clutch pid, service reset etc
Answer: This tool can test ferrari, maserati but not lamborghini, it can not only do clutch pid, service reset these basic function on your ferrari, maserati, but also can do such as battery reset, brake reset, oil reset, ABS bleeding, throttle adaptation, TPMS reset, DPF regeneration, gear learning and IMMO, etc.
Question: Does it give full diagnostic on diesel vehicles?
Answer: Dear friend, this diagnostic tool can work on some 12V diesel vehicles, if you need to confirm, please email us your car model, year and VIN, we will tell you the result.
Question: Can this scanner perform crank position relearn and idle relearn and can it do a crank position relearn on a 2007 subaru 2.5
Answer: sure, of course, still it can do key match, battery match, throttle match, epb reset, tpms reset, sas reset ,oil light reset, injector program, and this red outlook version is with 2 years free update, very economical, and now we are conducting promotion, please don’t hesitate, have any problem just contact us.
Question: this Launch Scanner includes an automotive Labscope?.
Answer: It doesn’t have a lab scope but does have graphing capabilities of the sensor inputs. .
Question: will this product do cylinder cutout test and functional test for most ford 6.0 diesels and other diesel engines alike?
Answer: yes, it can work well on the function.
Question: Why launch tech usa don’t offer me after-sale service?
Answer: A mi me an atendido muy bien, cualquier duda que tengo le pregunto a launch teach y me responden rapidamente.
Question: Will this scanner work on a ford 7.3 diesel motor?
Answer: i have the x431 v plus with the heavy duty and I use it on the ford with the cummings I can use it on the 7.3 but like I said I have the x431 plus with heavy duty for me the little extra coast for the heavy duty was worth it
Question: The scanner has new updates on a day to day basis? and it will work in brazil vehicles?
Answer: sorry,sir.the scanner has two years free to update.
Question: What is the difference between the V+ and 2.0?
Answer: V2.0 is the advanced version with more software coverage, better than X431 V+.
Question: Is this launch usa model ?
Answer: Yes, it is US veriosn from LAUNCH
Question: how is it different global version (x-431 pro 3) and this?
Answer: Both product from Launch.
They are with the same function but different outlook
That’s all FAQs of Launch X431 HD, updated on 15-05-2018
Posted by: youobd2 at
10:19 AM
| Comments (1)
| Add Comment
Post contains 668 words, total size 6 kb.
Newest Update Launch X431 V 8 inch, improve hardware and newly add more vehicles, with better features, work more faster. And it is stock in uk warehouse, free shipping via ups standard to EU country no tax, the delivery usually need 2-3 working days.
Here lets us check the key features of 2018 New Model Launch X431 V 8Inch:
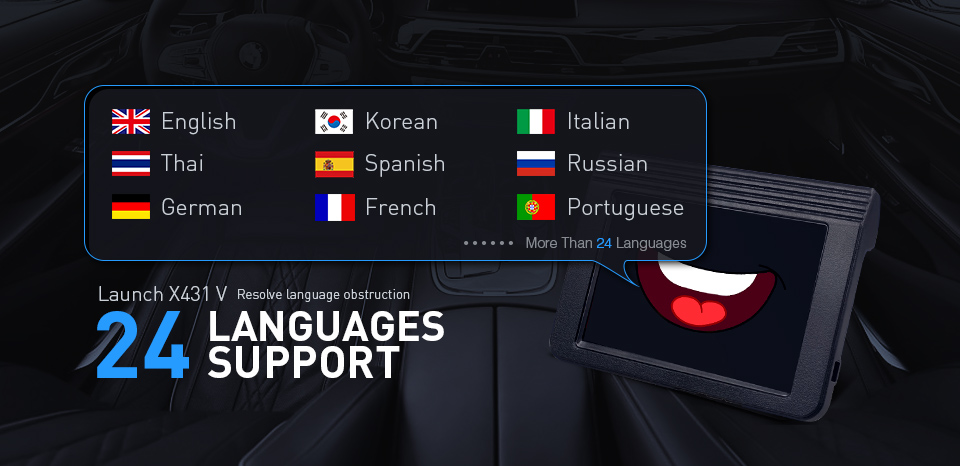
1.Support multi-languages: English, German, Japanese, Russian, French, Korea, Arabic, Spanish, Italy, Portuguese, Polish, Turkish, Dutch, Greek, Hungarian, Arabic, Danish, Persian, Romanian, Serbian, Finnish, Swedish and Czech(available to almost world-wide customers)
2. Update Online two years for free, update cost is 499.00USD/Year, after first two year. If you do not update it two years later, you still can use it, just not support new update car models
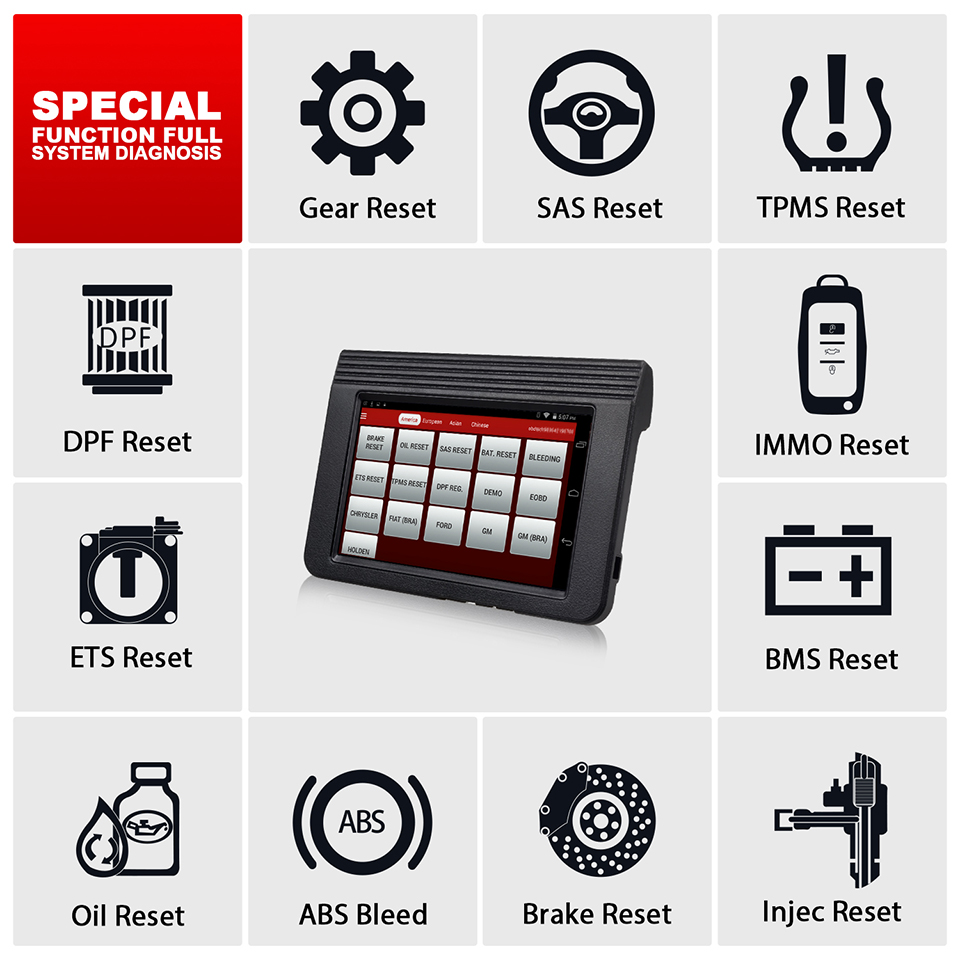
3. Support many Special function, it is very powerful for Garge : AUTOSEARCH(AutoSearch),Reset SAS, Reset Brake, Reset Gear, Reset Oil, Reset IMMO, Reset Injec, Reset TPMS, Reset BMS, Reset ABS Bleed , Reset ETS, Reset DPF, DEMO, EOBD2,ECUAID
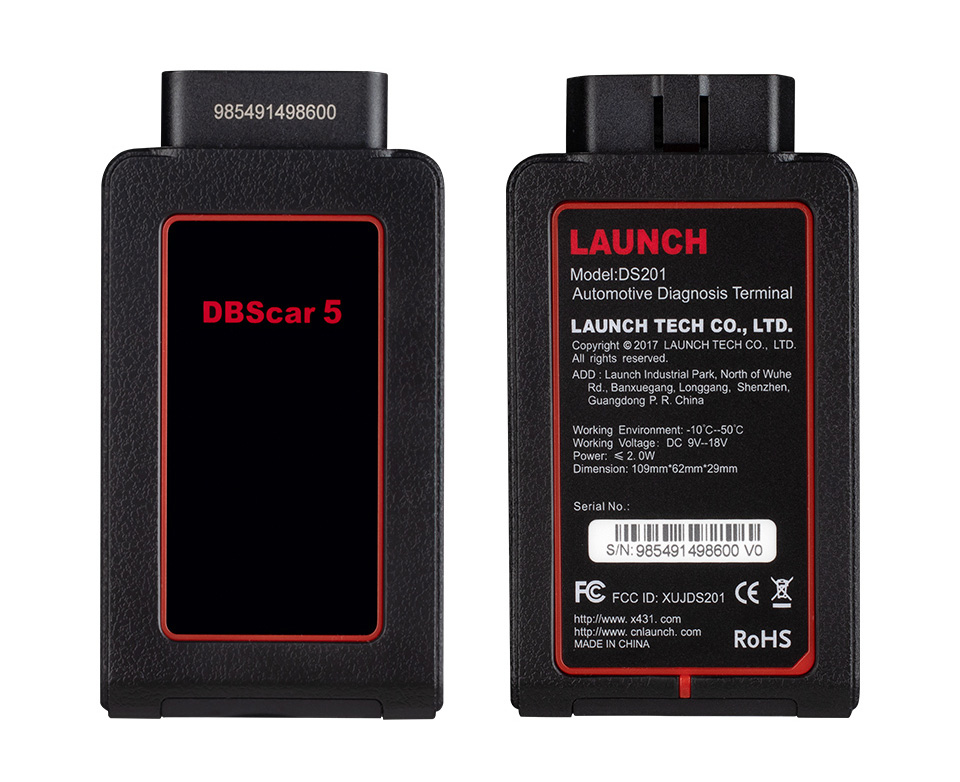
4. Support Bluetooth Connection, come with newest DBSCAR 5 Bluetooth Connector, Bluetooth Distance: 10M (Without Obstacle)

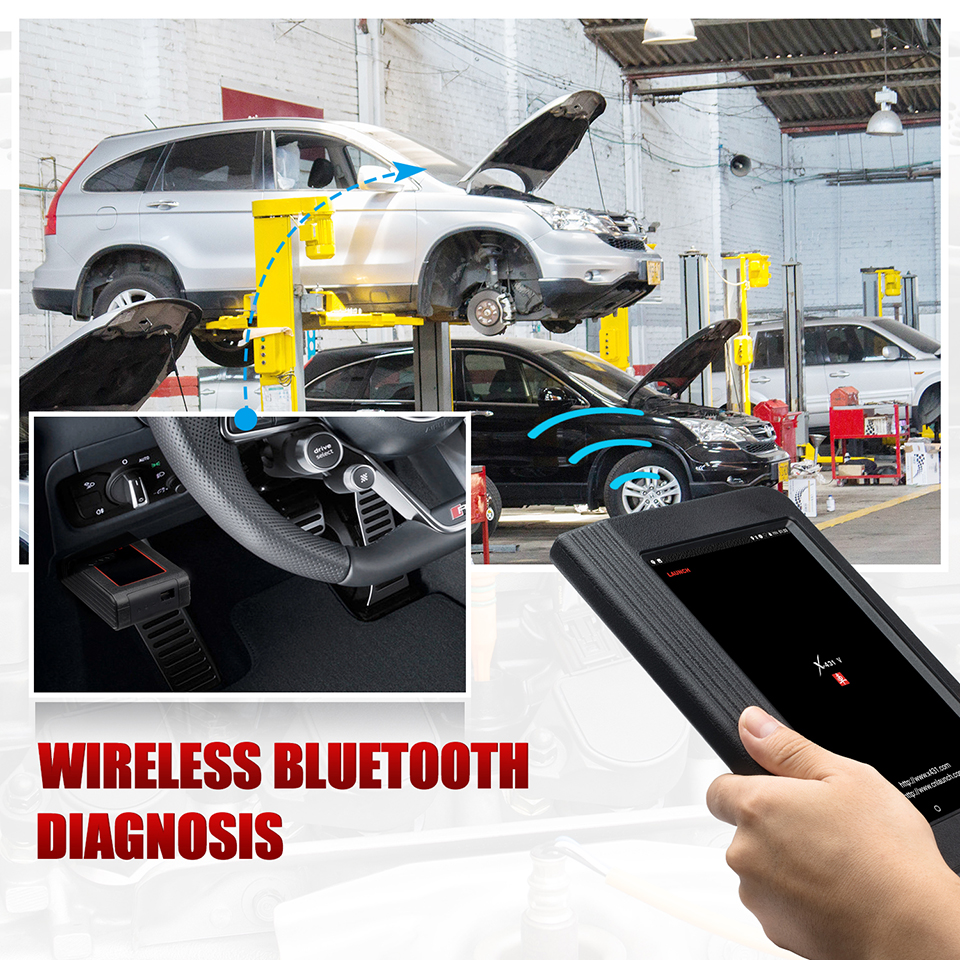
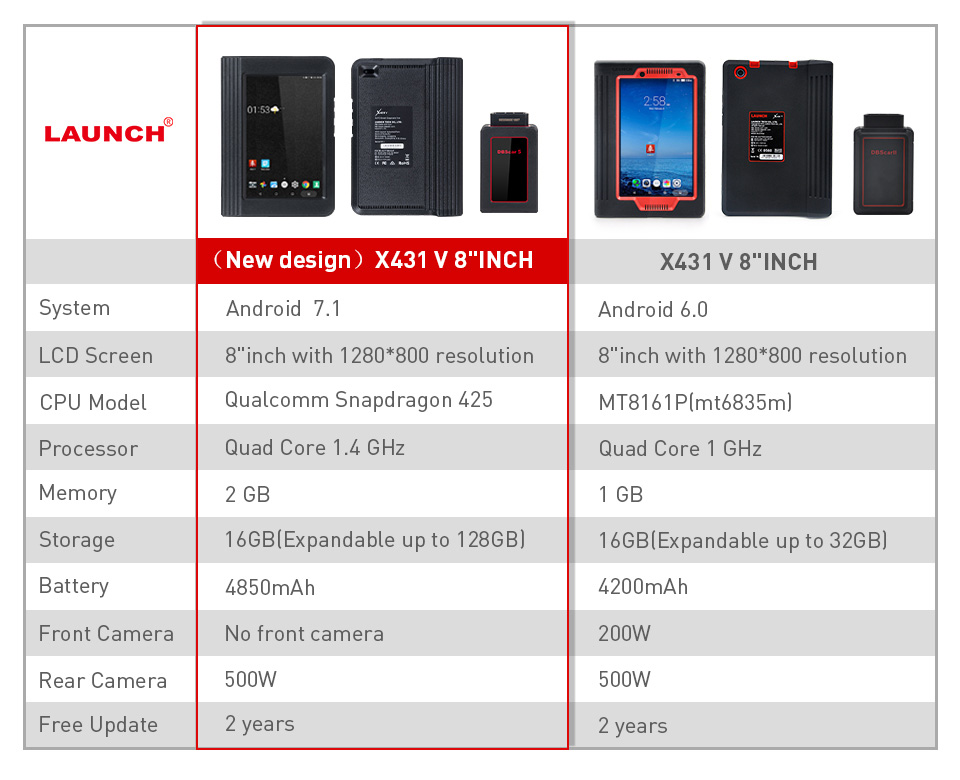
5. 2018 New Design X431 V 8 Inch with higher configuration
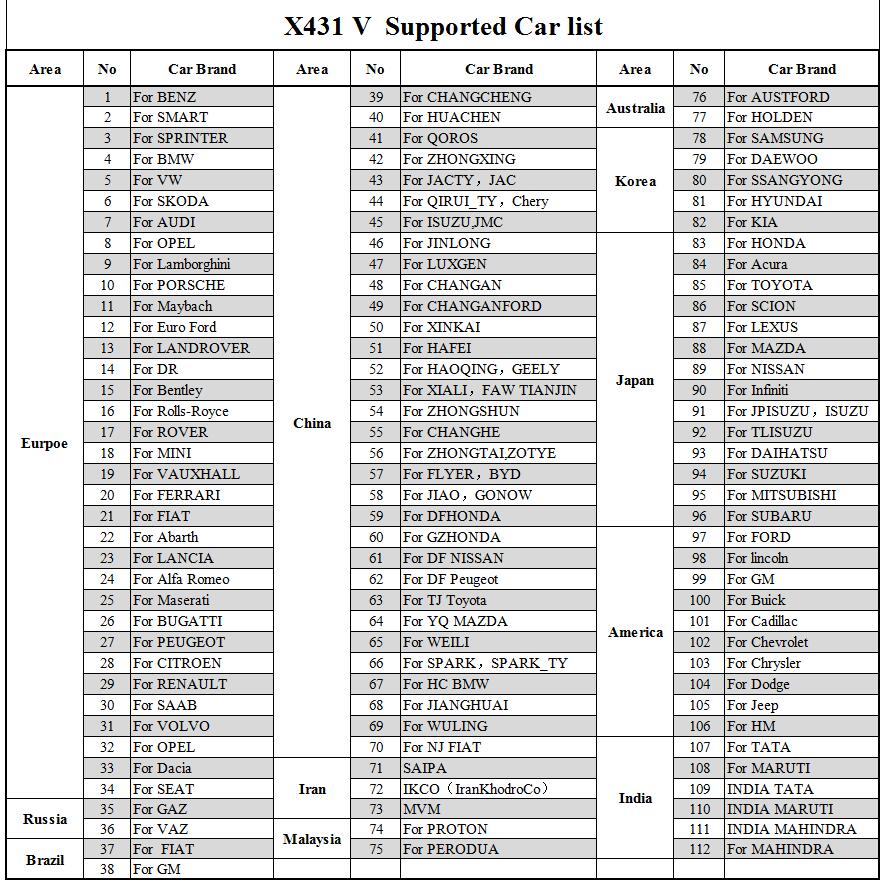
6. Support more and new models
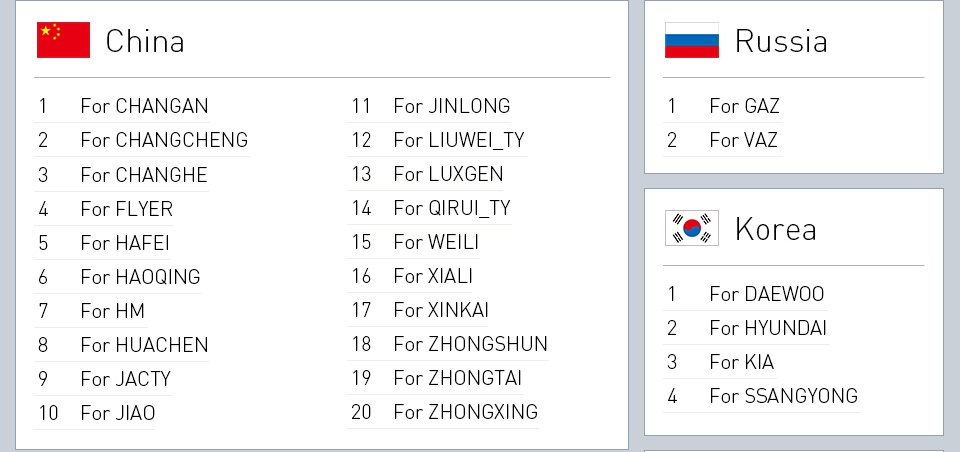
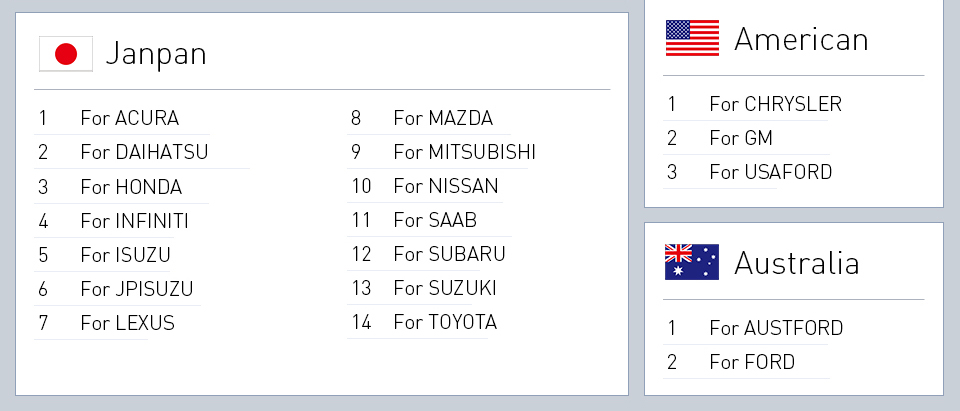
2018 new design X431 V 8 inch support following models
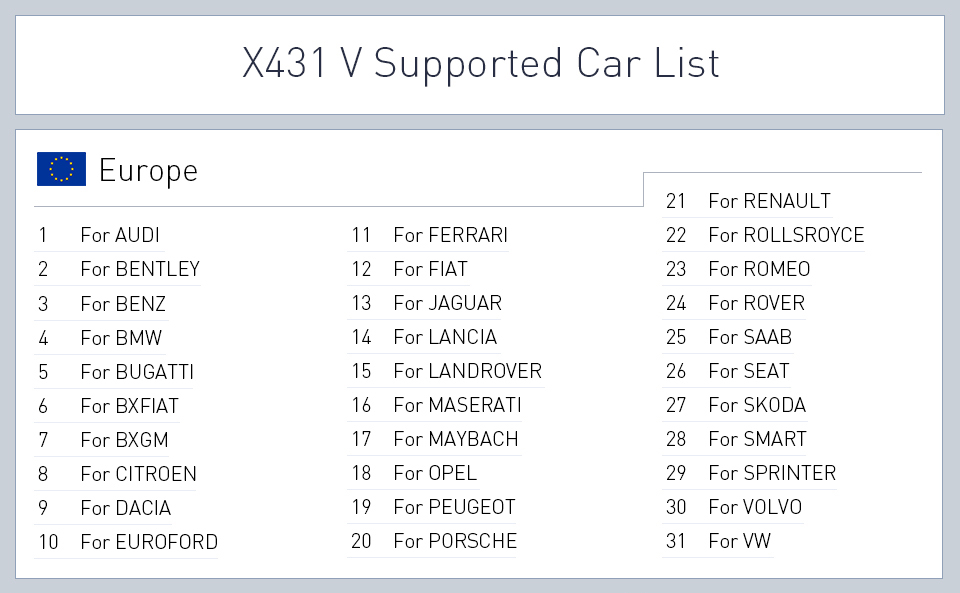
X431 V 8 Inch only support following models:
Posted by: youobd2 at
10:06 AM
| No Comments
| Add Comment
Post contains 221 words, total size 5 kb.
Problem:
I got the OEM Porsche tester iii with 128G PIWIS SSD. There was something wrong with the Dell laptop.
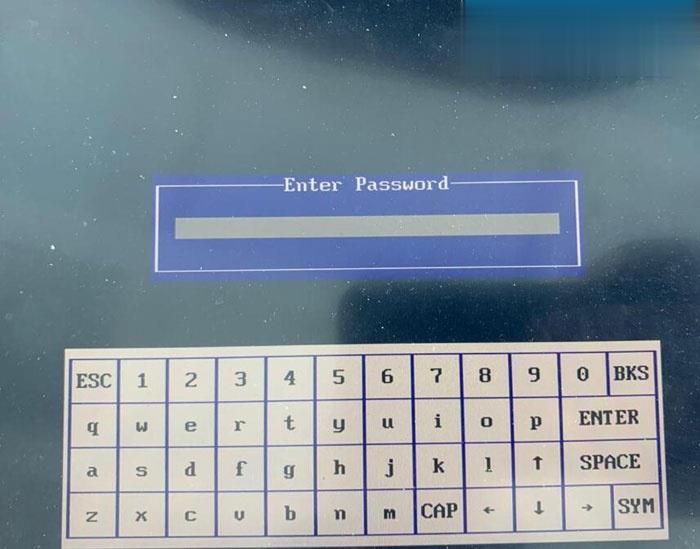
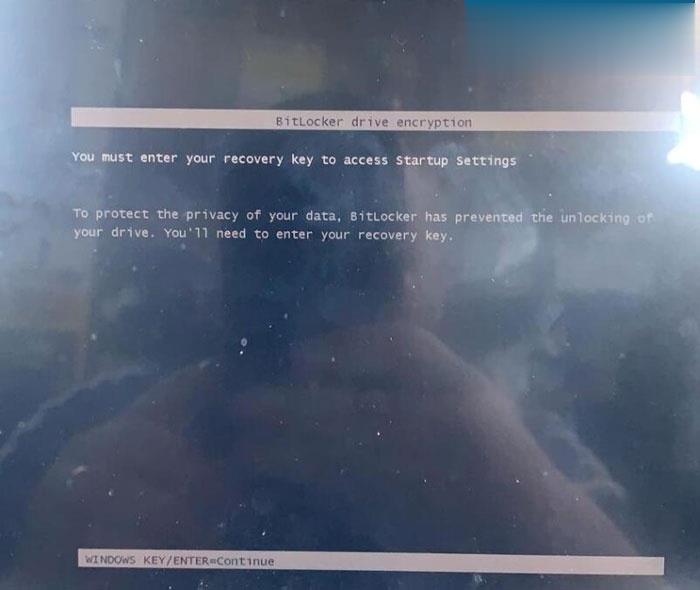
So i changed my own laptop and insert SSD. But the system display BitLocker driver encryption error page and require to enter recovery key to access Startup Settings.
What is the recovery key?
Possible reason:
The OEM Porsche PIWIS3 should only work with the DELL E7450 Laptop in default. Because each PIWIS III Tester is registered with each E7450 Laptop before delivery. Once you change a new laptop, the SSD is decrypted and formatted. In this case, you cannot use the SSD anymore nor send back laptop for repair. SSD is not for sale alone.
Solution:
If dell laptop has problem , don’t change laptop, get the laptop fixed by local dealership or send back the laptop to us to repair.
If you have changed a new laptop, contact your seller to buy a U disk.
Contact factory to authorized the piwis 3 account and download PIWIS iii to the U disk. Then install the disk to Dell computer.
Posted by: youobd2 at
08:50 AM
| Comments (1)
| Add Comment
Post contains 191 words, total size 2 kb.
Obd2tool.com here provides some coding procedures using Porsche PIWIS Tester.
To code you need to be in development (E) mode, which is unfortunately in German. I’ve made a start at doing some translations courtesy of Google Translate below.
How to Enable OEM Porsche Tester III Developer Mode?
If you play around in simulation mode, the car it uses is a 991 coupe. Whilst not exactly the same as the 981, it’s very close. It’s a good start at poking around the software to see where things are without having to be connected to the car.
Some general phrases
Codierung Anpassungen
Coding adaptations
Keine Eintrage gesetzt
No value set
Codierwert or kodierwert
Coding value
Wert
Value
Verbaut
Installed
Geandert
Changed
aktiv
Active
Inaktiv
Inactive
Einheit
Unit
Geandert
Changed
Schreiben
Save
Ja
Yes
Nein
No
MCR = Machine-readable Coding Rules
Manuelle Codierung ohne MCR Regeln (Entwicklung)
Manual coding without MCR rules (development)
Manuelle Codierung von Bin?rdaten (Entwicklung)
Manual coding of binary data (development)
Manuelle Codierung mit MCR Regeln
Manual coding with MCR rules
Automatische codierung
Automatic coding
Rucksetzen auf werkeinstellungen
Reset to factory settings
geben sie bitte fahrzeugdaten ein
Please enter vehicle data
werte andern und mit speichern
change values and save with
weiter zum nachsten screenmit
continue to the next screen with
coderung lauft
coding is running
codierung von steuerger?ten
coding of control units
Control Module names
waehlebel
Gear selector lever
kombiinstrument
instrument cluster
kombilenkstockschaltermodul
steering wheel module
stoppuhr
stopwatch
audio verst?rker
audio amplifier
bedien und klimaeinheit
operation and climate
parkbremse
park brake
reifendruckkontrolle
tyre pressure control
d?mpfersteuerung
damper control
servolenkung
power steering
verdeck synchronisation
convertible top
BCM vorne
Front Body Control Module
BCM hinten
Rear Body Control Module
scheinwerfer links
Left headlight
scheinwerfer rechts
Right headlight
spurwechselassistent
lane change assistant
sitz fahre
driver seat
sitz beifahrer
passenger seat
tuer vorne links
left front door
tuer vorne rechts
right front door
soundaktuator innen
inside sound actuator
DME coding translations
Manual coding without MCR
Bestelltyp
ordered type
getriebetyp
transmission type
innenausstattung
interior decoration
kodierung kodierbyte
coding coding byte
tempomat
cruise control
start/stopp aktiv
start stop active
allradantrieb
all wheel drive
abgasklappen
exhaust flap
getriebedrehzahlsensor
transmission speed sensor
kraftstoff brasilien
fuel brazil??
Gerauschtypisierung Asien
Noise typing Asia
Tankleckdiagnose Feinstleck
Tank leak diagnosis
Kraftstoffmarkt
Fuel market
Kodierung gultig
Coding valid
Landercode
Country code
Nummern
Numbers
Ruckrufaktion
Product recall
Seriennummer Wegfahrsperre
Serial number immobilizer
Tester Produktionsmodul
Tester production module
Verbauvorschrift
Building regulations
Wagen und Verdeckfarbe
Car and top color
Wartungsdienste
Maintenance services
Manual coding with MCR
Landercode
Country code
Modelljahr
Model year
Produktschlussel
Product key
Bordcomputer
On board computer
Anzeigendonfiguration
Show configuration
schlussel
Key
fahrzustand
driving state
Last Mode coding DIY
This is a Porsche PIWIS DIY to recode the car so that it keeps the last driving modes set. I used this primarily to ensure that start/stop initialises OFF each time I start the car rather than me having to push the button each time I start the car.
I don’t know what other modes it keeps for the next time your start the car. It seems to keep the last PASM and seat heating settings, but not SPORT or SPORT PLUS.
Note: Development mode is in German. English translations are after each step to show what you are doing.
I can’t take credit for the procedure. I won’t name who it was, but they know who they are, and thanks for the help.
If you are worried about doing this for the first time on your car, it’s the same in simulation mode, so have a practice here first. Being simulation mode, it won’t let you save it.
To make the coding changes, do the following.
Change the PIWIS mode to E (development)
Open the diagnostics for the car type, then make the following selections.
1. BKE (bedien und klimaeinheit)
operation and climate
2. Codierung Anpassungen
Coding adaptations
3. Manuelle Codierung ohne MCR Regeln (Entwicklung)
Manual coding without MCR rules (development)
4. Select both kodierwert:kodierwert default fahrzustand and kodierwert:kodierwert default fahrzustand last mode
codeword default driving state
5. In Wert (value) dropdown
Change …fahrzustand to "last modeâ€
Change …fahrzustand last mode to "jaâ€
6. Click schreiben (save) at bottom.
Coding complete. Exit and change the settings back to V (aftersales) mode if desired.
Posted by: youobd2 at
08:38 AM
| Comments (1)
| Add Comment
Post contains 706 words, total size 7 kb.
July 01, 2020
Description:
Everything you need to diagnose and repair heavy & medium-duty vehicles.
JPRO Professional truck scanner is the most comprehensive and powerful all makes, all models diagnostic tool available in the industry today. In one, easy annual subscription, JPRO provides a complete & unparalleled diagnostic service & repair solution with bi-directional functionality.
Next Step Service Information module helps speed up repair times by providing users with detailed engine repair information and troubleshooting guides for ABS and Transmissions – with the click of a button.
Noergon’s DLA+ 2.0 adapter is a diagnostic communication device
designed to interface between a vehicle and PC via USB cable for
diagnostic and vehicle information, re-programming or parameter
adjustments.
JPRO Professional can support DPF Regeneration for Cummins,Detroit,International,MACK,Paccar,Volvo and more. So here CnAutotool.com show you guide on how to use JPRO Professional to perform DPF Regen.
Preparations:
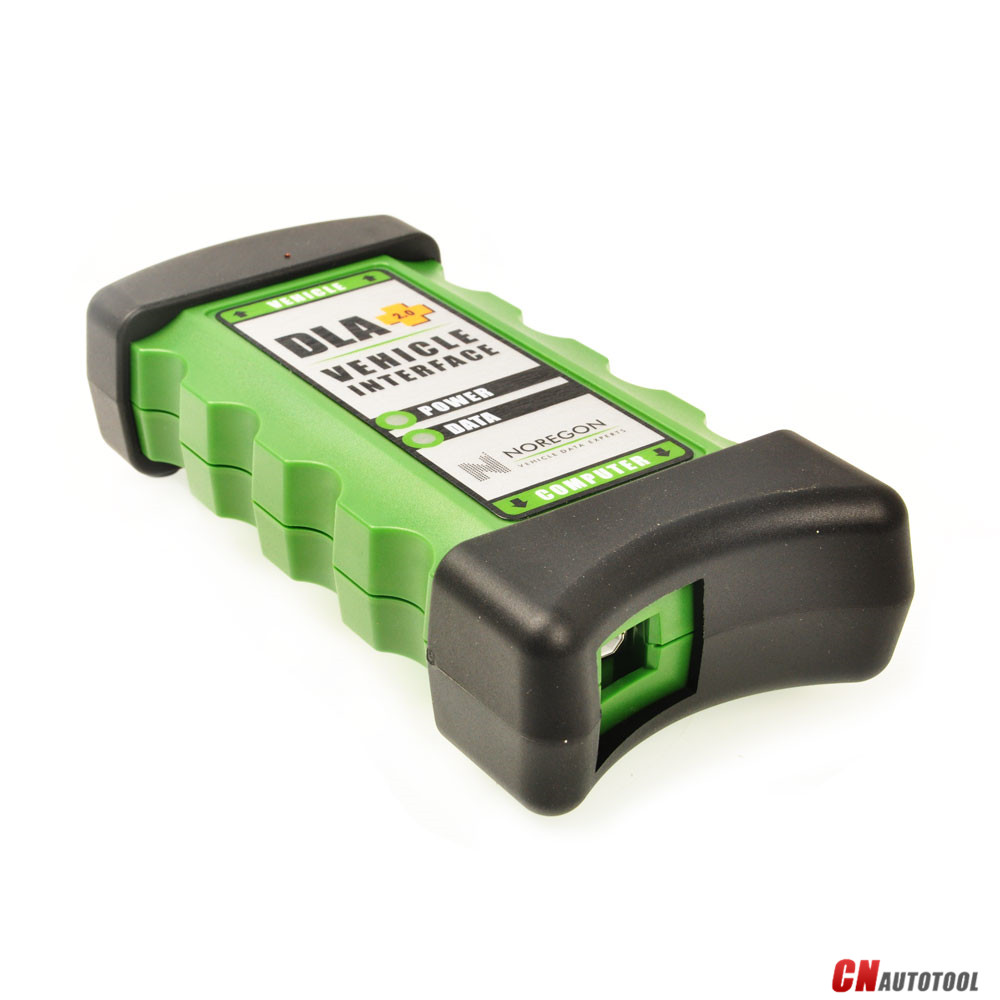
JPRO Professional Heavy Duty Diagnostic Software Download
Note:Please ensure you have followed all necessary safety precautions BEFORE performing a forced regen.
Procedures:
In the top left corner,vehicle health indicators may alert that you need to perform a DPF regen.
Click the "DPF Regen Needed†button
Then it will show the Aftertreatment Diagnostics screen.Notice in the top right,buttons indicate a needed OR inhibited regen.To initiate a DPF regen,simply click the "Start DPF Regen†button
Alternatively,click the "Aftertreatment Diagnostics†button from the toolbar will also launch the Aftertreatment screen
Additionally,you can access a DPF Regen from the Bi-Directional Test screen.Click the "Bi-Directional†button from the main toolbar.
Select the "DPF service Regen†test and click the "Start†button to launch the Aftertreatment screen
And for those who hold NextStep can access a DPF regen from the NextStep screen.
Click the "Bi-Directional†button on the right hand side.
Posted by: youobd2 at
07:32 AM
| Comments (1)
| Add Comment
Post contains 294 words, total size 3 kb.
39 queries taking 0.0344 seconds, 145 records returned.
Powered by Minx 1.1.6c-pink.

