October 30, 2021
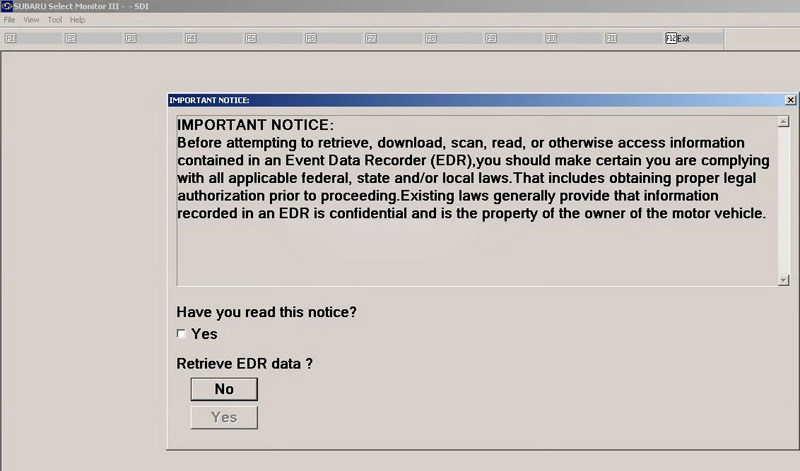
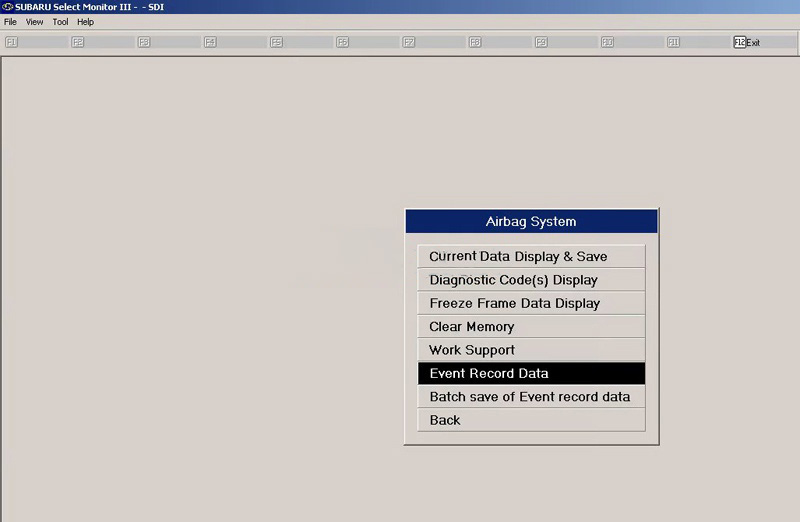
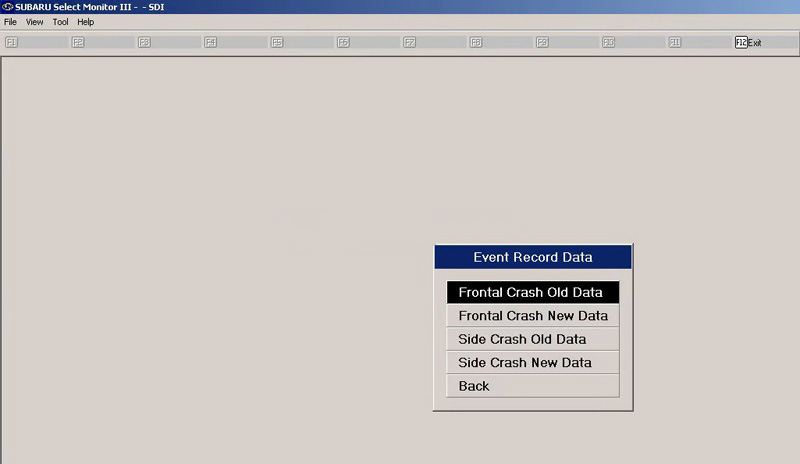
As titled, we had a customer asking is it possible to record data to a CF card when using VXDIAG Subaru SSM3 scanner.
Answer:
VXDIAG SSM3 does have the ability to log sensor data while the laptop is connected to the car. It records to a proprietary format, and it lets you export CSV afterward, for analysis in other tools.
If you buy the "real†hardware from Denso or Hitachi, then it can record to a CF card by leaving just the tool connected to the car. Then you can download the data later on the computer. But this VxDiag does not have that feature.
Posted by: youobd2 at
03:58 AM
| No Comments
| Add Comment
Post contains 116 words, total size 2 kb.
Yesterday I registered keys for Mitsubishi Outlander Classic 2.4L AT 4G69 2007Y.
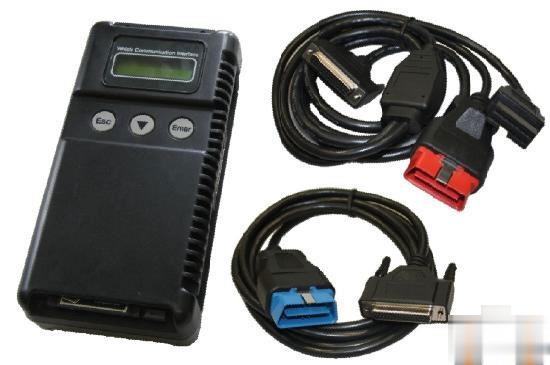
It was necessary to add 1 key. Everything was done through Mitsubishi MUT-3 diagnostic tool.
Disclaimer: The tutorial was translated from Russian. So the menu is in Russian, but have English explanation.
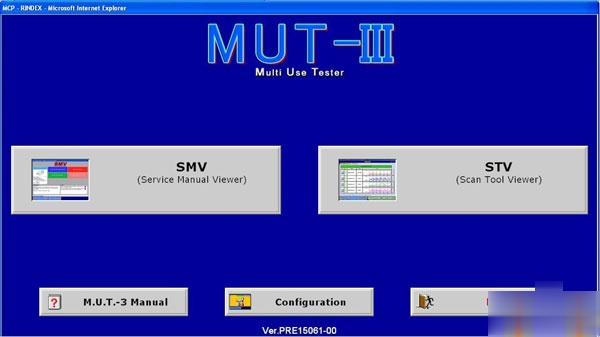
Run the software MUT 3 , select STV (Scan Tool Viewer):
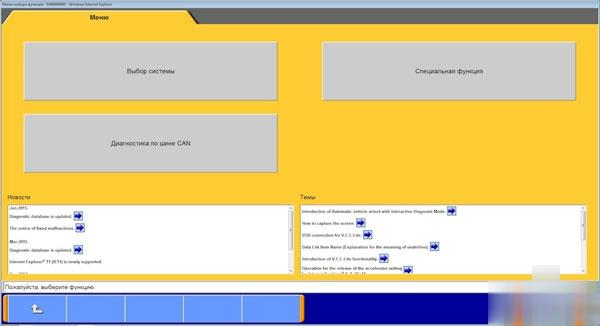
Go to the System Selection menu:
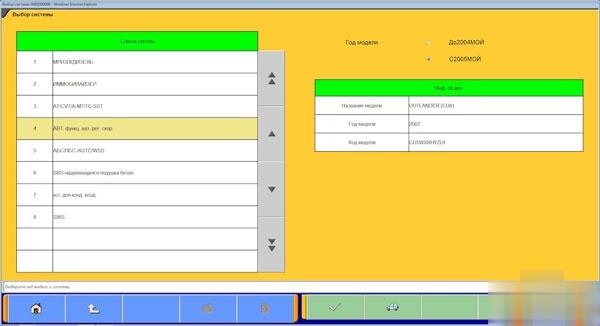
We put the year with 2005 , we enter the VIN-number, we get the active configuration, and we go further into the Immobilizer :
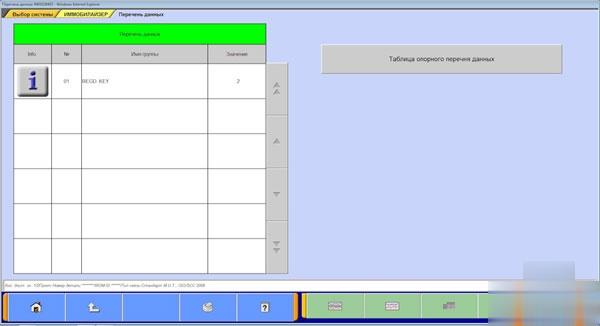
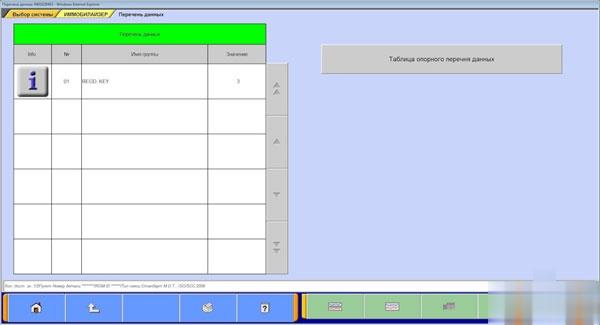
Let’s go to the list of data:
We see 2 registered keys:
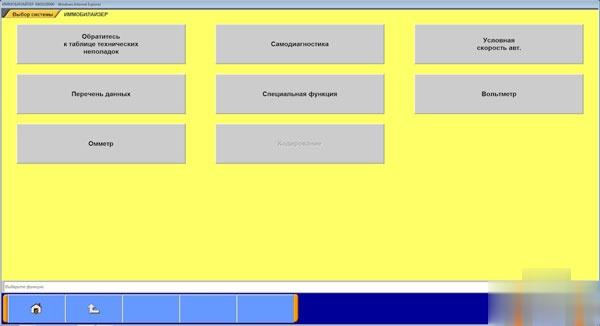
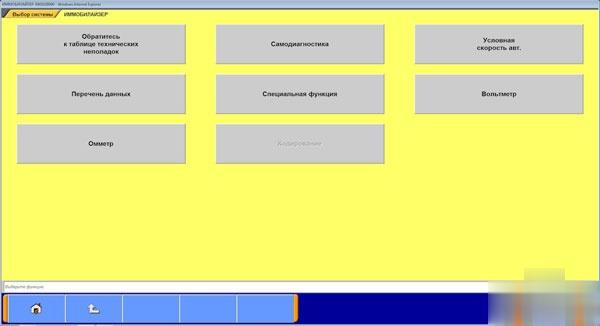
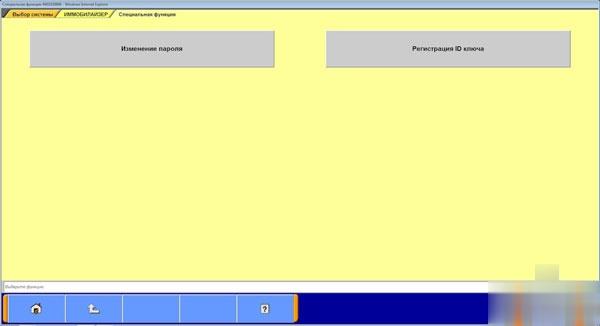
We go back to the menu, go to a special function:
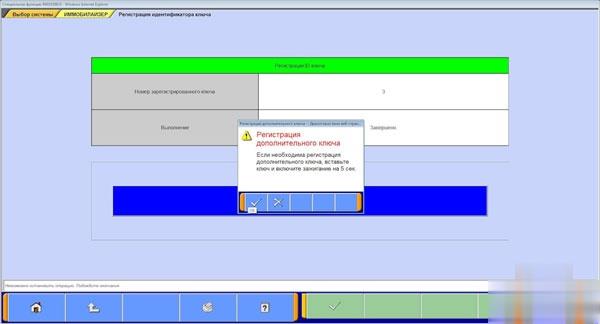
Registration of ID-key :
We enter the password and agree:
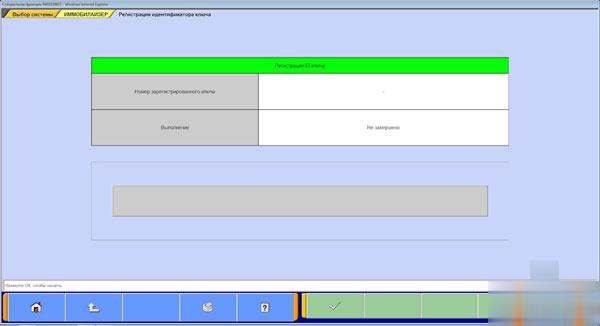
We see on this screen, the 1st key is already inserted in the ignition lock, we agree:
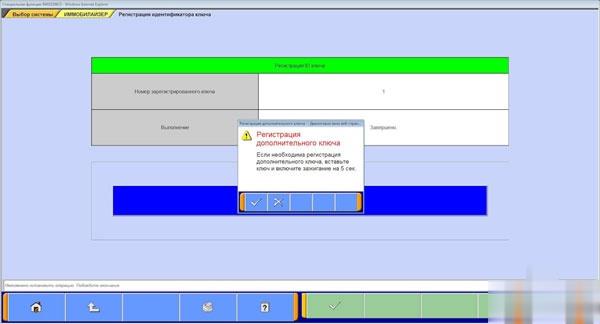
1st key registration successfully after 10 seconds, turn on the ignition with a second key, preferably do it quickly, we agree with the question of the registration of the following key:
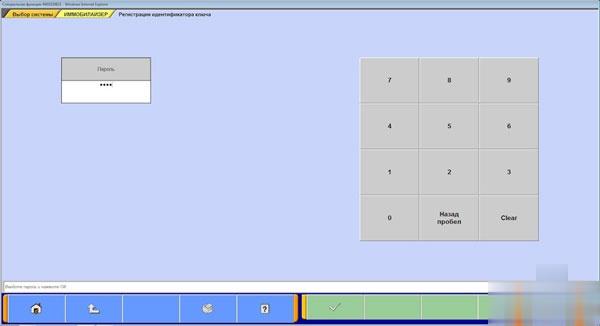
The second key is registered, we repeat the same thing for the third key:
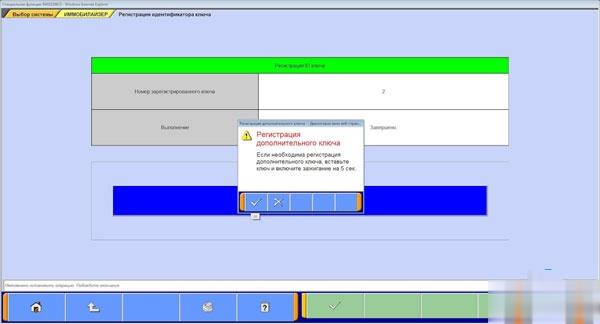
The third key is registered, because there are no more keys for registration, cancel the addition of the next possible key:
We go back and go to the data list, now we see 3 registered keys:
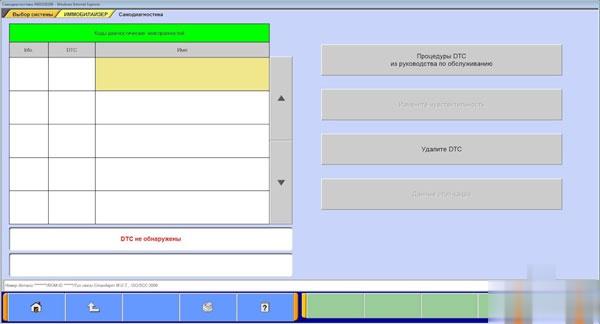
We go into self-diagnosis, no errors are found, then everything is ok:
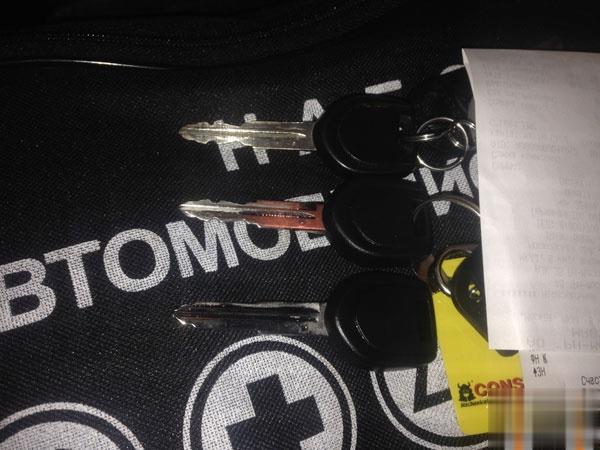
Alternately we start the engine of the car with each key, we make sure that all 3 are registered, they work:
Posted by: youobd2 at
03:40 AM
| No Comments
| Add Comment
Post contains 259 words, total size 8 kb.
October 06, 2021
Ediabas is the suite of software that BMW gives its engineers to diagnose / configure vehicles at the factory as well as on the field. Most BMWs since the 1990s have had some capability of being "coded†– that means some features can be altered / enabled with the use of the right software and hardware. Most options are there simply to allow for regional configurations, dealer configurations, different equipment, etc. But in a lot of modules, especially newer cars, there are functions that were never enabled from the factory, which can be fun to play with.
BMW Dealerships also have a set of software for diagnosis/coding. Generally they require significantly more computing resources, are somewhat clunky to use, and not much more functional than what the Ediabas suite can do. There are some diagnostic functions that can be useful. That said, I will not cover those applications in this post, they will likely be covered elsewhere.
So before you get started, you’ll need an OBDII interface. You have a few options here:
USB or Serial -> K-line interface
* Supports most BMWs from the mid 90s until 09/2007
* On E36 and earlier models, functionality is limited
* Will require pins 7 and 8 to be bridged together to access non-powertrain modules
* On cars with the 20-pin connector, you’ll need an adapter to access non-powertrain modules
* Can be used with some tuning software
* For USB interfaces, you want one with the FTDI FT232RL chip (others may work, but this is proven to be reliable)
USB -> D-CAN Interface
* Supports all the cars that K-line interfaces support, plus D-CAN BMWs (BMWs built from 09/2007 onward, however do note that functionality is limited on Fxx vehicles).
* Some will come with a built-in switch to connect or disconnect pins 7 and 8 together (2010+ BMWs need pins 7 and 8 to be disconnected at the cable end).
* The vast majority of these cables have flawed firmware that can cause some errors in D-CAN mode (no impact to K-line mode used on pre-09/2007 cars). This firmware error can cause some modules to be bricked
* It is therefore recommended to buy Bimmergeeks’ Pro Cable if you’re going to be flashing modules on MY2008+ BMWs
* Alternatively you can flash the fixed firmware yourself using an ASP programmer (search ediabaslib firmware)
* Full Disclosure: I helped Bimmergeeks with their cables and some software and was gifted one of their pro-cables as a thanks, but otherwise have not received any sort of compensation financial or otherwise.
Serial -> ADS Interface
* These cables require a true serial port (USB->Serial will not work)
* Will allow communication with all E36 modules
* Likely also works with newer pre-DCAN cars, but I never tested this.
* Not compatible with newer versions of Ediabas, so you’ll likely be limited to 32-bit versions of Windows.
* This is what dealerships use for diagnostic purposes, it is fairly expensive (a genuine "ICOM Next†costs around $700; the old version was actually even more expensive).
* Connect via ethernet or wifi (most Chinese clones will be missing wifi)
* Compatible with all BMWs ever made (including E36 era vehicles), does require an adapter for cars with the 20-pin connector
* Little bit of a pain to setup, I’m not covering that here
* Note: BMW recently released the "ICOM Nano†which is a wireless only device which is actually fairly reasonable priced (~$130). However at this time it is unclear if it works with pre-DCAN cars.
ENET Cable
* These only work with Fxx cars, I’m only mentioning it here so that you know not to buy them unless you have one of those cars
I would recommend most people buy the USB -> D-CAN cables. These do not cost significantly more than cables without D-CAN, and will generally work with most BMWs. You might also read about BMW yellowheads, OPS, OPPS, Modic, etc… – these are largely legacy interfaces that should not be necessary. For consumer use, the USB -> D-CAN is going to be enough for nearly everything. For professional use, you may want to consider a BMW ICOM (though even that is not strictly necessary).
You will also need a computer. Generally any Windows computer running Windows 2000 or newer is adequate. You can also run Windows in a virtual machine if using a mac or linux system. 32-bit and 64-bit are both fine.
Setting up the software
* Find ‘ediabas-6.4.3-full.nrg’, mount that image using your favorite image mounting tool (I like WinCDEmu) and install the software.
* * This package is circa 2004, so it’s missing stuff for newer cars
* * This package will install, but will not properly function on 64-bit cars, so see below to getting things up to date
* Download "Standard Tools 2.12.rar†and run that setup. If it gives you the option to transfer data, do so.
* Download the E46 Sp-daten files (and any other chassis you’re interested in working with). Almost any version you find online will be sufficiently up to date. Bimmergeeks typically has up to date copies.
* * Extract all the files somewhere
* Copy the contents of the ECU folder to C:\Ediabas\ECU
* Copy the contents of the sgdat folder to C:\NCSExper\sgdat, C:\EC-APPS\INPA\sgdat, C:\EC-APPS\sgdat
* Copy the contents of the "daten†folder to C:\NCSEXPER\daten\E46
* Run laden.bat with administrative privileges
* Start WinKFP, click Import -> Import Assembly Data, and then point to the "DATA†folder that you extracted
Setting up your cable
* Plug in your USB cable.
* * If you need drivers, you can get them from the ftdi website
* Go to your device manager, and find your cable under serial ports
* * Change the port to COM1 (if the system warns you it’s in use, set it anyway)
* * Change the latency to 1ms (default is 16).
That’s the basic setup, time to test things. Open up INPA, you should see two black dots. And if you try to diagnose an E46 module, it should work. You may get an error about the version not matching or something to that effect, that is normal.
Okay, that’s the basic setup. Most of you will probably be interested in messing with NCS Expert.
Posted by: youobd2 at
06:20 AM
| No Comments
| Add Comment
Post contains 1061 words, total size 7 kb.
Ediabas is the suite of software that BMW gives its engineers to diagnose / configure vehicles at the factory as well as on the field. Most BMWs since the 1990s have had some capability of being "coded†– that means some features can be altered / enabled with the use of the right software and hardware. Most options are there simply to allow for regional configurations, dealer configurations, different equipment, etc. But in a lot of modules, especially newer cars, there are functions that were never enabled from the factory, which can be fun to play with.
BMW Dealerships also have a set of software for diagnosis/coding. Generally they require significantly more computing resources, are somewhat clunky to use, and not much more functional than what the Ediabas suite can do. There are some diagnostic functions that can be useful. That said, I will not cover those applications in this post, they will likely be covered elsewhere.
So before you get started, you’ll need an OBDII interface. You have a few options here:
USB or Serial -> K-line interface
* Supports most BMWs from the mid 90s until 09/2007
* On E36 and earlier models, functionality is limited
* Will require pins 7 and 8 to be bridged together to access non-powertrain modules
* On cars with the 20-pin connector, you’ll need an adapter to access non-powertrain modules
* Can be used with some tuning software
* For USB interfaces, you want one with the FTDI FT232RL chip (others may work, but this is proven to be reliable)
USB -> D-CAN Interface
* Supports all the cars that K-line interfaces support, plus D-CAN BMWs (BMWs built from 09/2007 onward, however do note that functionality is limited on Fxx vehicles).
* Some will come with a built-in switch to connect or disconnect pins 7 and 8 together (2010+ BMWs need pins 7 and 8 to be disconnected at the cable end).
* The vast majority of these cables have flawed firmware that can cause some errors in D-CAN mode (no impact to K-line mode used on pre-09/2007 cars). This firmware error can cause some modules to be bricked
* It is therefore recommended to buy Bimmergeeks’ Pro Cable if you’re going to be flashing modules on MY2008+ BMWs
* Alternatively you can flash the fixed firmware yourself using an ASP programmer (search ediabaslib firmware)
* Full Disclosure: I helped Bimmergeeks with their cables and some software and was gifted one of their pro-cables as a thanks, but otherwise have not received any sort of compensation financial or otherwise.
Serial -> ADS Interface
* These cables require a true serial port (USB->Serial will not work)
* Will allow communication with all E36 modules
* Likely also works with newer pre-DCAN cars, but I never tested this.
* Not compatible with newer versions of Ediabas, so you’ll likely be limited to 32-bit versions of Windows.
* This is what dealerships use for diagnostic purposes, it is fairly expensive (a genuine "ICOM Next†costs around $700; the old version was actually even more expensive).
* Connect via ethernet or wifi (most Chinese clones will be missing wifi)
* Compatible with all BMWs ever made (including E36 era vehicles), does require an adapter for cars with the 20-pin connector
* Little bit of a pain to setup, I’m not covering that here
* Note: BMW recently released the "ICOM Nano†which is a wireless only device which is actually fairly reasonable priced (~$130). However at this time it is unclear if it works with pre-DCAN cars.
ENET Cable
* These only work with Fxx cars, I’m only mentioning it here so that you know not to buy them unless you have one of those cars
I would recommend most people buy the USB -> D-CAN cables. These do not cost significantly more than cables without D-CAN, and will generally work with most BMWs. You might also read about BMW yellowheads, OPS, OPPS, Modic, etc… – these are largely legacy interfaces that should not be necessary. For consumer use, the USB -> D-CAN is going to be enough for nearly everything. For professional use, you may want to consider a BMW ICOM (though even that is not strictly necessary).
You will also need a computer. Generally any Windows computer running Windows 2000 or newer is adequate. You can also run Windows in a virtual machine if using a mac or linux system. 32-bit and 64-bit are both fine.
Setting up the software
* Find ‘ediabas-6.4.3-full.nrg’, mount that image using your favorite image mounting tool (I like WinCDEmu) and install the software.
* * This package is circa 2004, so it’s missing stuff for newer cars
* * This package will install, but will not properly function on 64-bit cars, so see below to getting things up to date
* Download "Standard Tools 2.12.rar†and run that setup. If it gives you the option to transfer data, do so.
* Download the E46 Sp-daten files (and any other chassis you’re interested in working with). Almost any version you find online will be sufficiently up to date. Bimmergeeks typically has up to date copies.
* * Extract all the files somewhere
* Copy the contents of the ECU folder to C:\Ediabas\ECU
* Copy the contents of the sgdat folder to C:\NCSExper\sgdat, C:\EC-APPS\INPA\sgdat, C:\EC-APPS\sgdat
* Copy the contents of the "daten†folder to C:\NCSEXPER\daten\E46
* Run laden.bat with administrative privileges
* Start WinKFP, click Import -> Import Assembly Data, and then point to the "DATA†folder that you extracted
Setting up your cable
* Plug in your USB cable.
* * If you need drivers, you can get them from the ftdi website
* Go to your device manager, and find your cable under serial ports
* * Change the port to COM1 (if the system warns you it’s in use, set it anyway)
* * Change the latency to 1ms (default is 16).
That’s the basic setup, time to test things. Open up INPA, you should see two black dots. And if you try to diagnose an E46 module, it should work. You may get an error about the version not matching or something to that effect, that is normal.
Okay, that’s the basic setup. Most of you will probably be interested in messing with NCS Expert.
Posted by: youobd2 at
06:20 AM
| No Comments
| Add Comment
Post contains 1061 words, total size 7 kb.
Here we are, the step-by-step below:
Step 1. Connect Xtool x-100 PAD3 with 2008 Range rover sport via OBD-port,power up X100 PAD 3.
Step 2. select the function and vehicle.
immobilizer–>LANDROVER–>Range rover European –> Range Rover (Sport) –>2005-2009–>Program keys
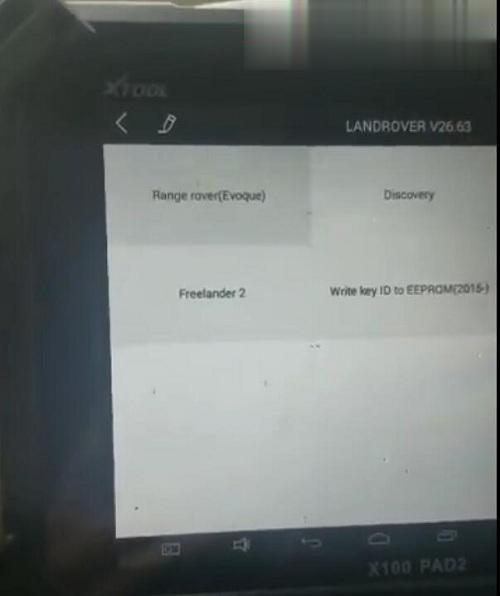
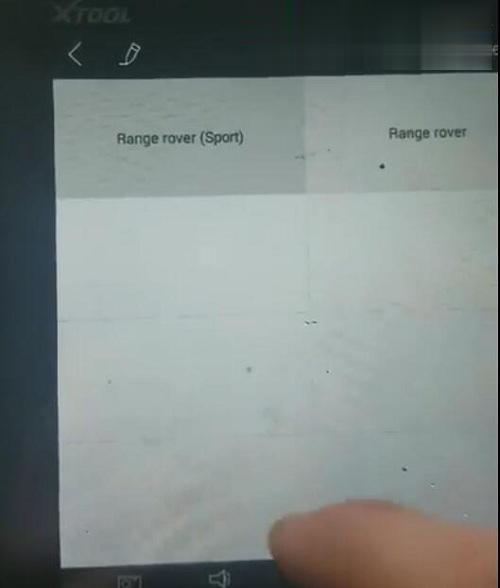
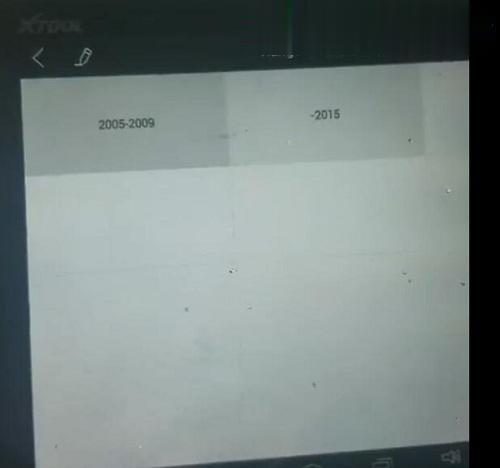
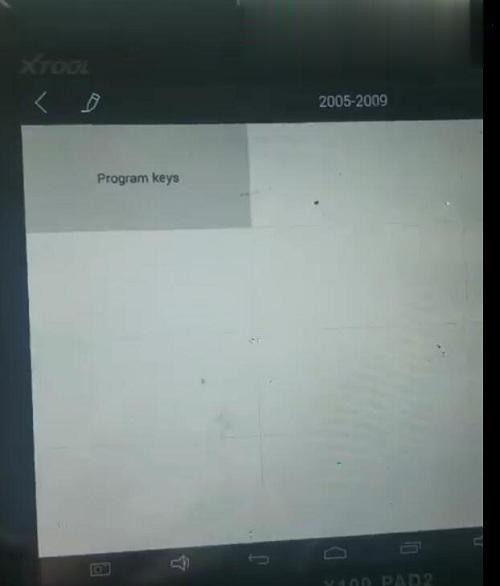
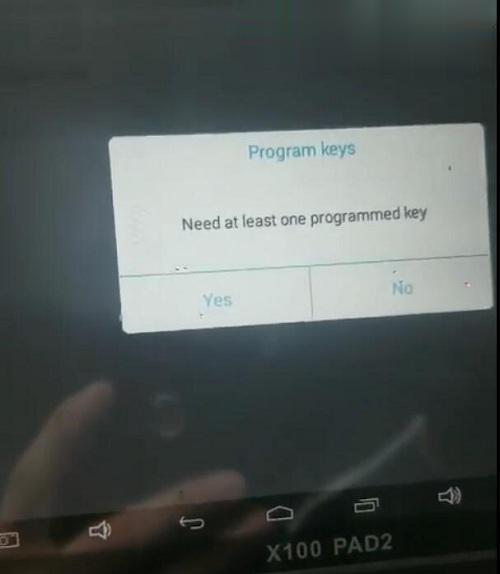
Step 3.Program keys
Note: need at least one programmed key.
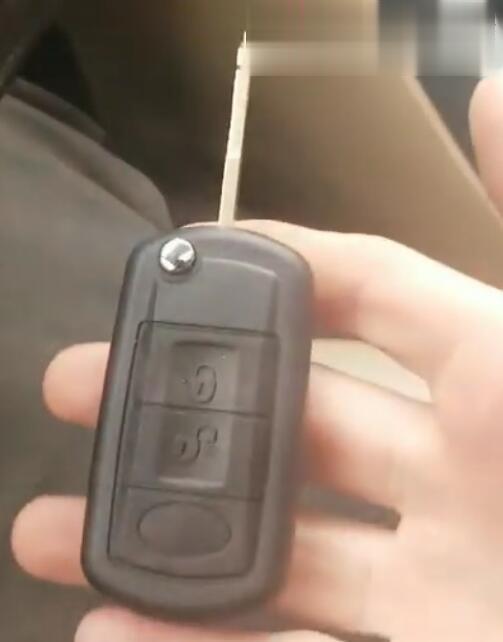
08 Rangerover Sport remote key
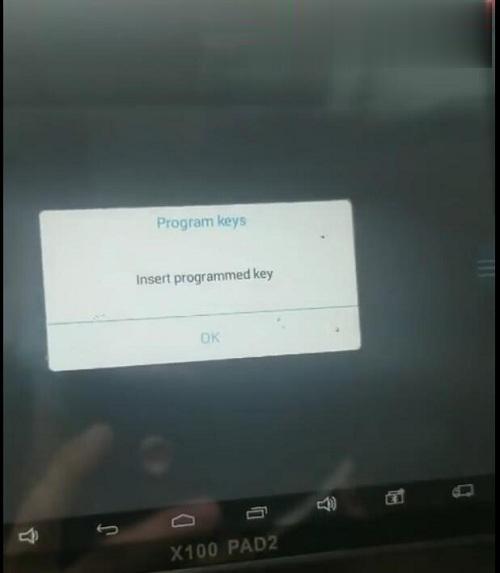
Insert the programmed key, then press OK
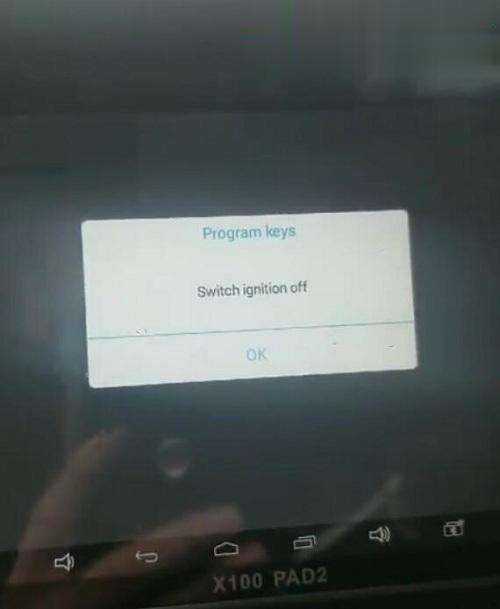
Switch ignition off
Configuring the system, It only takes five seconds please wait…
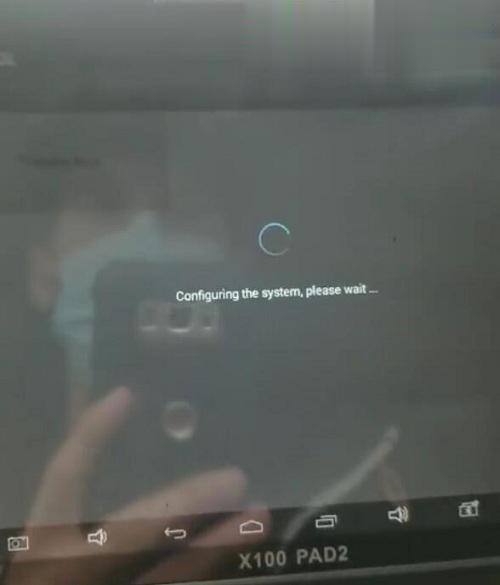
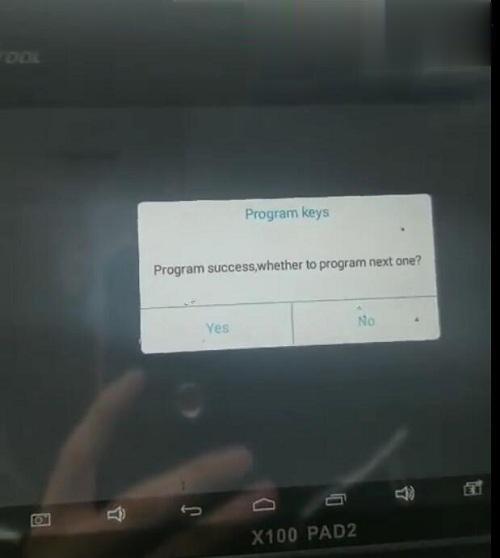
Step 4. Program the first key success. then program the next one.
Press OK to continue
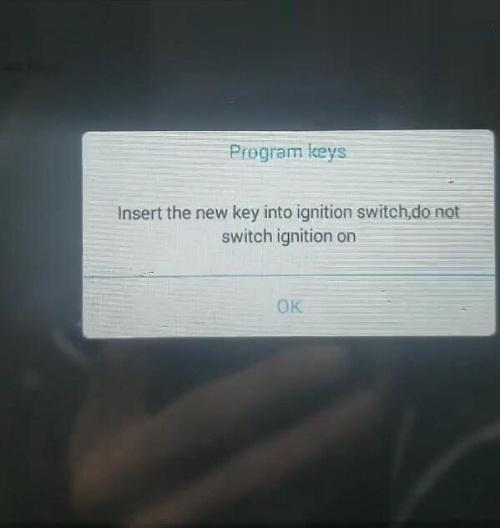
Note: Insert the new key into ignition switch, do not switch ignition on.then press OK
Program success!!!
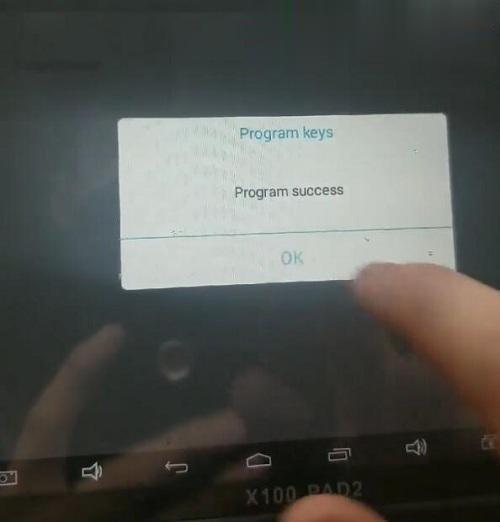
Done! Xtool X-100 PAD3 add keys for 08 Range rover Sport Via OBD
Attachment:Xtool X100 PAD3 for LANDROVER IMMO Car List
| Automaker | Model/Protocol | System | Function |
| LANDROVER | Range rover(Sport) 2005-2009 | Immobiliser | 1.Program keys |
| LANDROVER | Range rover(Sport) 2010-2015 | Smart key system | 1.Add smart key 2.All smart key lost |
| LANDROVER | Range rover 2006-2009 | Immobiliser | 1.Program keys |
| LANDROVER | Range rover 2010-2015 | Smart key system | 1.Add smart key 2.All smart key lost |
| LANDROVER | Range rover 2010-2013 | Smart key system | 1.Add smart key 2.All smart key lost |
| LANDROVER | Range rover 2014-2015 | Smart key system | 1.Add smart key 2.All smart key lost |
| LANDROVER | Range rover (Evoque)-2013 | Smart key system | 1.Add smart key 2.All smart key lost |
| LANDROVER | Range rover (Evoque) 2014-2015 | Smart key system | 1.Add smart key 2.All smart key lost |
| LANDROVER | Discovery 3 | Immobiliser | 1.Program keys |
| LANDROVER | Discovery 4 -2013 | Smart key system | 1.Add smart key 2.All smart key lost |
| LANDROVER | Discovery 4 2014-2015 | Smart key system | 1.Add smart key 2.All smart key lost |
| LANDROVER | Freelander | Immobiliser | 1.Program remotes |
| LANDROVER | Freelander 2(-2012) | Immobiliser | 1.Smart key |
| LANDROVER | Freelander 2(2012-) | Smart key system | 1.Add smart key 2.All smart key lost |
Posted by: youobd2 at
06:12 AM
| No Comments
| Add Comment
Post contains 324 words, total size 7 kb.
September 30, 2021
As titled, Can we dial with Chrysler (Dodge Jeep) 2020 2021 models with the Microod2 China clone wiTECH 1.0 (17.04.27)? Here are some clues.
2018 + FCA cars have new ecu SGW which need to be unlocked online WITECH 2.0 for diagnostic session or need to bypass SGW. wiTECH 1.0 will not be able to dial with 2018+ FCA models.Car ScannerwiTECH 2.0 is mandatory.
There are 2 Micrpod II clone interfaces available:
A295-2 without WiFi. This one with wiTech 1.0 supports Chrysler till 2017/some 2018. No possibleto support Chrysler 2020 or newer.
https://www.obd2tool.com/goods-5281-Chrysler-Diagnostic-Tool-wiTech-MicroPod-2.html
A295-4 with WiFi module.
It has the possibility of doing latest Chrysler by changing the serial number to work with wiTech 2.0. wiTech 2.0 requires MOPARS 2017 secure micropod II VSP-31560 or above.
We don’t provide Serial Number service nor tutorial. You are at your own risk.
https://www.obd2tool.com/goods-10415-Chrysler-Diagnostic-Tool-wiTech-MicroPod-2-With-WIFI.html
Tips:
If you have clone with serial number change 000000 will not work because the serial number is lower then recommendation per witech2 must have new Micropod2 number starting 31xxxx must higher able can using witech 2 diag application.
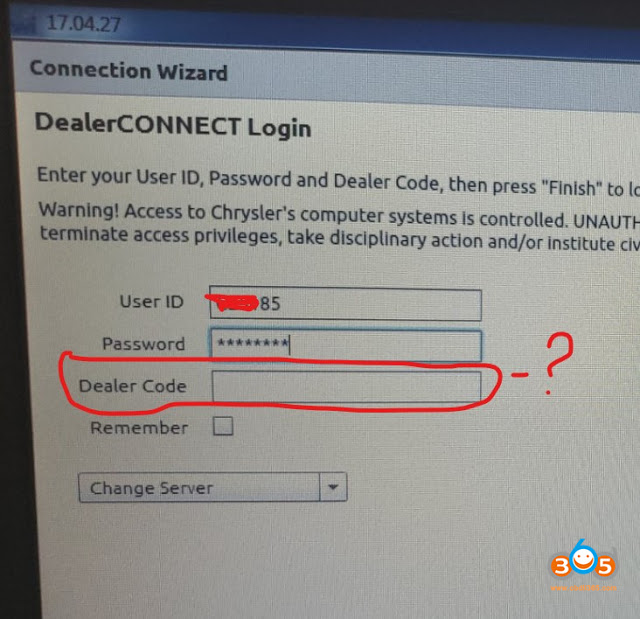
You can use witech1 17.04.027 but you need pay some set up this version pass FCA check up when you launch witech1 application ..BUT you can’t log in dealer connect if you have log in techauthority ID not dealer connect tech ID & dealer codes.
Some FAQs:
Q: will be possible to work online?
A: Yes, tested by many. Online subscription to TechAuthority works with both USB and WIFI MicroPod 2.
No difference if the Micropod 2 is clone or genuine, both of them work perfectly for diagnostics and programming, online or offline, with TechAuthority account.
Q: Does wiTech 2.0 still have a DRB III emulator?
A: The DRB 3 Emulator is no longer included with the wiTECH software, it was removed a few years ago.
You can download DRB3 from third-party resources and test with micropod2 clones. Security is unknown.
or go for wiTech VCI Pod which has DRBIII emulator included in default.
Q: Does the scanner MicroPOD II witech 2.0 also read the old Chrysler??
A: No, the Micropod 2 with WiTech 2.0 software will only work on most CAN compliant vehicles 2007 and newer, and some Chryslers back to 2004.
For vehicles not covered by WiTech software you will need a DRB III or DRB III emulator.
Q: How to work online micropod2 through witech 17.04.27?
A:
-First you need to get a TechAuthority subscription, directly from TechAuthority or from AEtools (You can order a 3-day subscription).
-Then open the Witech program and when the Micropod 2 is detected click the "Next†button at the right bottom in the screen.
-In the next screen you have to enter your license credentials but the first option is only for dealers: username, password and dealer code.
-To use the TechAuthority account you need to click in the tab "change server†and select "Techauthorityâ€, then you only need your username and passsword, not dealer code needed because TechAuthority access is intended for aftermarket or independent workshops.
With TechAuthority access we can use all functions in Witech 17.04.27 for diagnostics, calibrations and programming. We can Update or reprogram the PCM, TCM, TIPM… also we can program a new key or make "Restore vehicle optionsâ€, "Reset Ecu†and many other calibrations like "Learn ETCâ€, "proxy alignmentâ€â€¦, also we can install a new module and make a full flash or configuration. All of this is only possible for vehicles until 2017, for vehicles from 2018+ we need to use Witech 2.0.
FYI: There is a hardware bypass solution for the SGW that uses the chrysler 12 + 8 cable, i.e Autel or Launch X431 with AutoAuth access.
Posted by: youobd2 at
12:53 PM
| No Comments
| Add Comment
Post contains 622 words, total size 5 kb.
1. Read Key Info
Prepare a working key & a new key, connect VVDI Key Tool Plus with OBD.
And turn ignition on, press
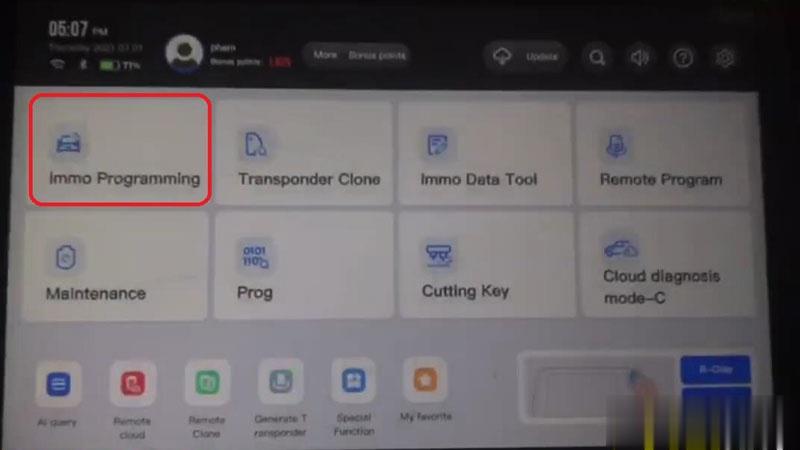
Immo programming >> BMW >> Automatically diagnose models >> Start programming
The current system type is detected as CAS4 1L15Y.
Please wait…
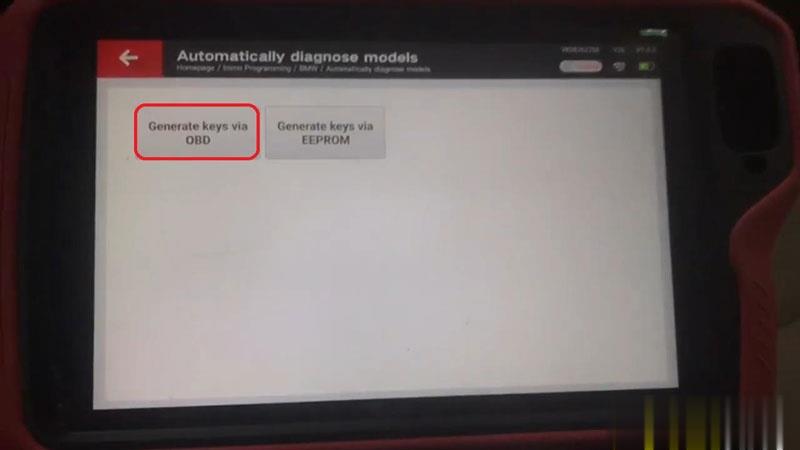
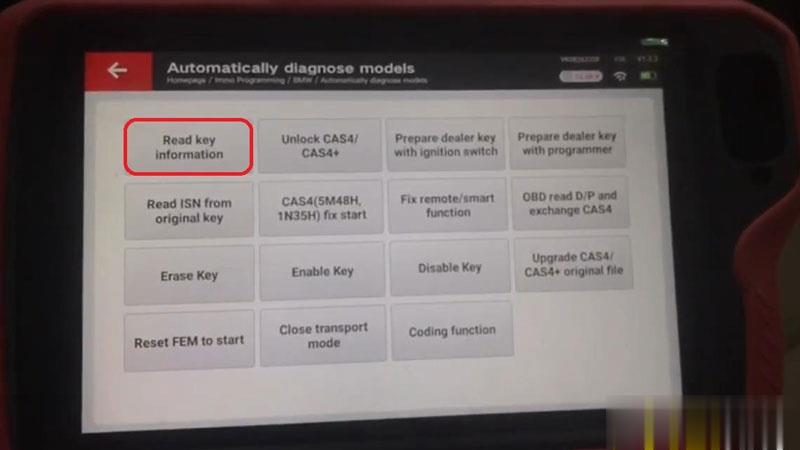
Generate keys via OBD >> Read key information >> Continue >> Continue
Note: prepare dealer key require unlock CAS4, enable key and disable key no need unlock CAS4!
2. Unlock CAS4
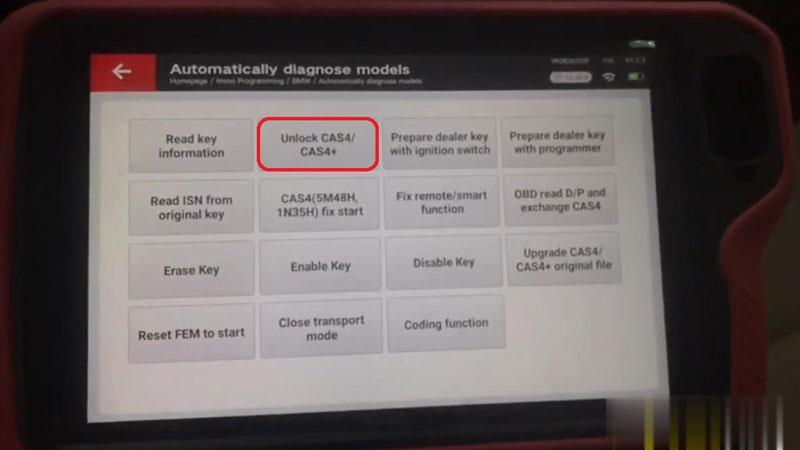
Unlock CAS4/CAS4+ >> Yes >> Save here, Rename, OK
Updating flashing…(please don’t touch any button on the car!)
Wait processing until 100%.
CAS4/CAS4+ unlock success!
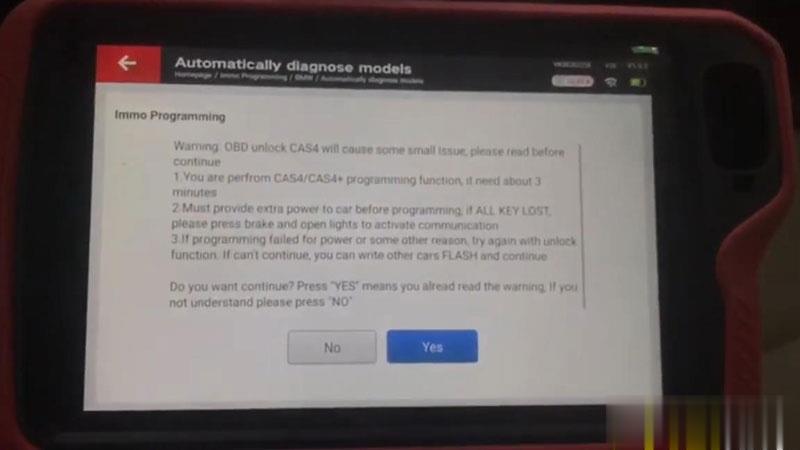
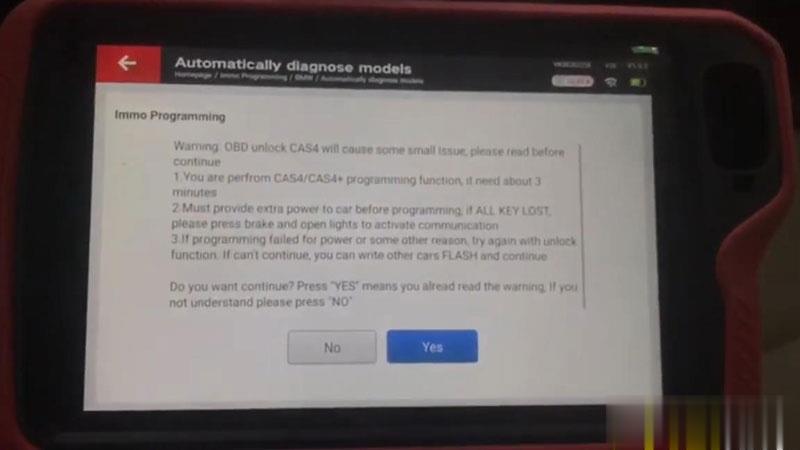
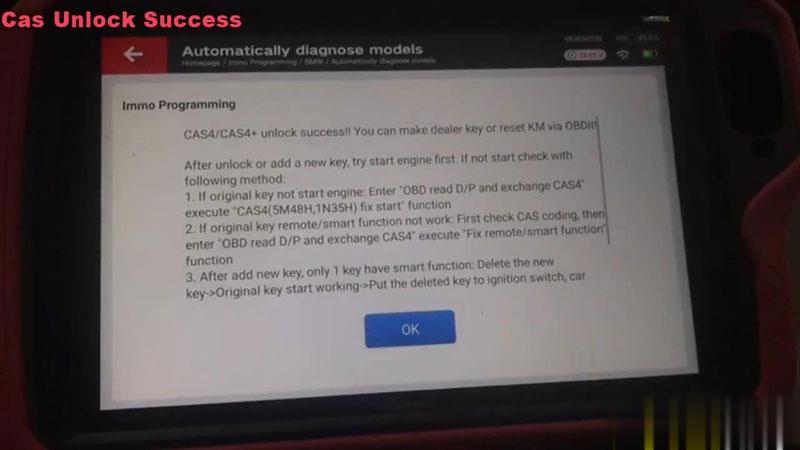
3. Program New Key
Prepare dealer key with ignition switch >> Select a blank key position: Key 4 >> Record key info, OK
Insert the new key into ignition or keep the new key close to emergency start position of the vehicle.
Learning key, please wait…
Key learn success!
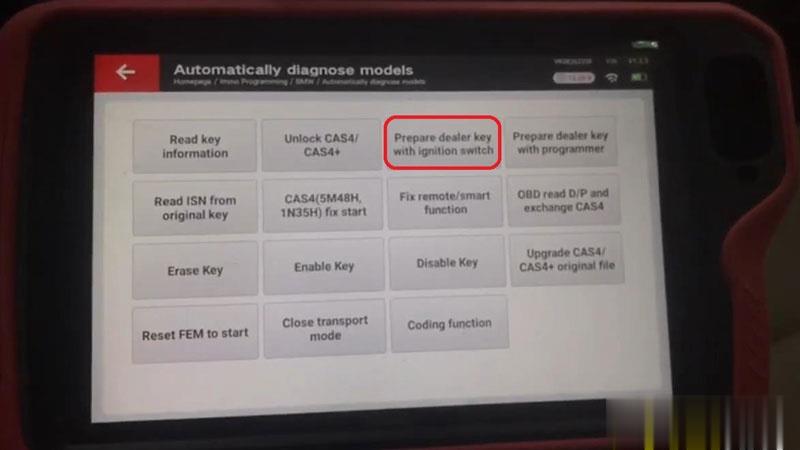
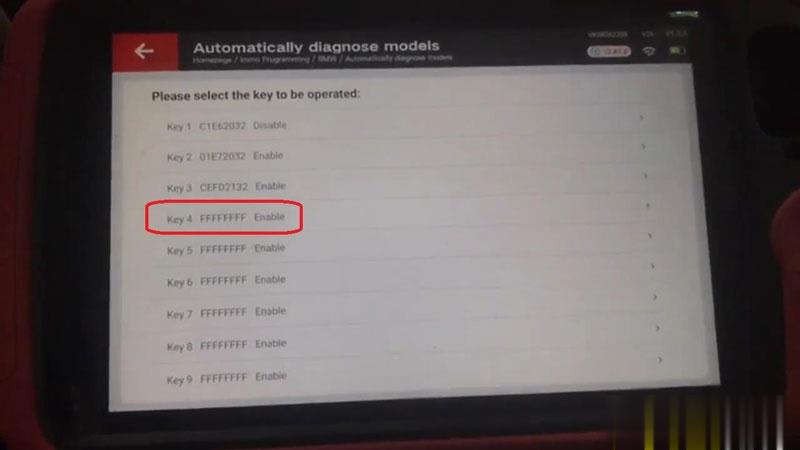
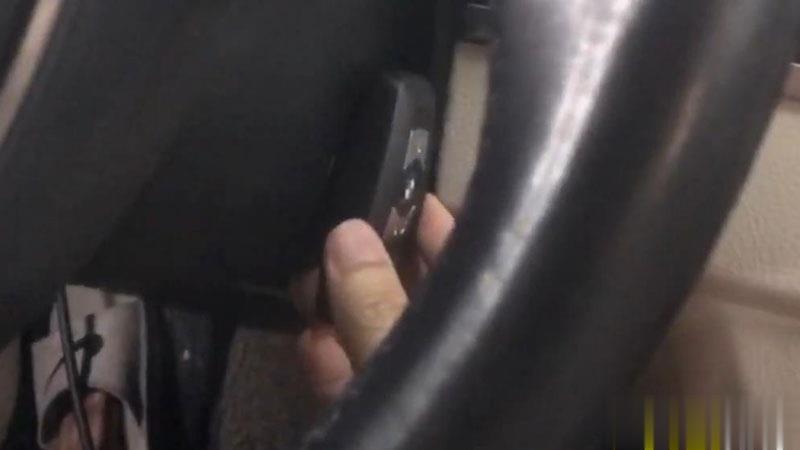
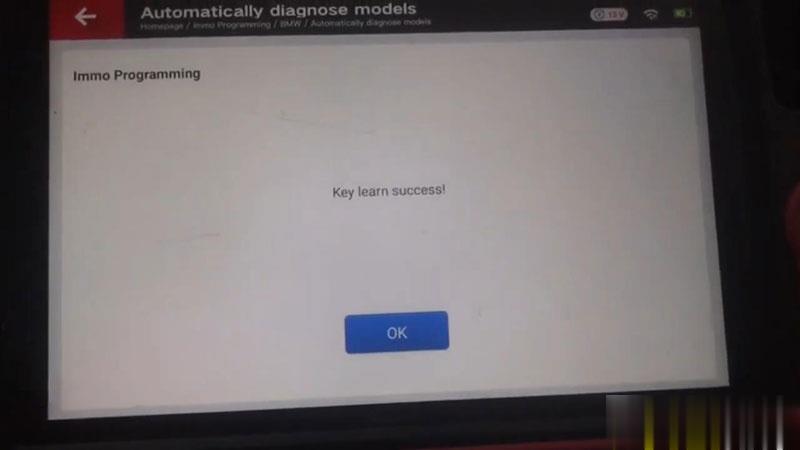
Test the keys now, both can work well.
Done!
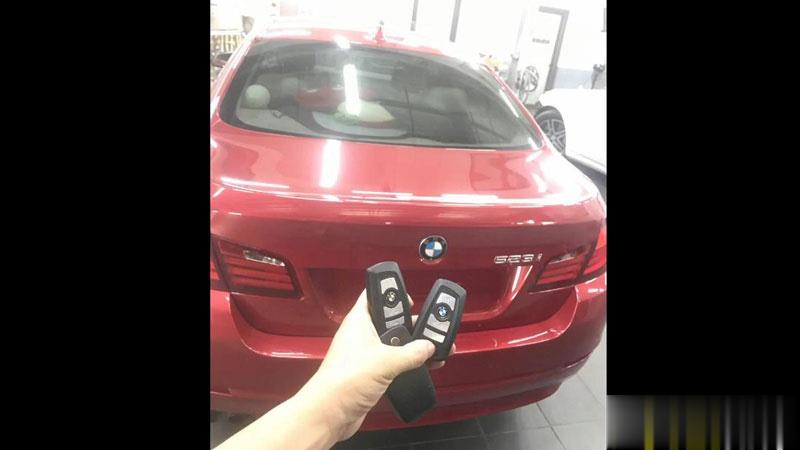
This is how to use VVDI Key Tool Plus to program a BMW 523i CAS4 1L15Y key via OBD.
Posted by: youobd2 at
12:45 PM
| No Comments
| Add Comment
Post contains 221 words, total size 8 kb.
September 16, 2021
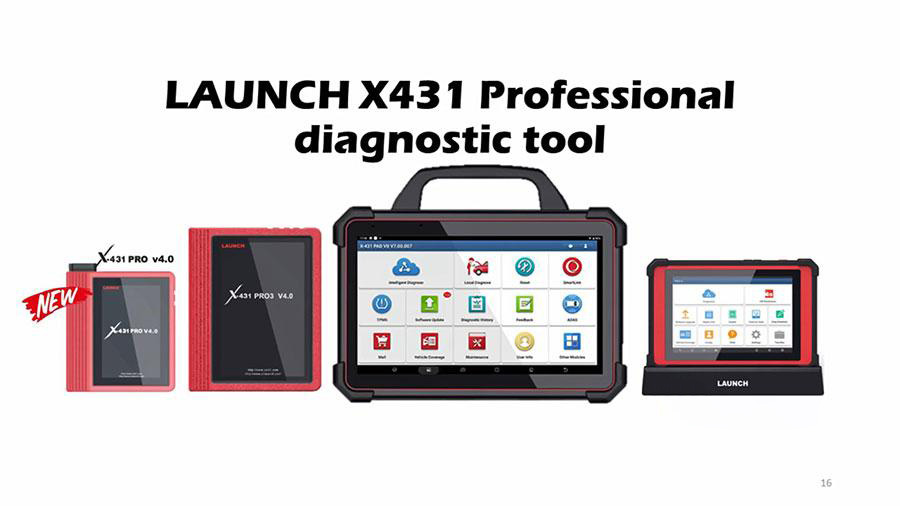
Any of these Launch X431 diagnostic scanners has VW Passat 2013 Guided Function: X431 Pro, X431 Pro3, Launch X431 Pad VII, X431 PAD V.
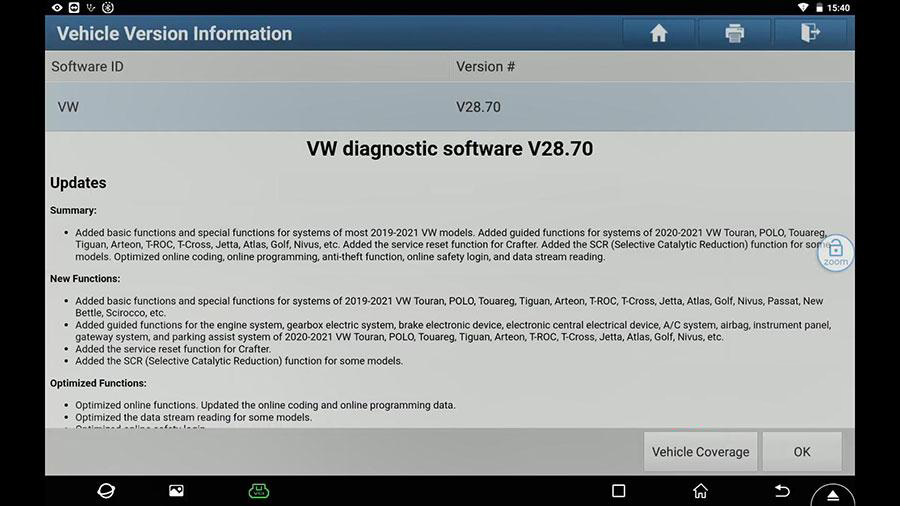
Here is the operation procedure of X431 PAD V VW Passat 2013 Guided Function Air Cond Compressor first run:
Select VW, and connect the VCI in Wifi mode…
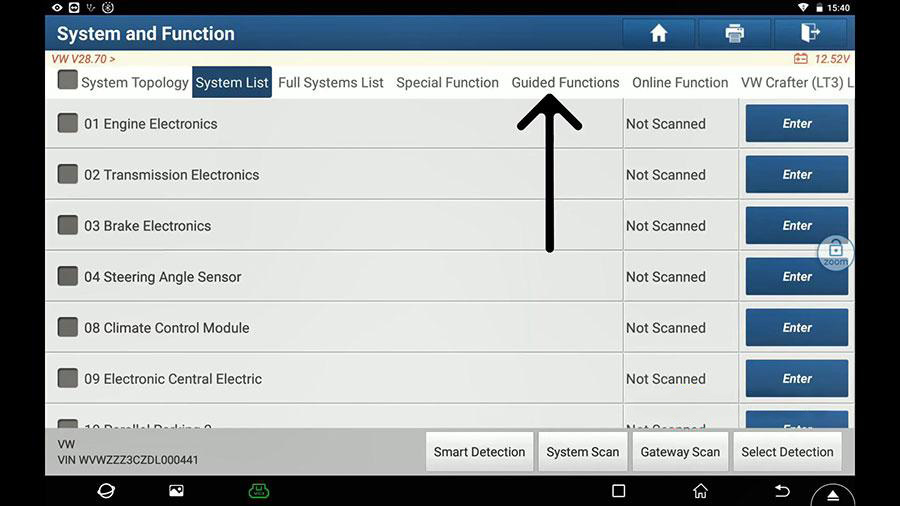
Select "System and Function†and then "Guided Functionsâ€.
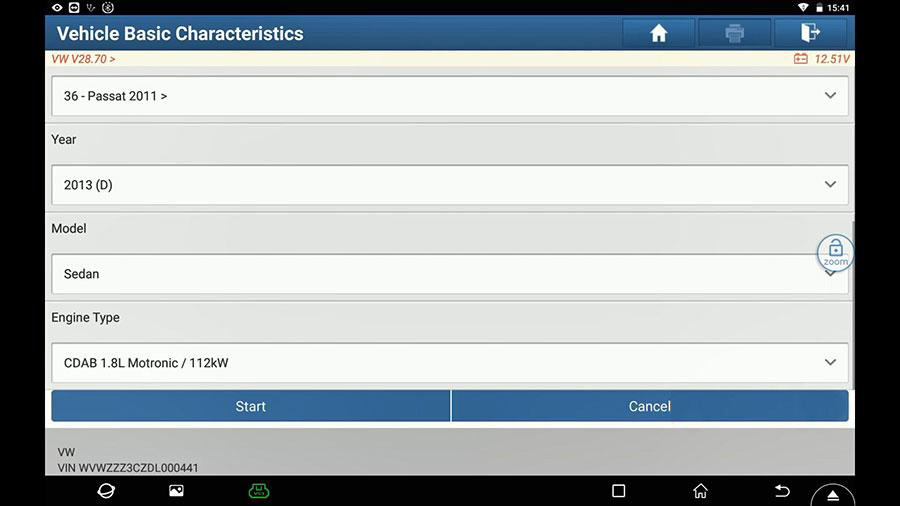
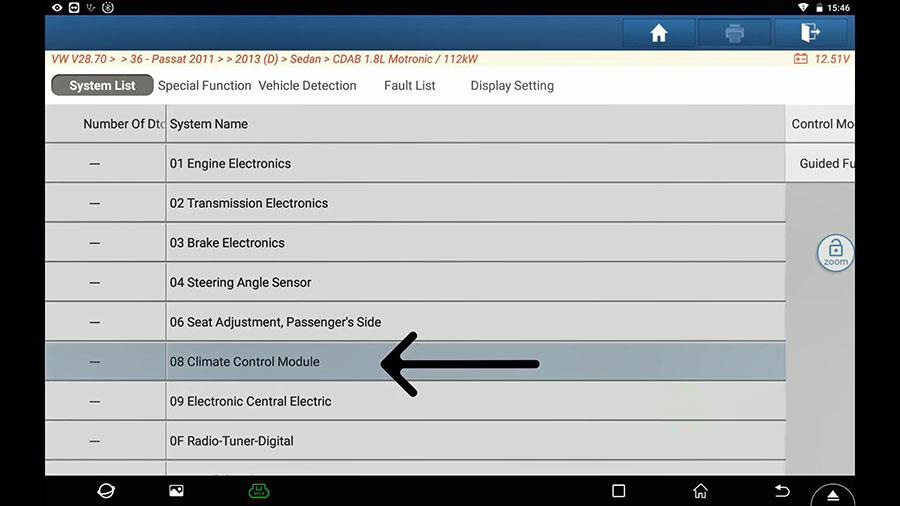
Select your car model and year ( Passat 2013 Sedan)
Select 08 Climate Control Module.
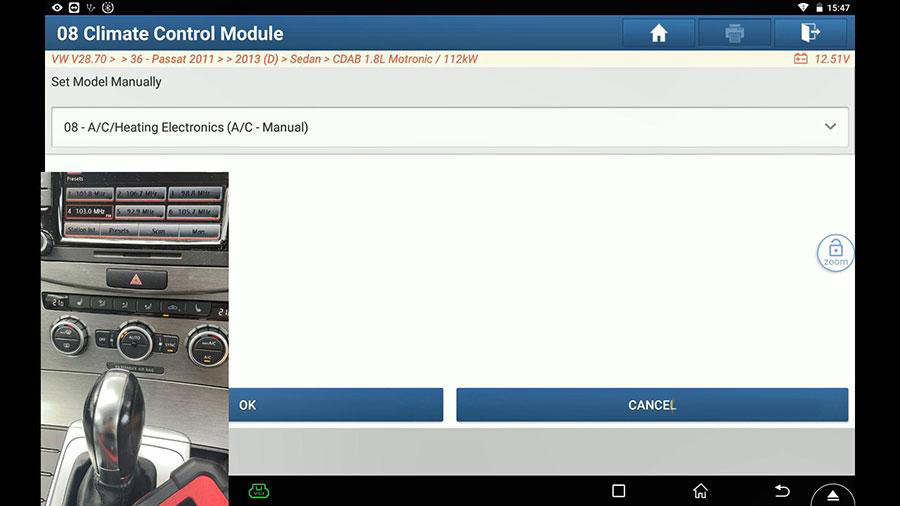
Set Model manually.
Select A/C Compressor First Run (Repair Group 87).
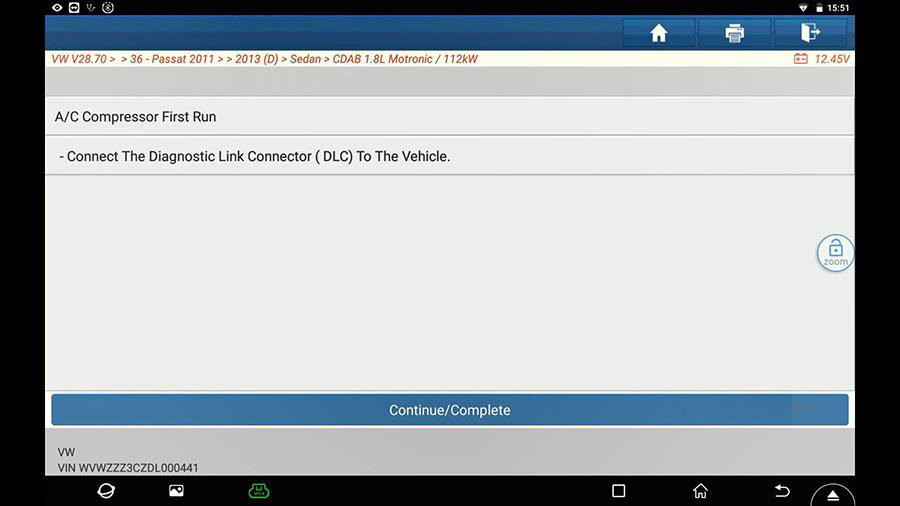
Follow the below steps to operate.
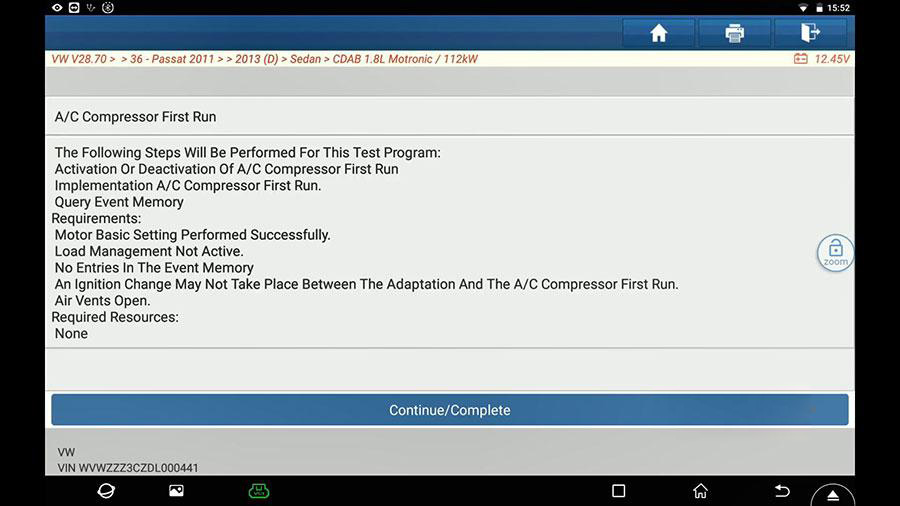
Next is follow the instruction to continue.
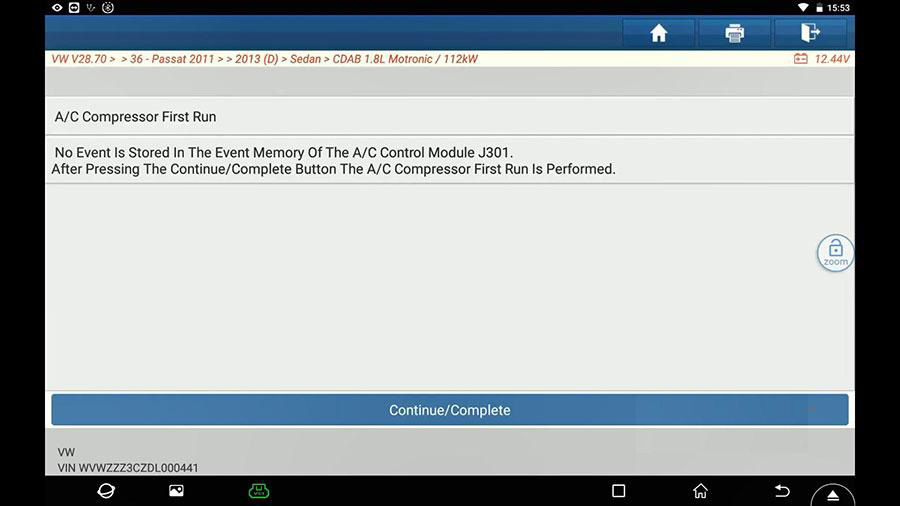
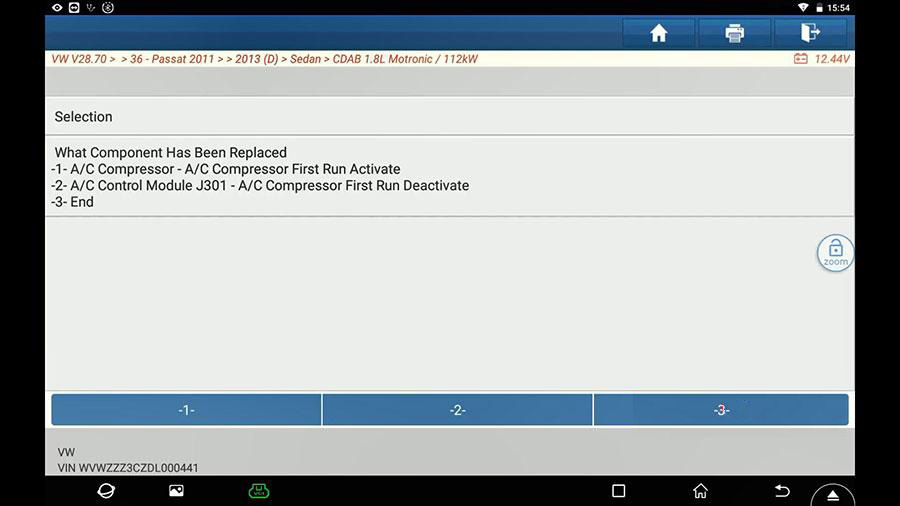
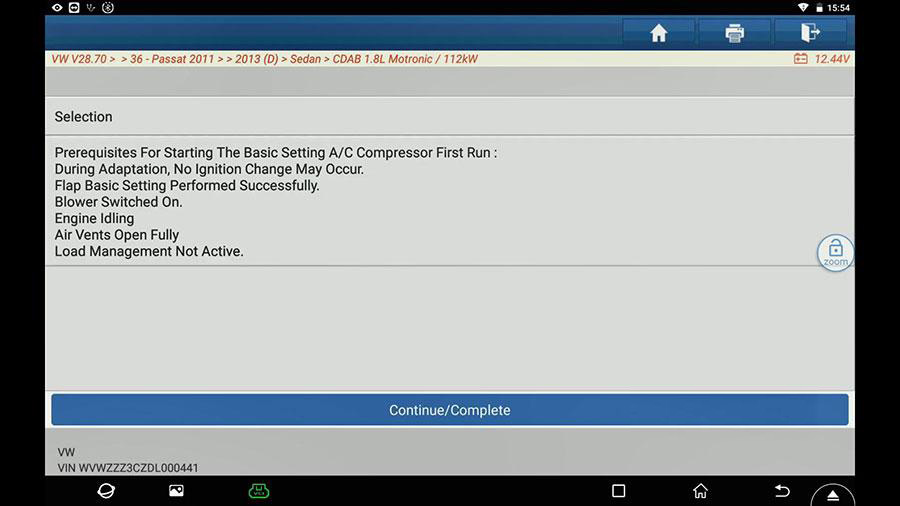
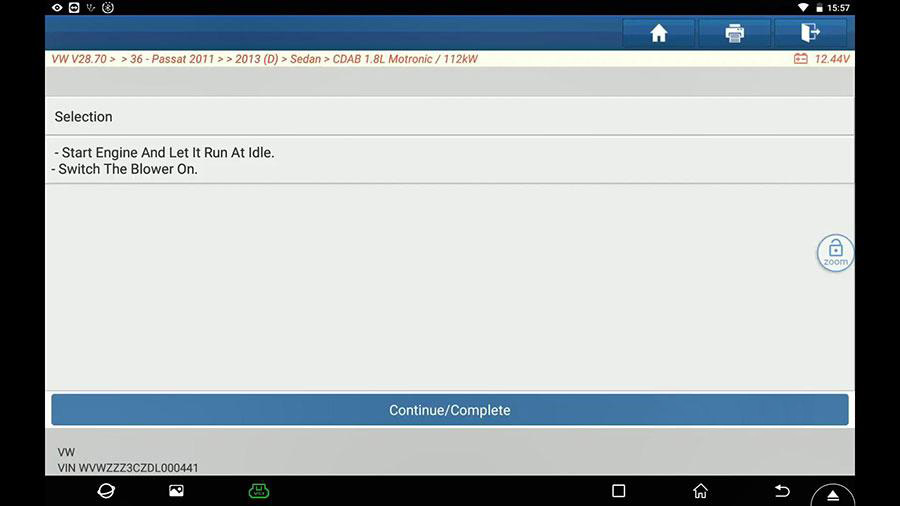
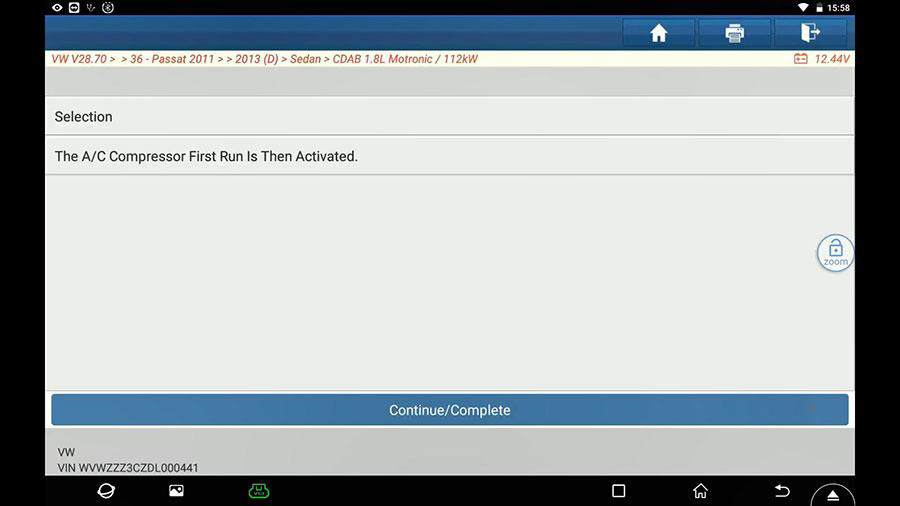
Select "A/C compressor First Run is then activatedâ€.
Select "Have you performed basic setting for the flapsâ€.
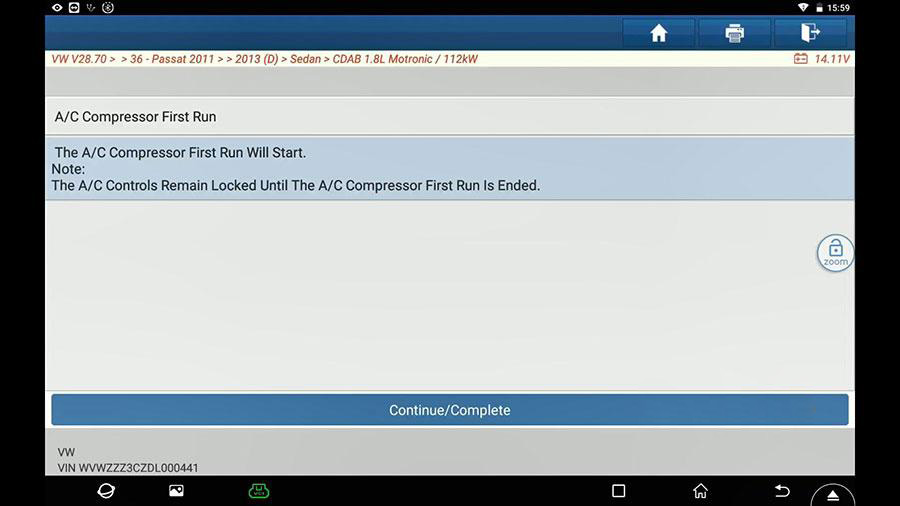
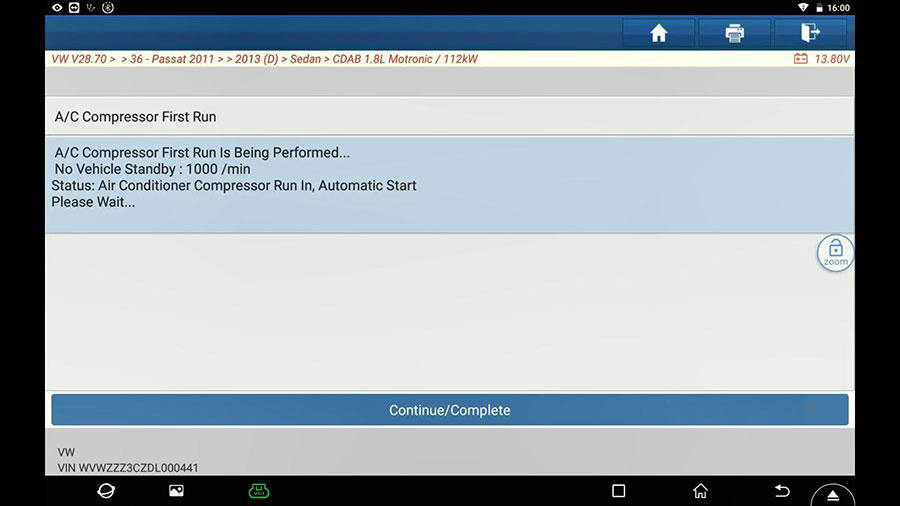
And then follow the on-screen guide to perform.
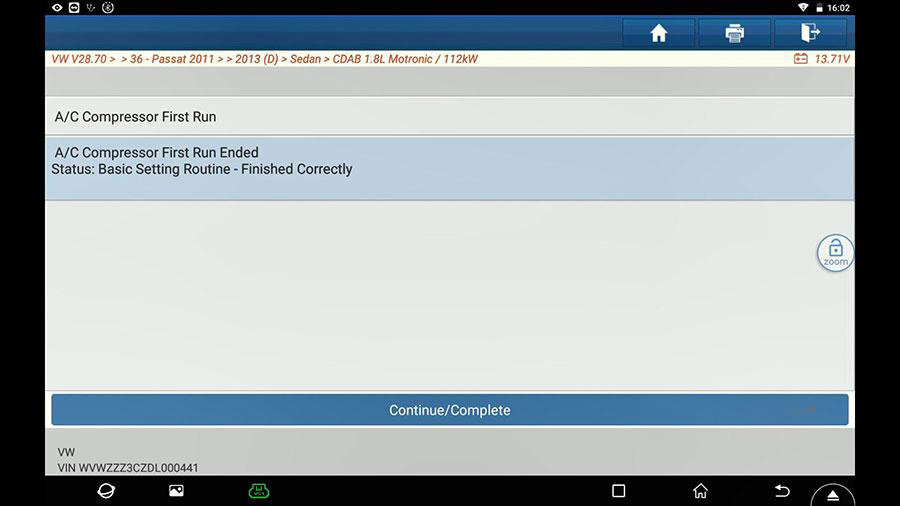
A/C Compressor First run ended.
No event is listed in the event memory of the A /C Control module J301.
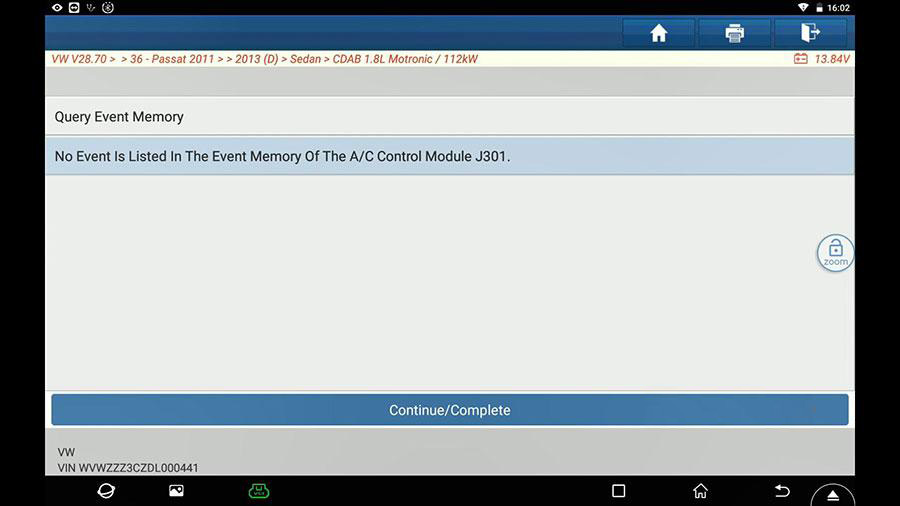
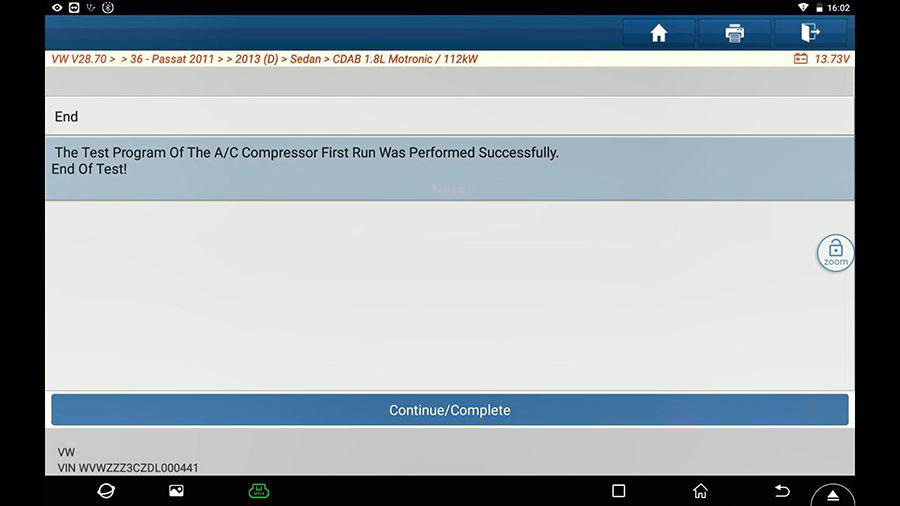
Finally, the test program of the A/C Compressor first run was performed successfully.
End of test.
Enjoy!
Posted by: youobd2 at
03:00 AM
| No Comments
| Add Comment
Post contains 172 words, total size 15 kb.
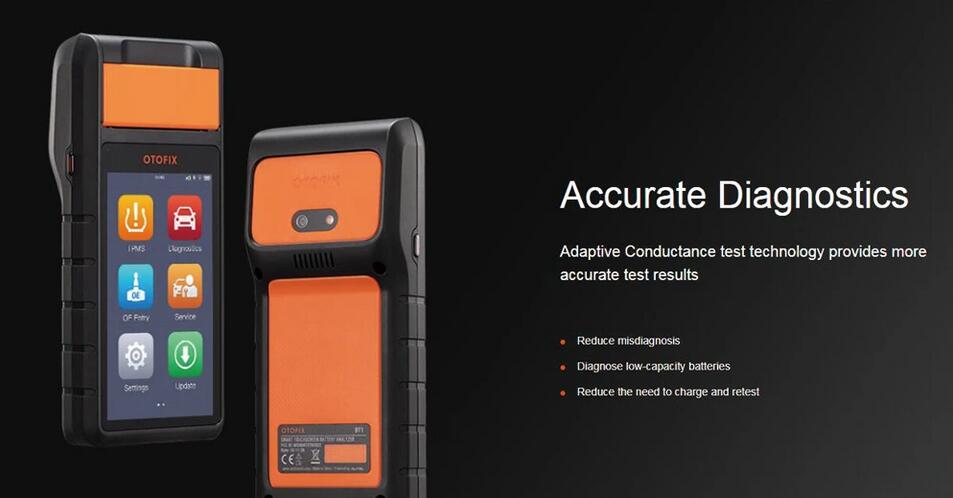
The OTOFIX BT1– with its smart 5.5 in. touchscreen – enables you to examine your battery and electrical systems and register a new battery with the fastest, most convenient experience ever. Combined with otofix Cloud Services, the otofix BT1 provides a comprehensive battery analysis solution from diagnosis to repair.
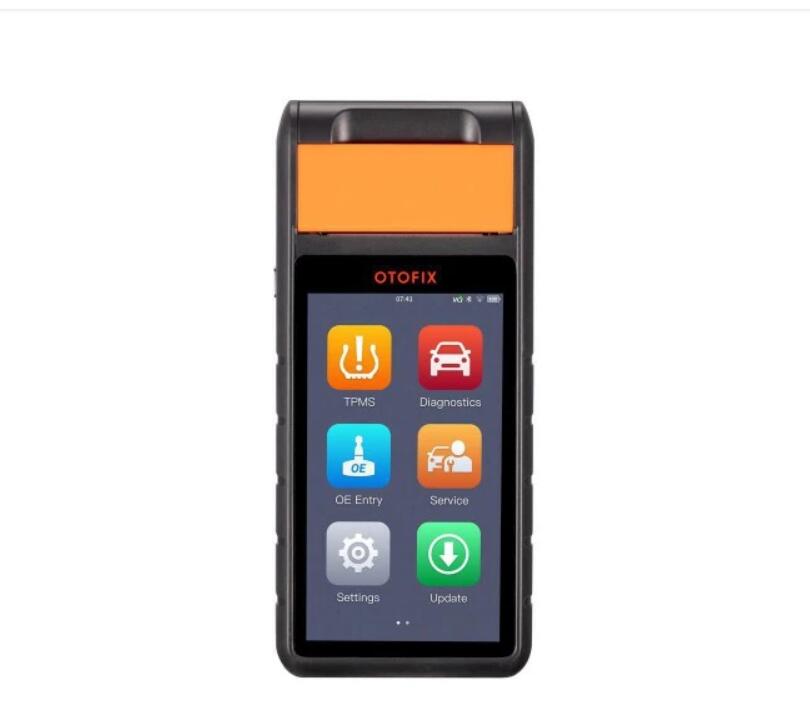
The OTOFIX BT1 is a touchscreen Battery & Electrical System analyzer that applies an advanced battery analysis algorithm – Adaptive Conductance. Adaptive Conductance produces a more accurate examination of the battery’s cold-cranking ability and reserve capacity, vital to determining a battery’s true health. The diagnostic report can be customized with your personal or entity information.

OTOFIX BT1 Battery Tester Highlight
1. Lifetime Free Update Online
2. Print and Email Customised Report
3. BMS Reset: Broaden your service expertise
4. Smart System Detection: Bolster confidence
5. Comprehensive Systems Diagnostics, unleash more possibilities
6. Accurate Diagnostics: Advanced testing methods, more decisive results
7. Multi-Language Supported: English, German, French, Italian, Dutch, Polish, Spanish, Portuguese, Russian, Swedish
8. Dynamic Service Experience, Faster and Easier Operation:The BT1 offers a rich user experience with a large touchscreen and on-screen support resources
* Offers Simple Navigation
* Improve Service Effectiveness with Its 5.5-Inch Color LCD Screen
OTOFIX BT1 Functions
1. Electrical System Reset
2. Auto Registration After Battery Replacement
3. All System Diagnostics with Subscription
4. Graphic Instructions for Battery Replacing and Testing
5. Guided Battery Replacement Procedure with Prompted Memory Reset
6. AutoVIN to identify Battery Parameters
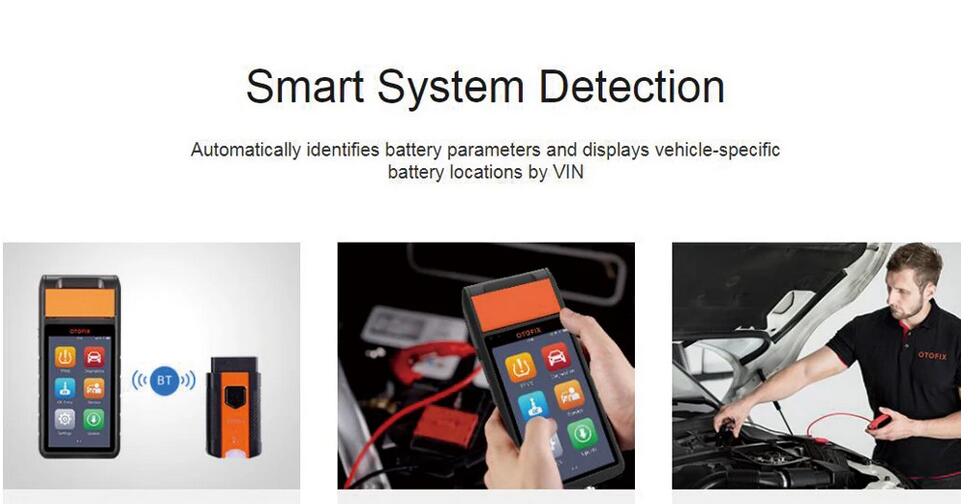
OTOFIX BT1 Supports Battery Types
1. Battery Ratings:
CCA, CA, MCA, JIS, DIN, SAE, IEC, EN, EN2, BCI, GB
2. Battery Types:
Test Flooded, AGM, AGM_Spiral, EFB and GEL Batteries
Test 6- and 12-volt Batteries: 100 – 3000 CCA
Test 12- and 24-volt Cranking/Charging Systems
Specification:
Operating System: Android 9
Screen Display: 5.5″ LCD Touch Screen / 720*1280 Resolution
Storage: 32GB
Connectivity: Wi-Fi (802.1.1 a/b/g/n/ac) / USB 2.0 Type-C / BT5.0+EDR
Camera: 8MP
Input Voltage: 5V DC
Working Current: < 450 mA at 7.7 V DC
Internal Battery: 7.7V, 3000 mAh
CCA Range: 100 to 3000 A
Voltage Range: 1.5 to 36 V
Operating Temperature: 0° to 45°C
Storage Temperature: -10° to 60°C
What Can OTOFIX BT1 Do for You?
1. Electrical System Reset
2. Auto Registration After Battery Replacement
3. All System Diagnostics with Subscription
4. Graphic Instructions for Battery Replacing and Testing
5. Guided Battery Replacement Procedure with Prompted Memory Reset
AUTEL OTOFIX BT1 Package List:
1pc Main Unit
1pc x Battery Clamp Cable
2pcs x Paper Roll
1pc x Power Adapter
1pc x USB Cable
See What Customers Said About OTOFIX BT1
Review 1:
Completely standalone battery tester and electrical system analyzer
it’s very handy and for both professional and personal use.
It come in a hard plastic case, open it up, there are a V200 VCI for bluetooth connection. It’s said to test flooded or wet cell batteries and AGM aka absorbed glass mat as well as AGM Spiral and others. I have tried on flooded battery. After starting the connection with the VCI and starting the engine, I attached the test leads to the battery and tab in the vehicle test, the tool recognized the application in seconds by the wireless vci and detected VIN automatically, then it read the Battery Type, Battery standard, Battery capacity. Then the tool guided me through the steps required to initiate the in-vehicle test.
Review 2:
Can function as a diagnostic case
I am looking for a battery tester that tells the truth. The testers under 50 € on amazon never work and suddenly I said to myself this time you have to find a good product. I found BT1 by chance it is expensive as a battery tester but not at all expensive for a diag case which can clear codes
Enjoy!
Posted by: youobd2 at
02:45 AM
| No Comments
| Add Comment
Post contains 632 words, total size 6 kb.
July 31, 2021
Problem:
I bought a Ford VCM 2, it works with ids 101.01 in VMware 10 with XP SP3.
But, although it connects well to ids and VCI Manager (V101.01), it can’t detect or connect to my ford mondeo PCM.
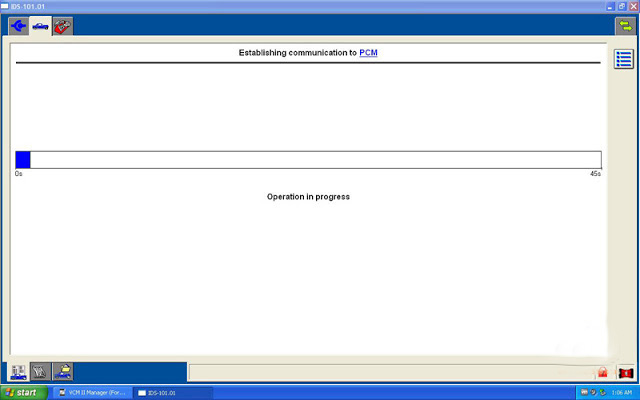
Finally Fixed!
Well, managed to downgrade the firmware using ids V86 (version 2.1.1.5) and now the VCM2 can connect to the car.
For the first time I listen the relay clicking.
VIN and the characteristics of the car was read by ids V86.
The clone vcm2 is working well with ids V86.
It is sufficient to me, it covers my 2011 mondeo.
A bonus is that this VCM2 also work with forscan, nice!
A new problem: unable to do Modules programming
But It was unable to do Modules programming (I want to setup the SASM module, the mondeo pull to the right although it visit some 10 or more 4 wheel alignment shops, it has almost 2º to the right when steering wheel is centred).
How to do?
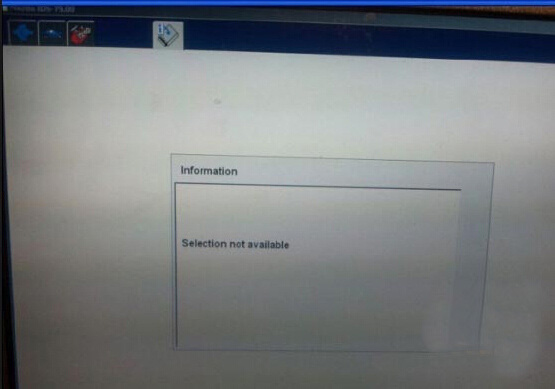
The padlock symbol means you do not currently have full communication with vehicle yet it doesn’t mean blacklisted You need to activate module programming with extender software which lasts for just 120 days but can be renewed as often as you wish
Please downloaded "Ford Extending Programming.rar file, it is used to solve †error selection not available after entering module programmingâ€
https://mega.nz/file/gREkDChZ#7Yo8_ks39I0Wr6-k8nspZauR6qMqvdfcqeHlR60GMxc
Hope it helps!
Posted by: youobd2 at
06:55 AM
| No Comments
| Add Comment
Post contains 242 words, total size 2 kb.
How to activate driving and watch video in BMW 730 CIC
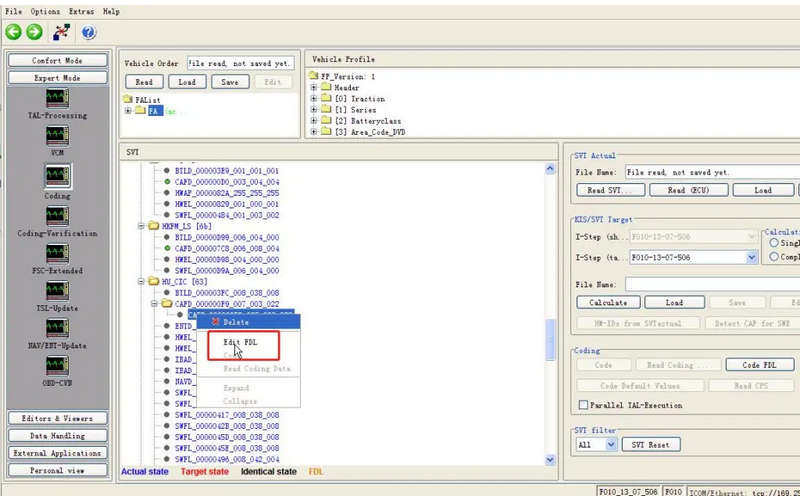
1.After connectingE sys software, read ecu and select "HU_CIC (63)â€-â€Read Codingâ€;
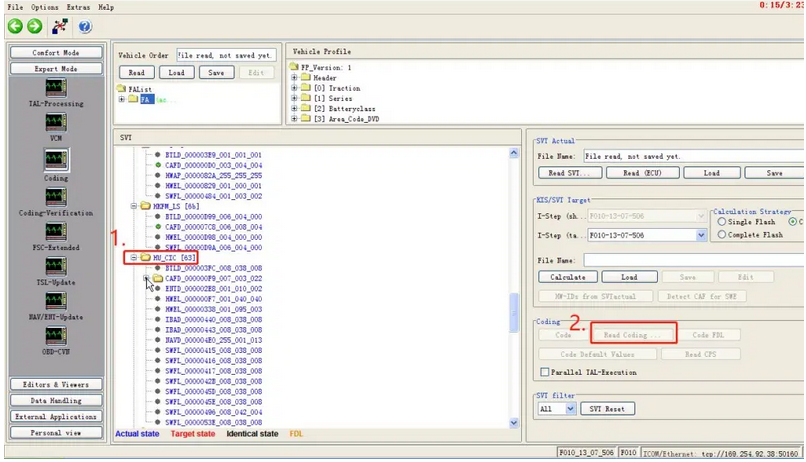
2.Select "HU_CIC â€-â€Edit FDLâ€;
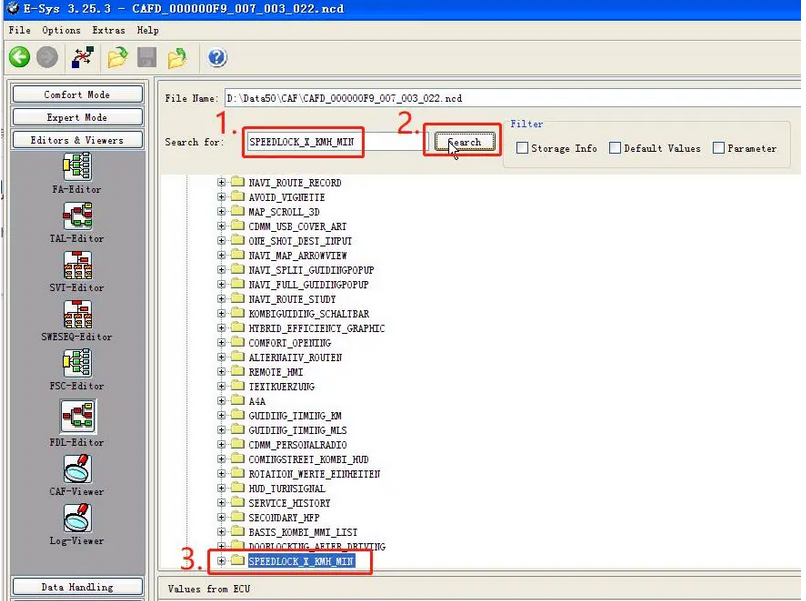
3.Search for "SPEEDLOCK_X_KMH_MINâ€,
4.08 changed to FF;
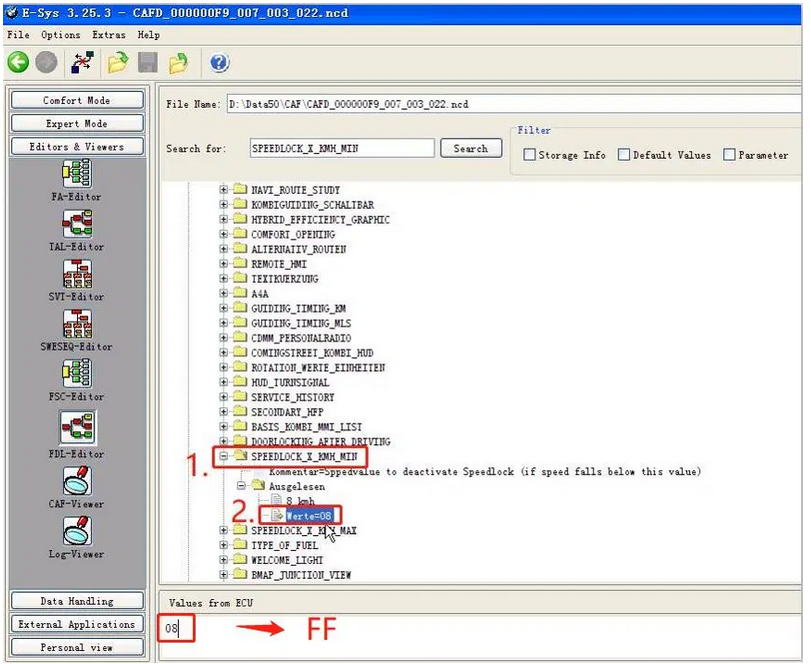
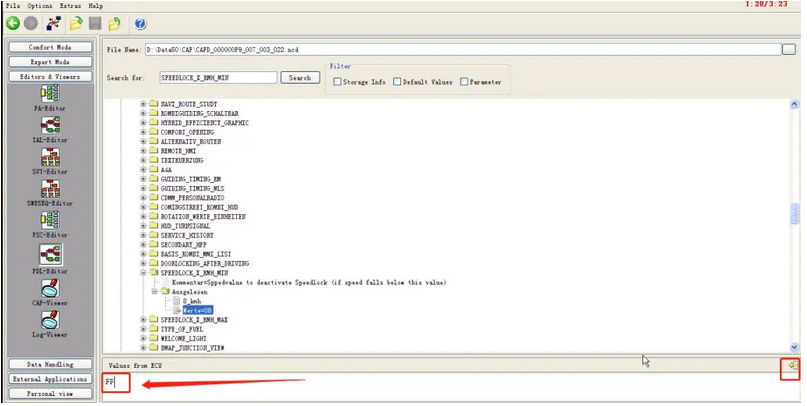
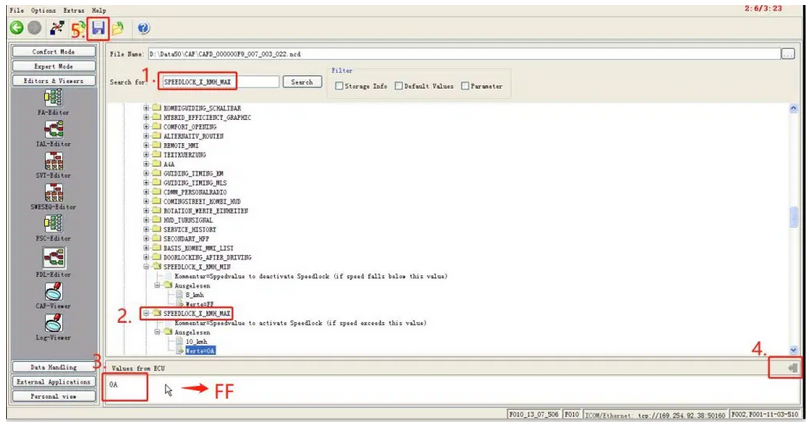
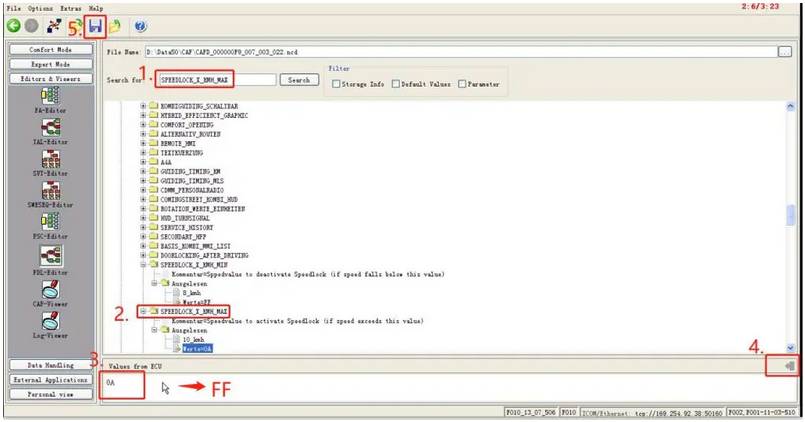
5.Search for "SPEEDLOCK_X_KMH_MAXâ€,0A changed to FF,SAVE;
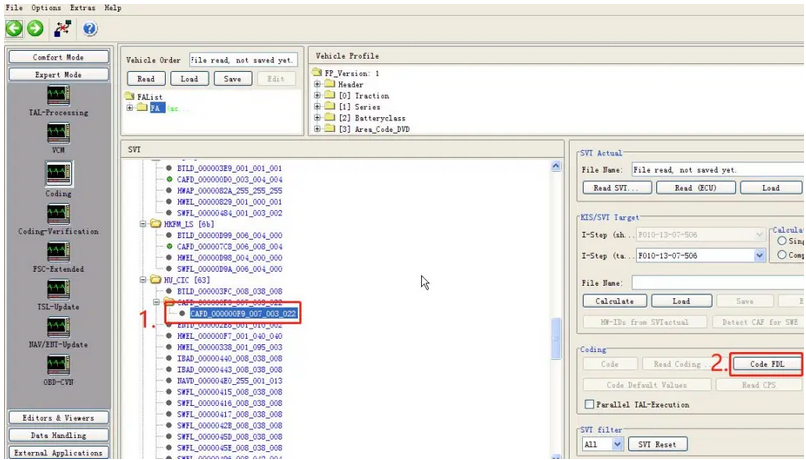
6.HU_CIC – Code FDL
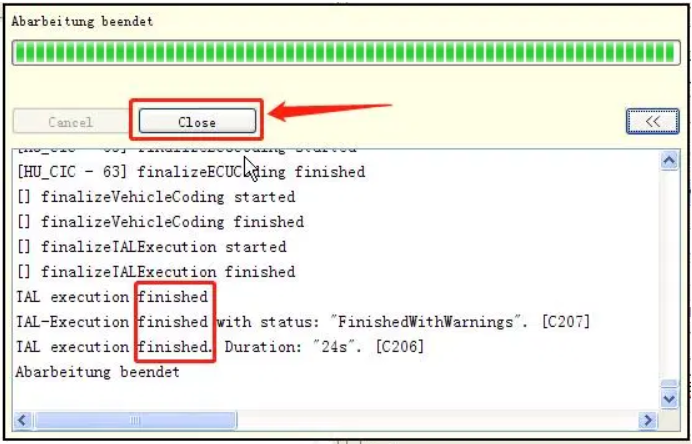
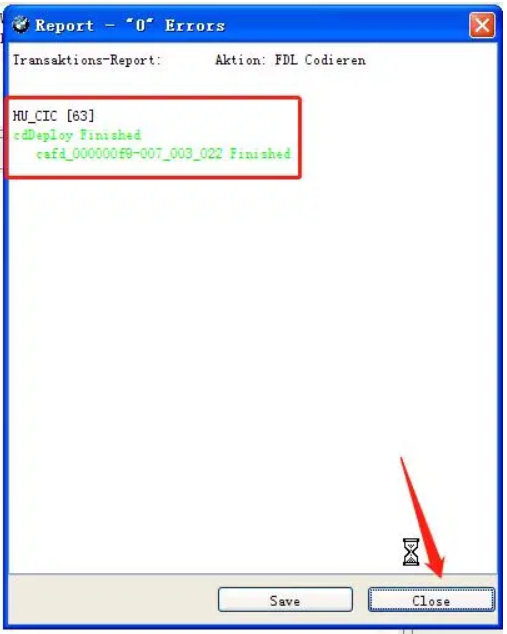
7.Code finished, It is recommended that you turn off the car key and try again after five minutes.
(If you cannot read and change the ECU value, you need to use E sys Launcher PRO or E sys plus software to decrypt the ECU.)
Posted by: youobd2 at
06:48 AM
| No Comments
| Add Comment
Post contains 98 words, total size 4 kb.
June 25, 2021
Autel MaxiIM IM608 and IM508 new 2021 April upgrade
First Global Launch of Key Programming without PIN
•Supports Read PIN for 8A smart card for Kia KX Cross.
•Supports All keys lost without PIN or ECU replacement for Honda Elysion and Odyssey, 2019 and newer.
•Supports Add key without PIN for smart key for 2021 models: Nissan Sylphy, Sentra.
•Supports Reset parameter (without PIN) for 18 Ford models, including 2011-2014 Focus, 2011-2015 MKX.
•Adds Read ISN for 48 new software versions of BMW B48/B58 engine.
•Adds Key learning for 1 new software version and adds Coding for 7 new software versions of BMW FEM/BDC immobilizer system.

Posted by: youobd2 at
02:31 AM
| No Comments
| Add Comment
Post contains 118 words, total size 2 kb.
May 26, 2021
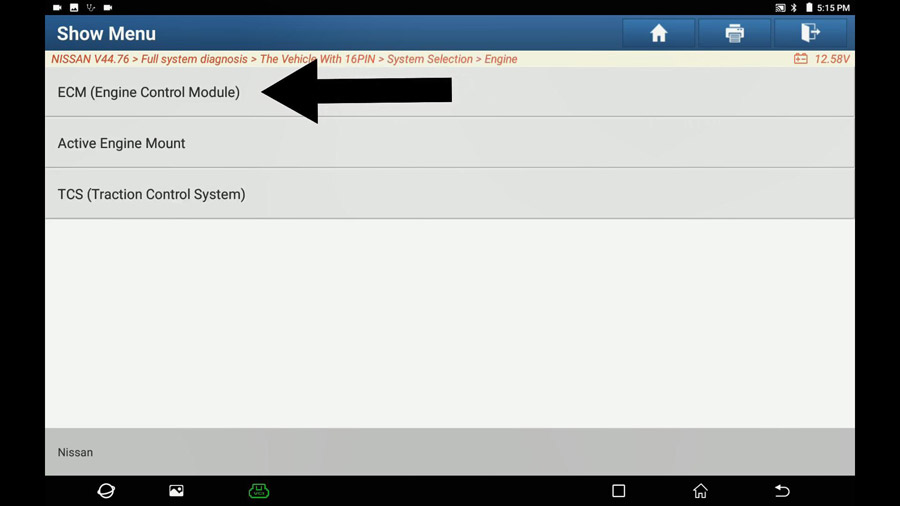
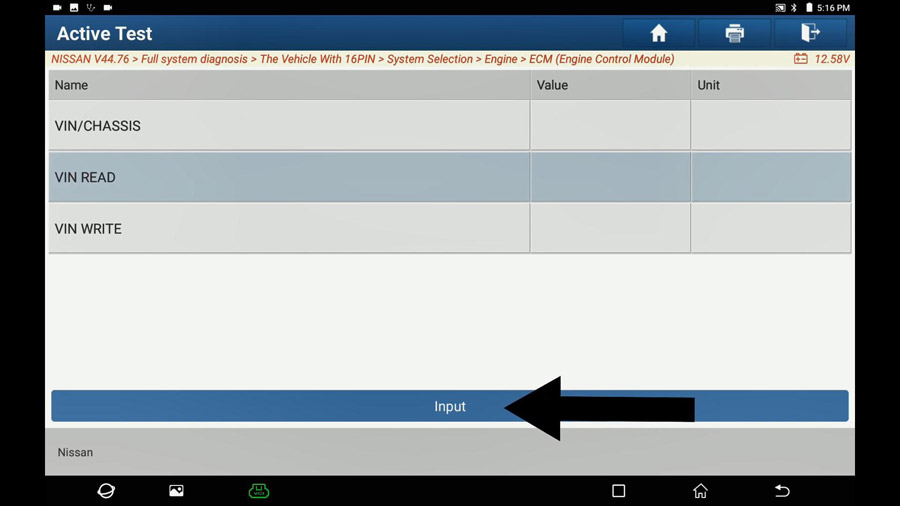
VIN Registration is an operation to registering VIN in ECM (Engine Control Module). It must be performed each time ECM is replaced. NOTE: Accurate VIN which is registered in ECM may be required for Inspection & Maintenance (I/M). For example, Nissan X-Trail T32 2017 ECM VIN registration can be done by anyLaunch X431includingLaunch X431 V,X431 v+,PAD Vetc.
Procedure:I.E X431 PAD V Nissan X-Trail T32 2017 ECM VIN registration
Hook X431 Pad V up to Nissan X-Trail T32 2017, select "Diagnosis†and then Nissan, then "Full system diagnosisâ€.
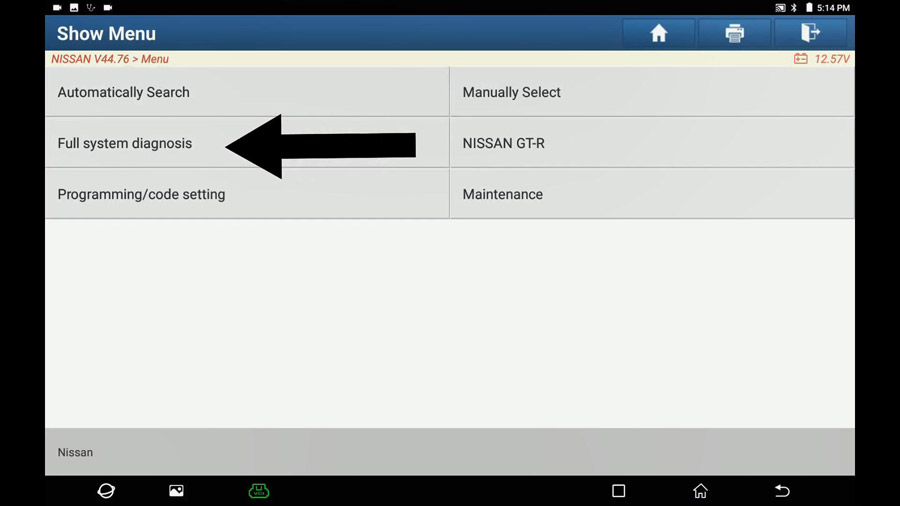
Select "The vehicle with 16PINâ€.

System selection.
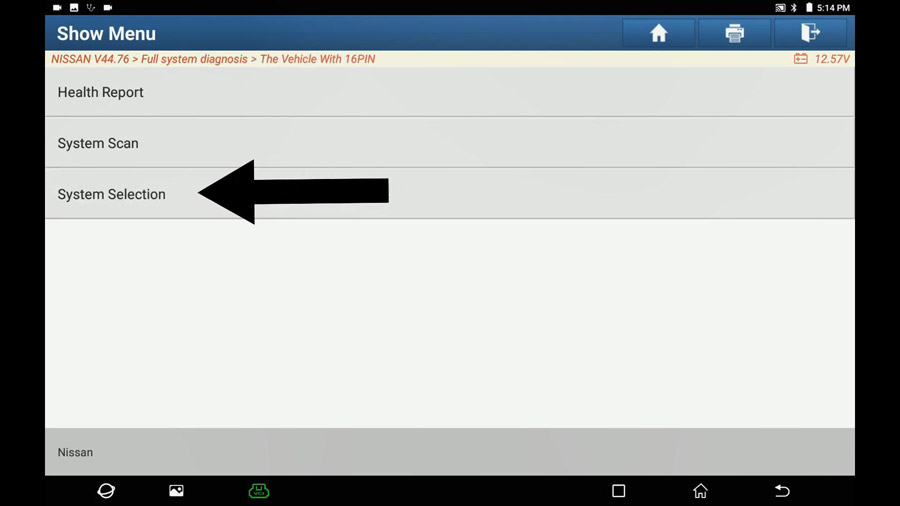
Engine.
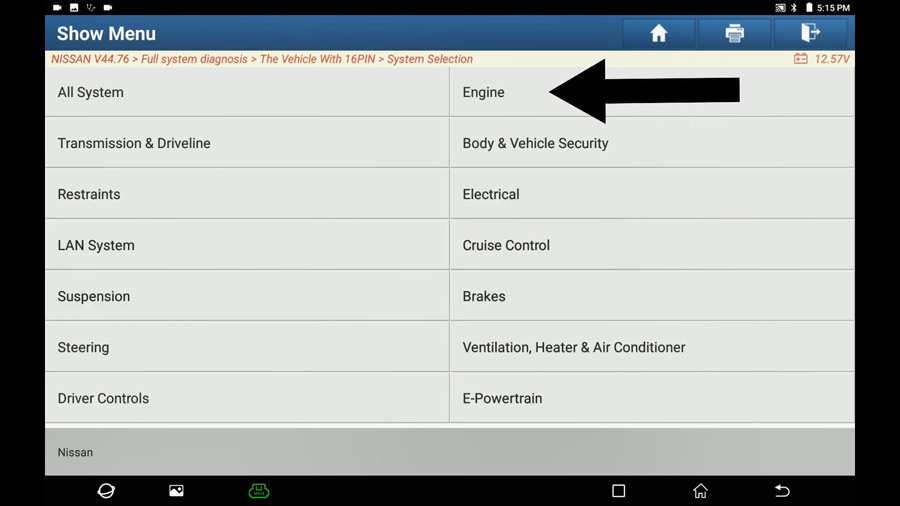
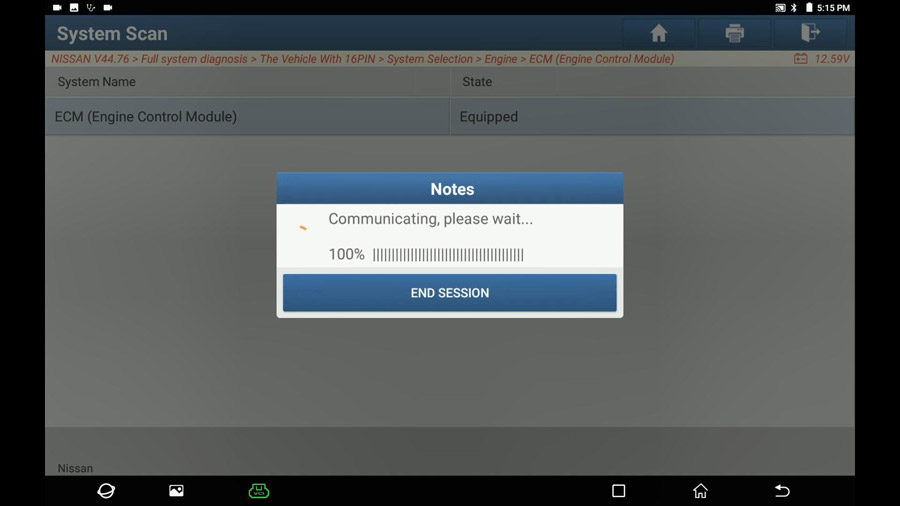
ECM (Engine Control Module).
Communicating… till 100%
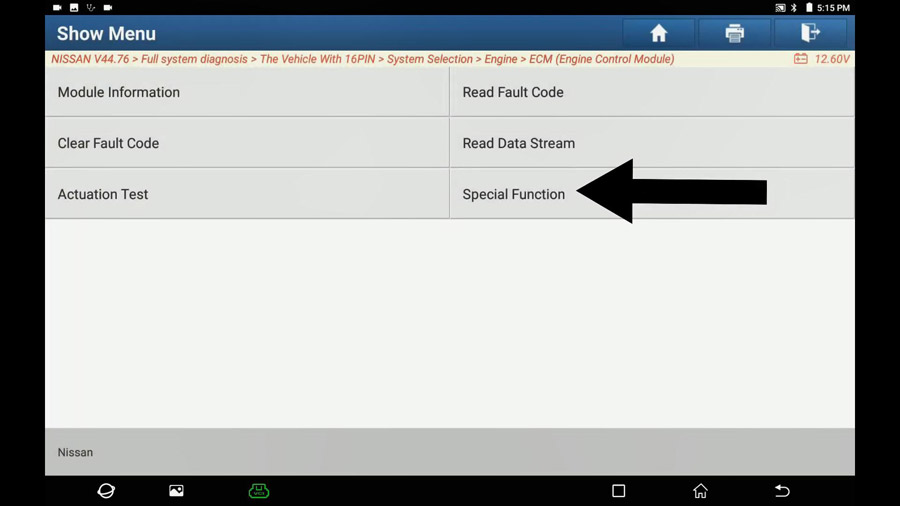
Special function.
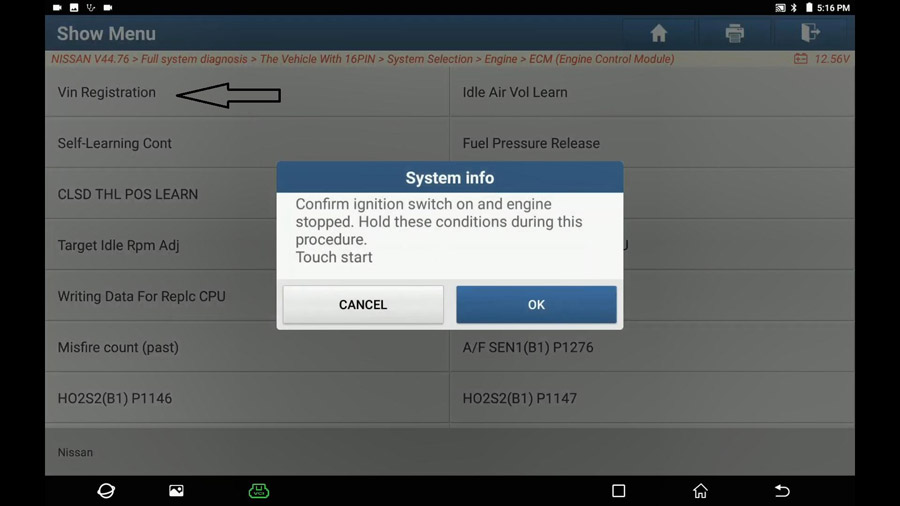
Select "Vin registrationâ€.
Turn ignition on and engine stopped.
Select "VIN Read†and click on "Readâ€.
Input VIN, refer to S /M for location of identification plate.
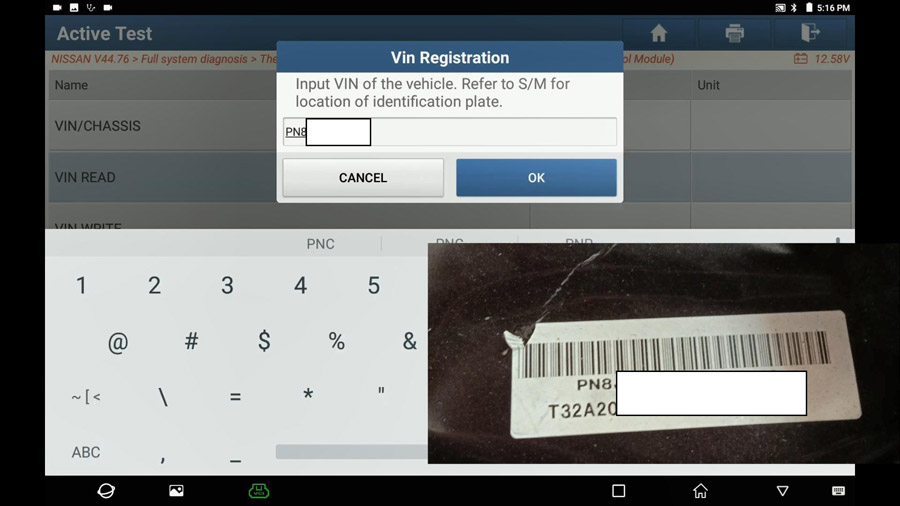
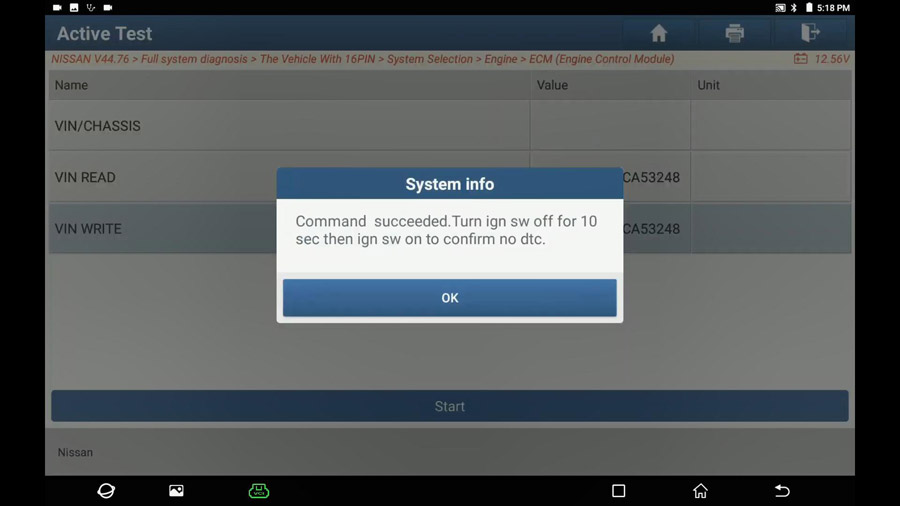
Command succeed. Turn ignition off for 10 seconds and then turn on to confirm no DTC.
Double check:
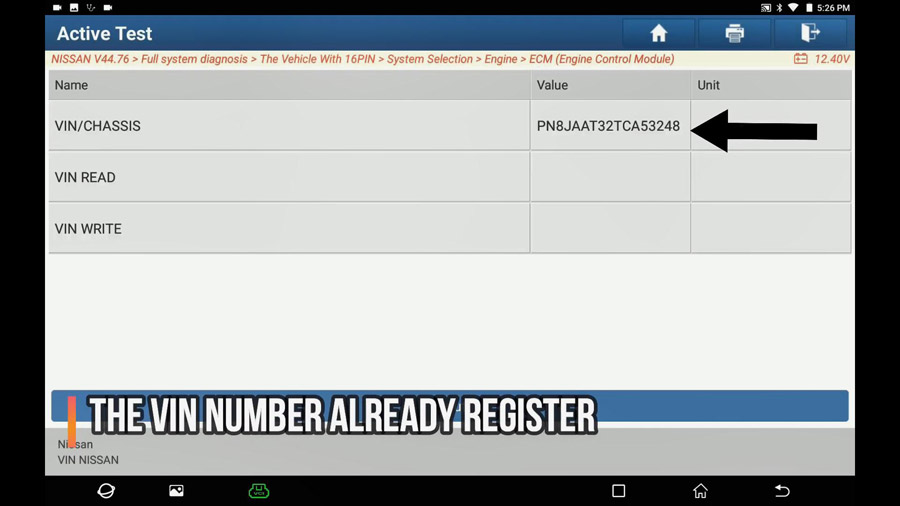
Back to ECM (Engine Control Module) -> Vin registration.
You can see on X431 PAD V VIN Value, that means the VIN Number is already registered successfully.
Job is done.
Please keep in mind, if you have any of X431 V, X431 V+ etc, you can also perform VIN registration.
Enjoy!
Posted by: youobd2 at
01:10 PM
| No Comments
| Add Comment
Post contains 213 words, total size 6 kb.
Before starting our topic "How to Upgrade ICOM Next Firmware?â€, let’s have an overview of one user’s feedback: when powered up the unit, immediately the COMM LED light RED ! Other LEDs light blue. When connected the unit to my laptop with ISTA D v4.24, LAN LED lights blue and IToolRadar recognized the unit. But ISTA does not connect to the ICOMâ€.
Look at the screenshot of error:
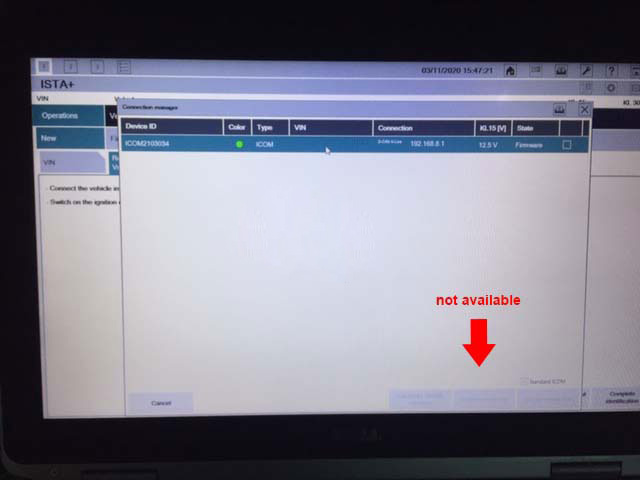
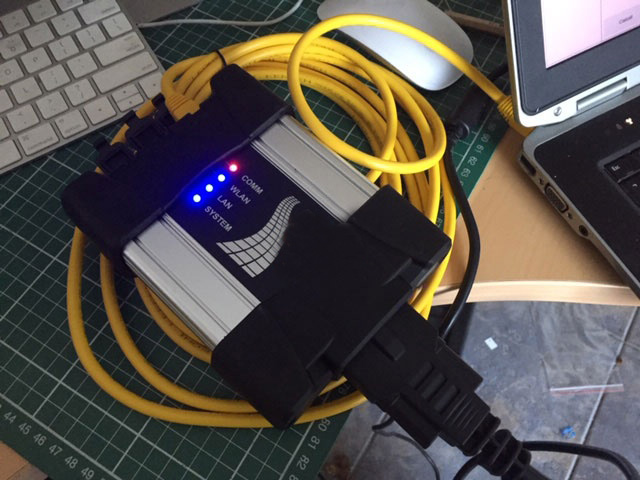
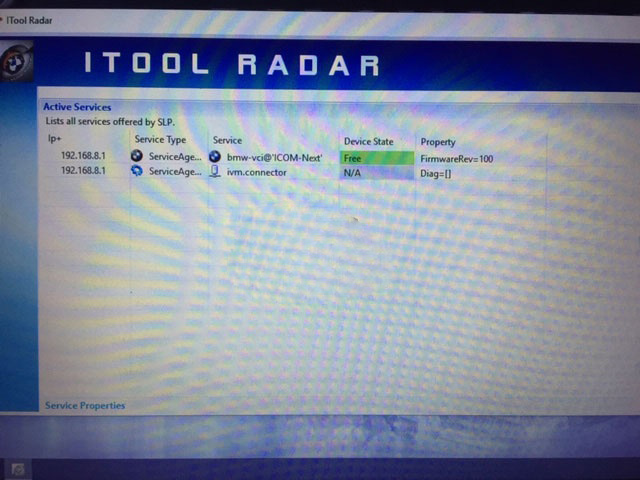
Possible reason and solution:
Need to update your ICOM Next firmware.. yours is on v100. latest is v141
The method to update ICOM next firmware:
By obdii365.com engineer: Open "vx manager†to click on "Firmware upgradeâ€.
Browse http://www.vxdiag.net/
Click on "Downloadâ€
Click on "VX Managerâ€.
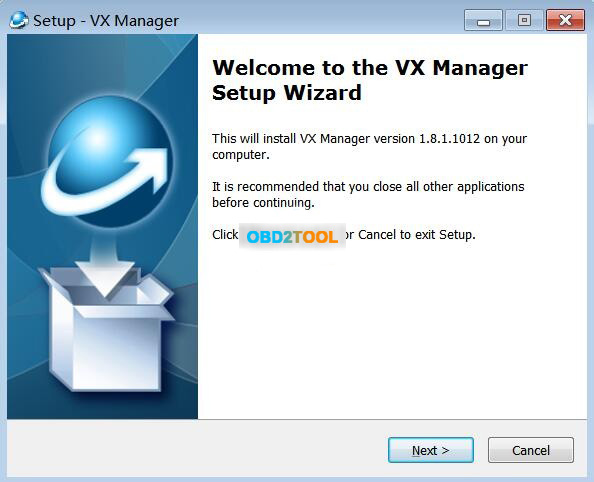
Run VX Manager.exe to setup
Click on [Next]
Select Components.
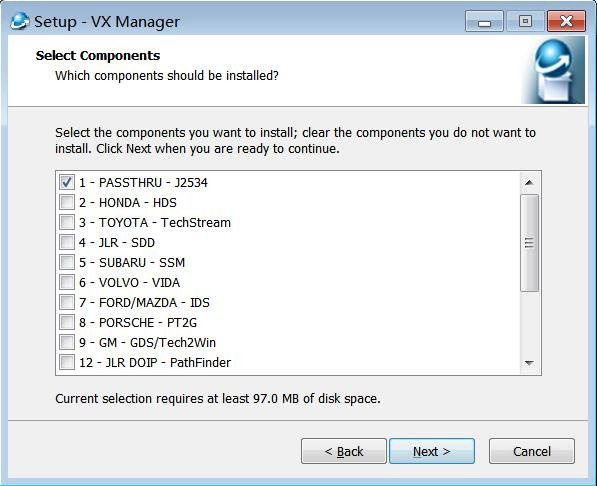
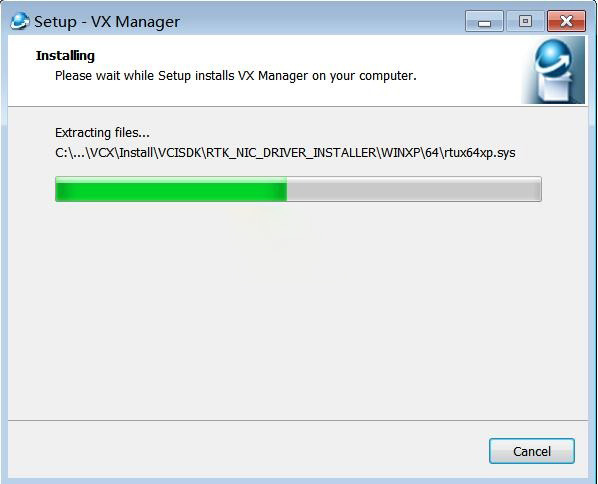
Installing…
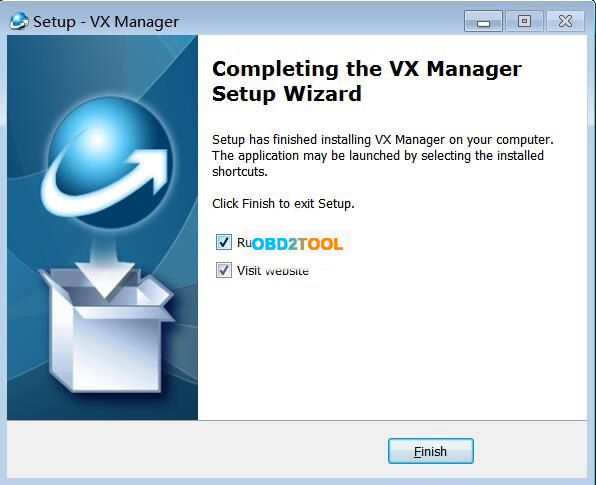
Complete the VX Manager Setup Wizard.
Connection ICOM NEXT device and run VX Manager, and you will have the information of device in "Device Managerâ€.
Click on "Firmware†to upgrade.
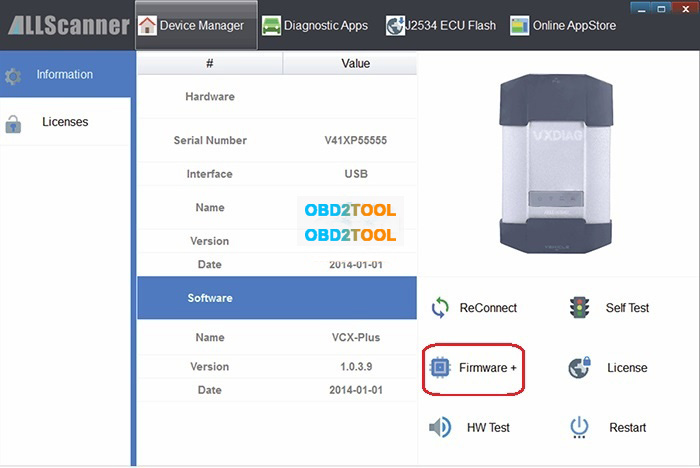
Posted by: youobd2 at
12:59 PM
| No Comments
| Add Comment
Post contains 159 words, total size 4 kb.
May 13, 2021
It can also be used with Launch HD module to test Heavy Trucks.
It is global version, no IP limited. You can use it everywhere in the world.
-ECU Coding and Auto VIN Tech
This diagnostic tablet supports ECU coding function on a large amount of makes, including Benz, Ford and more.
It also supports quick diagnosis via one-button VIN scanning.
-Active Test
The Active Test function is used to access vehicle-specific subsystem and component tests. Available test vary
by manufacturer, year, and model, and only the available tests display in the menu.
-All System Diagnosis
LAUNCH X431 V+ can read DTCs and data streams for ALL systems to diagnose car comprehensively including
Fuel system, Emission system, Transmission, Engine, Body, Powertrain and more, thus users don’t have to buy
other tools for diagnosing systems for time & money saving.
Full 11 Special Functions:
1. Oil Reset Service
Clear the Oil light, perform reset for the engine oil life system;
2. Steering Angle Calibration
Perform steering angle adjustment, clear steering sensor fault memory and turn off steering wheel warning light.
3. Electronic Parking Brake Reset
Reset the brake pad after repairs in electronic parking brake system are done.
4. Battery Register & Battery Maintenance
Re-match the control module and motoring sensor for battery detecting more accurately, clear original low battery information and prevent the related control module from detecting false information.
5. ABS Bleeding
Perform various bi-directional tests to check the operating conditions of Anti-lock Braking System (ABS).
6. Electronic Throttle Position Reset & Learn
Initialize the throttle actuators to the default state for regulating throttle (or idle engine) operations accurately.
7. Diesel Particulate Filter (DPF) Regeneration
Clear particulate matter from the DPF filter to stabilize the filter performance.
8. Tire Pressure Monitor System Reset
Reset tire pressure and turn off the tire pressure MIL.
9. Tooth Learning
Clear the lost car key’s information and program the new key into the ECU database to protect user’s car from being stolen.
10. Anti-theft Matching:
Clear the lost car key’s information and program the new key into the ECU database to protect user’s car from being stolen.
11. Injector matching
Program in the new fuel injector numbers after replacement to replace the ones previously programmed into the ECU.
5 More Reset Functions:
You can check the 5 reset functions in the car diagnostic software.
1. Air Suspension Reset
2. Gearbox Reset
3. Sunroof RESET
4. AFS Reset
5. EGR Reset
Launch X431 V+ – Setup & Initial Impressions
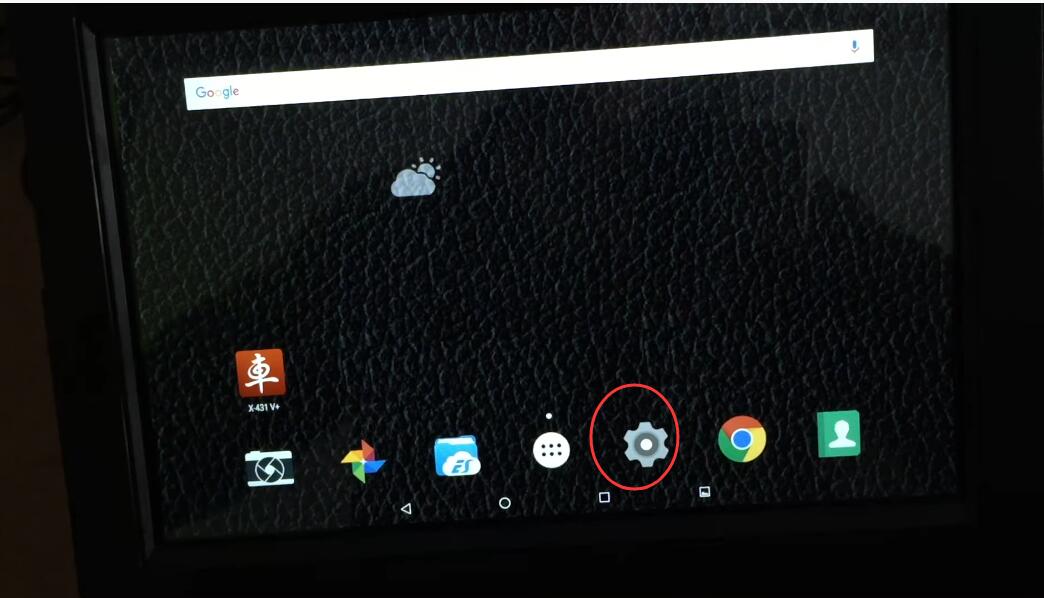
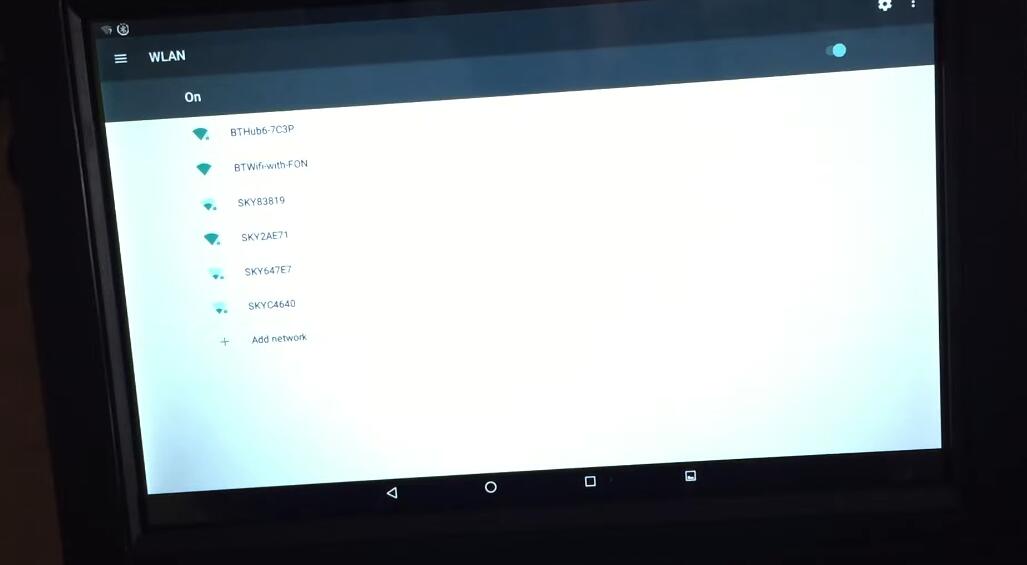
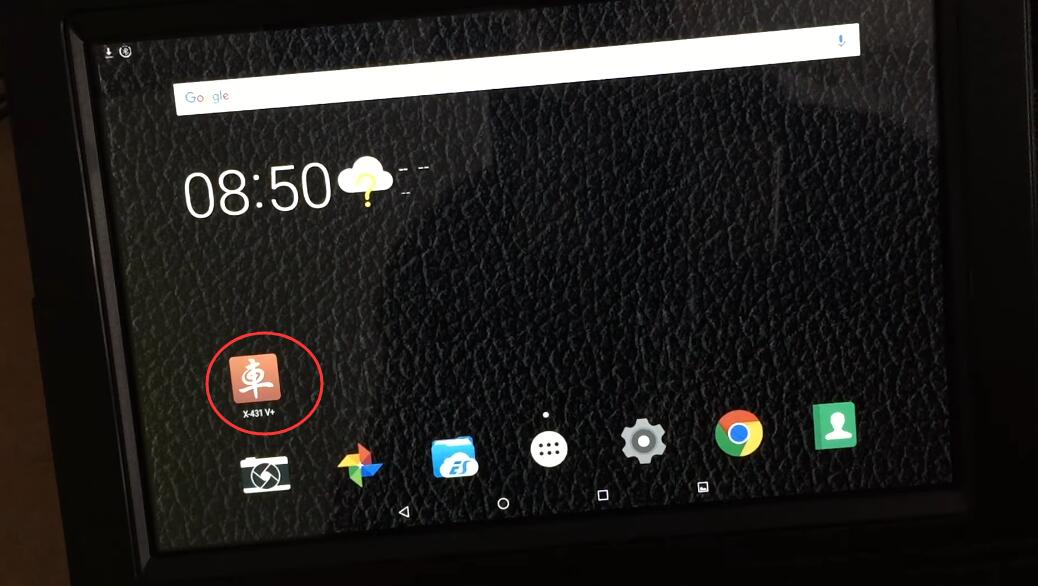
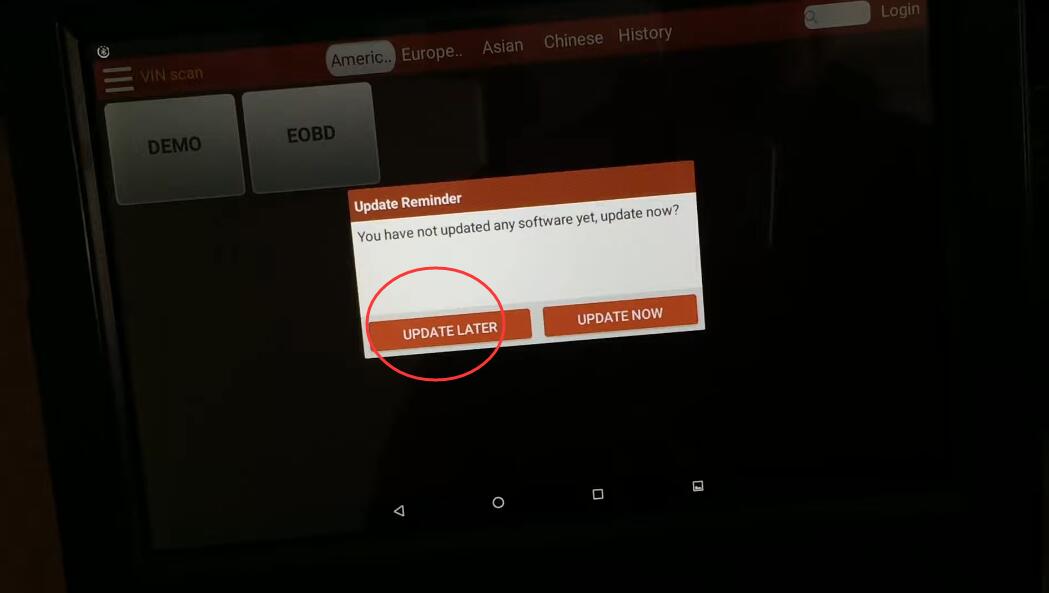
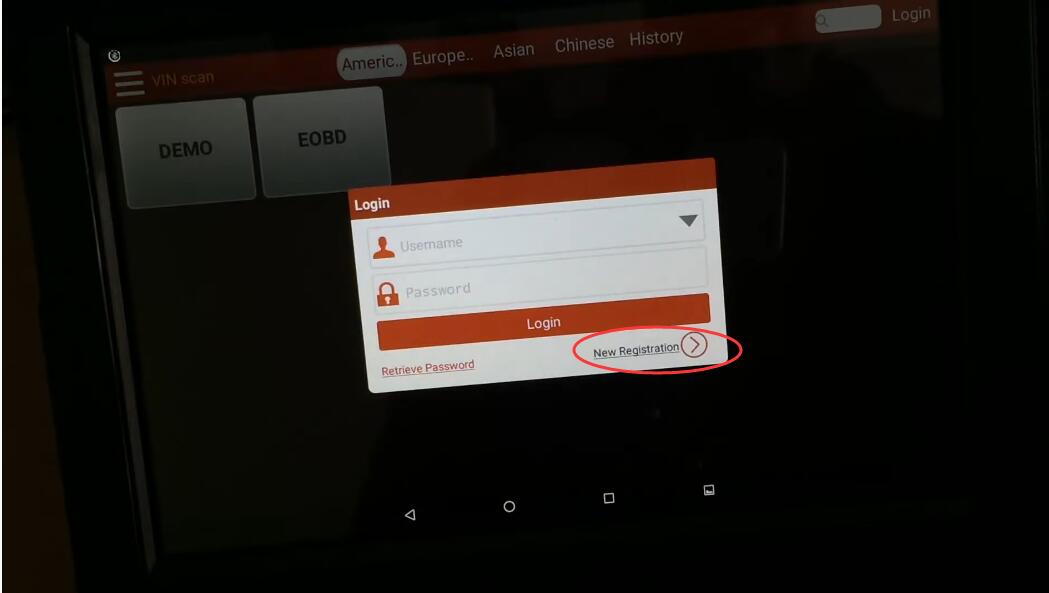
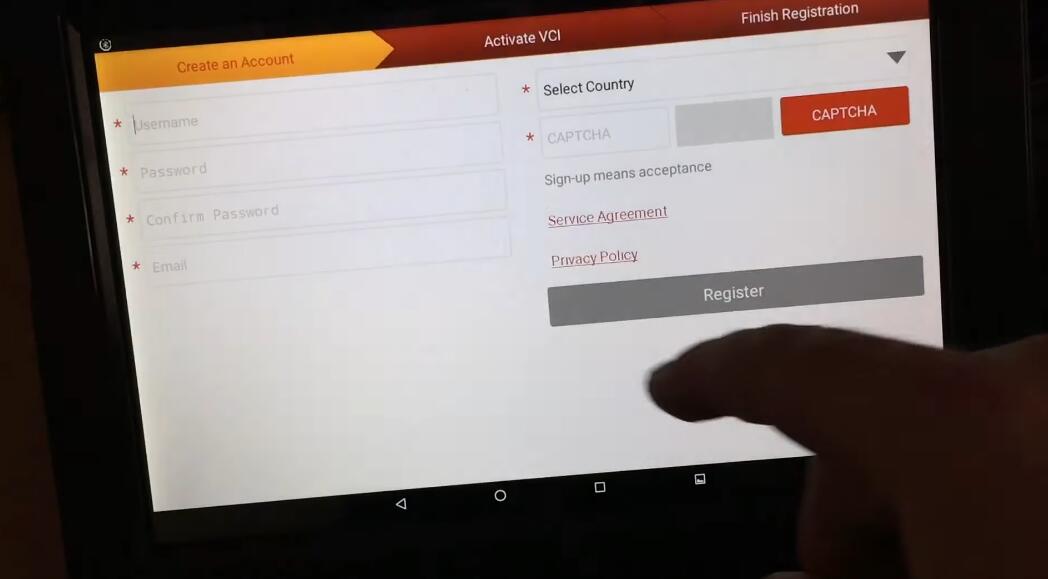
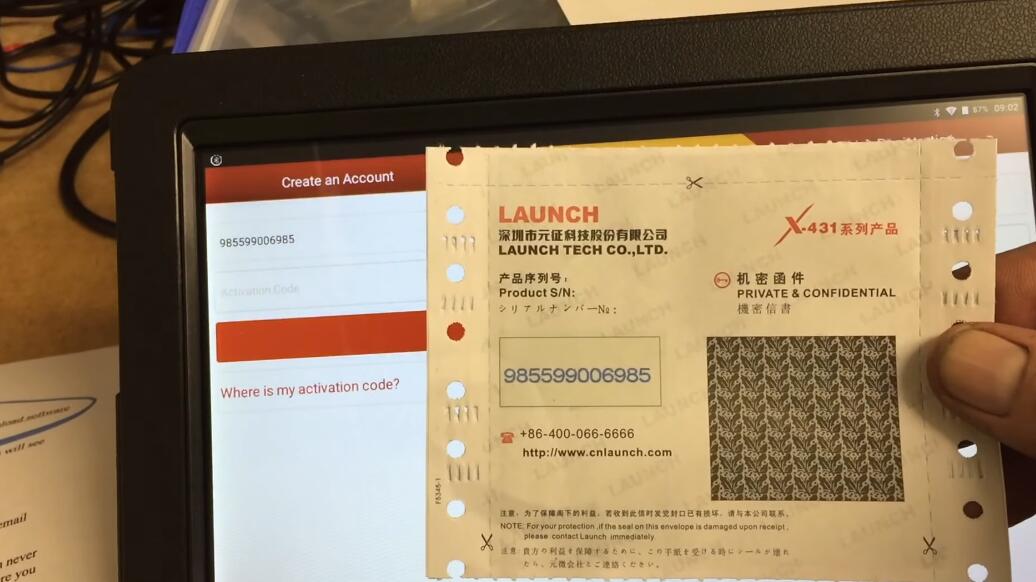
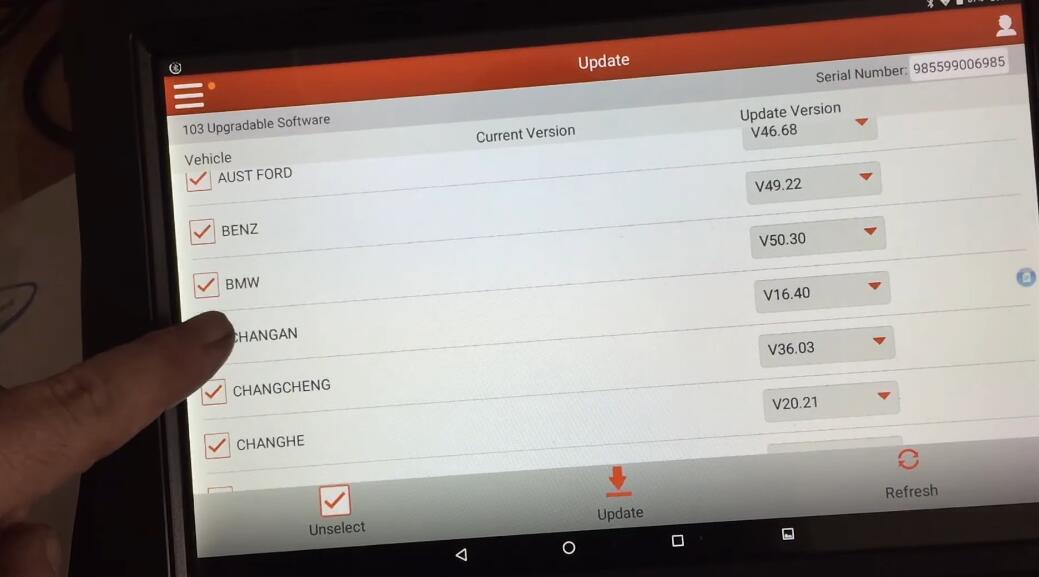
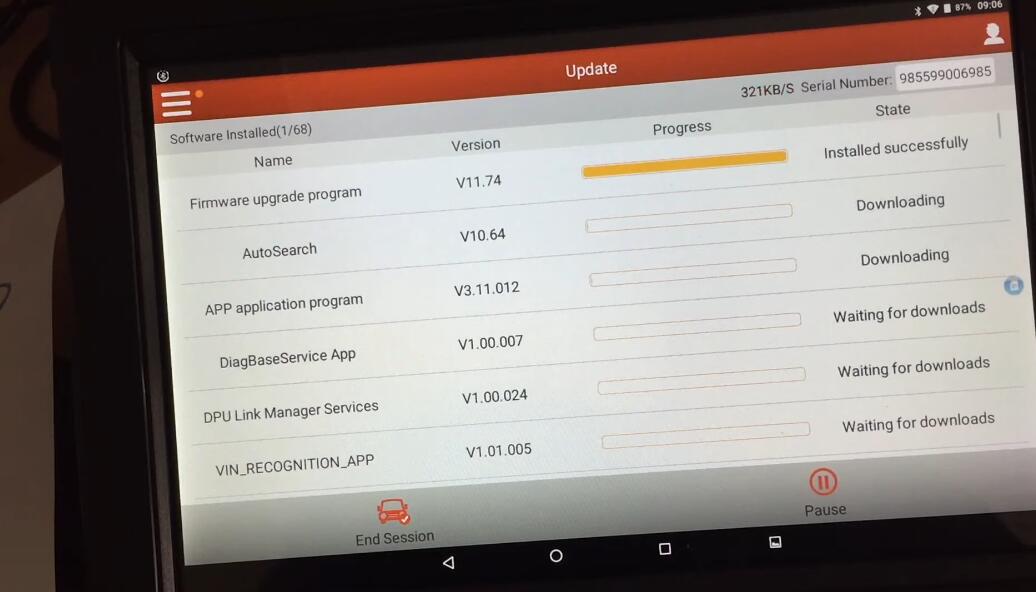
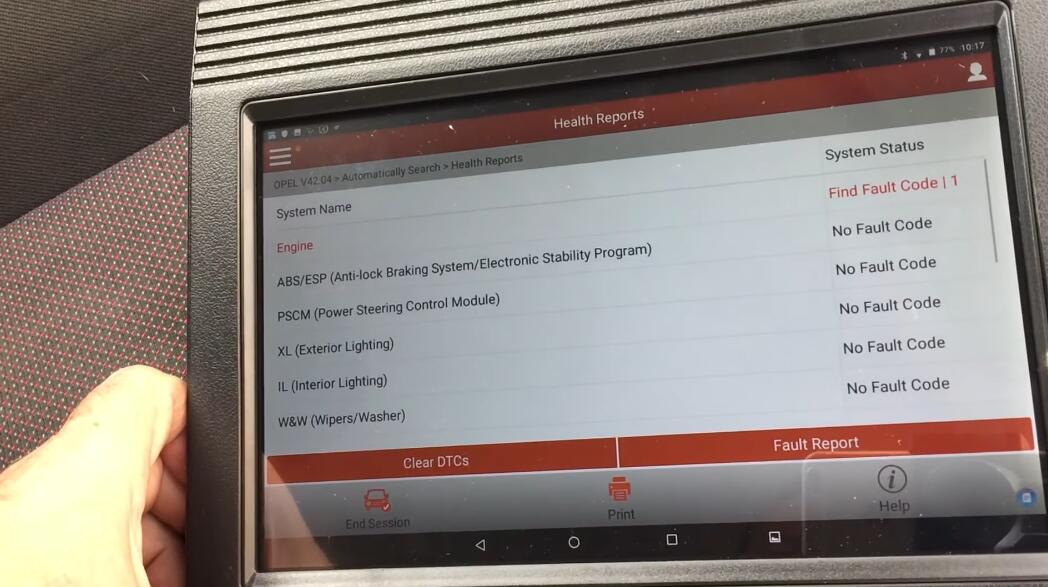
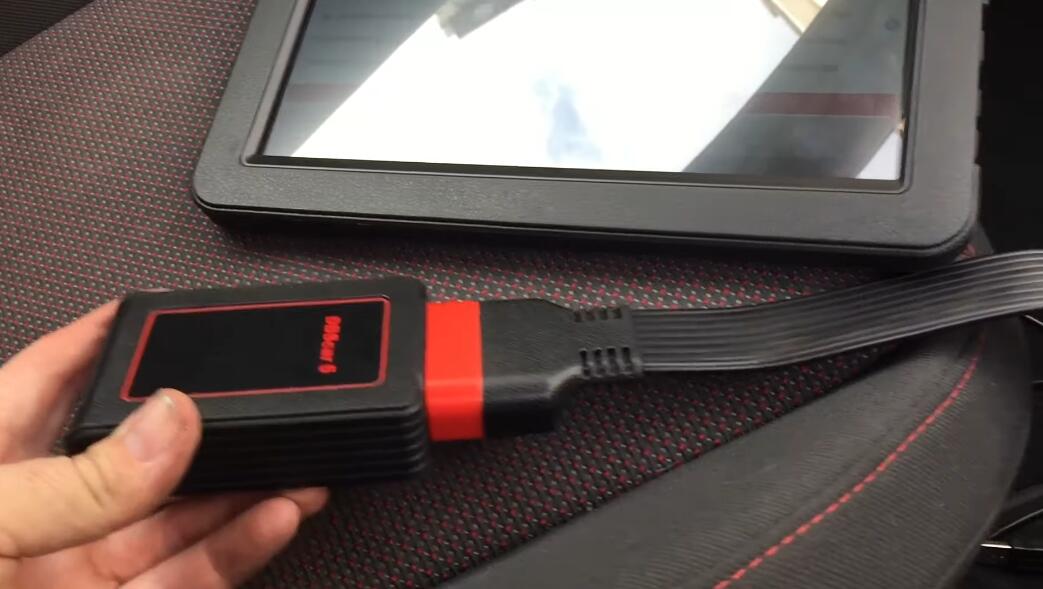
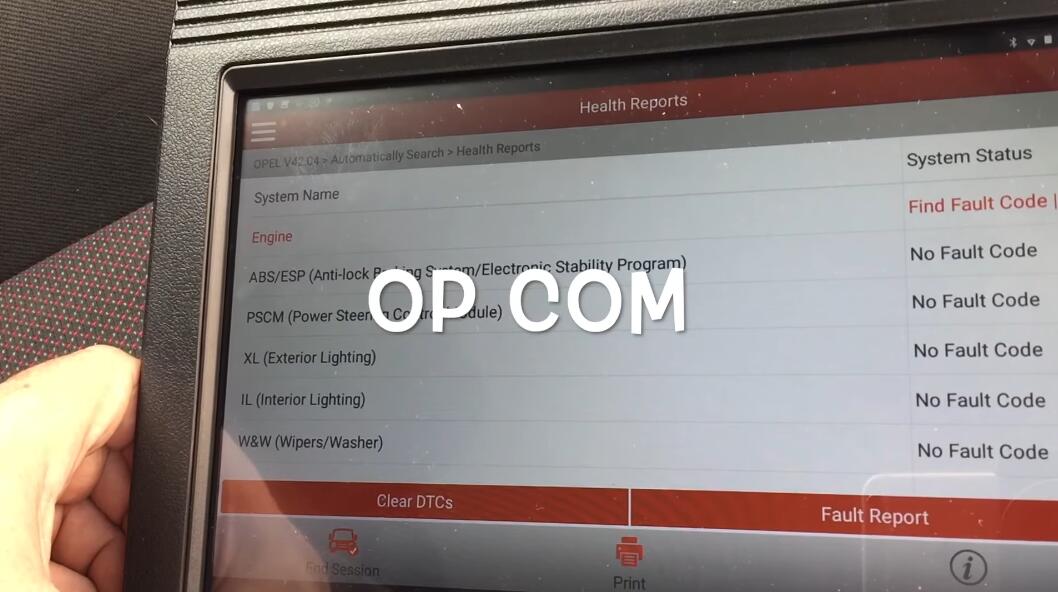
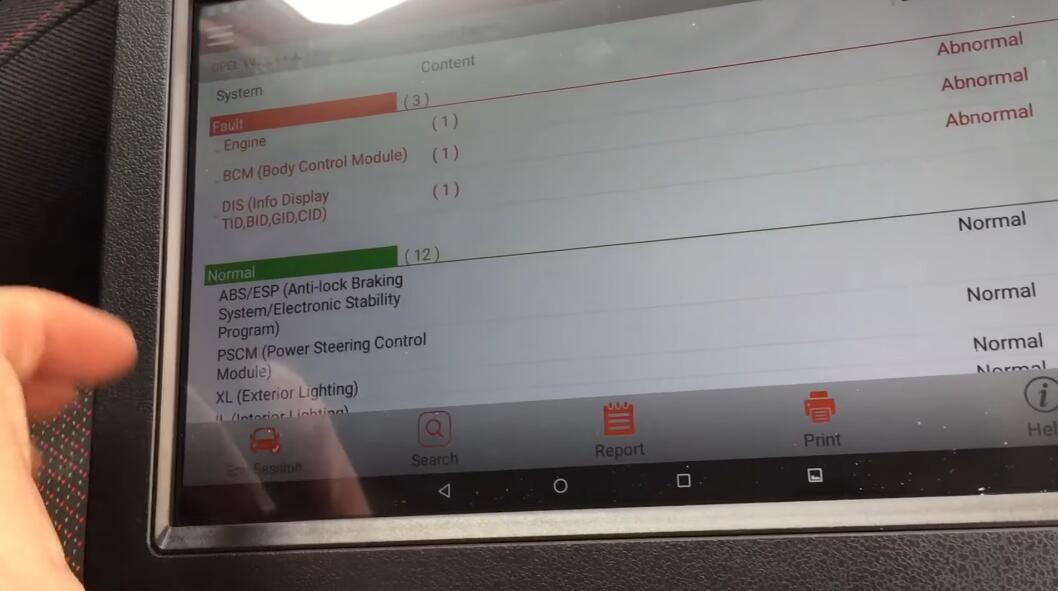
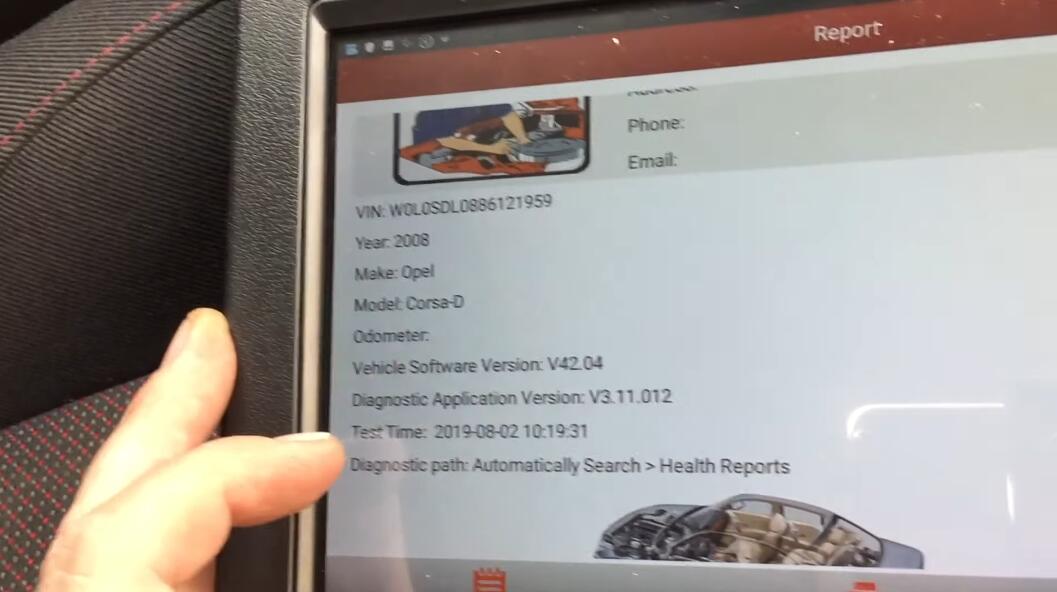
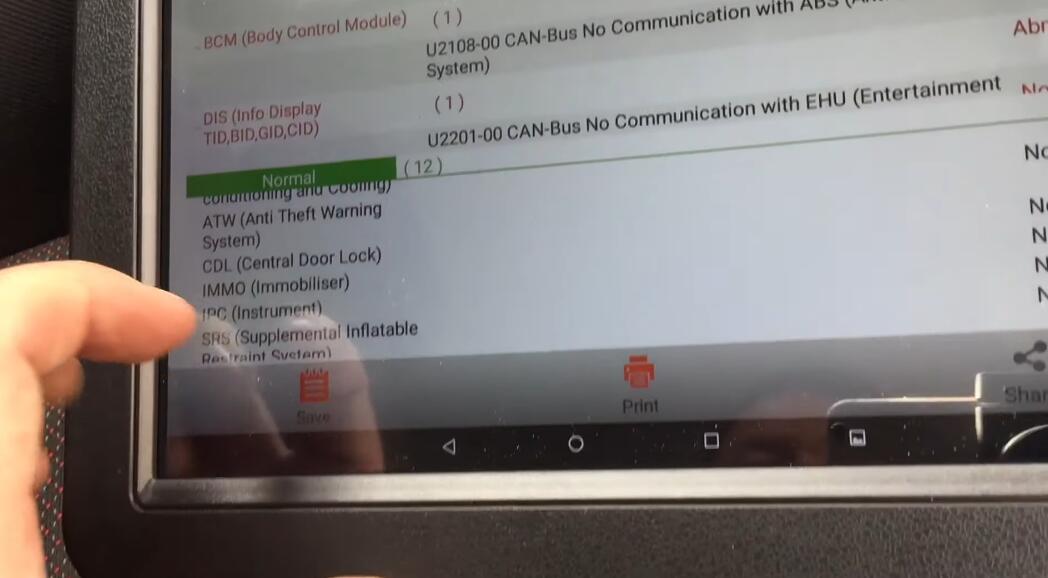
If you want to know more aboutLaunch X431, please visit our websitewww.obd2tool.com
Posted by: youobd2 at
08:33 AM
| Comments (1)
| Add Comment
Post contains 454 words, total size 9 kb.
April 09, 2021
This post comes with the guide to replace rear brake pad on 2016 Mini Cooper S F55 using Launch X431 Pro V4.0.
Something to know about brake pads:
When to replace brake pads?
Here are a few common symptoms of worn-out brake pads:
1.Low brake pad warning light is on: Not all vehicles are equipped with this system, but if yours is, this dashboard indicator light will likely be the first signal it’s time to replace your brake pads.
2.Brakes start to squeal regularly: This is often one of the first signs of worn brake pads and is caused by a metallic piece built into brake pads for this exact purpose. This part contacts the brake rotor to make a squealing or whining noise when the pads are low.
3.Brakes make loud grinding noise: If not addressed early enough, your brake pads may get so worn that the metal backing plate of the pad grinds against the metal rotor.
4.Brake pads look thin: You may be able to visually check your brake pad thickness to determine if they need replacement.
Can I drive with a brake problem?
It is not safe to operate any vehicle with a braking problem. If there is any sign that the brakes are not performing as originally intended, the vehicle should immediately be towed and repaired.
If the brake pads are being replaced as part of routine maintenance, with no symptoms noticed, the vehicle can safely be driven to a repair shop. Also, if the brake wear indicator has begun making noise, the vehicle can be driven to a repair facility, but postponing will result in unsafe driving conditions.
So how to replace brake pads with Launch X431 Pro?
Here will take Mini Cooper S F55 2016 as an example.
The low brake pad warning light appears on the dashboard and reminds to replace.
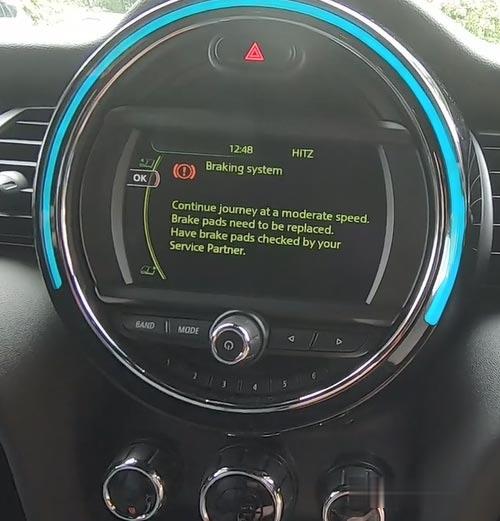
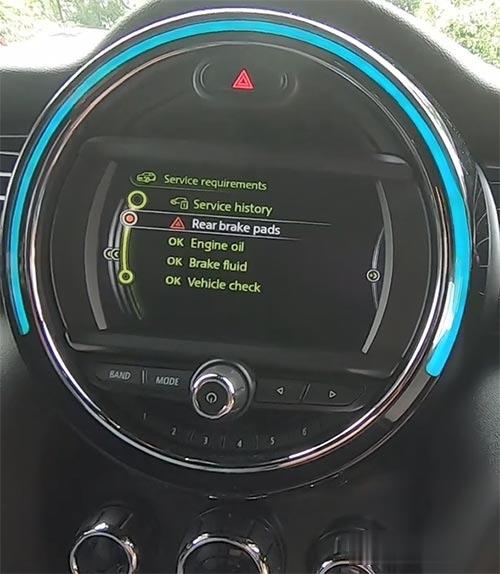
Now use Launch X431 V scan tool to diagnose the fault code firstly.
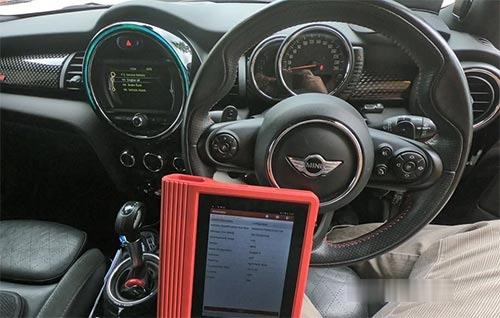
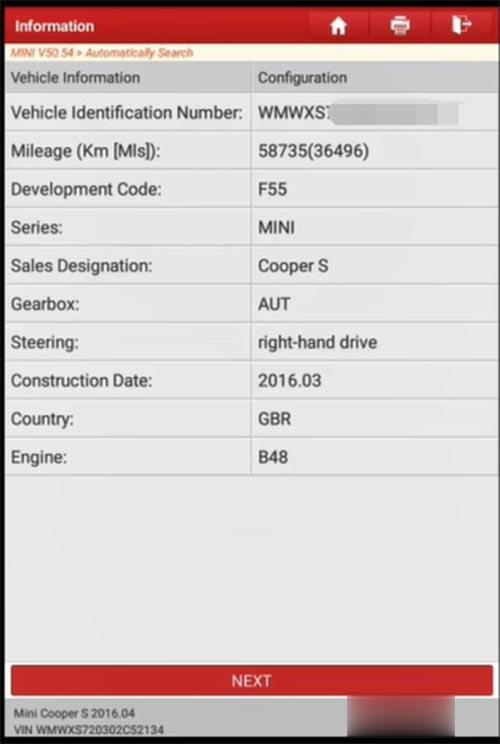
1.Enter X431 PRO menu
2.Select "Local Diagnoseâ€-> "Miniâ€-> "Automatically Searchâ€
3.Detect out the related vehicle info
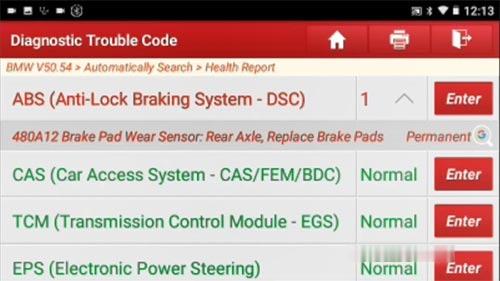
4.Select "Health Report†and read trouble code as below:
ABS (Anti-Lock Braking System-DSC): 1
480A12 Brake Pad Wear Sensor: Rear Axle, Replace Brake Pads Permanent
5.Then go to change a new brake pads
Raise the car on a lift or jacks and jack stands
Remove the wheels
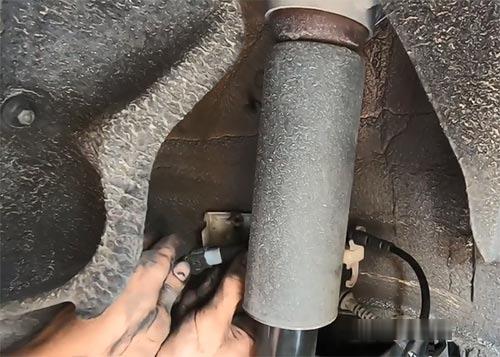
Remove the brake calipers. Brake pad replacement is done in pairs — both front wheels or both rear wheels at the same time, or all four
Remove and check rotors. Resurface or replace as necessary
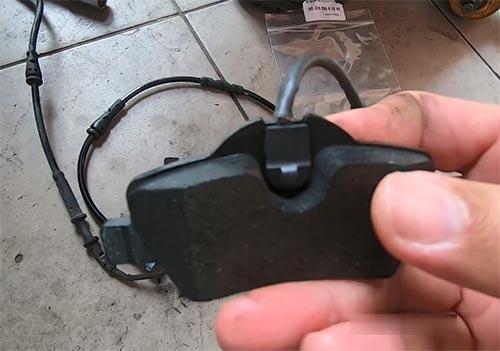
Replace worn brake pads with a new set
Replace rotors and calipers
Replace wheels and torque bolts to specifications
Please kindly notice:
Replacing brake pads on your vehicle is a fairly straightforward procedure, and can be done at home. But because brakes are essential safety equipment, we strongly recommend having a certified repair shop perform this job.
6.Then clear the maintenance warning with X431 V 8 inch tablet
7.Select "Resetâ€-> "Brake Resetâ€-> "MINIâ€
8.Switch on ignition
9.Select "Automatic Scanâ€-> "Brake Maintenanceâ€
Note: If the availability of Brake Pad Being Read Approaches 0%. Replace front and rear brake cable (front and rear brake pad sensors). Otherwise, service may fail.
10.Read out the VIN, mode, car year and system No.
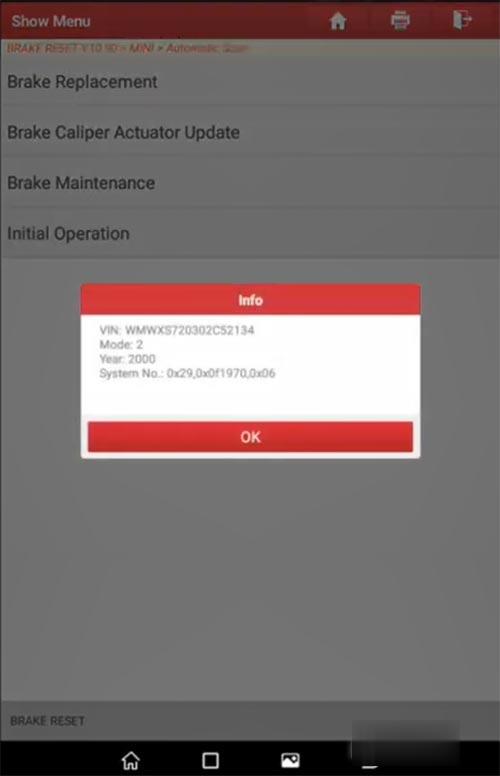
11.Select "Rear Brakeâ€-> "Software Resetâ€
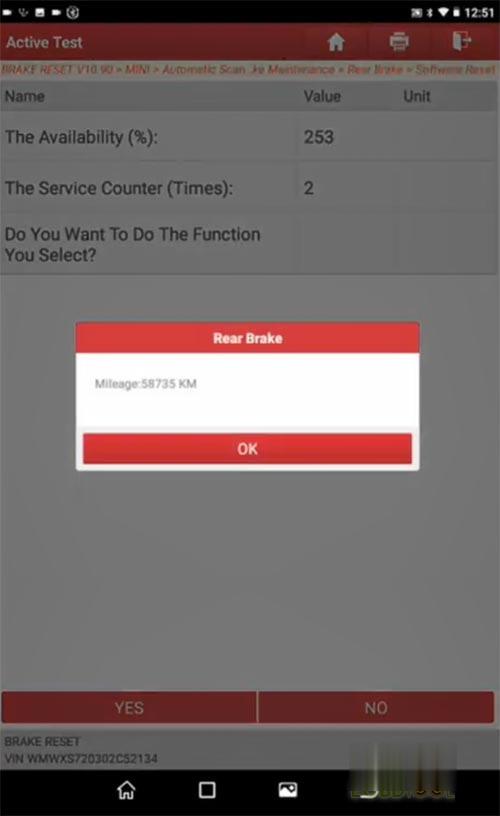
12.Read out the rear brake mileage
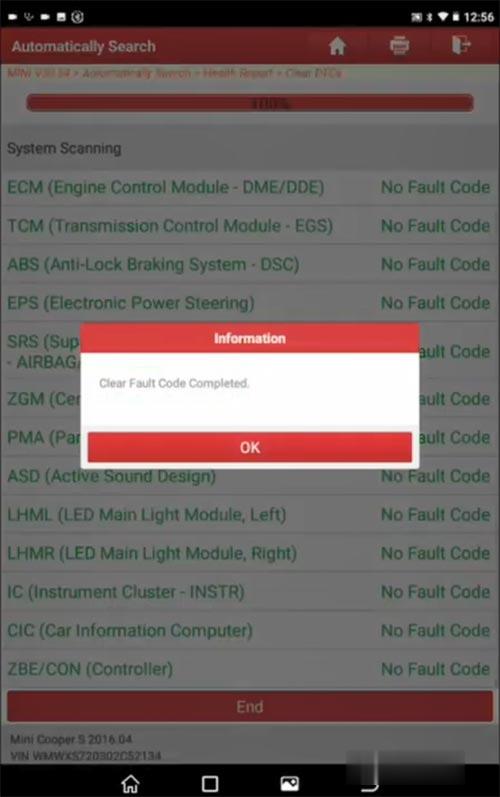
13.Clear all fault codes
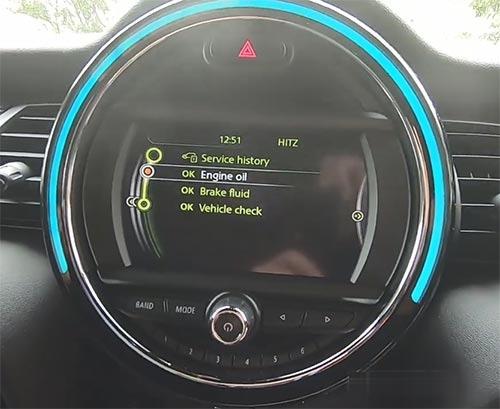
14.All warnings gone
Where to get Launch X431 V (X431 PRO) 8inch Tablet?
OBD2TOOLprovides it at good price with high quality.
Posted by: youobd2 at
08:59 AM
| Comments (1)
| Add Comment
Post contains 587 words, total size 8 kb.
April 08, 2021
New Cummins engine diagnostic tool Cummins INLINE 7 Data Link Adapter has a faster processor, more robust algorithms, larger memory buffers and more sophisticated filtering than previous models while simultaneously accessing multiple vehicle data channels. INLINE 7 supports USB, WiFi and Bluetooth technologies in a single device. INLINE 7 communicates with your PC and is designed for future capability with mobile products.

1.Hardware: Cummins INLINE 7 Data Link Adapter
2.Software: Cummins Insite 8.3
3.Update Method: update by CDs
4.Multi-language: English(united states)/ Chinese(simplified)/ Danish/ Dutch/ Finnish/ French/ German/ Italian/ Japanese/ Korean/ Norwegian/ Portuguese/ Russian/ Spanish/ Swedish/ Turkish
5.Suggest Operating System: Win7 32 Bit System
6.Connection Method: WIFI/ Bluetooth/ USB
The Heavy Duty Scanner Cummins INLINE 7 data link adapter communicates with your PC using a Universal Serial Bus (USB) through a standard USB connector as well as through WiFi or Bluetooth. INLINE 7 is fully compliant with the Technology and Maintenance Council’s RP1210 standard and supports three simultaneous CAN connections and offers baud rates of 250k, 500k and 1 megabaud.
Cummins INLINE 7 Supports several other protocols:
such as J1708, J1587, ISO 15765, ISO 9141 (K and L line)
The Cummins INLINE 7 DataLink Adapter is designed to function with a wide array of Cummins, OEM and third-party service and information tools, including the following:
Cummins INSITE
Cummins PowerSpec
Detroit Diesel Diagnostic Link
CAT Electronic Technician (On-Highway only)
Navistar® -ServiceMaxx Fleet Pro
Volvo PTT
VCAD Elite Mack/Volvo
V-Mac Service Tools
Allison DOC® For PC Service Tool
Allison DOC® for Fleets (1000/2000/3000/4000)
Eaton ServiceRanger
Bendix ACom
WABCO Toolbox
Freightliner ServiceLink
International DLB, Intune, and IPC v2.02
International ServiceMaxx
PF-Diagnosis
Cummins INLINE 7 Package List:
1pc x Cummins INLINE 7 Data Link Adapter
1pc x DB26Pln-OBDllCable
1pc x USBCable
1pc x DB26/2Pin/3PinCable
1pc x DB26/9PinDataLinkCable
1pc x 3PinConnector
1pc x 3PinConnector
1pc x Software
and many more!
Posted by: youobd2 at
07:22 AM
| Comments (1)
| Add Comment
Post contains 315 words, total size 3 kb.
March 28, 2021
1. Will my Land Rover / Jaguar work with the JLR SDD Software?
As long as your Jaguar is between 1997 and 2019 and your Land Rover is between 2005-2019, our kits will work. (OBD2 port must be present.) Note for newer models its required to have the higher version for the software to work best. check features page for years and models supported for each kit.
2. i Have an old Model Jaguar From 1995 to 2006. Can these kits work for me ?
Older models of Jaguar are Supported in V131 or Lower Versions. IDS is the software used for these models.
The V131 Software has both the SDD & IDS.
To use IDS for the older models its required to type in the VIN number and then Identify to bring up the pop up window that loads IDS.
For models after 2006 can simply Read the Vin without entering manually to use the SDD Software as support of IDS ends in 2005 and they switched over the the SDD.
3. Does the Kit support Flashing / Programming Modules ?
Yes Programming Functions are supported in our Kits.
You can Flash update Modules with newer firmwares or Program Virgin Parts to match the Car Vin
4. Is Key and KVM Programming Supported
Yes is Supported in Some Packages we offer
Posted by: youobd2 at
09:21 AM
| Comments (1)
| Add Comment
Post contains 232 words, total size 1 kb.
March 12, 2021
| Item | X431 V 8 inch | Launch X431 V+ | Launch X431 proS mini |
| Item No. | SP183-D | SP184 | SP291-B |
| OS | Android 7.1 | Android 7.1 | Android 5.1 |
| SIZE | 8-inch LCD touchscreen
1280*720 |
10.1-inch LCD touchscreen
1280*800 |
6.9 inch touchscreen 1280 x 720 |
| CPU | Quad-core 1.4GHz | quad-core 1.4 GHz | Quad-core 1.3 GHz |
| RAM | 2 GB | 2GB | 2GB |
| Capacity(internal/ SD card) | 16GB (expandable by up to 32GB) | 16GB (expandable by up to 32GB) | 16GB |
| Battery | 4850mh rechargeable polymer
lithium battery |
7000 mAh | 3.7V/3000mh rechargeable
polymer lithium battery |
| Pixels | No Front camera and rear-facing 5 MP
camera with 1080p HD video recording |
No Front camera/ Back 5mp | Front-facing 2MP camera +
rear-facing 5MP camera |
| Wireless Communication | Wifi & Bluetooth | Wifi & Bluetooth | Wifi & Bluetooth |
| Extensive Coverage | 115+ | 127+ | 115+ |
| Multi-Language | √ | √ | √ |
| Software Upgdate | 2 Years free update online | 2 Years free update online | 2 Years free update online |
| ECU Coding | √ | √ | √ |
| 10 OBD2 Test Mode | √ | √ | √ |
| Full System Diagnose | √ | √ | √ |
| Actuaction Test | √ | √ | √ |
| Sepcial Service Function | 11 | 11 | 11 |
Posted by: youobd2 at
10:01 AM
| Comments (1)
| Add Comment
Post contains 184 words, total size 3 kb.
March 04, 2021
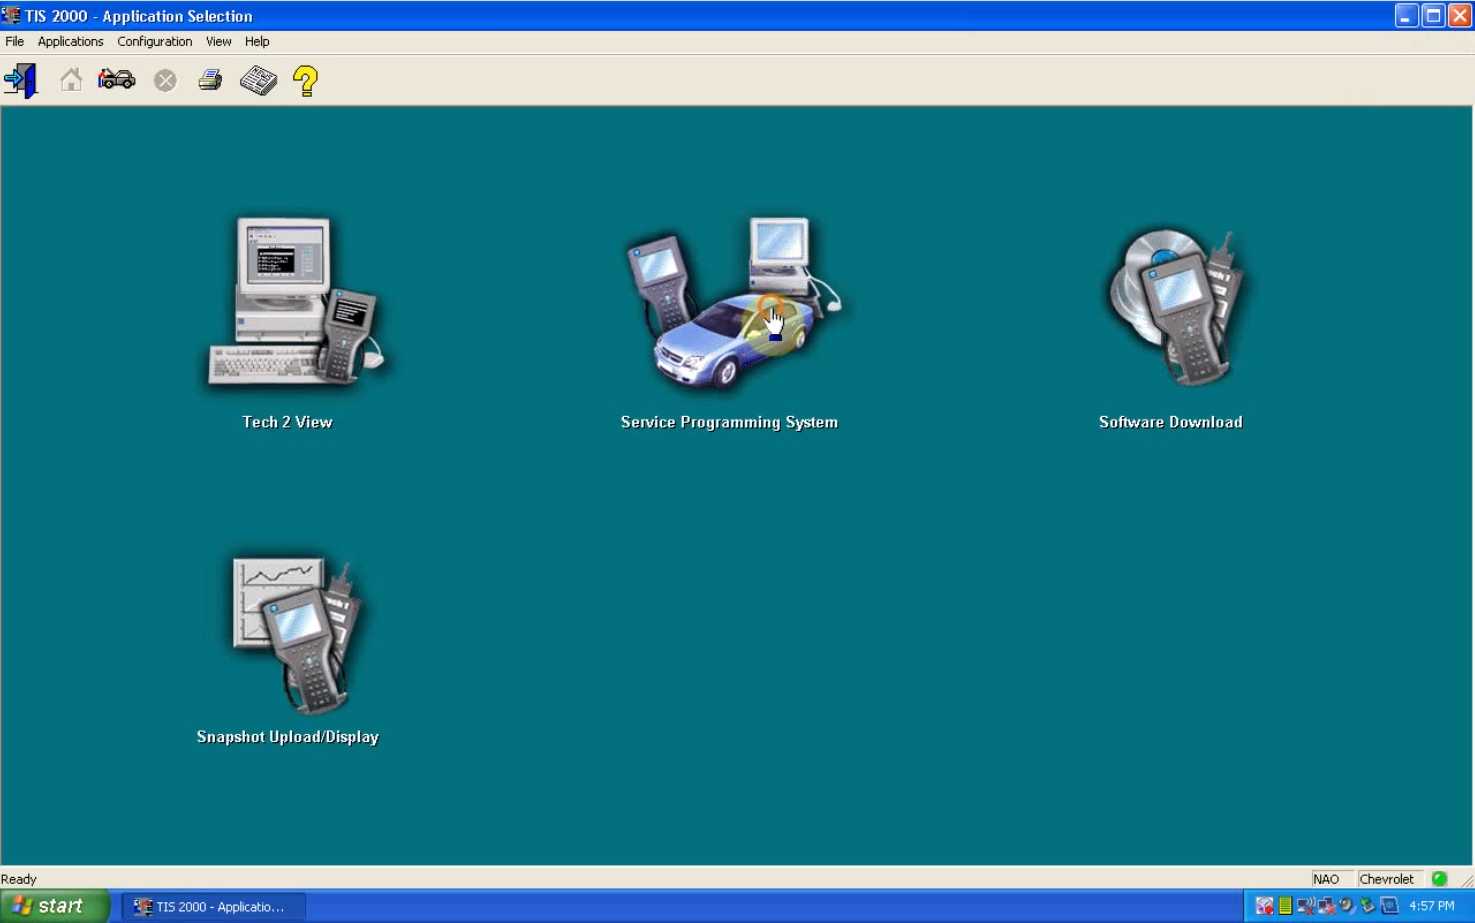
Part I of Two Parts…
Okay… It has been a while since I’ve been able to continue working on my 2000 Chevrolet Silverado 5.3l Engine Performance Build and subsequent use of HP Tuners on a Duplicate PCM because my Dedicated TIS2000 Laptop locked up at the point where the physical "HWK†(Hard Ware Key) kept failing. Consequently that problem stopped my creation of a GM OEM PCM Clone …Dead In Its Tracks.
I discovered a physical problem was present on the Old Dell Precision M65 Motherboard In-Dwelling USB that caused a communications breakdown between the "Dongle†and the TIS2000 Software. My affection for Dell Workstation Quality Machines prompted some Research on eBay and I located quite a few Used or "Parts Only†Dell Precision M65 Machines… generally meaning that they ALL Work… BUT are in need of New Memory Sticks, a Hard Drive and/or a Battery with Charger.
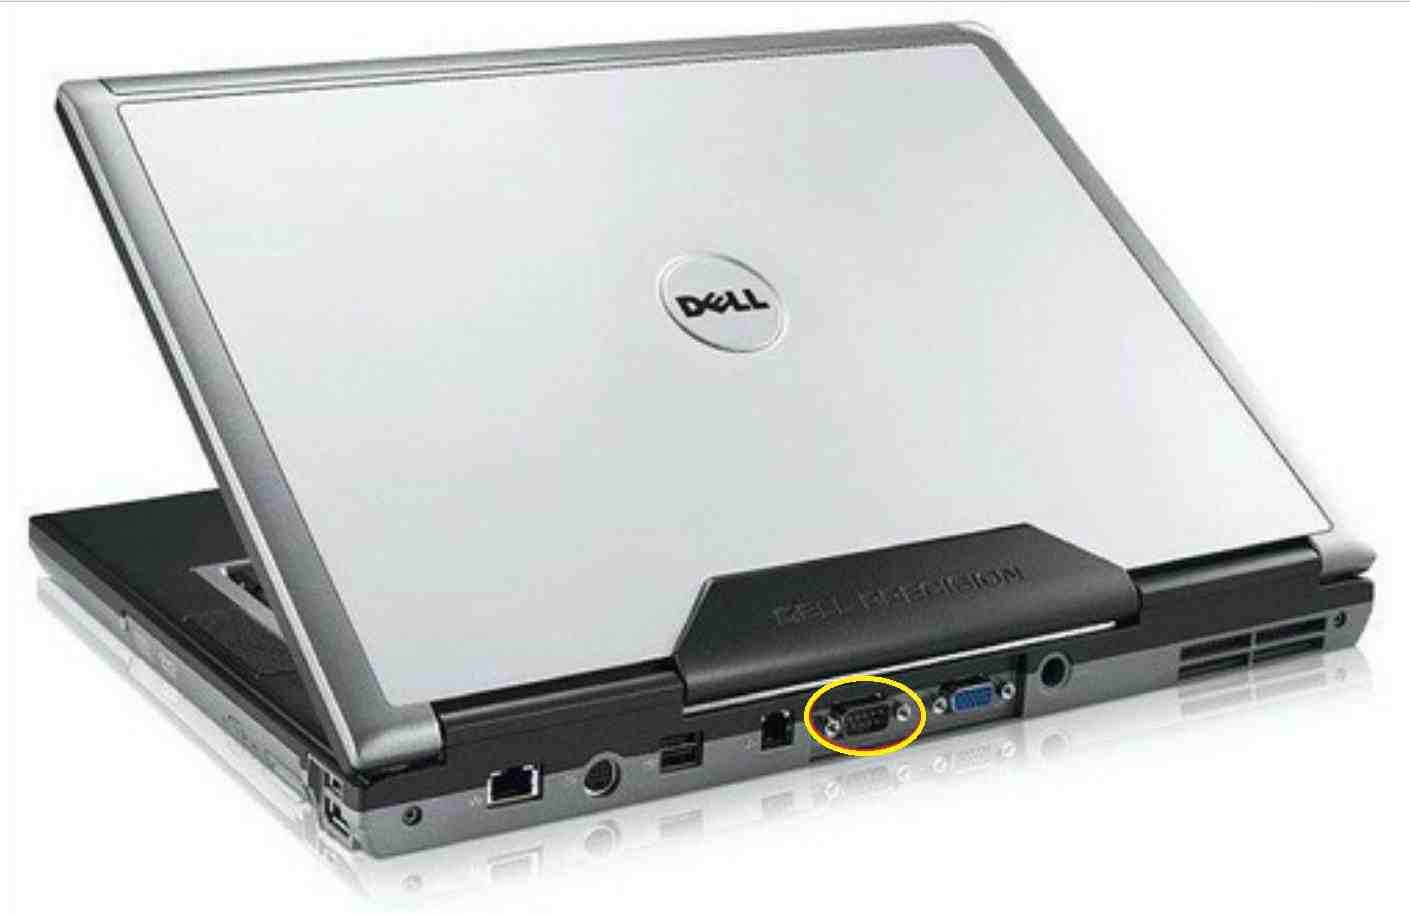
My eBay search disclosed another EXCELLENT Dell Precision M65 Workstation Laptop …for ONLY $30.00 & $15.00 S&H…. So I took it to be a Very Good Deal. The critical component required when using any Legacy Laptop Computer destined for becoming a Dedicated TIS2000 Machine is having a Working (9) Pin DIN Serial Interface for Bi-Directional Communications between the "GYMKO†RS-232 Port on theGM Tech 2 Scannerand the PCM for both "On The Bench†and "Inside the GM SUVs and Trucksâ€. The Yellow Circle surrounding the Serial-COM Port DB9 Connector shown on the Back Panel of the Dell Precision M65 laptop illustrated below shows that THIS machine has a Built-In COM Port that WILL work whereas Modern Computers DO NOT sport this Feature:
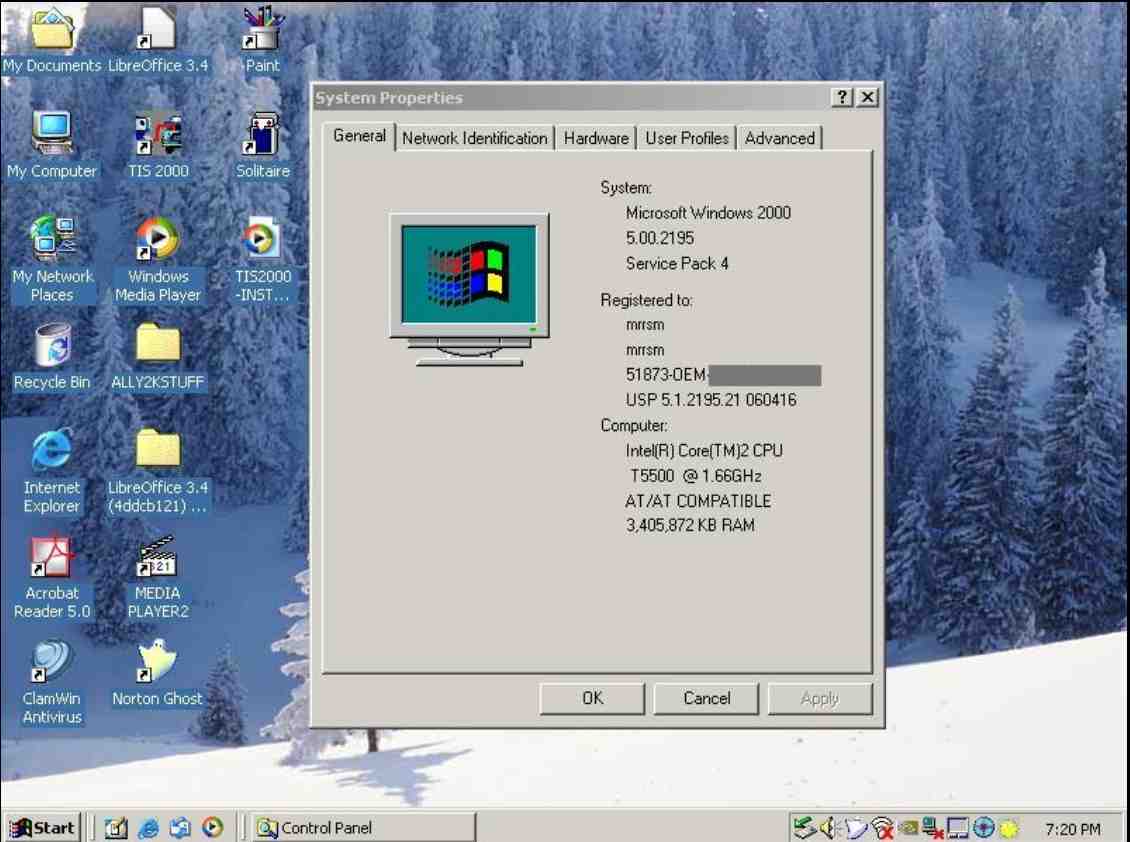
I note here that regardless of your choice of Windows Operating Systems; Windows 95, 98 or XP in 32 Bit Versions alternative to using the Windows 2000 Professional Operating System, the Dell M65 Laptops that can still be purchased VERY CHEAPLY on eBay will STILL work with the SAME Installation of the TIS2000 Software:

If you ‘Pull The Trigger’ on the modest expense of getting one of these machines… It will become very important to visit Dell.com right away and Download the Latest BIOS and ALL Additional System Drivers for the Dell Precision M65 Workstation Computer. Either Create 1.44 MB Installation Diskettes, or use the more convenient USB Thumb Drive or Burn them onto a CD-DVD for OS Post-Installation Updates. Before buying ANY Legacy Laptop, be SURE that you can easily access the Legacy Windows and Systems Drivers FIRST or those Machines will NOT work properly.
After settling on the TIS2000 Dedicated Laptop Hardware, I next turned my attention on eBay towards finding a Valid Installation CD-DVD for the Windows 2000 Professional Operating System (Windows NT GUI Based OS) that DEFINITELY would arrive with a Valid COA Sticker inside of the sealed package (Certificate Of Authenticity).
This is a precaution that anyone interested in following up on this happy experience of mine will come to appreciate, as there will come a point during the Windows Y2K Installation where the Prompts will ask for the Multi-Alpha-Numeric Software Key to be entered. You will NOT be able to proceed further without it…
If you make your Software Package Buy via eBay… be certain that the Seller includes at least a partial image displaying the actual presence of the COA Sticker BEFORE you commit to making any purchase.
I found one such item offered at a reasonable price and after performing my "COA Sticker Due Diligence†I purchased the Package that arrived around (3) Weeks later… Perhaps a Bit Long In The Tooth for S&H… but it arrived Shrink-Wrapped, Fully Intact and it DID include the Valid COA Sticker.
Prior to installing the Windows 2000 Professional OS Software, I needed to do the following things that were absolutely painless as upgrades to improve the performance of the Basic Dell Machine I had purchased:
(1) Swapped out the Low Resolution LED Screen for the Highest Quality and Resolution Screen available. I found the exact one on ebay for $35.00 and the R&R on Dell Workstation Quality Machines is always a breeze as it took less than (5) Five Minutes to perform this R&R. The Higher Definition LED Screen works splendidly and is Much Brighter at Higher Levels.
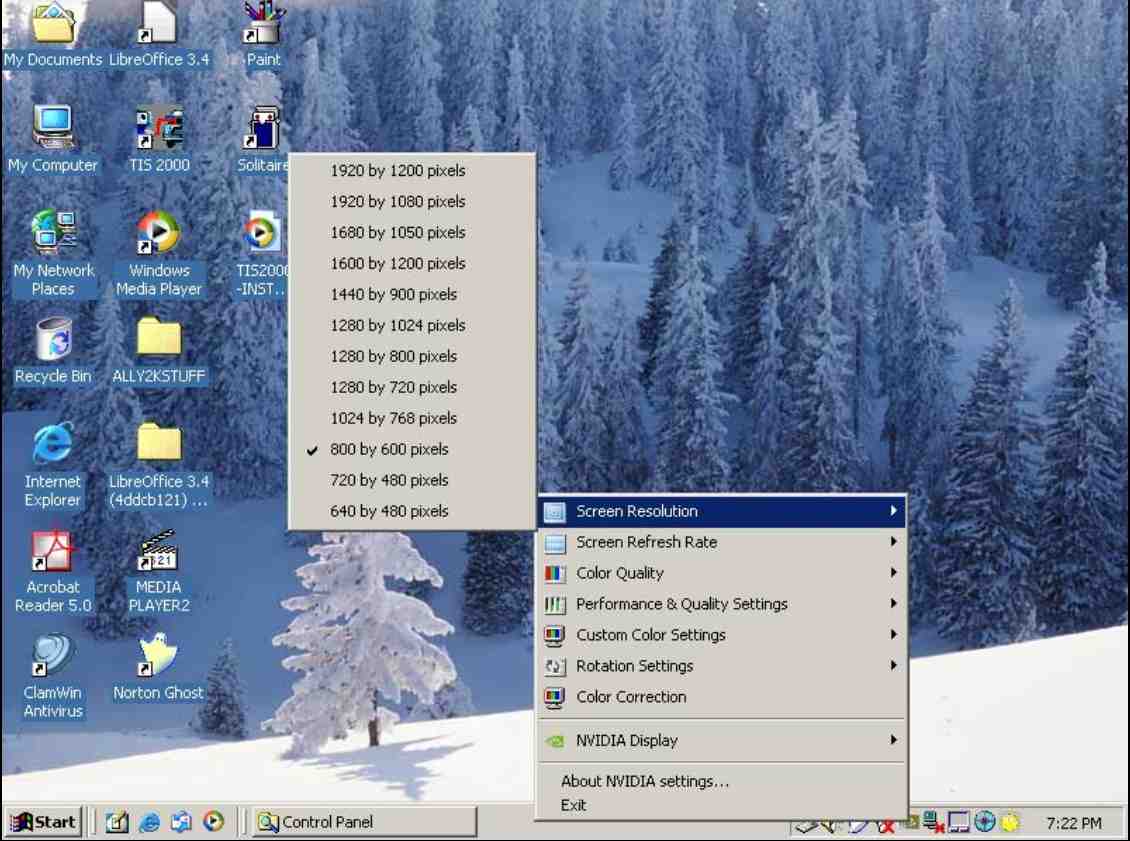
(2) Swapped out-In the One Gig Stick of Low Speed RAM for two (2) Two Gig Sticks of Higher Speed RAM, These were available on Amazon via two different Vendors for around $12.00 per Stick… bumping the System RAM up to (4) Four Gigs…which is the MAX RAM addressable when using the Windows 2000 Professional Operating System.
(3) Install a Western Digital "BLACK†500 Gigabyte Hard Drive running at 7,200 RPM for $35.00 via Amazon.
(4) Purchased the "Acronis Disk Director Version 12†Bootable DVD Software in order to prepare the New Hard Drive for the Windows 2000 Installation. This may seem like "Over-Killâ€â€¦but I wanted to make DAMNED SURE that at its most Basic Level… THIS Hard Drive would have NO issues whatsoever once I Partitioned and Formatted the HD with the NTFS File System.
(5) Purchased an Early Version of Norton "GHOST†2003 for use in Cloning the Post SW Install Completed New Hard Drive on an Identical Western Digital "BLACK†500 Gigabyte Hard Drive …just to be certain of having a Race Ready Back Up Drive on the shelf… should Worse ever come to Worse.
(6) Remove and Validate the Life and Durability of the Dell M65 Factory Battery to determine whether or not I would need to replace it right away… You cannot use an Unreliable Battery…either inside of ANY laptop or inside of the GM Vehicle and expect Good Results when interfacing all of these items using the TIS2000 SPS to Tech 2 or PASS-THRU Procedures. The Battery that came with this inexpensive Dell Box is in EXCELLENT condition.
(7) Install the Open Source Anti-Virus Software called CLAMAV aka "CLAMWIN†AV Software and subsequently, the system passed as "Clean As A Whistle†with Flying Colors… just to make certain that NO Virii(Viruses) or Root-Kits managed to Sneak in via the USB Thumb Drive Back Door Transfer of all of this stuff…
( Purchased the LATEST Three Disk Set of the TIS2000 Software via AliExpress.com. This proved out to be a VERY LUCKY move on my part because by STARTING FRESH, I discovered that the (3) Three Disk Set contained a NEW Installation Video that SHOWED A BETTER WAY TO INSTALL THE "DONGLE CRACK†and have it WORK PROPERLY after only One GO!
(9) Purchased Two Add-On Hard Drive Caddies that can work through the Removable DVD Slot when Cloning the Back Up Drive(s).
(10) Purchased a Pair of System Hard Drive Cover-caddy Combos (Under $5.00 a Piece) to replace the one missing from the Dell Box.


Part II of Two Parts…
After conducting all of this "Hardware House-Keeping†… I next turned my attention to copying the Official Complex Alpha-Numeric COA Validation Number onto a CD Case Plain Paper Insert against the advent of either losing or damaging the New COA Sticker if future re-installs of the Windows Y2K Pro OS becomes necessary.
The other reason for doing so is just as important because I wrote that code down in LARGE TEXT AND NUMBERS so that when called for during the Installation… I would be able to easily transpose the Numbers and Letters CORRECTLY instead of trying to read the Microscopic Microsoft Validation Code off of that Damned COA Sticker.
Next I went through what can be described as the "Most Desirable Outcome†for a Smooth Installation of the Windows 2000 Professional Operating System… and subsequently, the Machine has been Booting Up and Shutting Down Reliably ever since. But rather than have a simple Bare Bones Installation on this Box… I decided to continue on with installing all of the requisite SP Revisions (ALWAYS INSTALL THESE ONE AT A TIME …AND IN THEIR CORRECT NUMERIC ORDER) for Windows 2000 Pro SP-2, SP-3, SP-4 and I even managed to locate a NON-WINDOWS creation called SP-5.1 Basic Edition which included over 425 "Hot Fixes†and All Security and System Updates… making this just about the most ‘up-to-date’ Windows Y2K Pro Offline Machine …via the Roll-Ups …EVER.
One Final Word for anyone asking "WHY?†Install Windows 2000 Professional instead of relying upon Windows XP Professional SP3? The answers are simple:
(1) I had serious problems trying to use the TIS2000 Software on several different flavors of Windows XP on my Old Dell Precision M65 Laptop.
(2) Windows 2000 Professional is Based upon the VERY STABLE Windows NT Kernel and VERY seldom if ever suffered from any BSODs (Blue Screen Of Death) that Windows 95 and Windows 98 were rife with from so many SYSTEM FREEZES and BOOT FAILURES.
(3) After going through the Entire Creation Process for Building this Dell Precision M65 Workstation Laptop …and after the follow on of having a Smooth Installation of the GM TIS2000 Software… EVERYTHING WORKS PERFECTLY NOW!
(4) I’ve had many years of using many computers in a Professional Environment running the Windows 2000 Professional Operating System and VERY seldom if ever had ANY problems while running demanding applications requiring PERFORMANCE RELIABILITY.
(5) Having STABILITY with Computer Hardware AND Software reduces the Chances of BRICKING any PCMs hooked up to… and dependent upon this Dell M65 Machine and its Operating System and Apps working PERFECTLY.
After that… I installed all of the additional aforementioned Applications. I used MAJORGEEKS.COM and a few other on-line sites that Warehouse Old Windows APPs and Drivers to research and find everything I needed that Microsoft no longer directly supports for this Windows 2000 Pro Legacy OS …and the Dell M65 has been running properly on it ever since.
You will need to Download and Install Earlier MS System APPs like Microsoft .NET FRAME and the Early Versions of DirectX, as well as the last version of the MSI Executable (Micro Soft Installer) as these are necessary for the Windows 2000 Operating System to run correctly AND be able to seemlessly install other Legacy Applications as well.
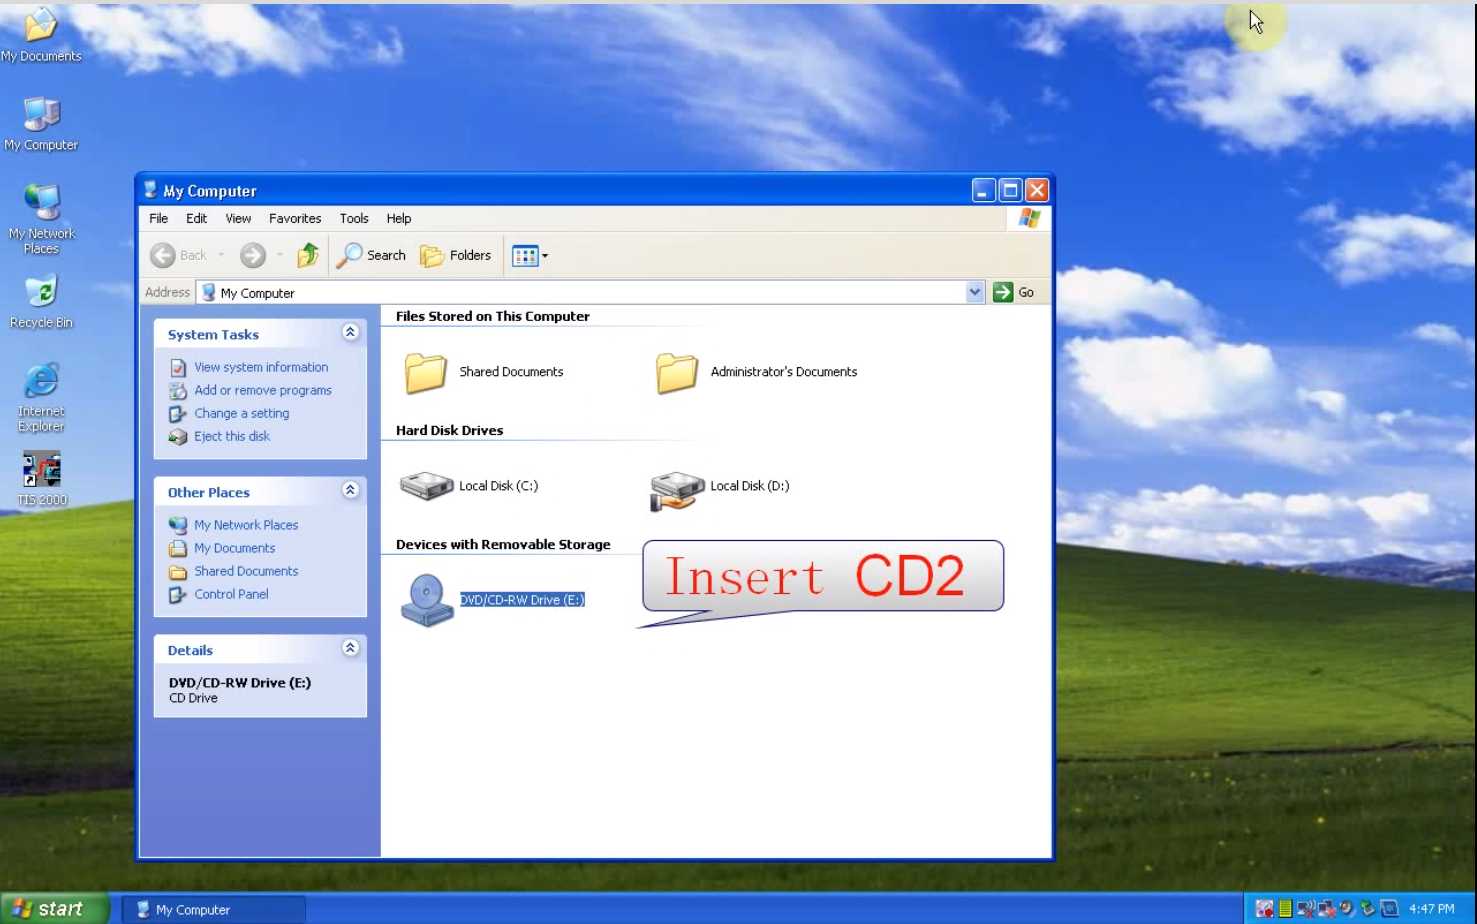
The wait on the arrival of the "Cracked†TIS2000 (3) Disk Set from AliExpress.com was nearly three weeks long; probably due to the on-going Trade Embargo. However… after the (3) Disc Set arrived and I could view the contents of all three DVDs… this is their Manifest:
(1) Disk (1) is a Full Sized DVD containing the Initial Installation Software for the GM TIS2000 System.
(2) Disk (2) is a Full Sized DVD containing an OVER-WRITE the R-Base Files of Disk (1) with NEW GM TIS2000 Software.
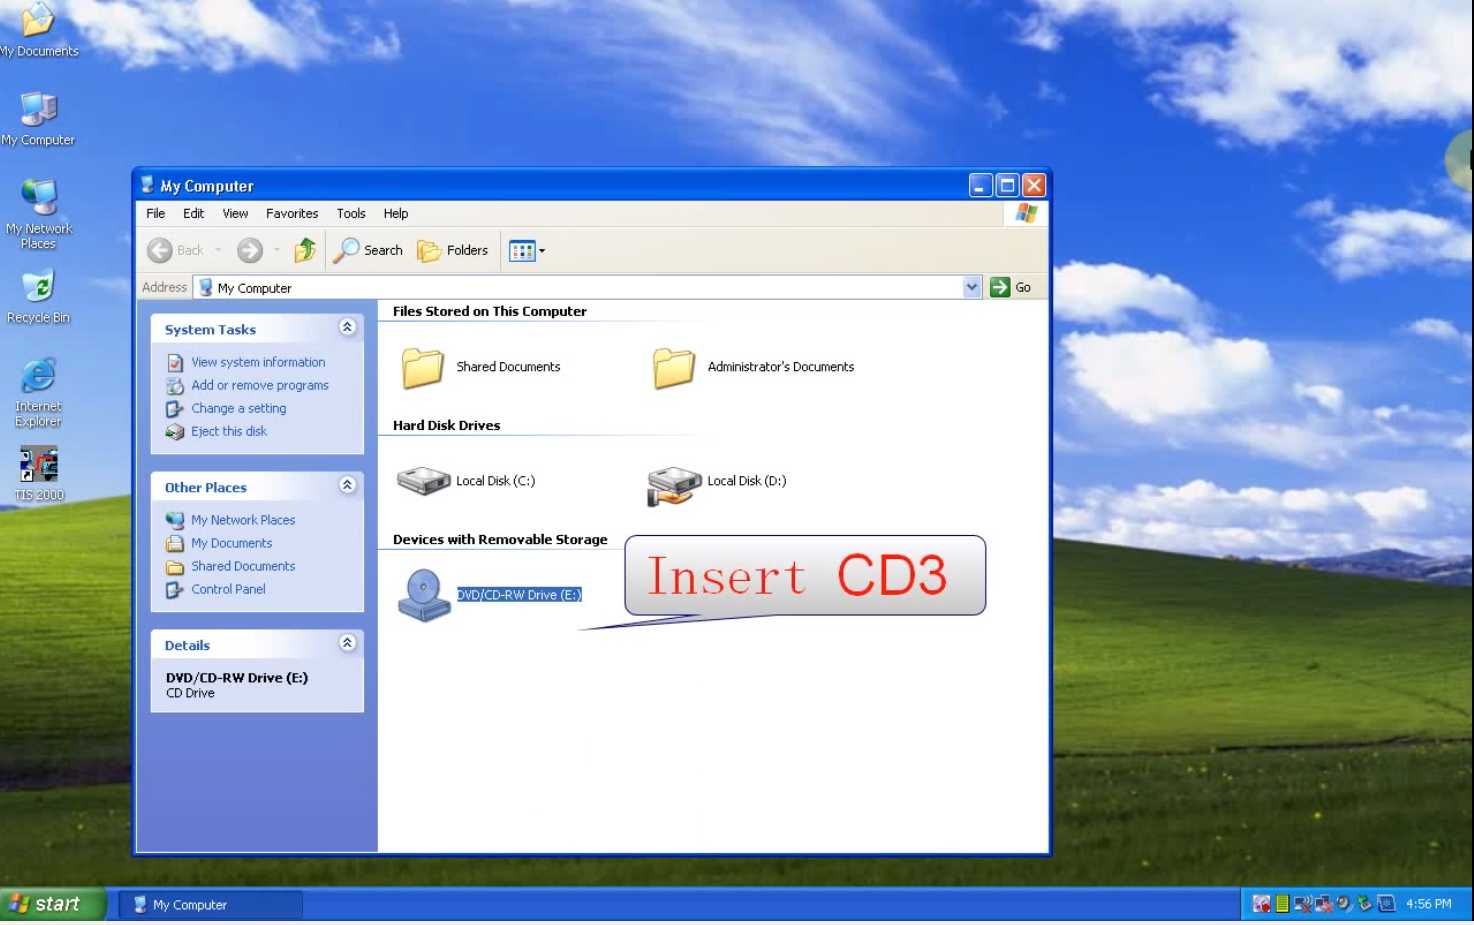
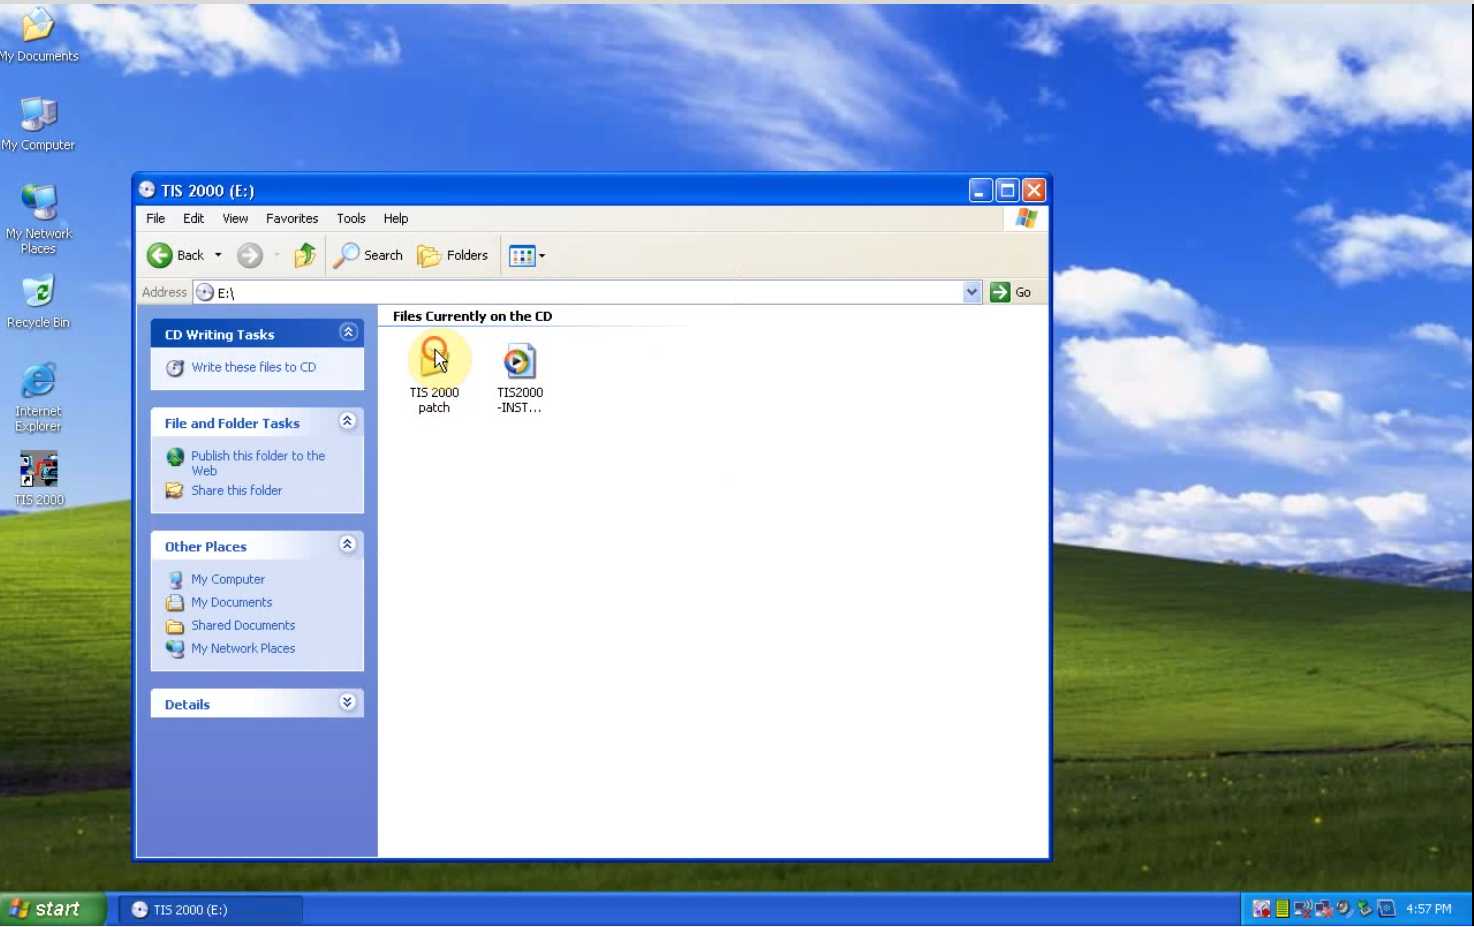
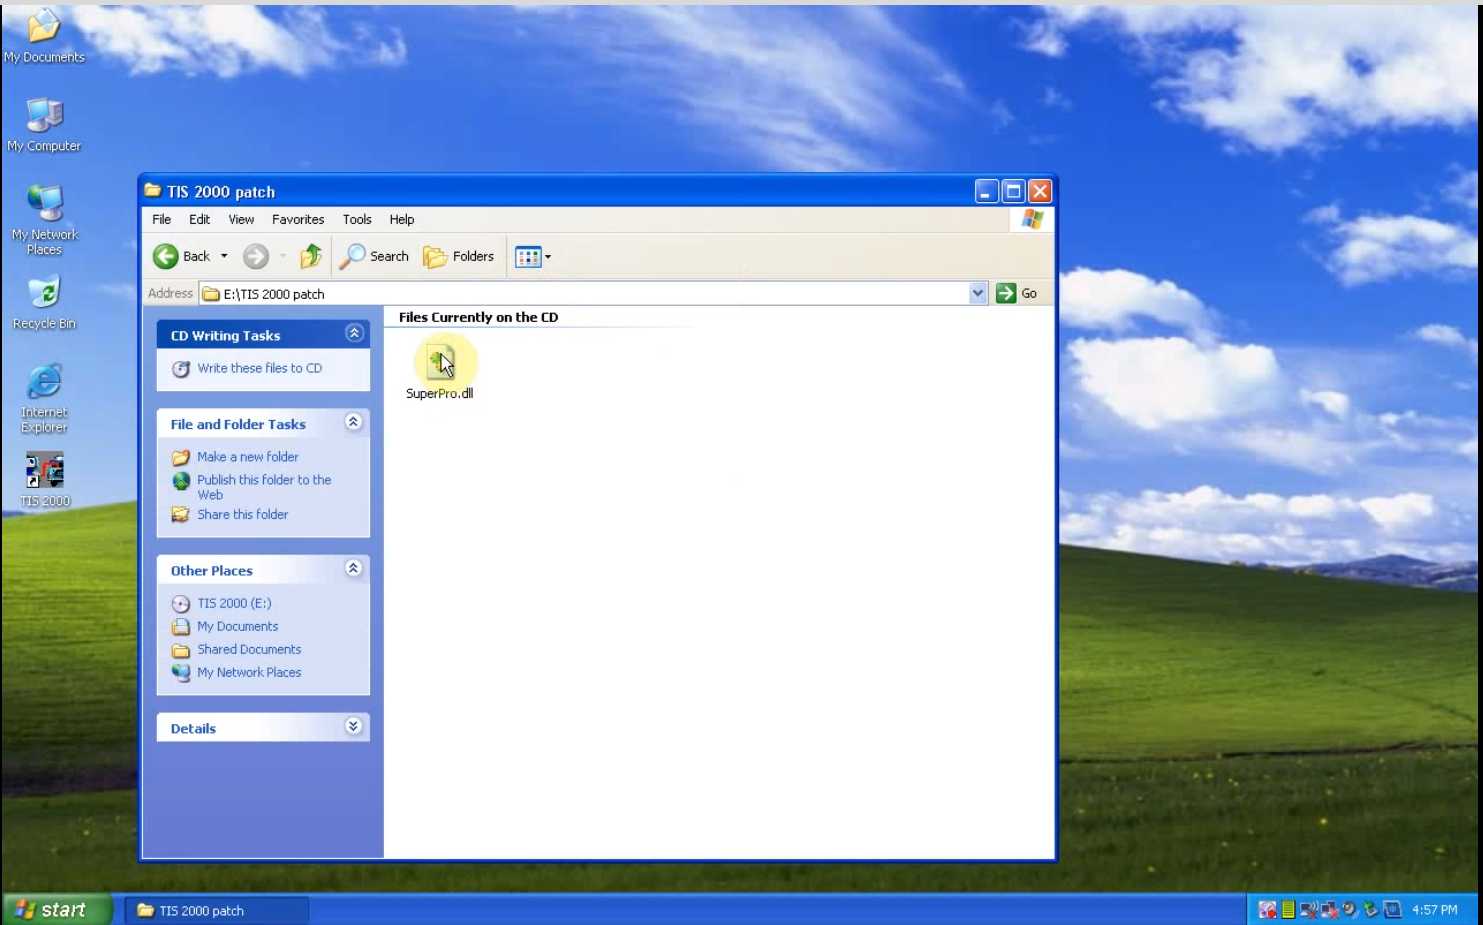
(3) Disc (3) is an ‘LBMF’ (Little, Bitty Emm-Effer) Mini-DVD that contains the "Dongle-Cracked†SuperPro.DLL File … and … a NEW Installation Procedures Video worth its Weight in GOLD!.
I played that Video at a Very Slow Speed in order to identify the Key Points to follow when FINALLY Installing the "Dongle-Cracked†SuperPro.DLL File. I made consecutive Screen Prints that are linked below to compliment what follows. I note that the key differences involved my prior use of the WRONG METHOD for transferring the SuperPro.DLL File, as opposed to what follows to achieve the desired results:
(1) Installing Disc (1) …and then immediately install Disc (2) in their proper sequence.
(2) Swap in Disc (3) and select the "TIS 2000 Patch†Folder.
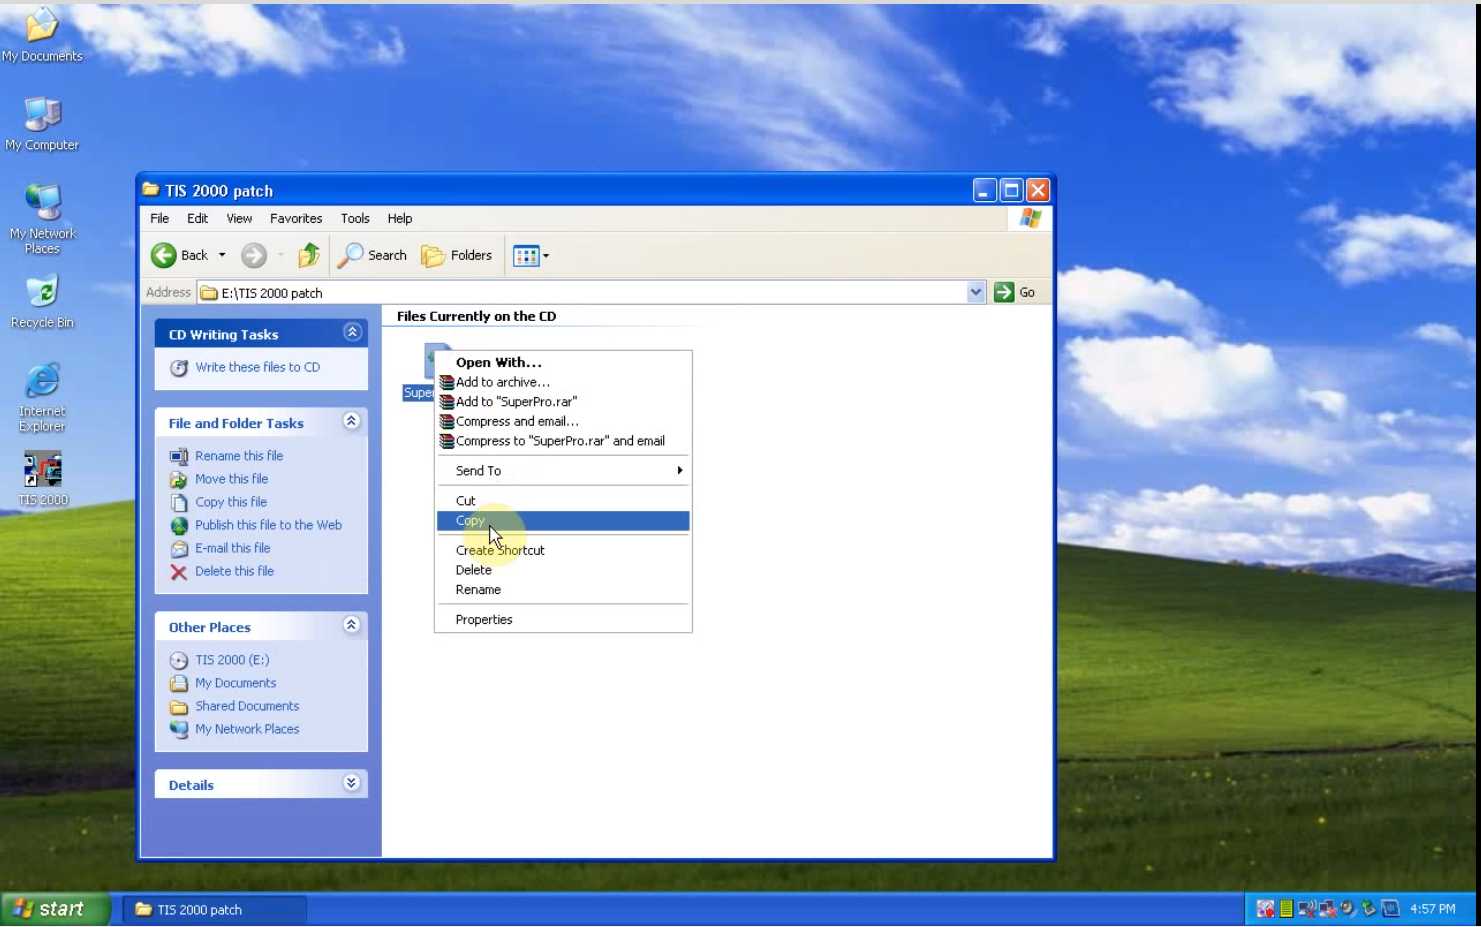
(2) Select and Copy the SuperPro.DLL File into RAM.
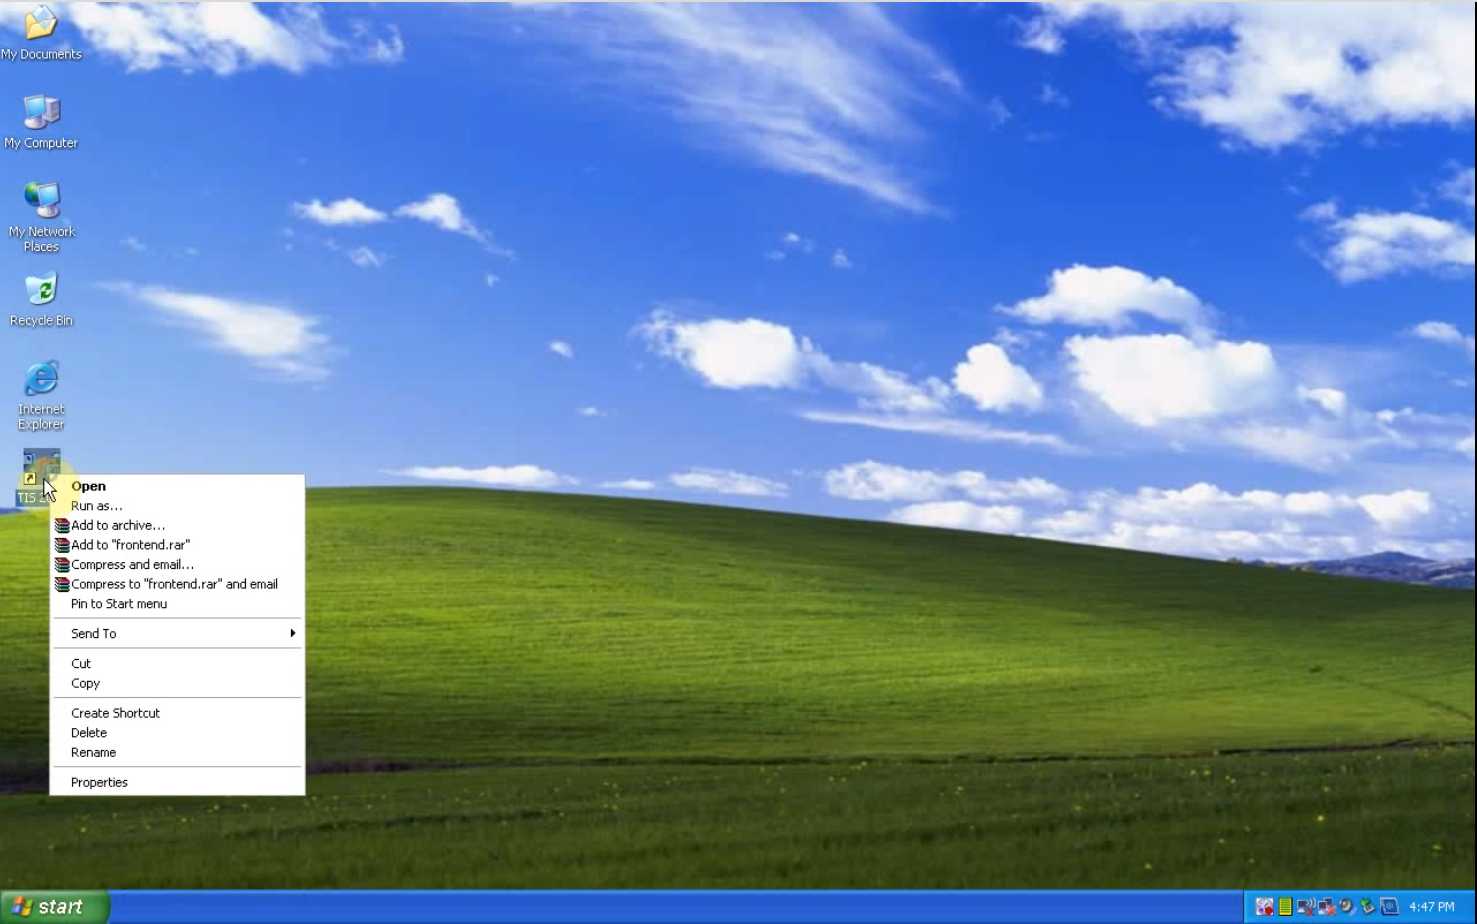
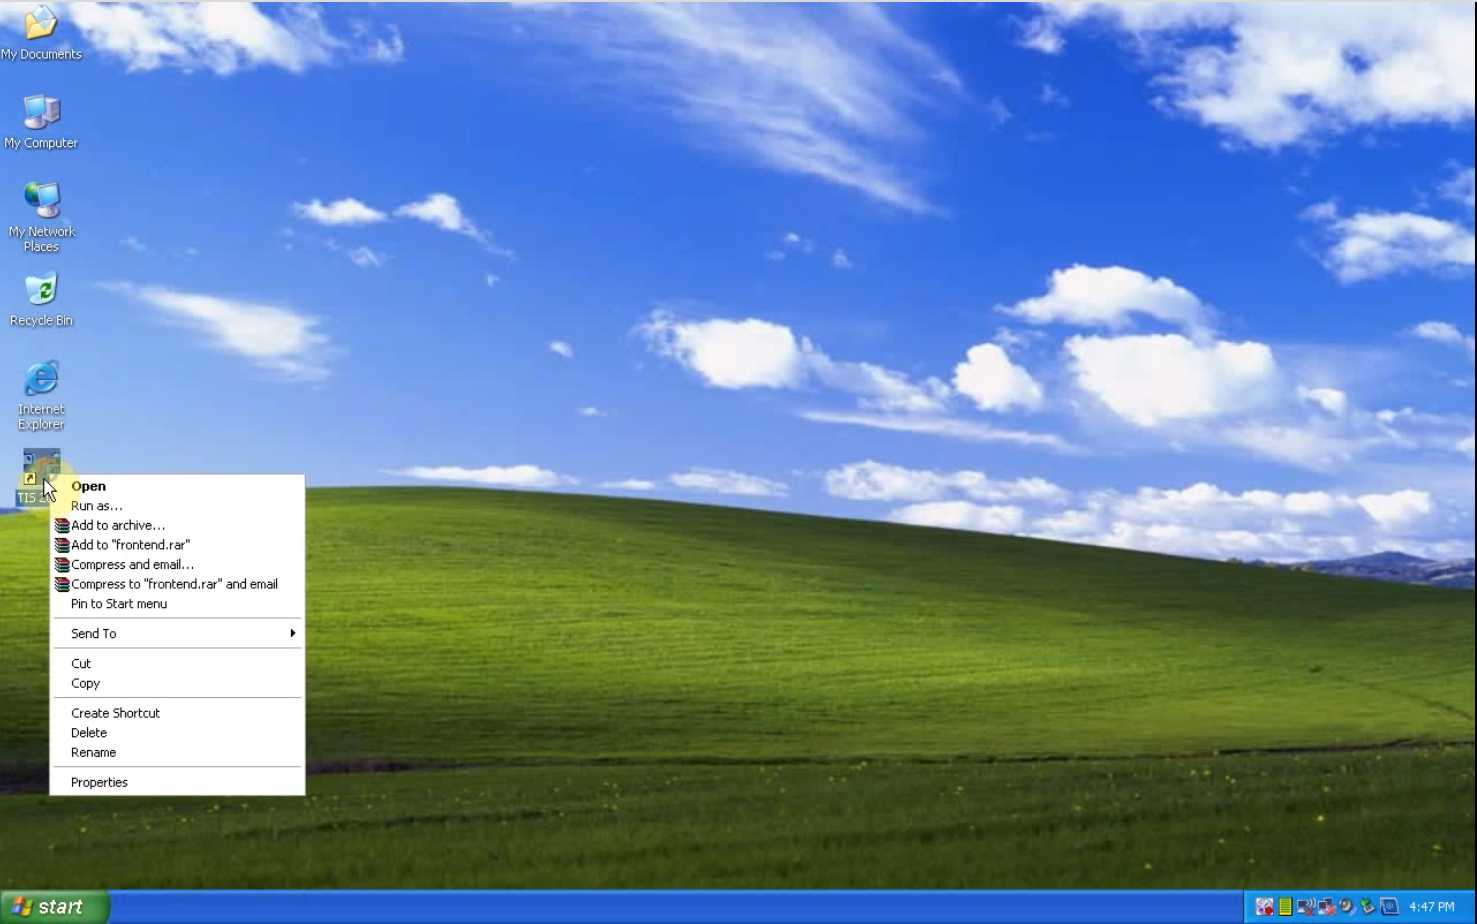
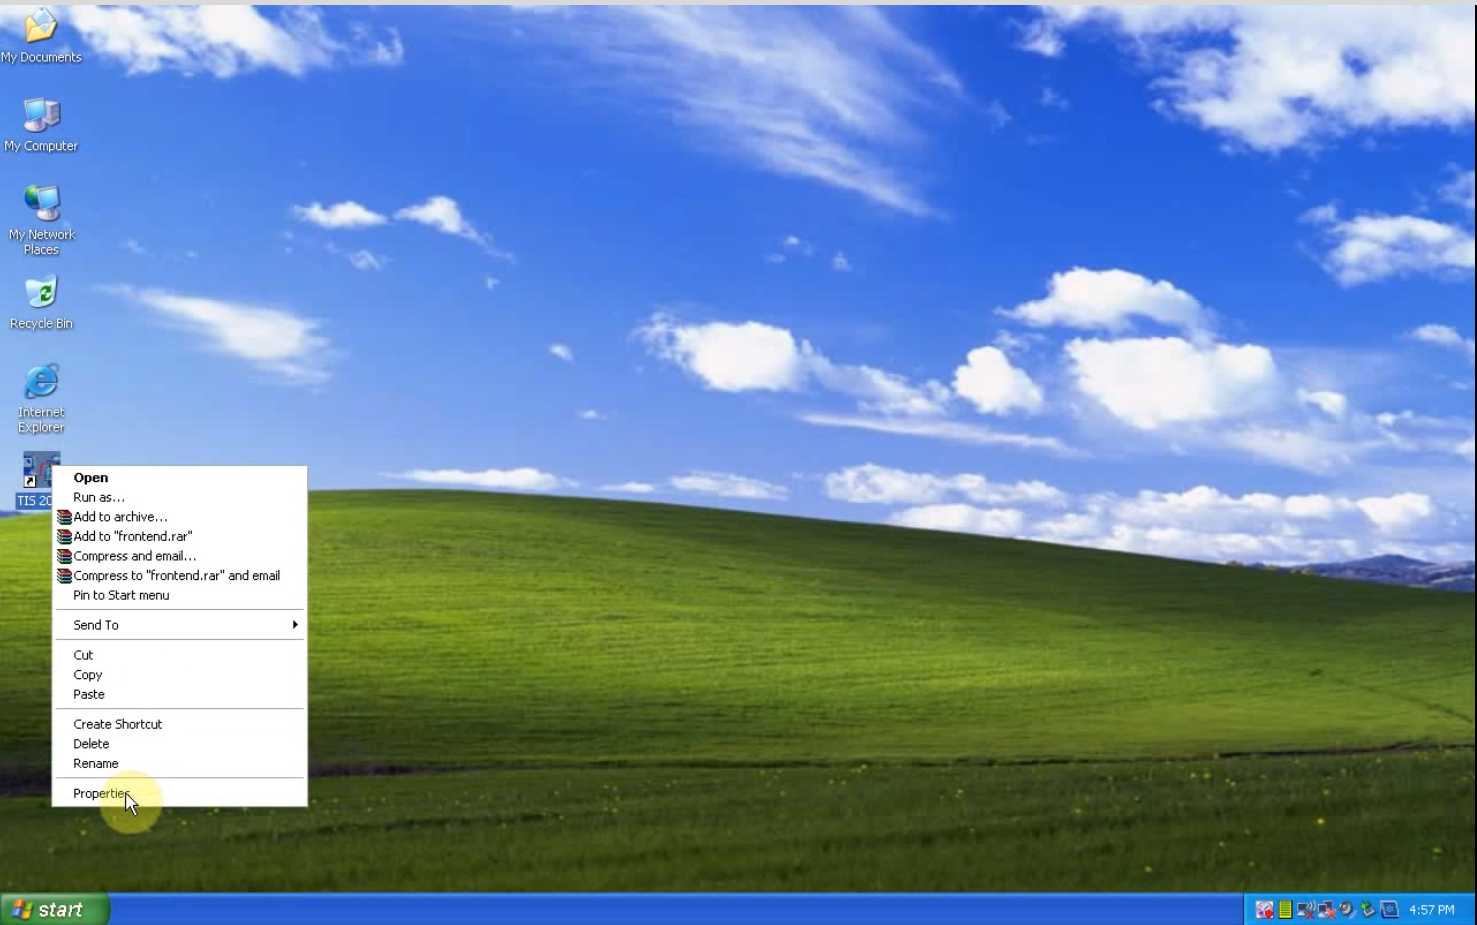
(3) Select the Newly Installed TIS2000 Software Application Desktop ICON.
(4) Right-Click on the TIS2000 ICON.
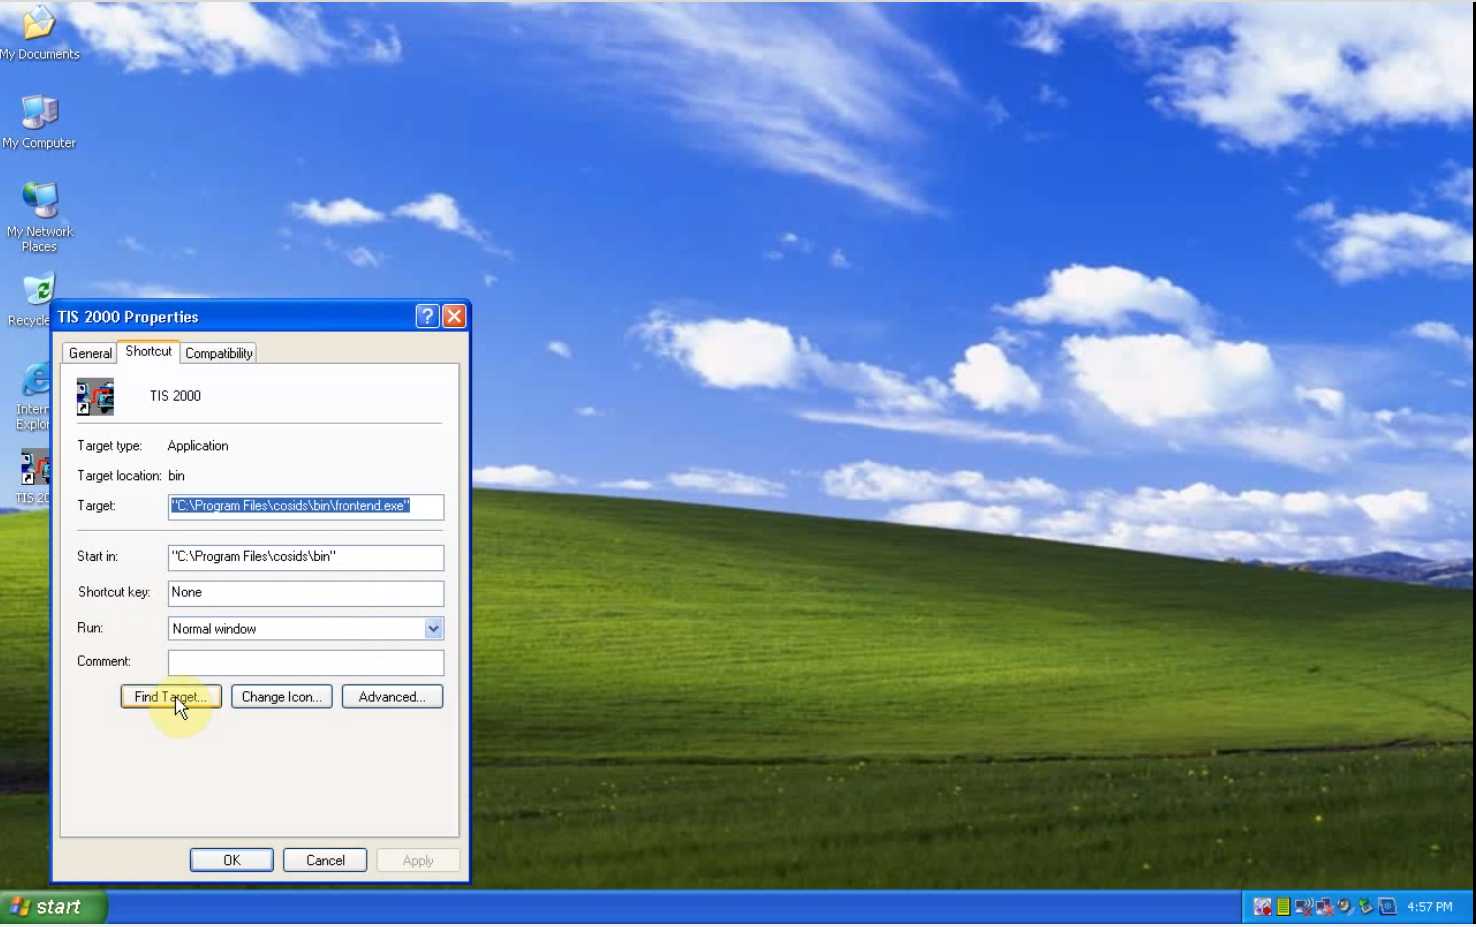
(5) Select and Open the "Properties†Feature at the Bottom.
(6) Select the "Find Target†Button.
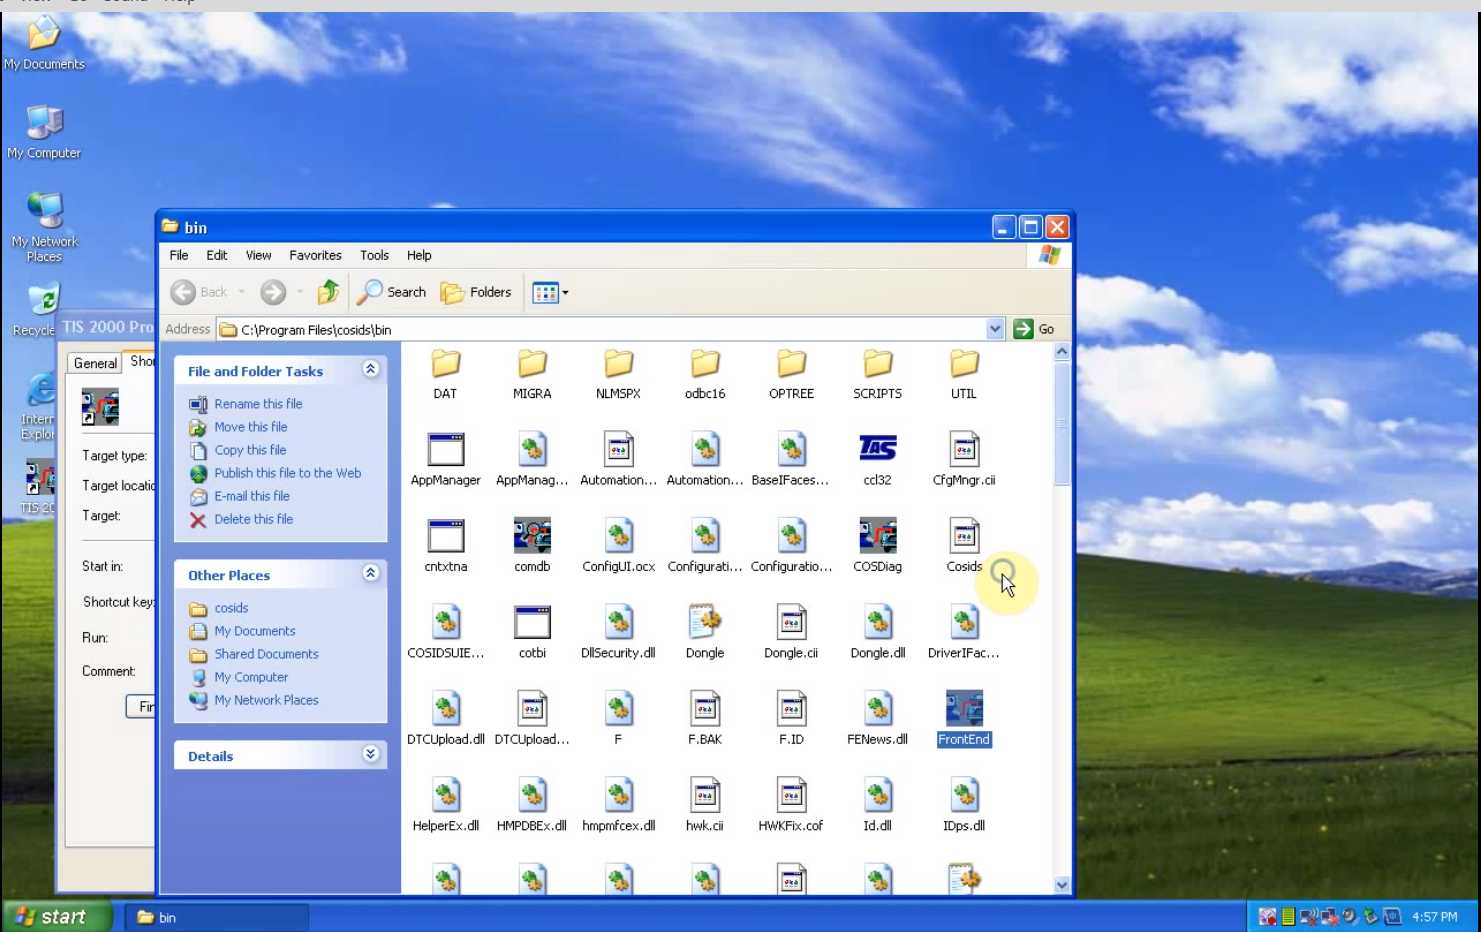
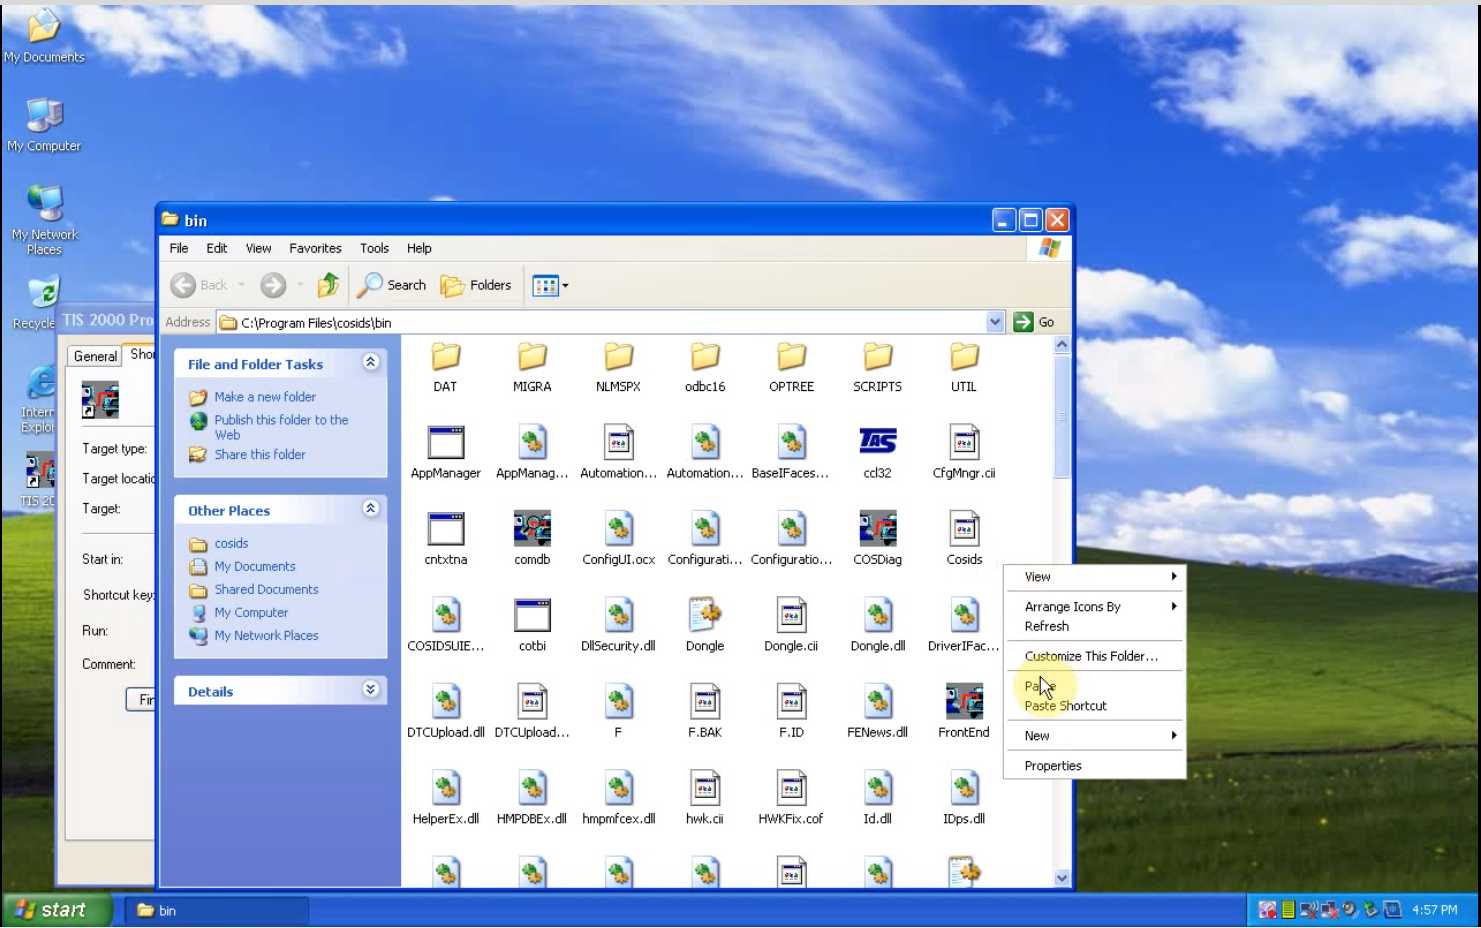
(7) When the COSIDS Sub-Folders Open Up, Right-Click anywhere within an Open Margin along the right side of the Window Pane.
(
Then… Click the "Paste†Option and paste in the NEW SuperPro.DLL File.
(9) When the Option Screen asks Permission to replace the Old SuperPro.DLL File, select "Yesâ€.
(10) Click on the Desktop TIS2000 Icon to Open and Start Running the TIS2000 Program.
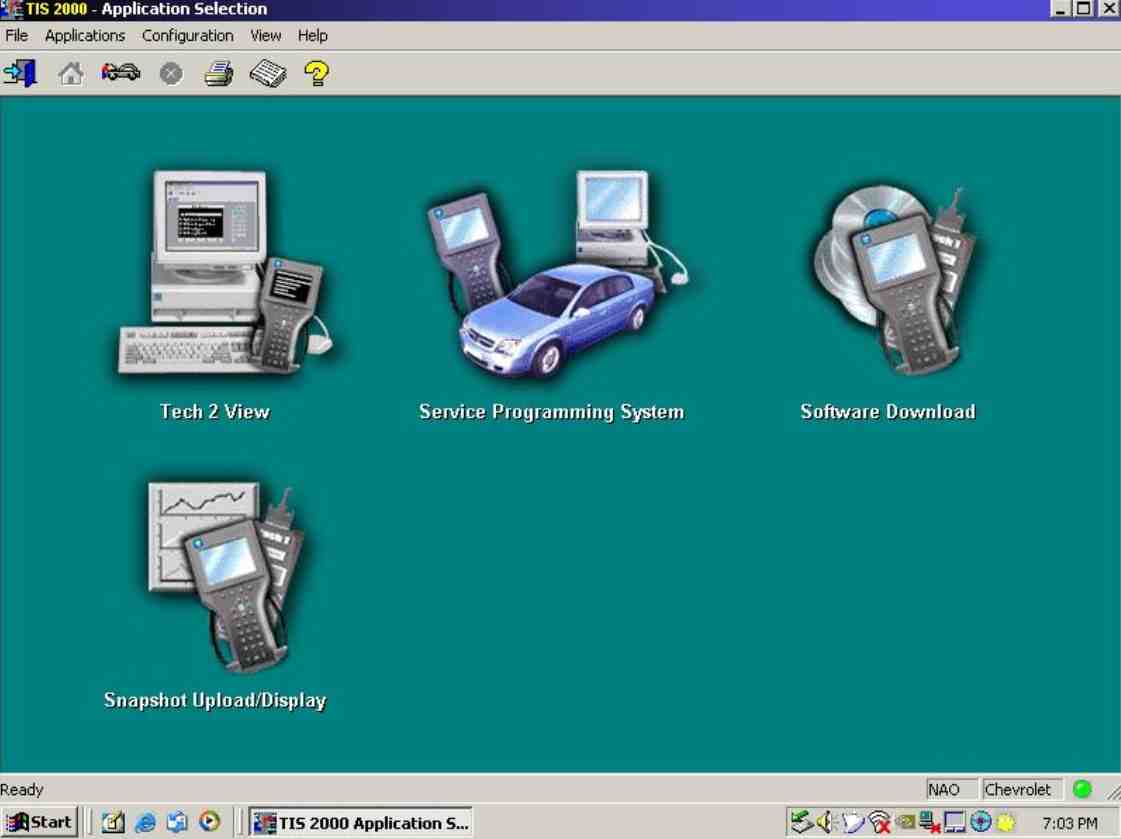
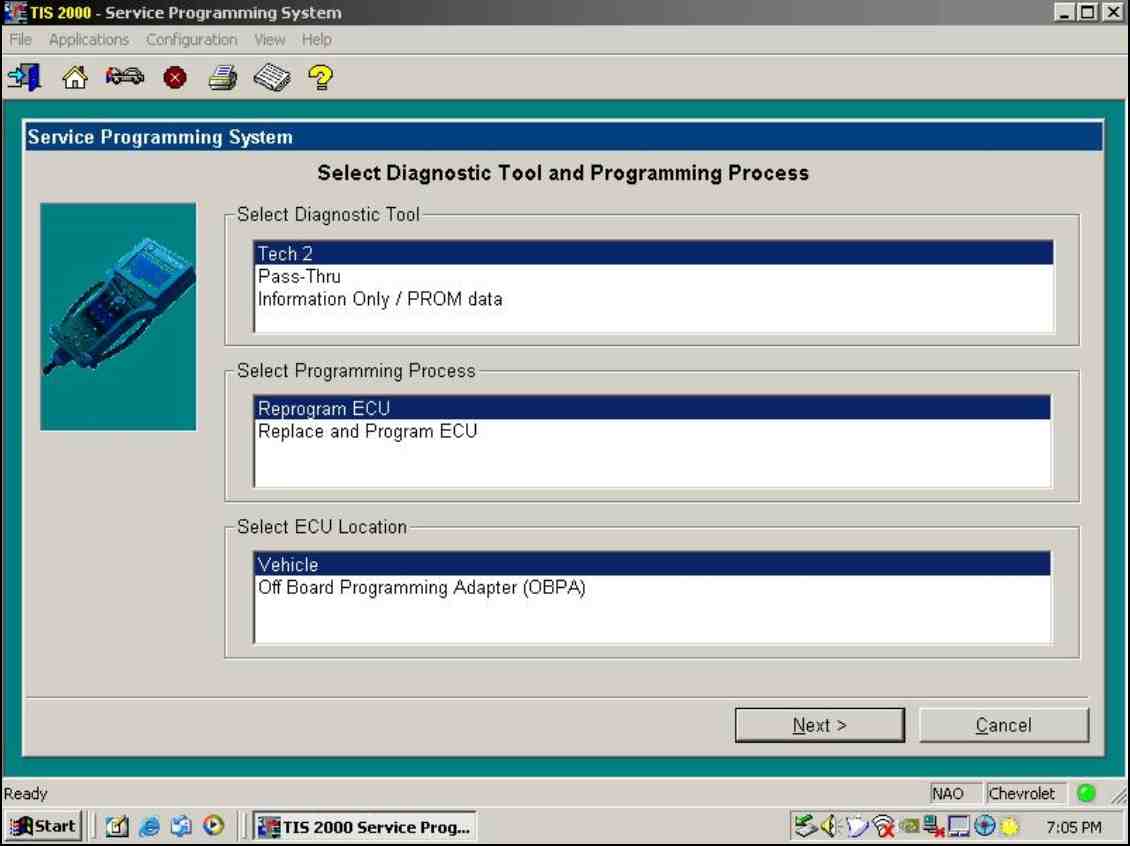
(11) View the Opening TIS2000 Application Desktop Screen and Select the "SPS Programming†Tab.
(12) Open the SPS Programming Tab… if you can SEE the Screen… Your TIS2000 Installation is COMPLETE and CORRECT.
The following attached Images are Listed by a Sequential Number and then by a Text Name for each Image as a Brief Explanation of WHAT each Image portrays. This procedure assumes that the User has ALREADY INSTALLED ONLY Disk(1) of the Three Disc Installation DVDs for the Complete TIS2000 Software Disc Set:
Continued in Part II…



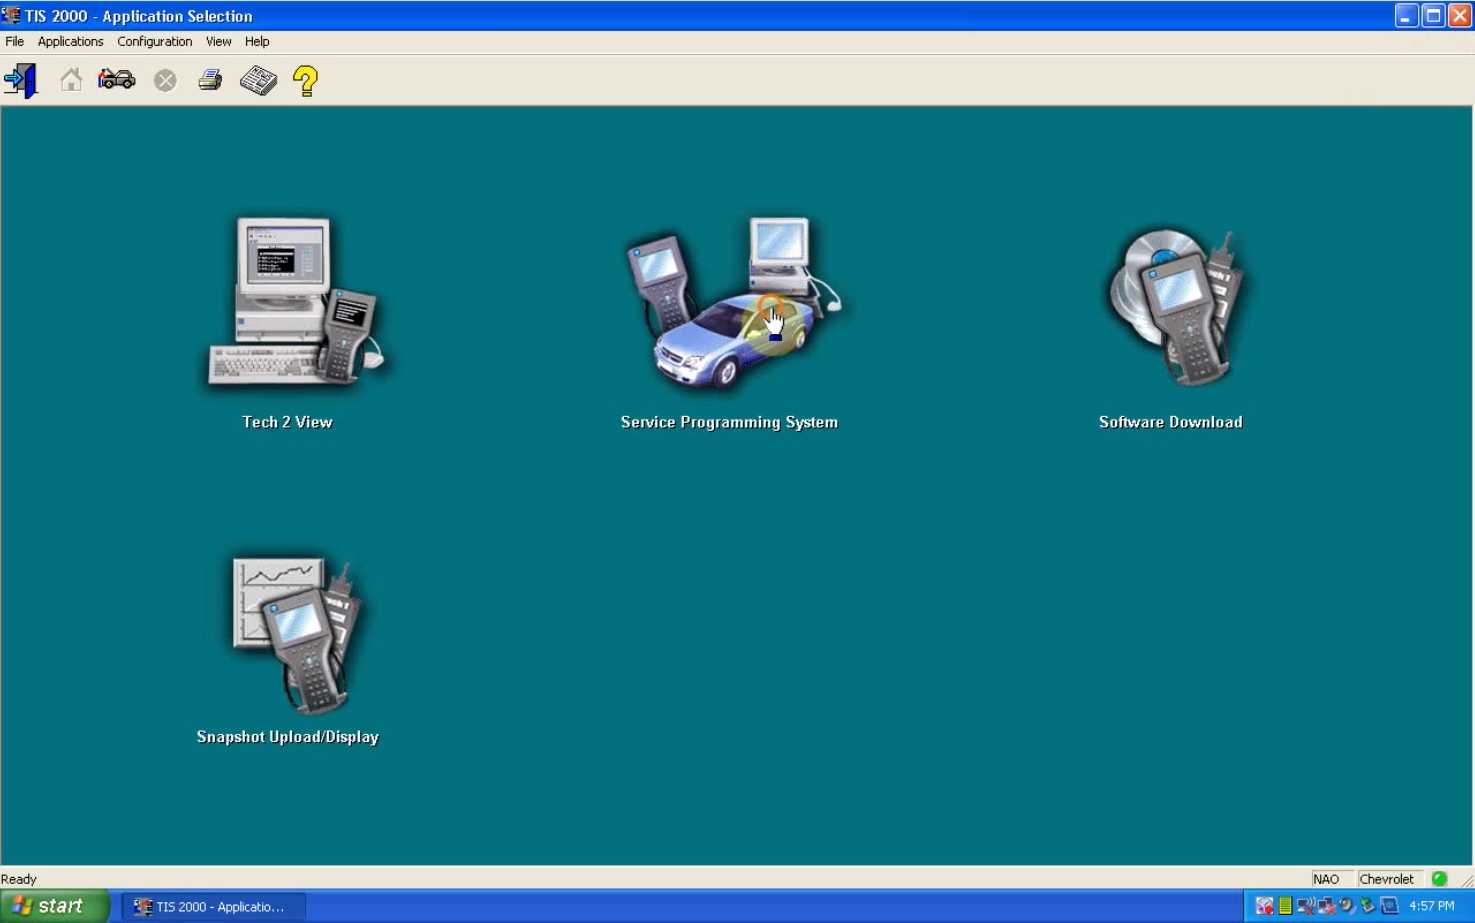
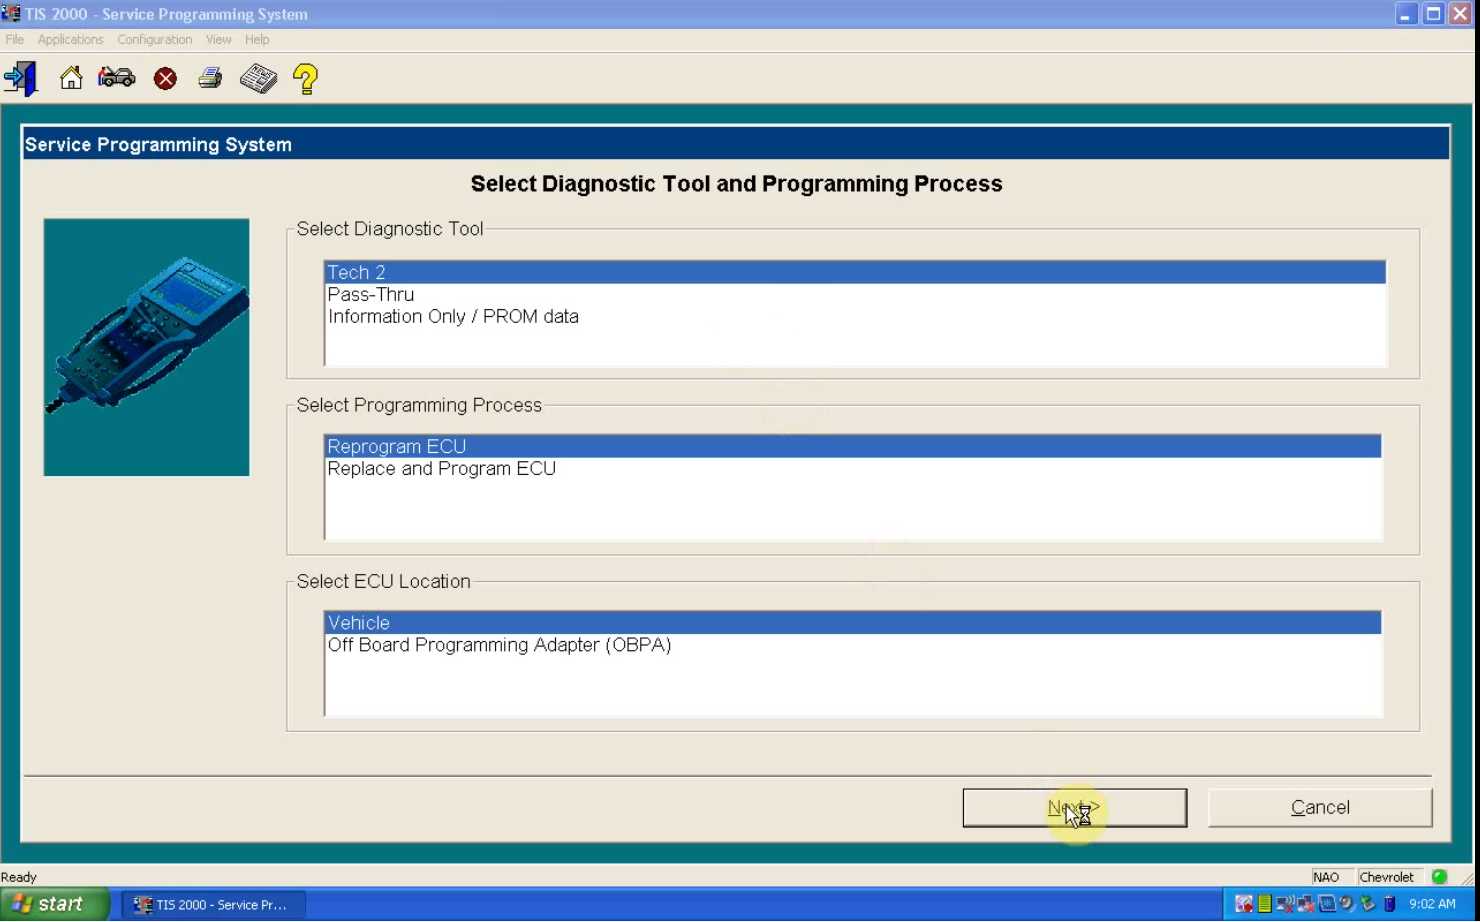
Sometimes… The "Fitz Und Startz†of unintended and unforeseen delays can force you to re-examine EVERYTHING Technical and Hardware related before jumping in with both feet and working away on ANY PCM. These are are often Touchy and Capricious sorts of "Beasts†that can very easily get "BRICKED†…and they will NOT Suffer The Foolish or The Careless when performing any Bench Top SPS Programming or the Add-On Updates necessary when performing Module R&Rs. I took this very conservative approach as previously documented in my "Start From Scratch†approach at Building another Dell Precision M65 Dedicated Laptop for the TIS2000 Software:
It follows that after sorting out that New-Old Computer System Hardware… I chose the Windows 2000 Professional SP5 Operating System for its excellent, albeit ancient and fine performance record of being a very stable and reliable OS. In hindsight… my next decision to visit AliExpress.com and order a Fresh Copy of the TIS2000 (3) Disk Set turned out to be a Good One as it came with an added bonus of their Updated "Dongle Crack†Installation Video. That choice served in helping to blend the Dell Machine, the Windows Y2K OS AND the aforesaid TIS2000 Software Triple Disk Set smoothly together… with NO resulting BSODS or Communications Problems with the "Cracked†Dongle.
All of this leads to the fact that early this morning… I took a perfectly serviceable GM PCM Model# P-01 WITH NO CALIBRATION INSTALLED… and quite successfully Reprogrammed and Re-Calibrated it using the following set up of Hardware and Software:
(1) "GYMKO†Clone Tech 2.
(2) Dell Precision M65 Laptop (Windows 2000 Pro SPS-5 OS).
(3) All Appropriate Power and Service Cables properly attached to EVERYTHING.
(4) A 650 Watt UPS for Stable Power into the Laptop, the Tech 2, and the Bench-Top Power Supply(s).
(5) A Quality Tested GM P-01 "BLUE†Donor PCM ) Red & Blue Connectors for Early Model Trucks
(6) A Professional Grade OBD2-to-PCM-to-Tech 2 Switched Power & Ignition Bench-Top Harness
(7) Followed ALL HW Set Up and TIS2000 SW Procedures.
This culminated with a Seamless Calibration Installation of my indigenous Chevrolet 2000 Silverado 1500 5.3l A4 PCM Programming. Ergo… The Successful Clone of the GM P-01 Donor PCM to use in a Bench Top Setting via the HP-Tuners "Tuning†exploitation that must follow. I really couldn’t be happier right now …if I was TWINS!
I would recommend anyone who wants to "Practice… without touching ANYTHING…†for this work to look over the shoulder of THIS Guy as he covers all the bases for both the "Use the Tech 2 to Read the PCM IN THE SUV-TRUCK and then hook it up to the Laptop for SPS Calibration Updates†Technique …as well as the "Use the Laptop and the TIS2000 SPS PASS_THRU Procedure… ON THE BENCH†Technique to achieve better, less cumbersome results. I would like to mention a few things to be aware of before you start:
(1) If you’ve purchased a BLANKED OUT ROM PCM… Do NOT key in the Replacement VIN on the First SPS Pass-Thru Screen (The Advisory Text indicates that it is NOT necessary to do so on THAT VIN Line).
(2) If you’ve purchased or obtained a BLANKED OUT ROM PCM … There WILL be an Error Message alerting you that the PCM "May Be a Service PCMâ€â€¦ probably meant to Alert GM ASE Techs NOT to Program any "Test PCM†from Stock accidentally… just as a reminder to ensure they have the RIGHT PCM on the Bench. In any case… Click out of the Warning Alert… and when the NEXT SCREEN Pops up with a Blank VIN Line… THAT is when you should ensure that your CAPS LOCK is ON and then Double Check the VIN you are Cloning BEFORE clicking to the NEXT Screen. It is VERY EZ 2 MAKE ERRORS HERE… So Double Check→ Triple Check that VIN!
(3) Once the PCM Program Calibration is Chosen from the consecutive screens and you accept it for installation… Wait Patiently for it to finish and confirm that it has COMPLETELY INSTALLED and Avoid Turning ANYTHING OFF until the "Programming Completed†Message appears on the SPS Screen. After reading the Advisory about the possible need for CASE Re-Learn… exit out of the Laptop SPS Program and then Turn Off the Tech 2 and Power Off the Clone PCM.
(4) If your particular Truck or SUV does NOT require a cANDI Adapter wired in between the "GYMKO†Tech 2 Clone and the OBD2 Cable… JUST LEAVE IT OFF.
(5) Visit this Link, Download, Save and Watch this Linked Video as often as required to familiarize yourself with all of the these steps…and you will NOT regret doing so. Please note how this person’s Camera work shows him all over the room, chasing down various components and screens because he was NOT in possession of a Professional TIS2000 SPS Tech 2 SPS Bench-Top Programming Harness. I was able to lay out out everything mentioned above atop a piece of Cardboard laid atop my Stove Burners and while "Snug As A Bug In A Rug…†everything in the way of ALL Equipment was right at my fingertips and a breeze to work with:
If the Engine Starts, Runs and Successfully Shifts Into and Out of Gear and then passes muster with the "GYMKO†Tech 2 Scanning for any Malfunction Codes and-or Module Problems… I’ll place the GM OEM Y2K PCM onto a "Dry, Safe Storage Shelfâ€. Once I’ve finally finished the hard work of installing or R&Ring all of the Performance Component Mods and Upgrades into and onto the 5.3L Engine… covered over at THIS Thread:
https://gmtnation.com/forums/threads/hoping-for-loping.18519/
… then I’ll be using the CLONED PCM after that for any subsequent HPT "Tuning†Mods mentioned and covered in THIS Thread.
https://gmtnation.com/forums/thread…ado-lm7-tsp-peformance-cam.19999/#post-585145
Posted by: youobd2 at
12:56 PM
| Comments (1)
| Add Comment
Post contains 3051 words, total size 29 kb.
37 queries taking 0.0448 seconds, 169 records returned.
Powered by Minx 1.1.6c-pink.