



January 01, 2019
MB Star C4 2018.12 is available with DELL 500G HDD and Solid Hard Disk 256G.
Following paragraphs are on instructions.
DAS
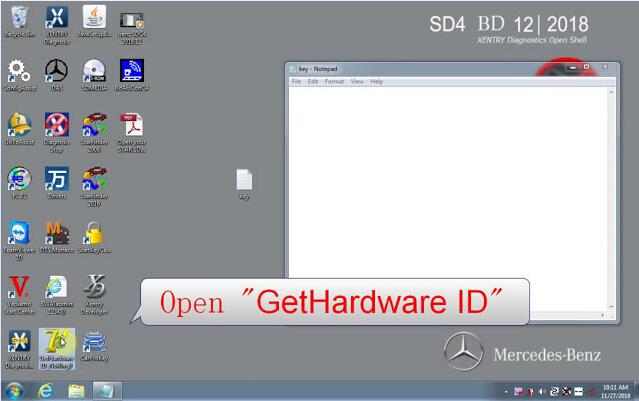
Open "Get Hardware IDâ€, Copy the HardwareID and send it to the dealer for generating "license.datâ€
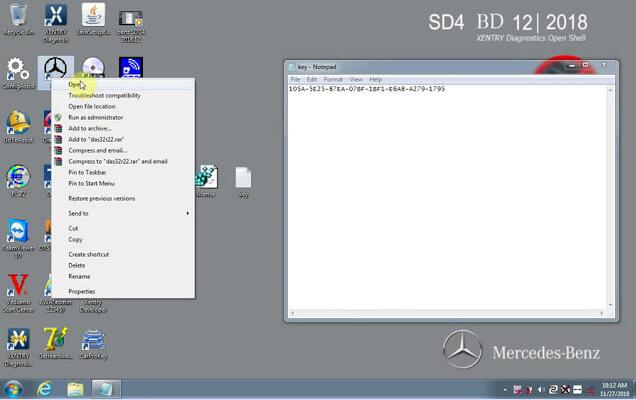
Open "license.datâ€

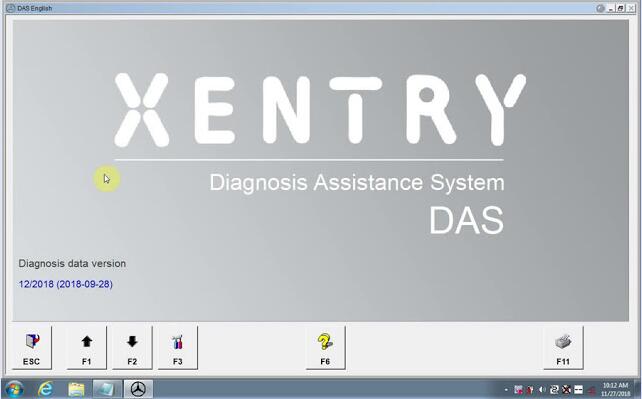
Openâ€DASâ€
EPC WIS
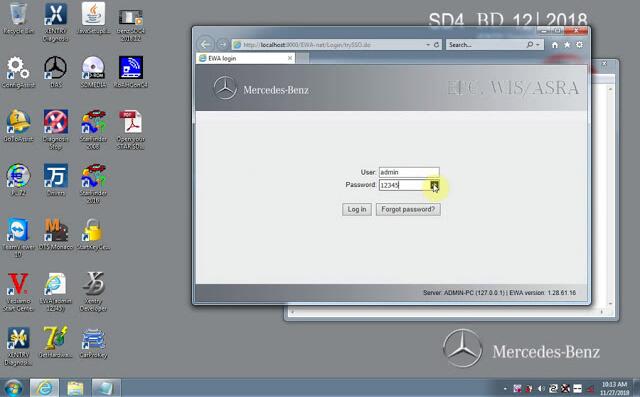
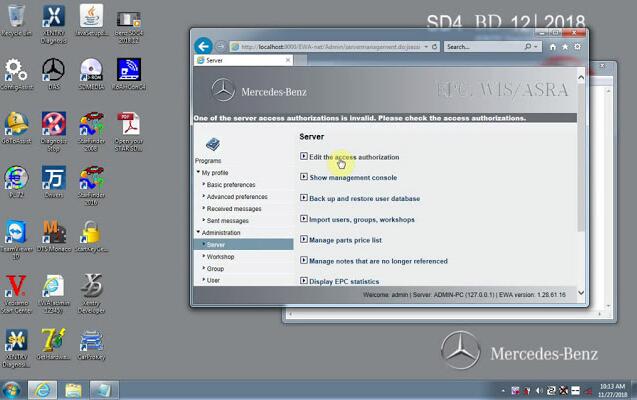
Openâ€EWA netâ€
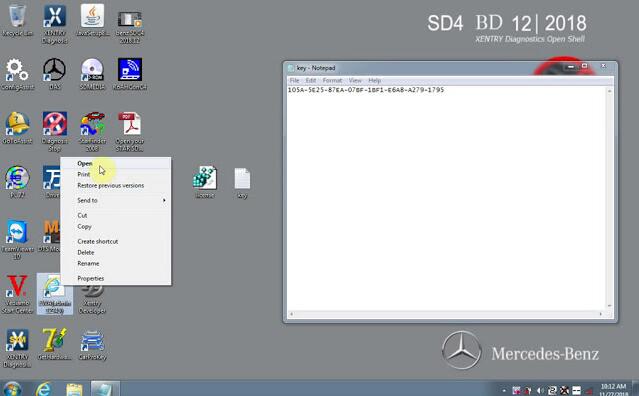
Name admin
Password 12345


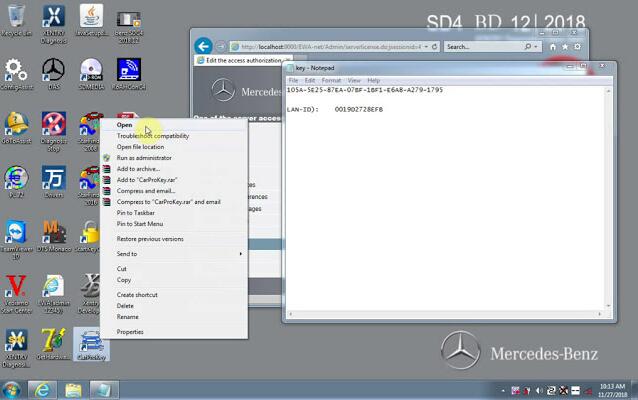
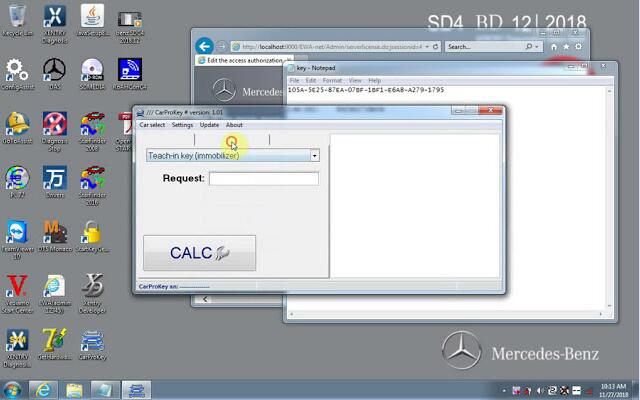
Openâ€CarProKeyâ€


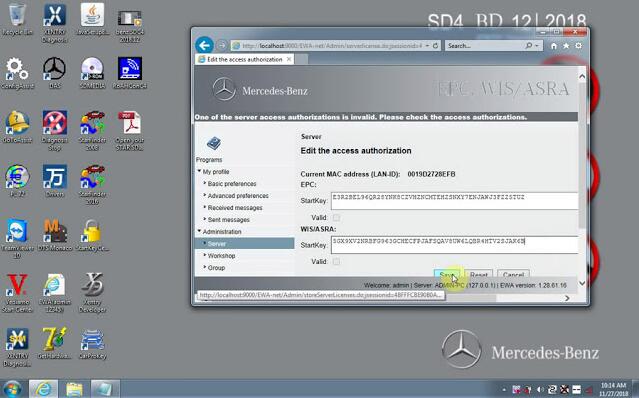
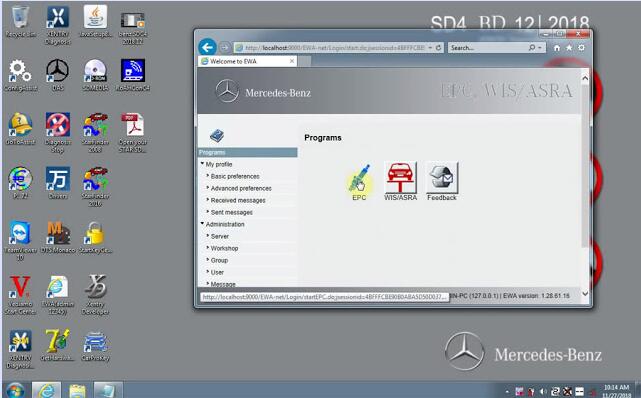
XENTRY Diagnosis
Openâ€ConfigAssistâ€
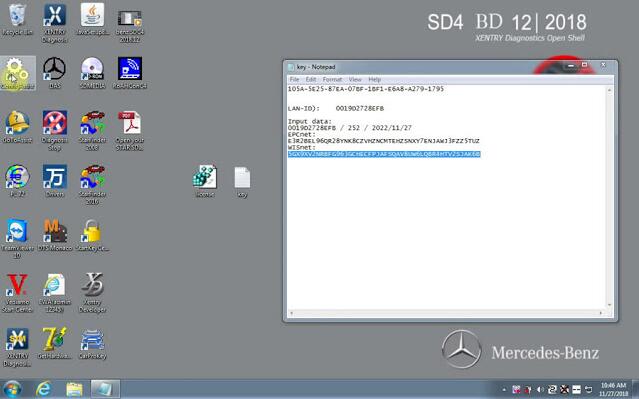
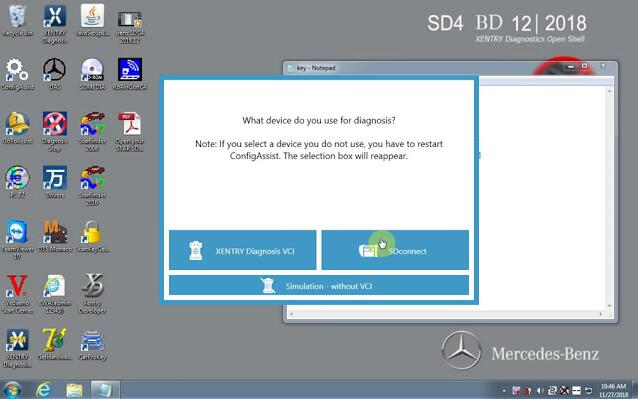
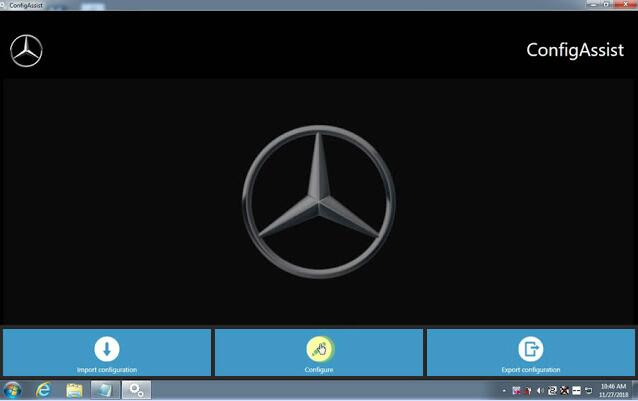
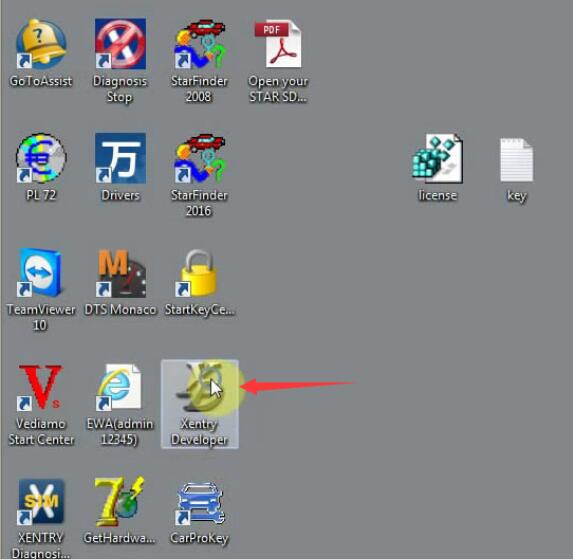
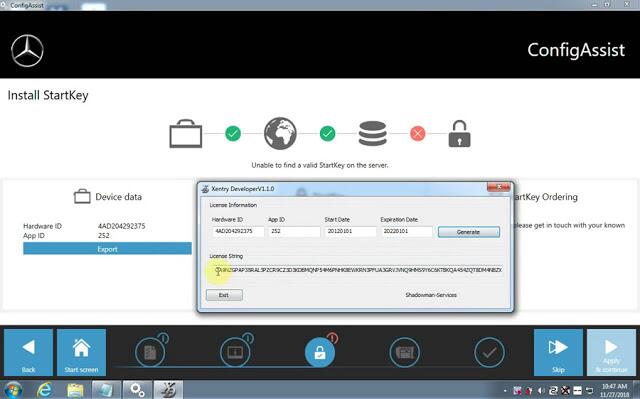
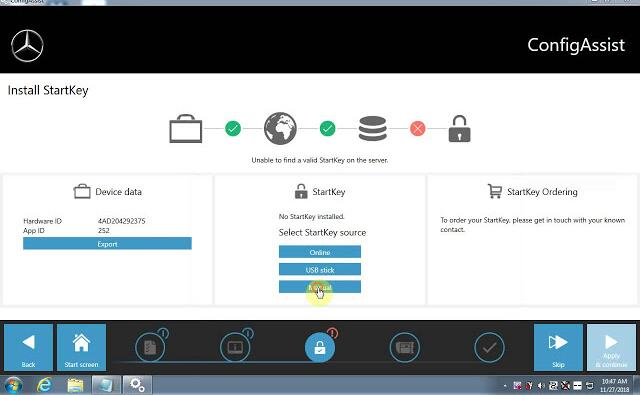
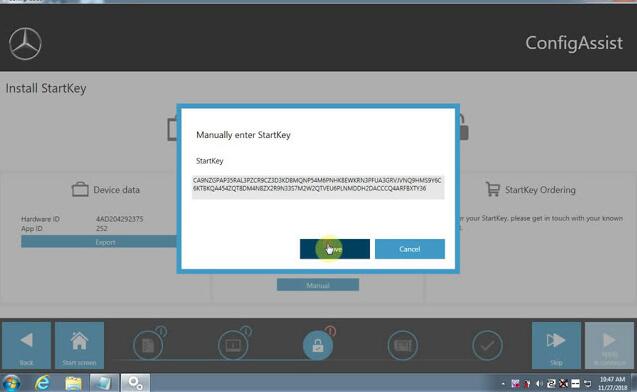
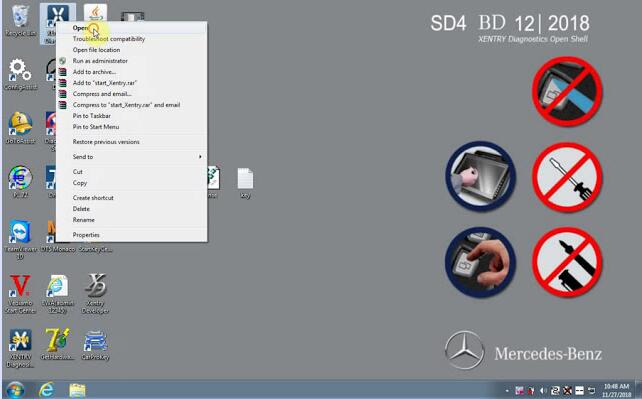
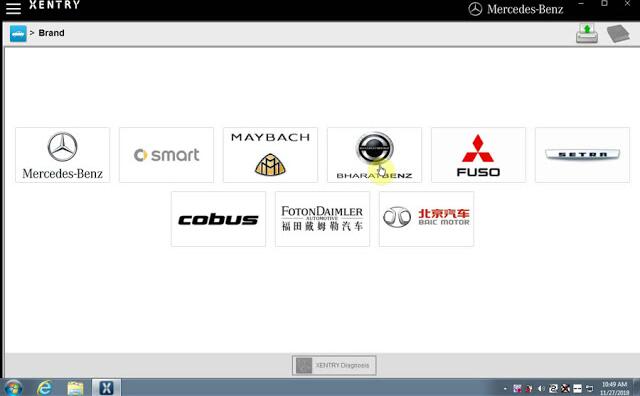
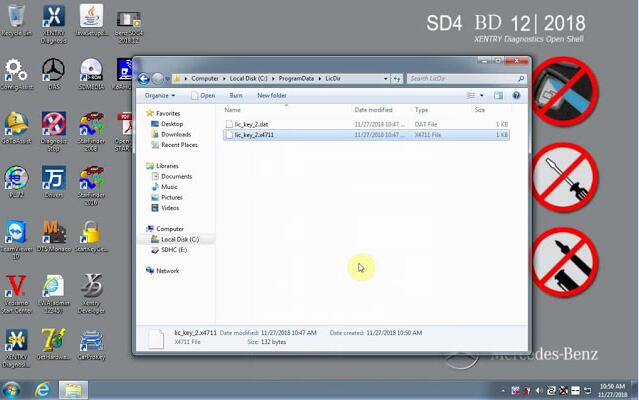
Open Computer –Local Disk C-ProgramData-LicDir copy "lic_key_2.datâ€, rename "lic_key_2.x4711″ Set to read-only file
Video guide:

Posted by: youobd2 at
02:30 PM
| No Comments
| Add Comment
Post contains 77 words, total size 14 kb.
December 23, 2018
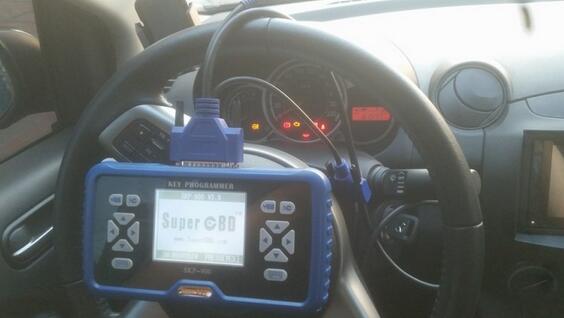
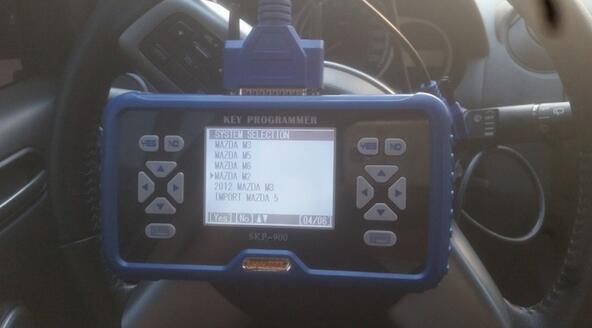
Bought SuperOBD SKP-900 Key Programmer in 2015.11 for my Mazda 2 to do key copy.
Skp900 v3.9 i got:
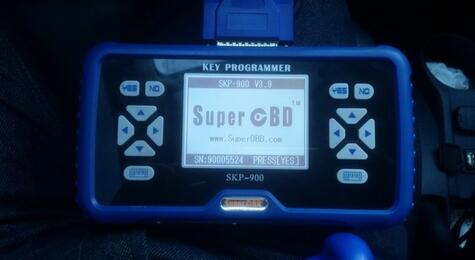
(i found that, skp 900 v4.0 is cheaper now ( $619 only) when i updated version 3.9 to 4.0)
My Mazda 2:
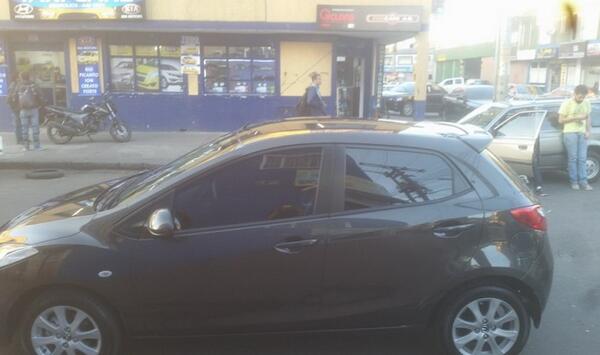
Two keys:
One original and one for key copy
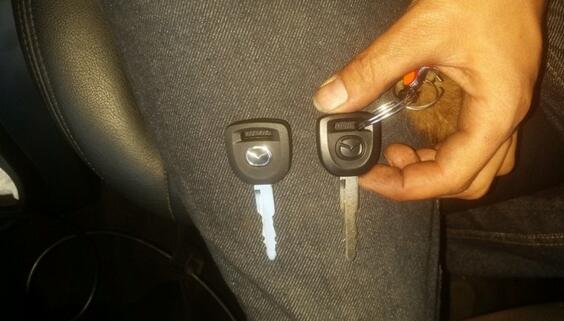
Here’s what i did.
Start the car
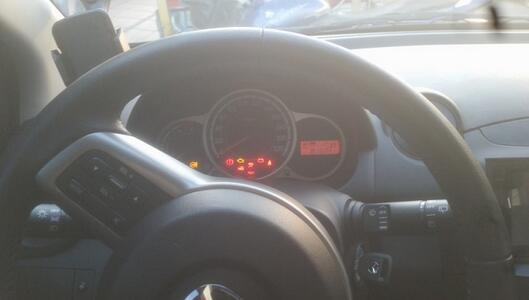
Connect skp900 key programmer to the car
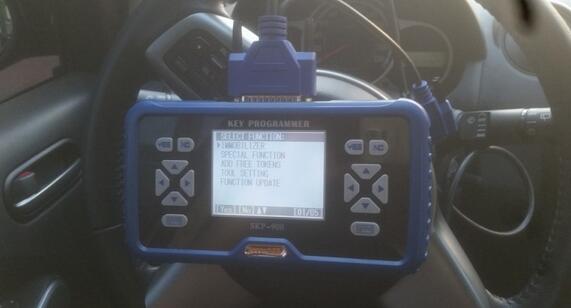
Function: immobilizer
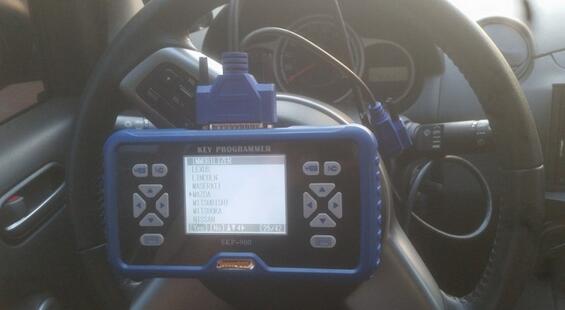
Brand: MAZDA
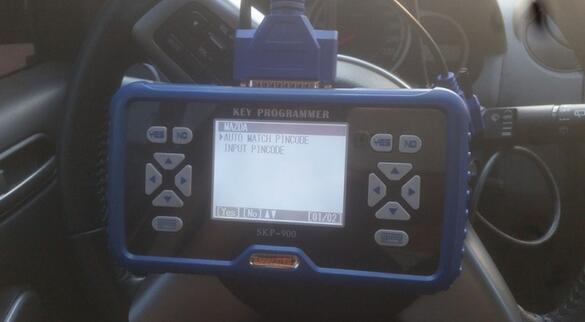
Auto match pincode
Select Mazda 2 model from list
System: Mazda M2
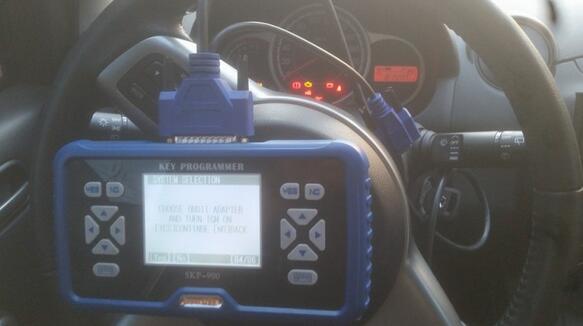
Choose OBDii adapter and turn the ignition on.
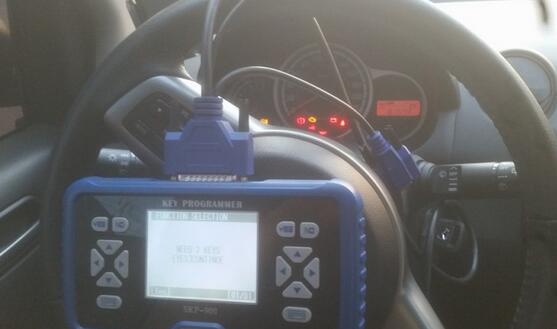
Need 2 keys
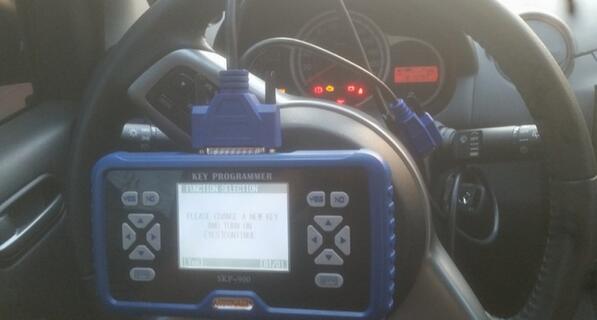
Change a new key and turn on
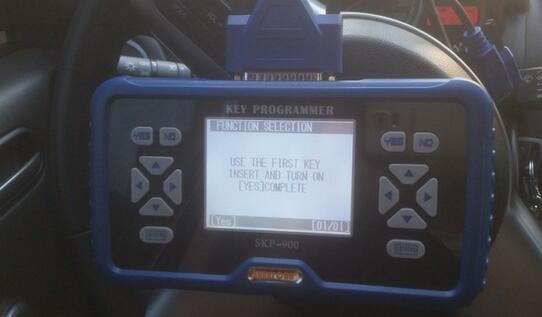
Done!!
Posted by: youobd2 at
01:12 PM
| No Comments
| Add Comment
Post contains 109 words, total size 4 kb.
December 16, 2018
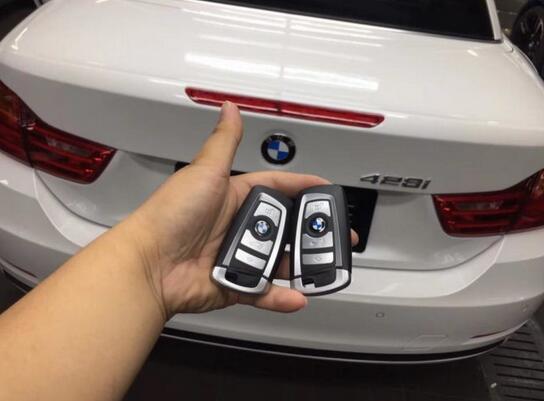
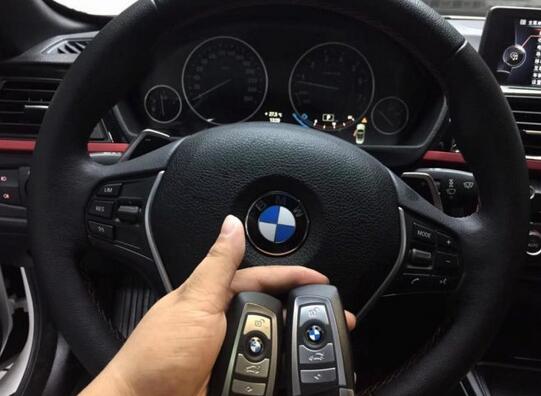
This post shows guide on how to use CGDI BMW and BMW FEM/BDC test platform to add original smart key for BMW FEM/BDC system.
Note:CGDI BMW can read Password, ISN, Key Sync Code, DME ISN etc.
Car model: BMW 428 with FEM/BDC immobilizer system
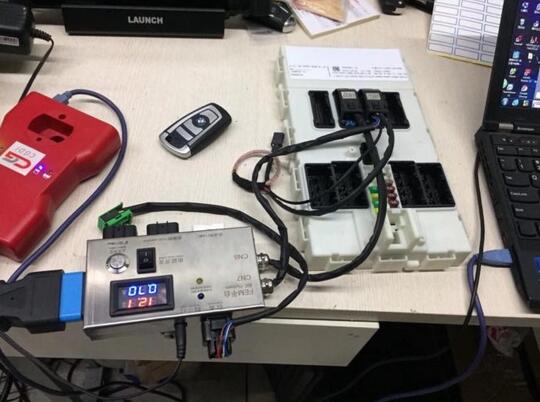
Required tools:
CGDI BMWAuto Key Programmer
BMW FEM/BDC Test Platform
One computer
One FEM/BDC module
Key blank
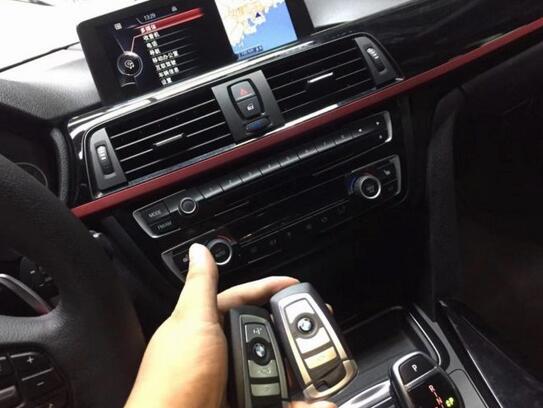
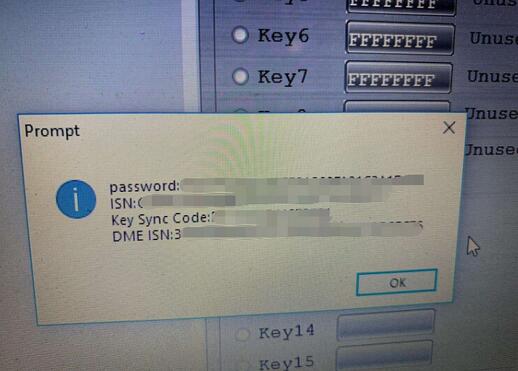
Read out basic info incl. Password, ISN, Key Sync Code, DME ISN.
Posted by: youobd2 at
12:17 PM
| No Comments
| Add Comment
Post contains 85 words, total size 2 kb.
December 09, 2018
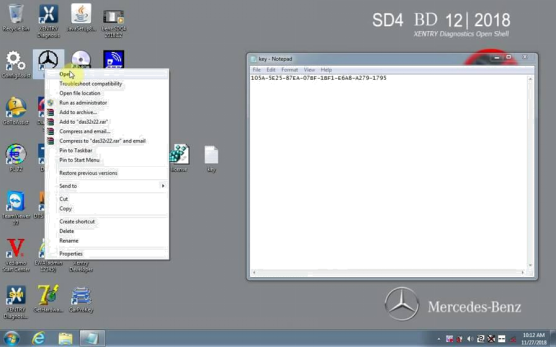
Open"Get Hardware ID ", Copy the HardwareID and send it to the dealer for generating"license.dat".
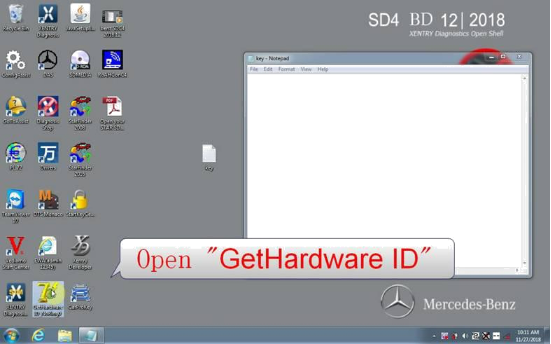
Open"license.dat"
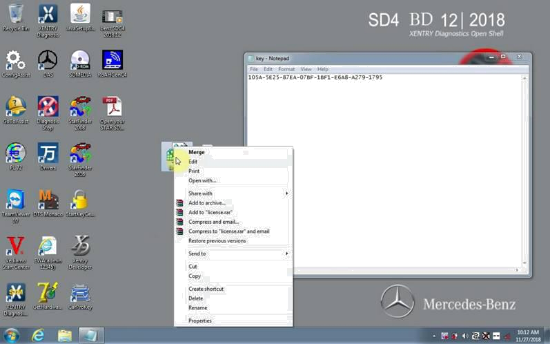
Open"DAS"
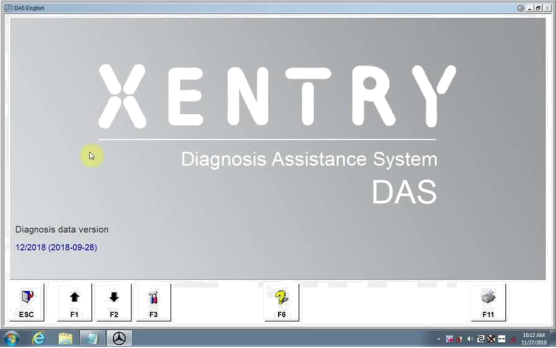
EPC WIS
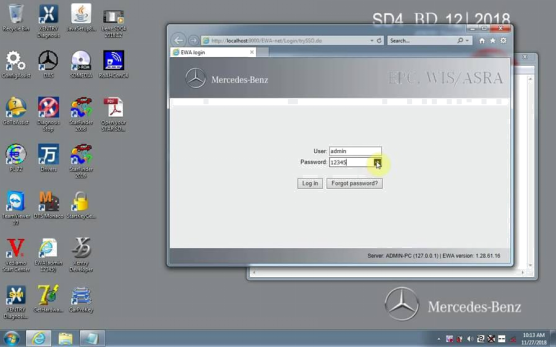
Open"EWA net"
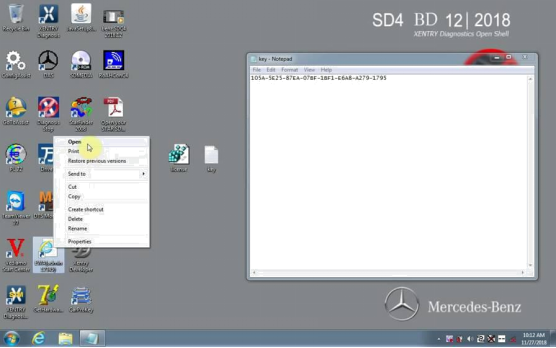
Name admin
Password 12345
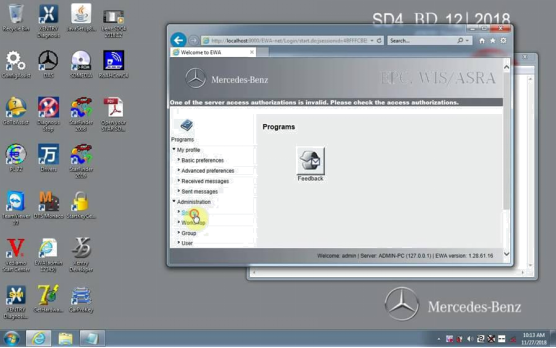
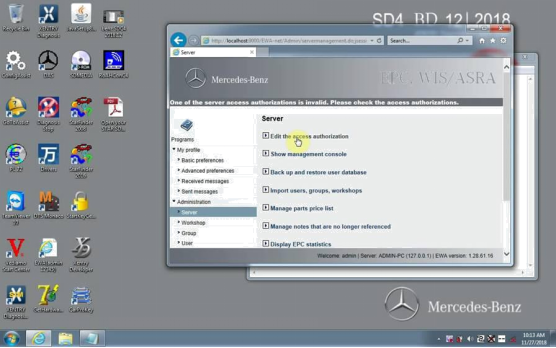
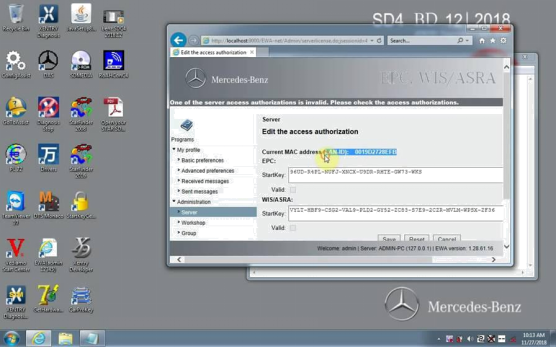
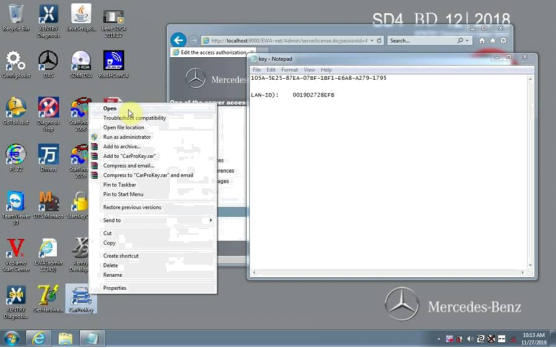
Open "CarProKeyâ€
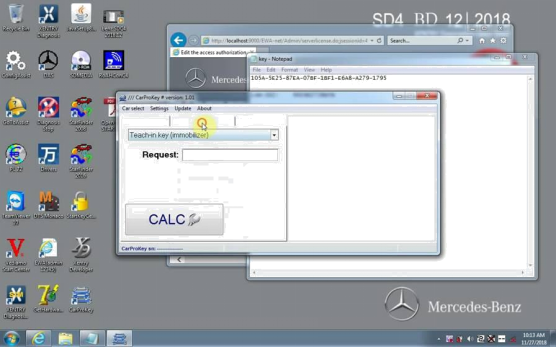

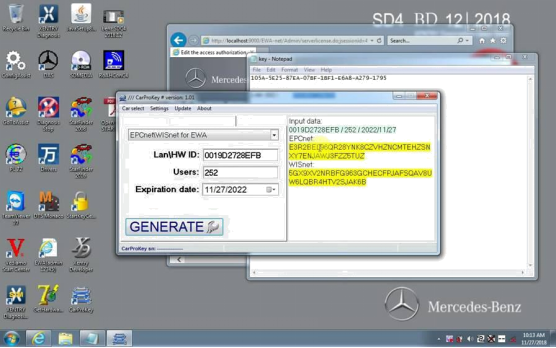
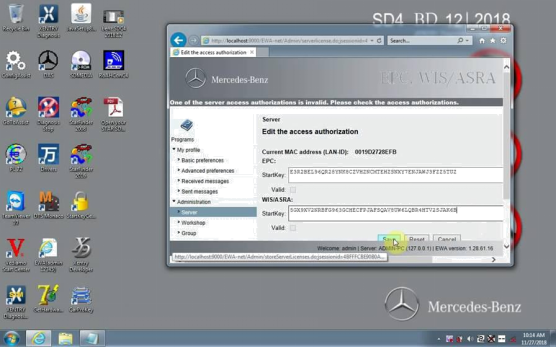
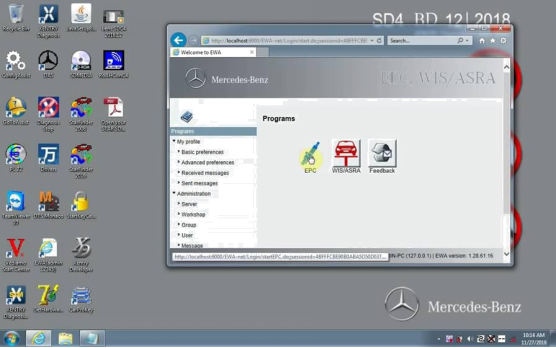
Xentry diagnosis
Open"ConfigAssist"
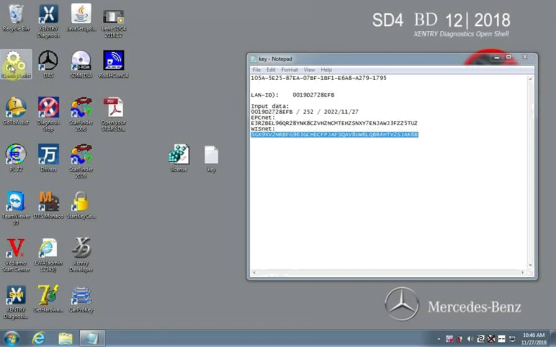
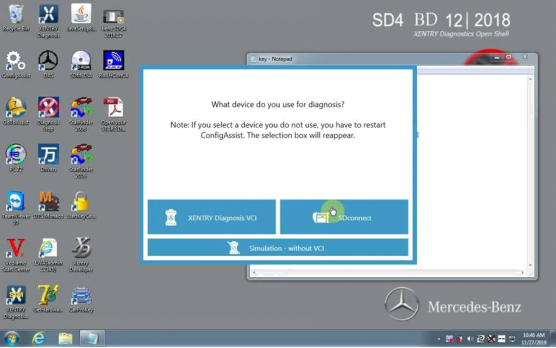
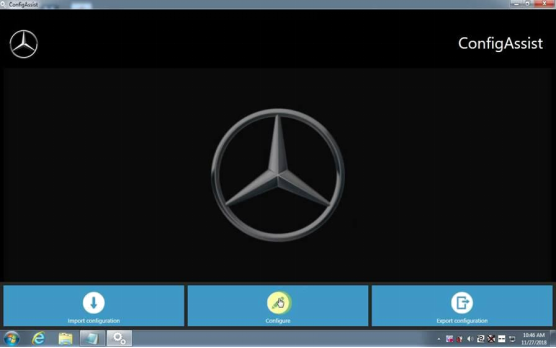
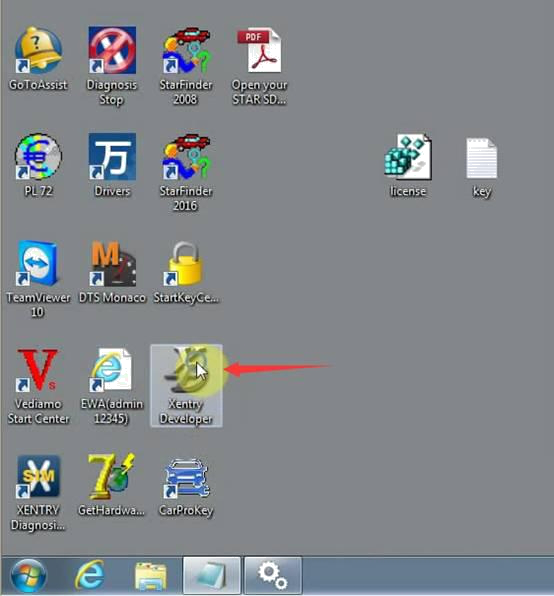
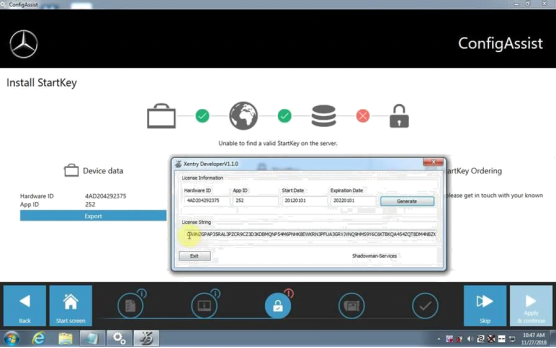
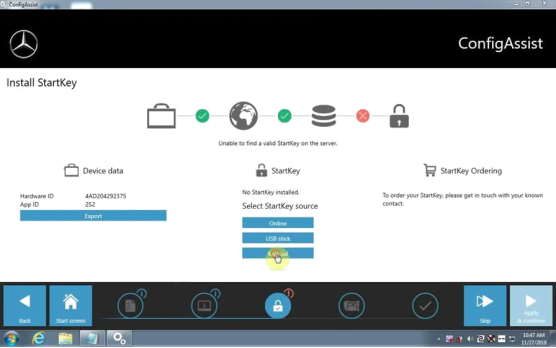
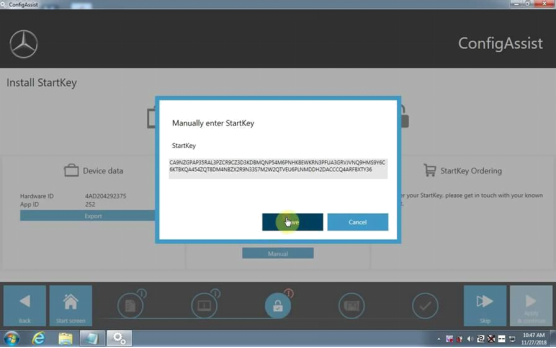
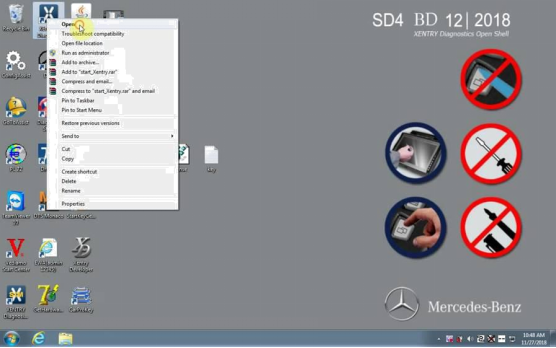
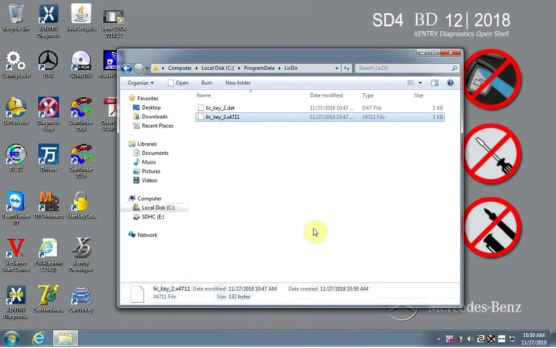

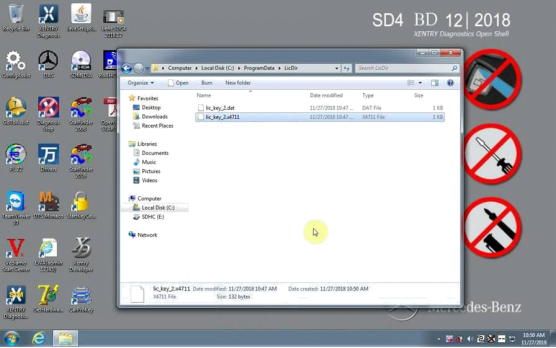
"Open computer - Local Disk C-ProgramData-LicDirâ€copy "lic_key_2.datâ€,rename "lic_key_2.x4711" Set to read-only file.
Posted by: youobd2 at
10:07 AM
| No Comments
| Add Comment
Post contains 53 words, total size 13 kb.
December 02, 2018
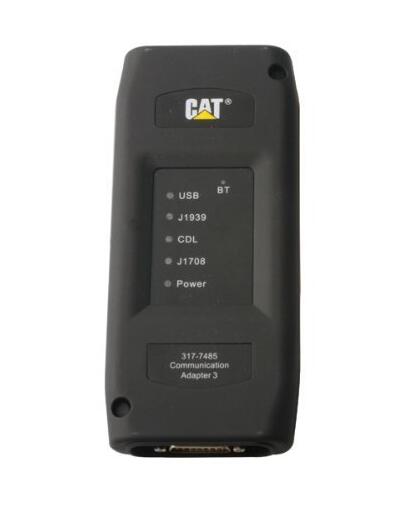
CAT ET Wireless function:
1.Display "Logged Event Codes†to show engine over speeds,High temperatures, fuel consumption, etc.
2.View ECM current configuration and change user settings
3.Perform diagnostic tests and calibrations, and calibrate
4.Electro-mechanical and electro-hydraulic components
5.Context sensitive help leads operator through every task Cat ET can perform
6.Data Logger and Data Log Viewer allows recording of ECM signals for delayed troubleshooting capability. Functionalities Shows all operating conditions that cause high repair costs such as: Over speeds, high temperatures, fuel consumption, transmission shift counts. This can provide awareness to change operator Cat "ET Trainer†is now included in ET Program. It allows Users to train and practice using Cat ET without a Communications adapter or Electronic Control Module (ECM).This is a free feature of Cat ET.0
Specification:
1.ECM Summary screen lists every control module on equipment
2.Being tested and gives information on these modules.
3.Fast hookup and real time display of systems status. Displays ,readings such as rpm, boost, pressures, temperatures, etc. for Easy troubleshooting.
4.Identifies faulty sensors, harness connectors, and system parameters which are out of specification. Allows customers
5.To help dealer identify problems without visiting machine.
6.Identifies intermittent sensors and wiring problems during Machine operation and keeps a record of each one. Showswhen problem occurred and how often it happened.
7.Added information to allow customer to assist dealer in diagnosing and repairing problems. (Troubeshooting Help is not built in with in the program, you will still need go back to books in order to follow a repair description and steps in each Fault Code display within the program).English and metric units of measure integrated help file to easy learn the "How To†around the software
Customer questions & answers
Question: Comes with connecting cables and the DVD?
Answer: it Comes with connecting cables and the CD,thank you!
Question: This Heavy Duty Truck Scanner is made in canada?
Answer: hello,it made in china,thanks!
Question: Does this communicator comes with cables or single component?
Answer: hello,it comes with cables,thank you!
Question: Normally comes in a plastic case with connection cables and a DVD installation of ET
Answer: yes,it comes in a plastic case with connection cables and a CD installation of ET on OBD2TOOL . thank you!
Posted by: youobd2 at
01:21 AM
| No Comments
| Add Comment
Post contains 376 words, total size 3 kb.
November 20, 2018
Autel Maxisys Pro MS908P Wireless printing may be tough to get your head about since it requires your MaxiSys to communicate together with your Computer via a network. This sounds a lot more difficult than it truly is.
Difficulty: Average. Expertise of installing a conventional printer is going to be a bonus.
Time: 10 – 20 mins primarily based on online connection and updates.
What to prepare:
* An active Internet connection on your Computer.
* A Wireless Network – like a broadband router.
* A Windows Primarily based Computer with full administrative Rights (be capable of run programs in administrative mode)
* To make certain the Pc is connected towards the network either wirelessly by way of Ethernet.
* Your Computer to possess Adobe Reader installed.
* The MaxiSys Pc Suite CD (positioned inside the box).
Firstly, possess a appear in the following diagram:
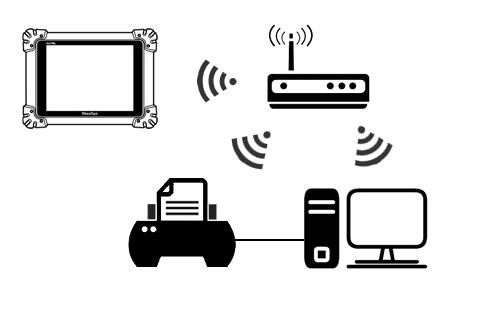
So how does this diagram operate? Initial you need to set up the MaxiSys Print Driver in your Pc. Then you definitely connect your MaxiSys towards the identical network. Then, after you send a Print command from your MaxiSys, the MaxiSys will search the network for PCs that have the print driver installed. The MaxiSys (through being connected towards the similar network as your Computer) sends the information for the Computer, which in turn prints the data. Consequently, all the following have to be connected for the Exact same network and turned on;
* Your MaxiSys Tablet
* Your Pc
* Your Printer
After you have carried out this, stick to the measures below to set up the Print Driver on your Pc.
* Spot theMaxisys Pc Suite CD into your CD Drive. The software program might load
automatically, but if not, Click Commence and after that My Laptop.
* You’ll want to now see a Orange Folder listed exactly where your CD
drive usually is; this really is the Autel application CD. Double click
to open this up. Inside this folder you must see an icon
calledAutorun.exe. Click This. The welcome screen of the Computer suite
really should now boot
* Around the Pc Suite screen, pick which Bluetooth Interface you’ve got
(at time of going to publish, just about all UK users may have the black
Bluetooth VCI unit, displayed on the appropriate) by clicking The
installation will now begin.
* During installation you may be prompted to Set up Drivers or if you
have a firewall, to let the computer software particular security
preferences. This can be since the computer software is communicating
together with your network. You need to accept these preferences or the
computer software is going to be blocked and printing won’t work.
* As soon as installation has finished, you will need to open the
MaxiSys Printer. To perform this click Startthen All Applications. Now
scroll by means of your applications till you come across MaxiSys
Computer Suite. Inside this folder you’ll discover MaxiSys Printer.
Click on this Item.
* The Printer Driver will open and you will see a printer icon within
the bottom suitable of your Computer, next towards the Time and Date.
The Printer Driver is now installed.
* You might be prompted to execute an update (for example in the
demonstration video above), in that case its a great concept to help
keep the software program up to date. Bear in mind to constantly permit
firewall preferences or new Autel drivers to become installed.
For those who have performed all the actions above and are nevertheless having issues, check the following:
* Does your Computer have an active world-wide-web connection?
* Does your Pc have complete administrative rights?
* Does yourMaxiSys have an active online connection? Are you able to load a web page in the tablets internet browser?
* Will be the MaxiSys printer icon loaded? Verify that the icon is being
displayed in your system tray, next towards the Date and Time.
* Did you permit the right settings on your Firewall/Anti-virus if prompted?
* Do you’ve got Adobe Reader installed? Click hereto download the and install the latest version.
Posted by: youobd2 at
01:33 PM
| No Comments
| Add Comment
Post contains 687 words, total size 5 kb.
November 12, 2018
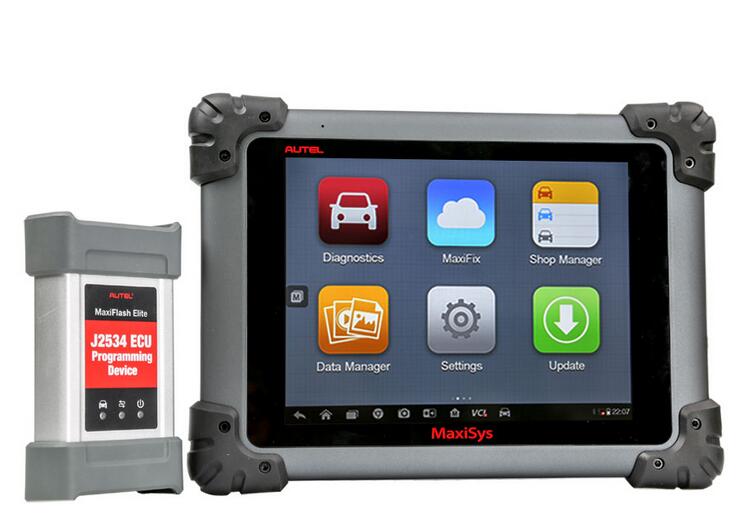
Autel Maxisys Pro MS908P is an evolutionary smart solution for specialized automotive diagnosis and ECU programming. Designed with the DNA of Autel’s diagnostics family, the MaxiSys is built to offer many of the prestigious qualities of the Automotive Scanners Autel MaxiDAS DS808 with extreme ease of use and powerful diagnostic performance.
Autel MaxiSys pro MS908P Highlight:
1.Autel Maxisys Pro can do online programming ,at the same time it’s
compatiable for diagnosis and online programming for part of the
original software.
2. MaxiSys Pro HAVE 6 Kinds of languages for you choose:English,German, French, Spanish,Portuguese
3. Extensive vehicle coverage for more than 40 US, Asian and European vehicle makes
4. MaxiSYS Pro includes the J-2534 reprogramming box and special MaxiSYS Pro software
5. The VCI connects wirelessly to the main unit with ultra-range Bluetooth / WIFI
6. Intelligent memory of vehicles for easy and quick diagnosis of tested vehicles
Autel MaxiSys Pro Scan Tool Software advantage:
1.Open source Android Operating System for fast boot-up and multitasking
2.Easy and intuitive navigation makes finding what you need simple and fast
3.Displays live data in text, graph and analog for easy data review and analysis
4.Configure live data display options, set alarms, record, and playback data frames with one touch
5.Records and playbacks live data to pinpoint troubles of sensors and components
6.Cloud-based Data Manager saves customer and vehicle records, scanner data and technician notes
7.Remote technical support for convenient demonstration, training and increased customer satisfaction
8.Intelligent memory of vehicles for easy and quick diagnosis of tested vehicles
9.Prints out recorded data anytime and anywhere with Wi-Fi technology
Posted by: youobd2 at
08:55 AM
| No Comments
| Add Comment
Post contains 268 words, total size 3 kb.
October 07, 2018
Higher Quality Piwis Tester II Diagnostic Tool For Porshe With CF30 Laptop and Latest Application PIWIS II V18.1 Piwis Tester II is the newest specialist tester for Porshe,the most poweful diagnose and offline programming tool for Porsche,with most recent tester for Porsche,effective functions,full access. Folling is The way to Perform a Forced PDK Update by means of Porsche PIWIS II
Applicable Model/Year
2013-2016 Porsche 981 Cayman and Boxster (Base, S, GTS) w/ PDK Transmission
2012-2016 Porsche 911.1 NA Carrera (Base, S, GTS) w/ PDK Transmission
2014-2016 Porsche 911 Turbo and Turbo S w/ PDK Transmission
The way to Enable
This function should be performed by a car diagnostic tool Porsche PIWIS II. It will be achievable having a PIWIS III however the workflow procedure may possibly vary.
When And Why to Update
A forced PDK update is needed when a car possesses the Q033 ROM and an open campaign update isn’t visible by way of the PIWIS tool. This procedure will update the PDK to a Q061 or newer ROM.
This update is essential to run the newest PDK OTS maps with custom characteristics including quicker shift speeds, sequential shifter stalk, dual paddle to neutral, no kickdown, and no creep. These features would otherwise not be possible running the Q033 ROM.
Things To Appear Out For
The update process does take some time (30 to 45 minutes), so it truly is critical to possess a battery charger (10A to 12A suggested, or a charger using a "flash†setting will operate) around the car’s battery for the duration of this process. It would also be a good thought to maintain a charger around the PIWIS II personal computer also.
When you have a Piwis III tool, the workflow process could slightly differ.
Measures to use
NOTE: Just before PROCEEDING, ACCESSPORT Must be UNINSTALLED FROM Automobile.
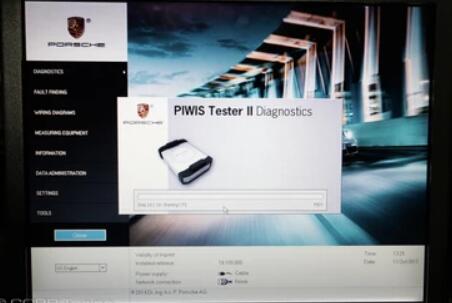
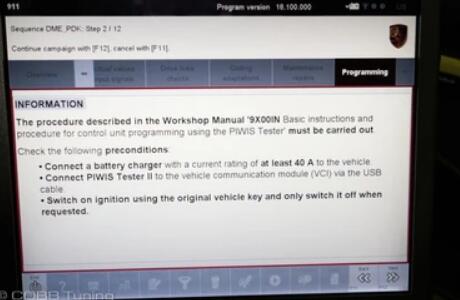
1.Connect a battery charger for the car’s battery, put the key in the "ON†position (engine off), and turn around the PIWIS II tool. The PIWIS II will must be connected for the OBD II port at his point as well.
two.At the principal menu around the PIWIS II, choose DIAGNOSTICS >> 911 >>> 991. Your selection may vary for those who have a Boxster/Cayman.
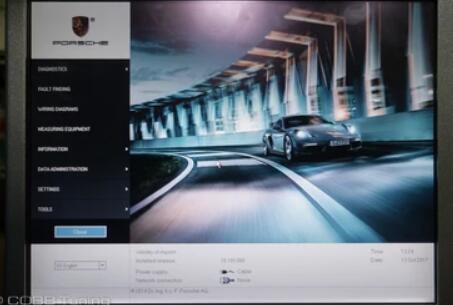
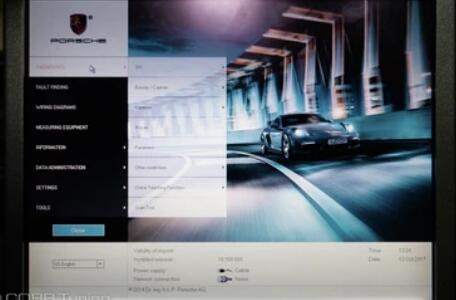
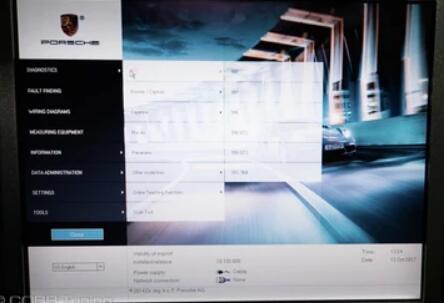
three.At this point, the PIWIS II will load up the computer software and prompt you to a brand new menu.

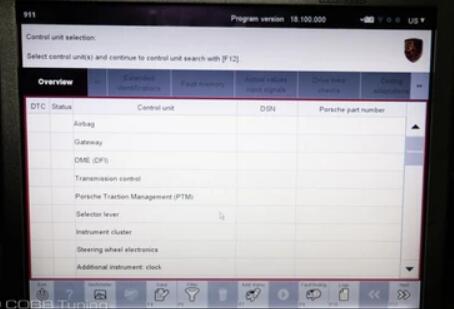
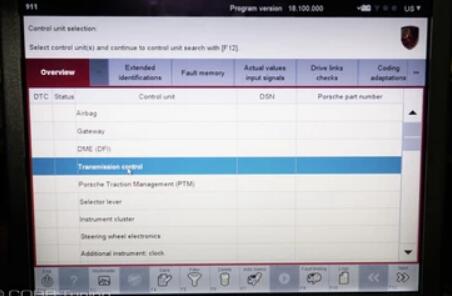
four.Choose the "Transmission Control†unit control. Right after this
can be chosen, scroll for the correct around the prime overview bar and
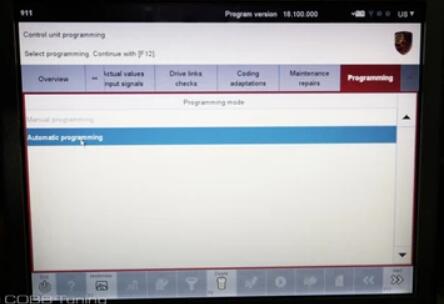
pick "Programmingâ€.
You are able to now pick "Automatic Programming†and hit the "Next†button on the bottom proper of PIWIS II.

5.From right here, Unit Documentation along with the update will
commence, many prompts regarding battery charger use and ignition on
will seem. Continue to press the "Next†button around the bottom correct
to move forward using the approach. It is possible to hold an eye
around the progress bar on the bottom and Steps listed in the top. Keep
an eye around the PIWIS II for any ignition off sequences or require to
press the "Next†button.




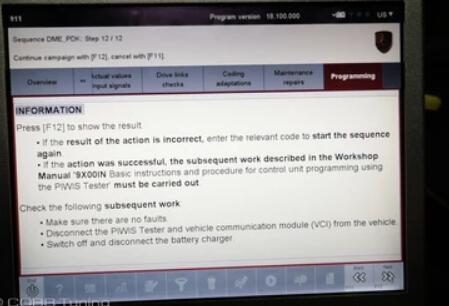
6.Whenever you finish the final step, step 12, an info prompt will seem. Hit "Next†to be shown good results programming.
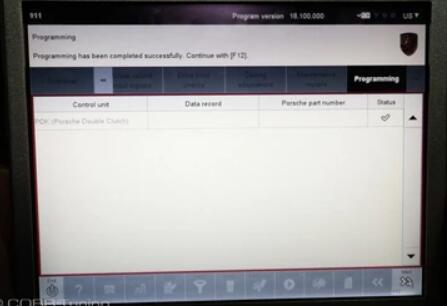
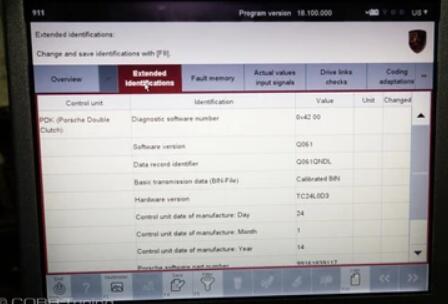
7.And that is it, you happen to be completed! This could be a good time to verify for any transmission fault codes and clear them if they are present. You are able to confirm you happen to be around the most recent Q061 ROM by picking the "Transmission Control†function around the principal menu and picking "Extended Identifications†on the best scroller bar.
Posted by: youobd2 at
11:14 AM
| No Comments
| Add Comment
Post contains 607 words, total size 8 kb.
September 06, 2018
Witch kind of key Autel MaxiSys Elite can program?
Dear sir,
This product support IMMO Matching and program many kind of keys from different manufacturer, you can provide your model, then we will check for you.
Thanks
Does this Maxisys Elite show you connector diagrams, wire diagrams, etc? And can you update it say once every 5 years, without paying for each year?
Sorry it dose not show connector diagrams, wire diagrams, but have data stream and graph display, it’s with 1 year free update, after 1 year it will be charged for updating.
http://obd2trade.com/2018/08/27/witch-kind-of-key-autel-maxisys-elite-can-program/
Posted by: youobd2 at
10:02 AM
| No Comments
| Add Comment
Post contains 95 words, total size 1 kb.
August 19, 2018

The Basics
As you go through this you will find that there are any number of terms and abbreviations and the like that might not be clear. Let’s see if we can demystify some of these. For starters, Obd ii scan tool for On Board Diagnostics. And when you get into the problem codes you will see many places list DTC. This simply means Diagnostic Trouble Codes.
These obd2 code reader can be broken out to generic and enhanced. Generic codes will mean the same things regardless of the make and model of car in question. These codes generally begin with P0 or P2 and then are followed by a 3 digit number. These faults tend to be ones that could indicate air pollution problems. Enhanced DTCs normally begin with P1, these codes are specific to the make and model as well as sometimes the year and at times even engine size of a car. These codes are ones that you need to make sure you have looked up properly.
Some codes are listed as pending. This simply means that a piece of data that would flag the code was observed, but the system is not going to completely flag it if it doesn’t happen a certain number of times in a given period. More simply, there was something that went wrong, but it is something that isn’t a problem if it doesn’t happen frequently.
You may also see the MIL status listed. The MIL is the malfunction indicator light. This is generally the check engine light (or the service engine soon light). The status lets you know if there was a problem that has caused the light to need to come on or not. At times you will have a fault that can cause a code, even a code that is not pending, but it is not a big enough issue to turn on the light.
Components Needed: Hardware + Software
The components of the tool are simple, there is the device itself and the software that it runs and both of these must work together to do their job. A device that was built several years ago might still work fine, but if you have never updated the software that it is running, you aren’t going to have the newest codes and settings.
While this may not be a problem if your car is not quite as new as your tool, but once you try working on a car that is newer you may have issues. For the most part, the generic codes don’t change overly much, but some manufacturer specifics may have. You don’t want to launch into a repair on the wrong part because of outdated codes.
The software also plays a huge role when you are working with a wireless option. With these, you will need the software application loaded on your phone or tablet. For the most part, these can update fairly frequently, but if you don’t have it or can’t run the app, your hardware is as good as a paperweight.
Step by Step Installation Guide
These devices don’t need a lot of high-tech tools to tell you what is going on with your car. While each different device will have a slightly different procedure, a basic process for using them can be found here.
Step 1 Connect
To get any data you are going to need to plug your device into your car’s OBD port. This is normally found somewhere on the driver’s side, in the region under the steering wheel. Your car’s manual should point you to the right location and short of that a quick google search or some old-fashioned poking around should quickly reveal the location.
If you have a wireless model you’ll need to find your attached device. For most, you will need to turn the key to the on position (many will ask you not to fully start the car, though).
Step 2 Read
Your device will read the data it is receiving in order to come up with the problem code. Depending on your particular set up it may start going through this process once the key is turned or you may need to command it to run a diagnostic. Either way, once the scanner has found the issue it will display a code or a number of codes.
Step 3 Understand
Having the code is great, but unless you’ve memorized all the problem codes it is only the first step. You will need to understand what that string of letters and numbers is telling you is wrong and probably what needs to be done to fix it.
If you have some styles this will meaning going through a book or CD of codes to come up with what it means or a quick online search. The more high-end models will provide an onscreen display to explain the issue. If your model has a built-in guide, it may even tell you a few things you can do to fix the problem.
Step 4 Make an Action
Now that you are sure you know what the code says and have an idea of what caused it, you will need to make an action. This could be anything from merely clearing the code to doing some work on the car or just taking Truck Diagnostic Tool into the mechanics to fix the problem.
Sometimes codes will trip because something gave the car a false signal, this would be a case to clear it and go on. If there truly is a problem the light will come back on. Otherwise, either you or your mechanic will do some work prior to resetting the code.
Posted by: youobd2 at
10:14 AM
| No Comments
| Add Comment
Post contains 953 words, total size 6 kb.
August 12, 2018
This post show a guide on how to use CGDI Pro 9S12 and CGDI MB to add new keys for Benz W639.
Procedures:
Step 1:Read EIS Data
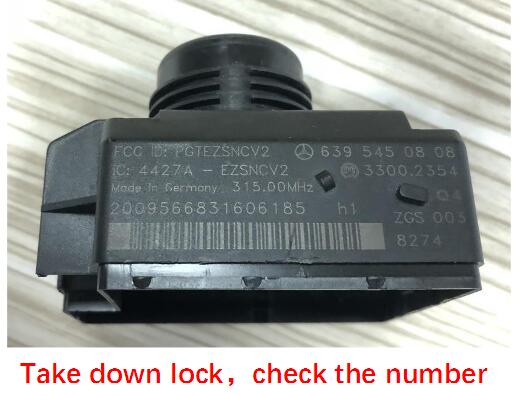
Check the EIS number
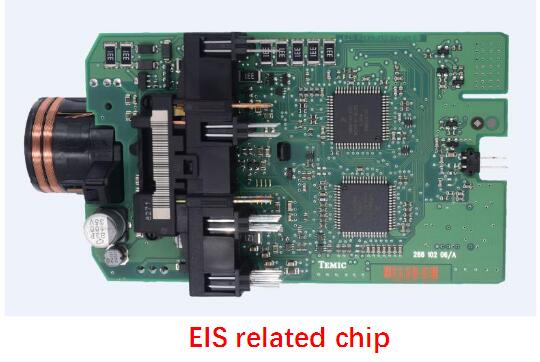
EIS PCB chips:
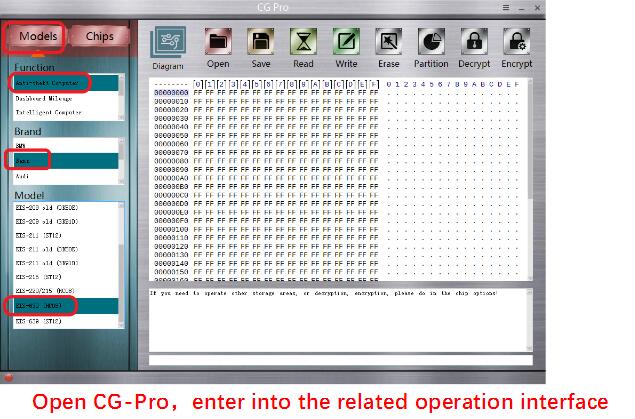
Run the CG Pro 9S12 software:
Select "Anti-theft Computerâ€,â€Benzâ€,â€EIS-639 (HC0 â€
â€
Then follow software wiring diagram to connect the cable connector to EIS PCB.
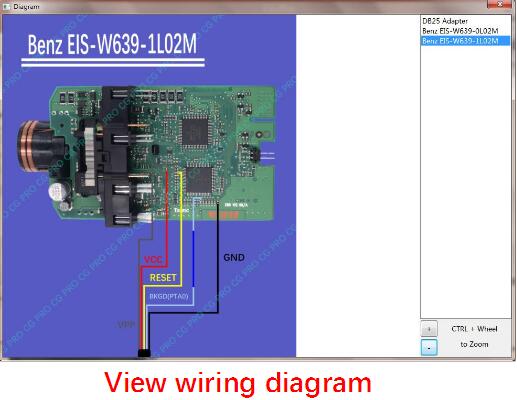
CGDI Pro 9S12 wiring connection to EIS
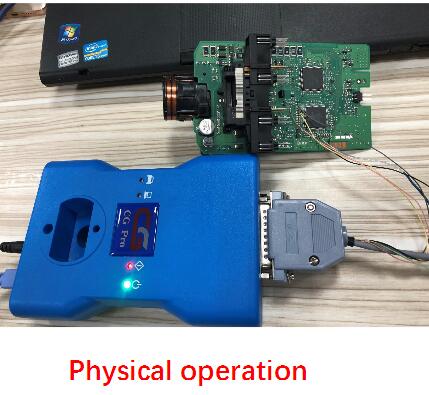
Click "Read†to read EIS data
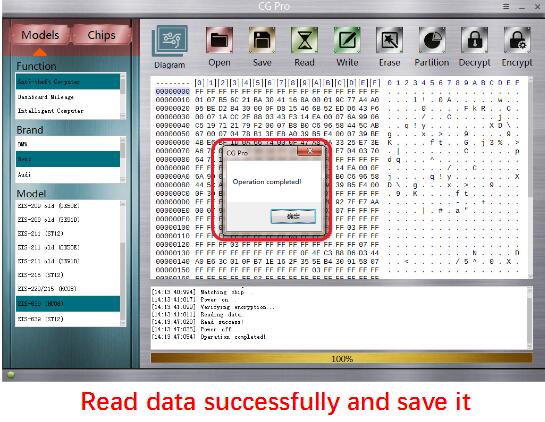
After EIS data reading successfully,save it on your laptop.
Step 2:Adding New Key
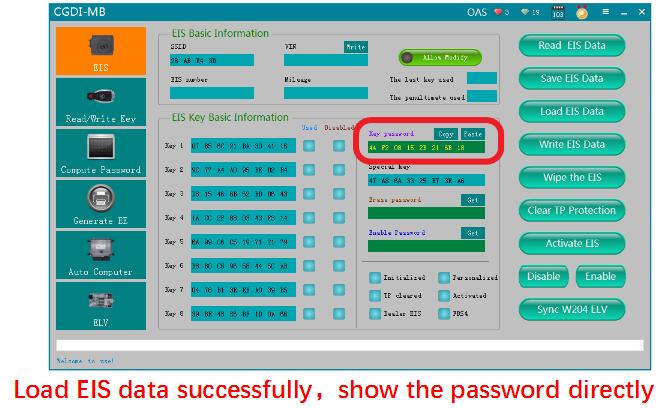
Run CGDI MB software and load EIS data you save before.Then software will show the password.
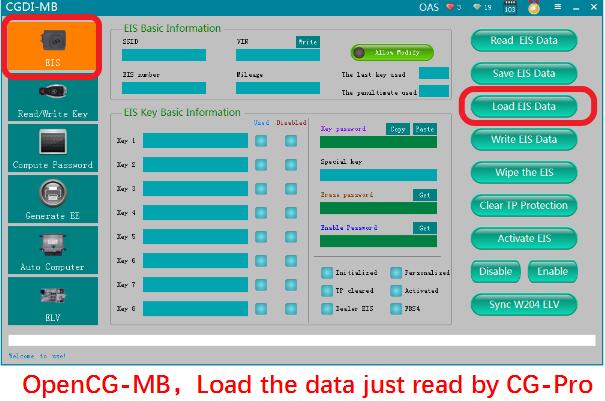
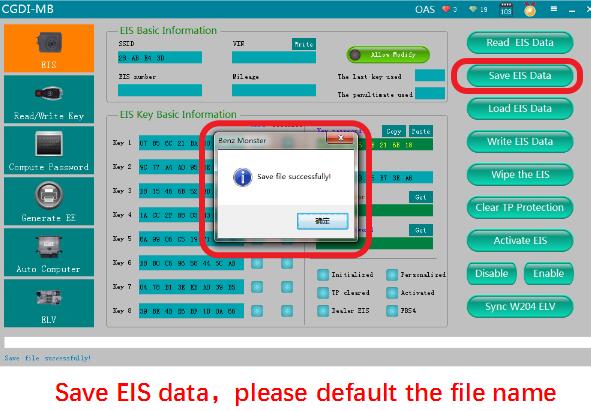
Then click "Save EIS Dataâ€,and you would better to use default file name to save it.
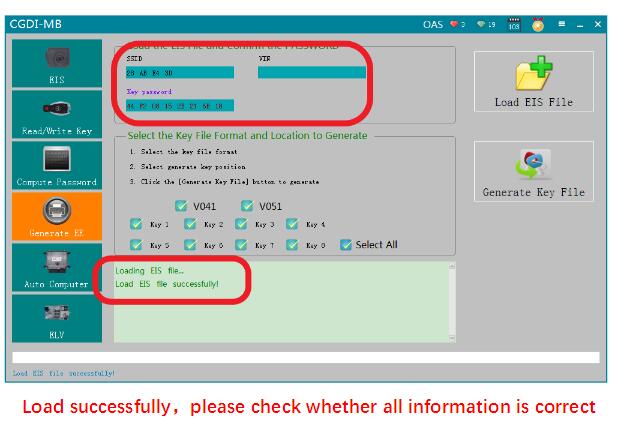
Click "Generate EEâ€,then click "Load EIS File†button to load the EIS data.(This EIS data saved by CGDI MB software,not by CGDI Pro software.)
After EIS data loading,pls check data information.
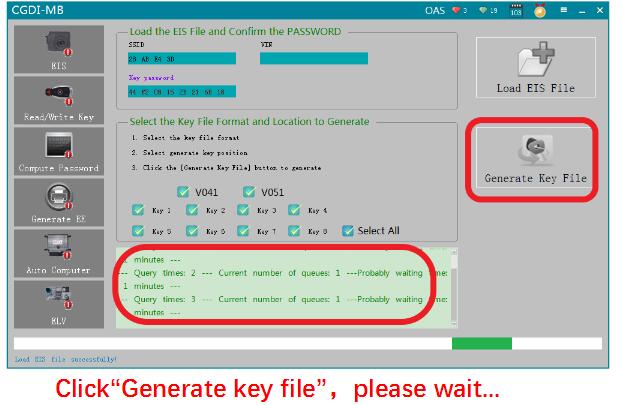
Then click "Generate Key Fileâ€,and wait…
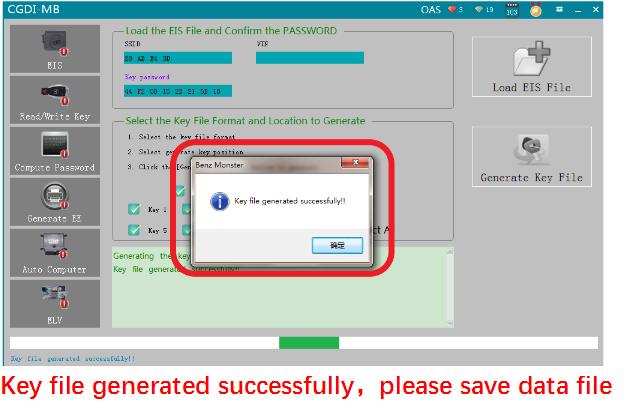
Then the CGDI MB software will prompt you "key file generate successfullyâ€,you need to save the data file.
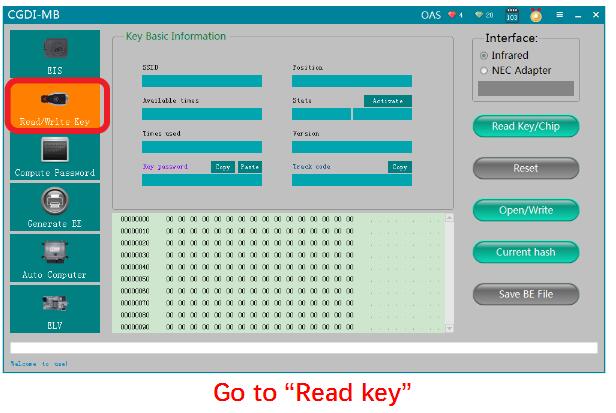
Select "Read/Write Keyâ€
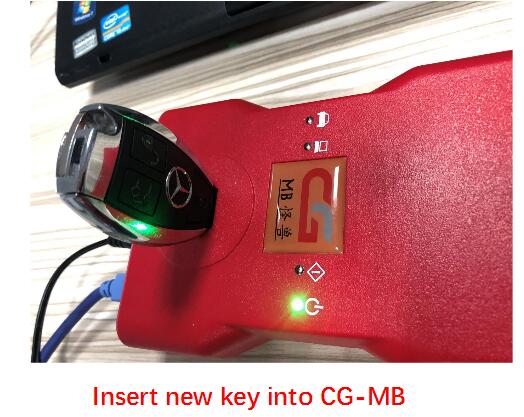
Insert new key you want to add intoKey Programmer CGD MB slot.
Click "Readâ€,the software will show this blank key information

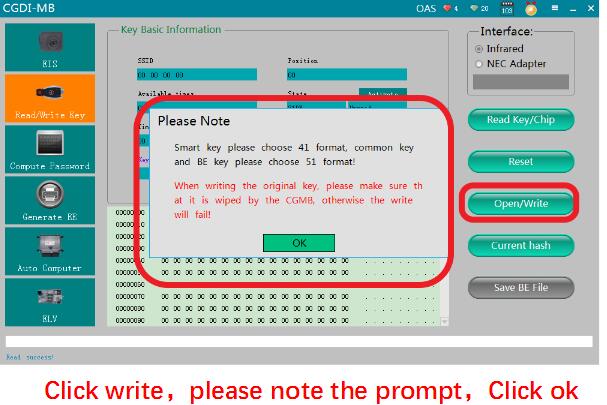
Click "Open/Writeâ€,and check the warning massage:
Smart key please choose 41 format,common key and BE key please choose 51 format.
When writing the original key,you need to use CGDI MB fromwww.obd2tool.com to erase the key data before,otherwise the programming progress will fail.
Choose a unused key data file,and open it to continue writing progress.

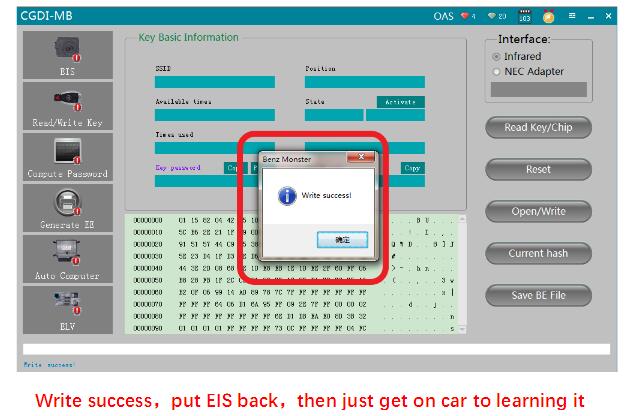
After writing successfully,install EIS back on vehicle,and then perform key learning.
http://wholesaleobd2.net/2018/08/04/how-to-add-benz-w639-with-cgdi-pro-and-cgdi-mb/
Posted by: youobd2 at
08:22 AM
| No Comments
| Add Comment
Post contains 271 words, total size 6 kb.
August 03, 2018
LaunchX431 V+ added new softwares,now it can support 62 softwares.As below:
X431 V+ HD Diagnostic Tool Software list:
1 WP_DIESEL
2 HD_BOSCH
3 DACHAI
4 HD_ZHONGTONG
5 AUTOSEARCH
6 HD_ABS
7 HD_FUSO
8 HD_CREDO
9 HD_RENAULT
10 DAF
11 HD_IVECO
12 HD_HINO
13 HD_IRISBUS
14 FAWJIEFANG
15 HD_SCR
16 CUMMINS
17 MACK
18 HD_OBD
19 HD_SUNLONG
20 SHANGCHAI
21 HD_HYUNDAI
22 YUCHAI
23 DFL
24 HD_GOLDENDRAGON
25 HD_HIGER
26 HD_CHAOCHAI
27 HD_XICHAI
28 HD_ISUZU
29 HD_QUANCHAITY
30 SCANIA
31 HD_YUFENG
32 HD_BONLUCK
33 HD_YANGCHAI
34 JAC_HD
35 HD_IRIZAR
36 HD_SETRA
37 SINOTRUK
38 HD_BENZ)
39 HD_NEOPLAN
40 HD_MAN
41 HD_SUNWIN
42 UD
43 FOTONAUMAN
44 HD_MACHINERY
45 HD_VOLVO
46 HD_DEMO
47 HD_JMC
48 HD_ALLISON
49 HD_DETROIT
50 HD_INTERNATIONAL
51 HD_WESTERN_STAR
52 HD_FREIGHTLINER
53 HD_ASHOK_LEYLAND
54 HD_STERLING
55 HD_KENWORTH
56 HD_CATERPILLAR
57 HD_ASTRA
58 DS_USAFORD
59 HD_SITCAR
60 HD_BREMACH
61 HD_TATA
62 HD_ERF
Posted by: youobd2 at
09:39 AM
| No Comments
| Add Comment
Post contains 152 words, total size 2 kb.
May 04, 2018
Newest Version BMW ICOM A2 For BMW Diagnostic & Programming Tool
1.with latest Software, Adapter and WIFI .
2. It is Second generation of BMW ISTA Diagnose and programming system.
3. Best BMW ICOM.
How to set wifi about the item bmw icom with wifi
Pay attention the bmw icom wifi setting
1.Usb wifi insert the computer usb connection firstly.
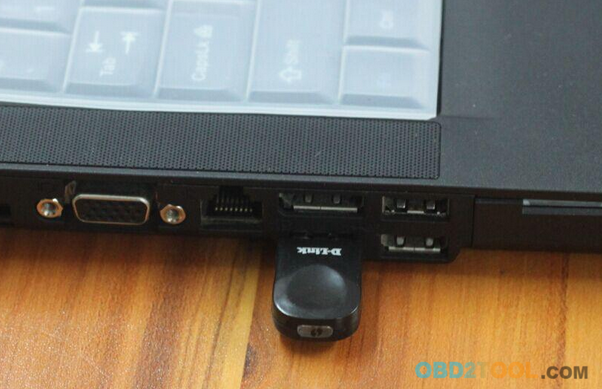
2.Close the computer wifi itself and other new added wifi, only ours device usb wifi, Wired connection port can not connect cable or device.
3.after confirmation, then boot computer.
4.And then confirm all the network is turned off and no connection of wired cable.
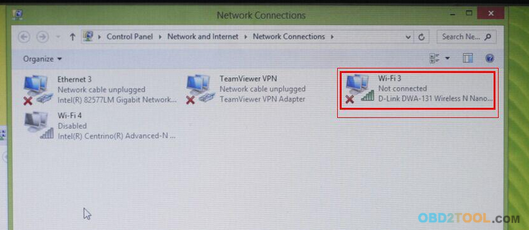
The picture shows wifi can not turn off, it is ours wifi.it is normal when it showsâ€Xâ€
5.Start software and choose wifi for ICOM.

6.And then connect icom a2 to car, wait 20 to 60 seconds, you can see the device wlan led not blinking or slowly blinking.
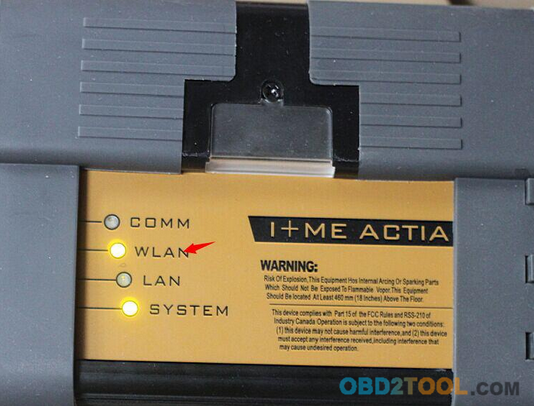
It shows usb wifi and icom a2 wifi communication is ok.
7.Now you can click diagnosis or programming software)
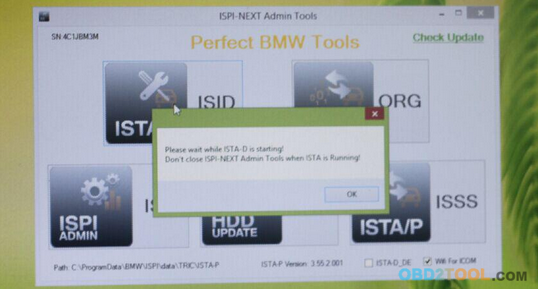
when you get this notice, just click ok.And don’t close it, just narrow it down.
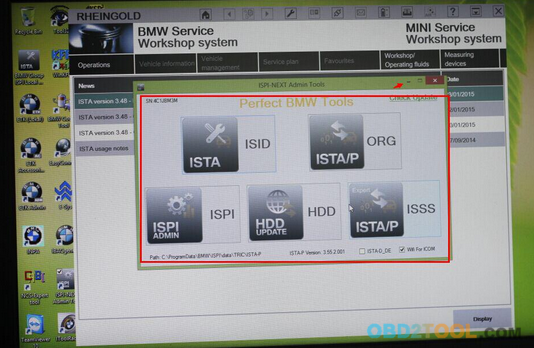
recognize the device normally
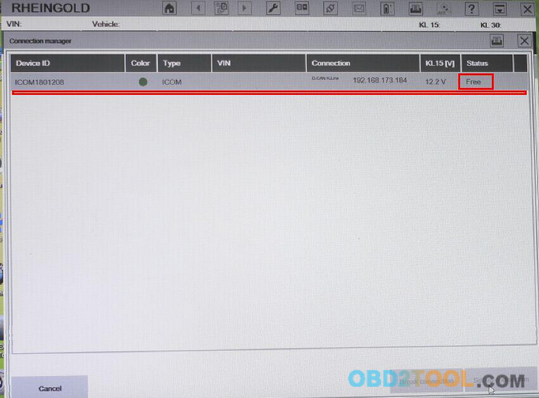
Posted by: youobd2 at
03:05 AM
| No Comments
| Add Comment
Post contains 205 words, total size 3 kb.
May 01, 2018
Tech-2 for GM is the same tester GM Technicians use to diagnose GM vehicles.
1.The VetronixGM Tech 2 comes with Authentic GM software and provides support for on-board diagnostics on all GM systems 1992 thru 2013.
2.TIS2000 do till 2007 year GM car programming.
3. Support Car Models: GM, SAAB, Opel, Suzuki, Isuzu, Holden
OBD2TOOL.COM provide you best price, high quality items and one year warranty with free technique service
Top 7 reasons to get for GM Tech2:
1. TheTech 2comes with one 32 mb card ( please see the card size option) and candi
module interface, do not need to buy seperately, full package like the
picture shows.
2. Extra cards can do more different cars: For GM/For SAAB/For OPEL/For SUZUKI/For ISUZU/For HOLDEN
3. The Tech-2 is the same tester for GM Technicians use to diagnose for GM vehicles.
4. TIS2000 do for GM car programming cars till 2007 year,Tis2000 need install on WIN XP.
5. TIS2000 for SAAB support car programming before 2008 year.
6. In stock with fast delivery
7. After sale service: One Year warranty
GM Tech2 related picture shows:
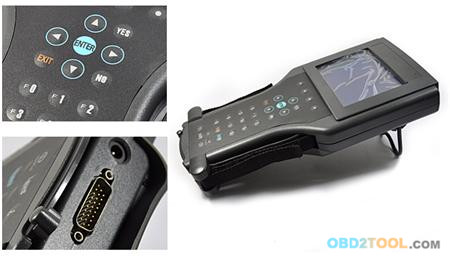
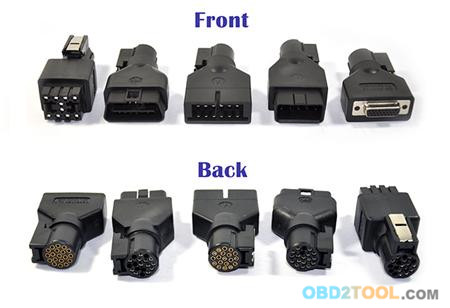
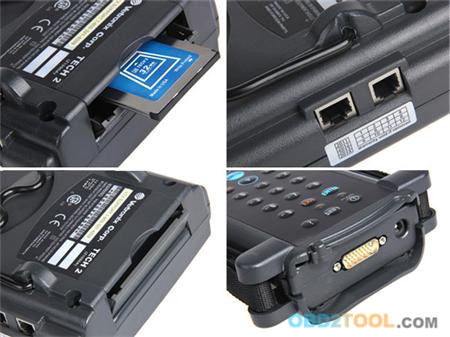
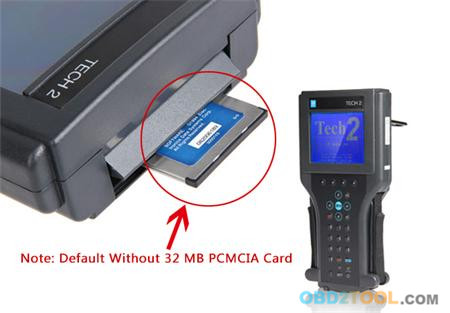
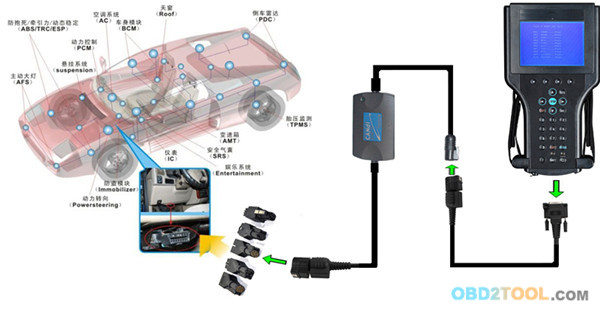
Tech2 for GM Connection with Candi interface Picture:
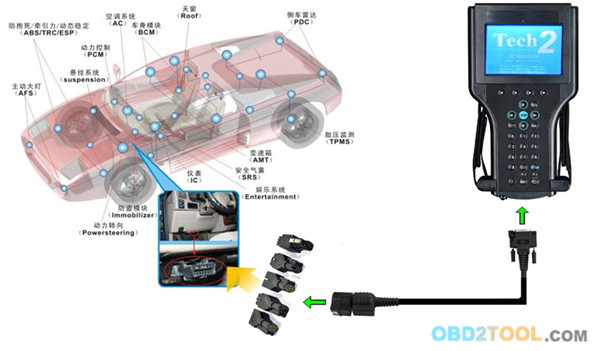
Tech 2 for GM Connection without Candi interface picture:
Tech2 Software for your choose:
For GM
For GM-English 32.008
For GM-Germany 32.008 1991-2013
For GM-Spanish 32.008 1991-2013
For GM-Italian 32.006
For GM-Japanese 32.006 1991-2013
For GM-French 32.008 1991-2013
For GM-Thai 32.008 1991-2013
For GM-Dutch 32.006
For GM-Portuguese 32.008 1991-2013
For GM-Korean 32.008 1991-2013
For OPEL
For OPEL-English 1997-2014 180.000 (Newest software)
For OPEL-Italian 133.001 1997-2012
For OPEL-Germany 85.001 1997-2008
For OPEL-Spanish 91.001 1997-2009
For SUZUKI
For SUZUKI-English 01.210.020
For SAAB
For SAAB-English 148.000
For ISUZU
For ISUZU-English 107.021
CAN-BUS: 2010- (CAN-BUS support car models 2006-2010)
K-line: 11.53 1996-2011 (K-line support car models from 1996 to 2011)
(Please select one: CAN-BUS or K-line)
For Holden
For HOLDEN-English 149.000 1999-2013 (Only Support North American Holden vehicles)
Blank Card
You can put your own software inside for use.
Tech 2 for GM Specification:
1. Features
1) Authentic For GM software in the Tech 2 Flash means the most
comprehensive diagnostic software available for late model For GM
vehicles.
2) Support for on-board diagnostics on all For GM systems 1992 thru current year.
3) Removable hardware modules provide insurance against scan tool obsolescence.
4) Large, easy-to-read backlit screen.
5) RS232 & RS485 ports provide the avenue to connect future devices to your Tech 2 Flash.
6) Ability to capture stored DTCs, Freeze Frame, and Failure Record for later review.
7) Ability to view the status of vehicle diagnostic tests as they run.
Bi-directional The authentic For GM 1992-current year software will
provide full bi-directional control when performing power train,
chassis, and body diagnostics.
9) Vetronix Tech 2 Specifications
10) Dimensions: 12
11) Microprocessor: 32 bit,16 MHz
12) Memory: 32 MB flash type II PCMCIA. Type III slot available for future expansion.
13) Communications: Integral RS232 communication port.
14) Screen: 3.8.8 backlit monochrome with full graphics capability:
320,40 pixels. Displays up to 9 vehicle parameters at once .Download
Tech2 Brochure (5.2 Mb)
An industry change in protocol from OBD II to Controller Area Network (CAN) has begun. In order to perform diagnostics on a vehicle that uses the CAN interface; you will need the Tech 2 Flash and a CAN diagnostic interface module. The module connects between the Tech 2 Flashs diagnostic link cable and the OBD adapter. Once the module is connected, it can be used on all GM vehicle applications,even those vehicles using other platforms such as OBD I and OBD II.
2. The following For GM vehicles utilize the CAN interface
05 For Buick Allure (3.6L)
05 For Buick LaCrosse (3.6L)
05 For Buick Rainier (5.3L)
04-05 For Buick Rendezvous (3.6L)
04-05 For Cadillac CTS (3.6L)
04-05 For Cadillac SRX (3.6L / 4.6L)
04-05 For Cadillac XLR (4.6L)
05 For Cadillac STS (3.6L / 4.6L)
05 For Chevrolet Cobalt (2.2L)
05 For Chevrolet Corvette (6.0L)
05 For Chevrolet Equinox (3.4L)
05 For Chevrolet TrailBlazer (5.3L)
05 For Chevrolet SSR (6.0L)
04 For Chevrolet Malibu (Body/Chassis only)
05 For Chevrolet Malibu (3.5L)
05 For GMC Envoy (5.3L)
05 For Pontiac G6 (3.5L)
05 For Pontiac GTO (6.0L)
05 For Pontiac Pursuit (2.2L)
GM Tech2 VS MDI for GM (item SP163)
Tech2 is the most cost-effective one, for it is with reasonable price
and covering not only For GM vehicles, but also For SAAB,For OPEL,For
SUZUKI,For ISUZU and as well as For Holden.
Besides, it is with authentic For GM software and support on-board
diagnostics on all gm systems. If you want to use it to do For GM car
programming, you should buy tis2000 software.
One disadvantage is that tech2 remains an basic or essential gm diagnostic tool for vehicles before 2010.
For GM MDI is used to serve vehicles with auxiliary CAN bus that cannot be served by tech2. Actually, thisCar Diagnostic Tool is working with vehicles after 2010 and covering newer models than that of Tech2.
Its highlights are with faster reprogramming (increased about 20-70%),
serving exclusive new models, and more economical. This is a good
investment for future vehicles models.
How to disable GM, SAAB DRL with Tech2
Many people want to disable the day running light for fuel economy or
other reasons, me included. Here I have figured out a simple way to
reset it completely on my 1999 GM and my daughters 2004 SAAB with GM
Tech2 scanner from my friend. This takes about 5 minutes from start to
finish and will completely disable your automatic headlights so they
will never come on. But all of the lights will function correctly. They
just would not be automatic anymore.
Tools you will need:
GM Tech2 scanner for GM and SAAB
32MB PCMCIA Card for Tech2
A SAAB car (Here take my daughters 2004 SAAB for example)
How to:
1. Insert 32MB card into Tech2
2. Run Tech2 diagnostic tool
3. Go to Diagnostic Mode
4. Select Diag >2003 >9-3 Sport Select Body>Exterior Lighting and Horn
5. Low beam adjustments, F0. Auto Low Beam also in Pos 0
6. Change setting to NO
7. Wait several seconds until the lights flicker and go out
8. Exit
9. Go to Fog Lights Front
10. Change to Position 1 & 2 ROW (Rest of World) Program and Exit
This will give you:
Pos 0 > No Lights
Pos 1 > Fogs and 5 Watt Headlamp / Parking Light
Pos 3 > Low Beam, High Beam, Manual Control of Fogs
GM Tech 2 Package List:
Tech-2 Flash Tester
32 MB PCMCIA Card with GM OE Applications
CAN diagnostic interface module(CANdi) and instruction sheet download (199.2 kb)
RS232 cable and user’s manual
RS232-DB9 adapter
DLC Cable, DLC Loopback Adapter
12V Cigarette Lighter Power Cable
SAE 16/19 Adapter
NAO 12/19 Adapter
Battery Power Cable
Storage Case
TIS 2000 CD
Posted by: youobd2 at
01:16 PM
| No Comments
| Add Comment
Post contains 1143 words, total size 10 kb.
April 26, 2018
GM Tech 2 with multi-languages, TIS2000 Programming CD, CANDI interface, update via 32MB Card, multi car model software to choose,Support GM,SAAB,OPEL,SUZUKI,ISUZU and Holden. One GM Tech II Scanner can be used on all GM vehicle applications.
GM Tech2 Professional GM Diagnostic Tool for GM vehicles.It supportsall GM systems from 1992 to 2014.
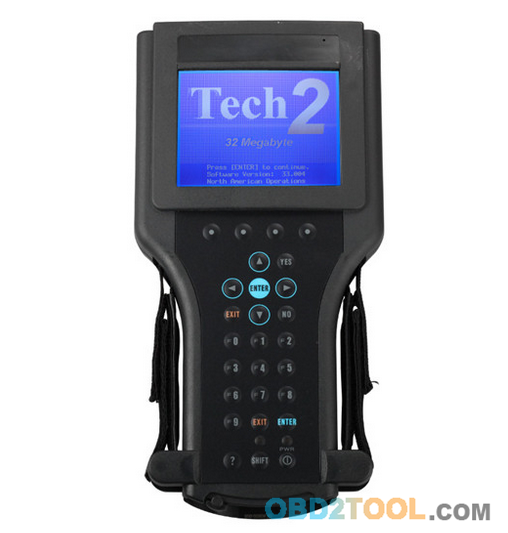
GM Tech2 Scanner specification:
1) Dimensions: 12
2) Microprocessor: 32 bit,16 MHz
3) Memory: 32 MB flash type II PCMCIA. Type III slot available for future expansion.
4) Communications: Integral RS232 communication port.
5) Screen: 3.8.8 backlit monochrome with full graphics capability:
320,40 pixels. Displays up to 9 vehicle parameters at once .Download
Tech2 Brochure (5.2 Mb)
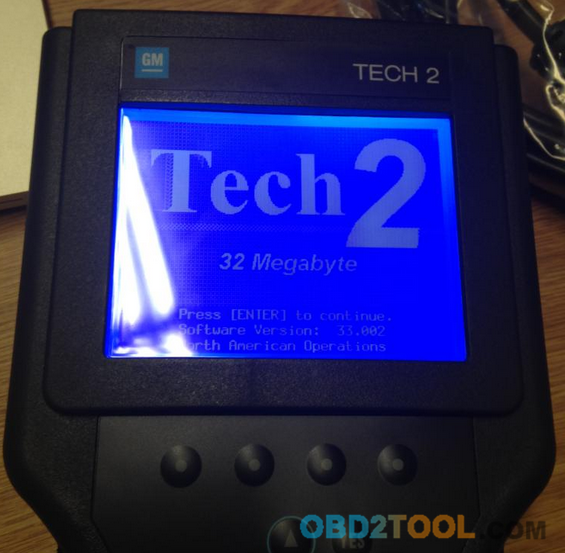
GM Tech2 Features:
1) Authentic GM software in the Auto Scanner Tool Tech 2 Flash means the most comprehensive diagnostic software available for late model GM vehicles.
2) Support for on-board diagnostics on all GM systems 1992 thru 2011.
3) Removable hardware modules provide insurance against scan tool obsolescence.
4) Large, easy-to-read backlit screen.
5) RS232 & RS485 ports provide the avenue to connect future devices to your Tech 2 Flash.
6) Ability to capture stored DTCs, Freeze Frame, and Failure Record for later review.
7) Ability to view the status of vehicle diagnostic tests as they run.
Bi-directional The authentic GM 1992-current year software will
provide full bi-directional control when performing power train,
chassis, and body diagnostics.
An industry change in protocol from OBD II to Controller Area Network
(CAN) has begun. In order to perform diagnostics on a vehicle that uses
the CAN interface; you will need the Tech 2 Flash and a CAN diagnostic
interface module. The module connects between the Tech 2 Flashs
diagnostic link cable and the OBD adapter. Once the module is connected,
it can be used on all GM vehicle applications,even those vehicles using
other platforms such as OBD I and OBD II.
An industry change in protocol from OBD II to Controller Area Network
(CAN) has begun. In order to perform diagnostics on a vehicle that uses
the CAN interface; you will need the Tech 2 Flash and a CAN diagnostic
interface module. The module connects between the Tech 2 Flashs
diagnostic link cable and the OBD adapter. Once the module is connected,
it can be used on all GM vehicle applications,even those vehicles using
other platforms such as OBD I and OBD2 Scanner.
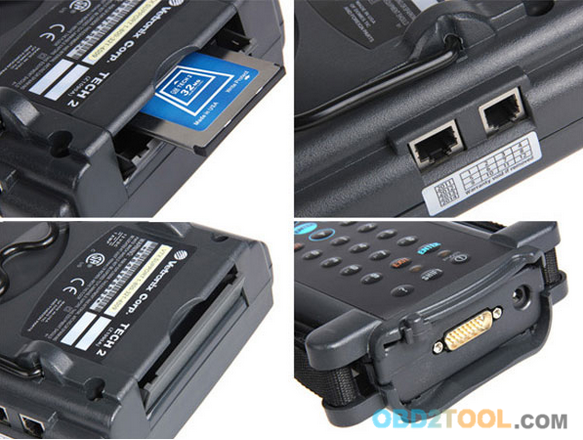
For GM
For GM-English 33.004 1991-2014 (Newest software)
For GM-Germany 32.007 1991-2013
For GM-Spanish 32.008 1991-2013
For GM-Italian 32.006
For GM-Japanese 32.006 1991-2013
For GM-French 32.008 1991-2013
For GM-Thai 32.008 1991-2013
For GM-Dutch 32.006
For GM-Portuguese 32.008 1991-2013
For GM-Korean 32.008 1991-2013
For OPEL
For OPEL-English 1997-2014 165.000 (Newest software)
For OPEL-Italian 133.001 1997-2012
For OPEL-Germany 85.001 1997-2008
For OPEL-Spanish 91.001 1997-2009
For SUZUKI
For SUZUKI-English 01.210.020
For SAAB
For SAAB-English 148.000 1998-2013
For ISUZU
For ISUZU-English 107.021
CAN-BUS: 2010- (CAN-BUS support car models after 2010)
K-line: 1996-2011 (K-line support car models from 1996 to 2011)
(Please select one: CAN-BUS or K-line)
For Holden
For HOLDEN-English  149.000 1999-2013
Tech 2 Vehicle CAN Interface:
05 Buick Allure (3.6L)
05 Buick LaCrosse (3.6L)
05 Buick Rainier (5.3L)
04-05 Buick Rendezvous (3.6L)
04-05 Cadillac CTS (3.6L)
04-05 Cadillac SRX (3.6L / 4.6L)
04-05 Cadillac XLR (4.6L)
05 Cadillac STS (3.6L / 4.6L)
05 Chevrolet Cobalt (2.2L)
05 Chevrolet Corvette (6.0L)
05 Chevrolet Equinox (3.4L)
05 Chevrolet TrailBlazer (5.3L)
05 Chevrolet SSR (6.0L)
04 Chevrolet Malibu (Body/Chassis only)
05 Chevrolet Malibu (3.5L)
05 GMC Envoy (5.3L)
05 Pontiac G6 (3.5L)
05 Pontiac GTO (6.0L)
05 Pontiac Pursuit (2.2L)
http://forobd2tool.com/blog/2018/04/23/gm-tech2-professional-gm-diagnostic-tool-for-gm-vehicles/
Posted by: youobd2 at
03:18 AM
| No Comments
| Add Comment
Post contains 596 words, total size 6 kb.
April 23, 2018
BMW ISTA+ for BMW diagnostic & programming function, BMW ISTA+ software compatible with BMW ICOM A2,ICOM Next & Enet cable, recently some users to help those with error "Programming is not possible†when using BMW ISTA+. Eobdtool.com share How to Solve BMW ISTA+ 4.1 "Programming is not possible†as following.
Rheingold ISTA+ BMW Diagnostic Software BMW ISTA D/P software 2018.03 Version
Here obd2tool.com share lists possible solutions as follows:
Sw version: Ista+ 4.10.30
Hw: Enet cable
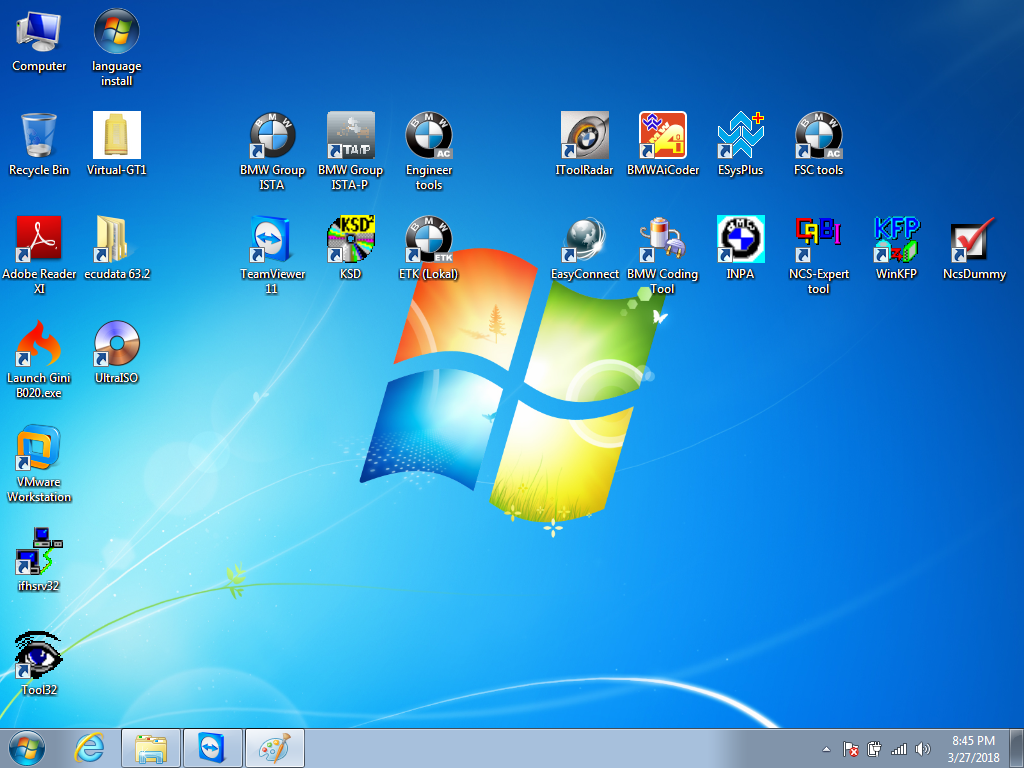
Error message: I get message after reading all ECU’s
"Programming is not possibleâ€
If I click this message away I can just continue.
I have: bin, binx64, host, hostx64
But which files/maps must be located in map PSdZ?
Solution 1:
Try it with the BLP data so the folder "data†under C / Rheingold / PSdZ / data ..
Of course, in the Reg also specify that the data is available but still as you have made everything on "false†..
you unpack the BLP under C / Rheingold / PSdZ / and you get the folder "data†..
So C / Rheingold / PSdZ / data ..
Reg:
"Product Version†= "4.10.30.15635â€
"Main Product Version†= "4.10â€
"Data version†= "10/04/31â€
"DataVersion_en-GB†"04/10/31â€
"Logistic Base Version†"10/04/30â€
"SWIData†= "04/10/30â€
"BMW.Rheingold.Programming.ExpertMode†"Trueâ€
"BMW.Rheingold.Programming.Enabled†= "Trueâ€
"BMW.Rheingold.Programming.PsdzDataPath†= ".. \\ .. \\ .. \\ \\ PSdZ data_swiâ€
If it doesn’t work, try the following solution. It works for bmw a2 in earlier version.
Solution 2:
In earlier versions this worked:
"BMW.Rheingold.Programming.ExpertModeâ€=â€Falseâ€
"BMW.Rheingold.Programming.Enabledâ€=â€Falseâ€
"BMW.Rheingold.Programming.PsdzDataPathâ€=â€..\\..\\PSdZ\\dataâ€
Have not tried on latest.
P.S. BLP must be installed normally into data folder. No need to create any empty folders.
Still had psdz path set to data_swi. You must adjust it to be data instead of data_swi when no sdp installed. Then it should not complain and work.BMW ICOM BLP data MUST be installed in all cases.
Solution 3:
Create empty folders
С:\Rheingold\PSdZ\data
С:\Rheingold\PSdZ\data_swi
Working registry
Windows Registry Editor Version 5.00
[HKEY_LOCAL_MACHINE\SOFTWARE\WOW6432Node\BMWGroup]
[HKEY_LOCAL_MACHINE\SOFTWARE\WOW6432Node\BMWGroup\ISPI]
[HKEY_LOCAL_MACHINE\SOFTWARE\WOW6432Node\BMWGroup\ISPI\ISTA]
"DataVersionâ€=â€4.10.31â€
"DataVersion_en-GBâ€=â€4.10.31â€
"ProductVersionâ€=â€4.10.30.15635â€
"MainProductVersionâ€=â€4.10â€
"InstallLocationâ€=â€C:\\Rheingoldâ€
"LogisticBaseVersionâ€=â€4.10.30â€
"SWIDataâ€=â€4.10.30â€
[HKEY_LOCAL_MACHINE\SOFTWARE\WOW6432Node\BMWGroup\ISPI\Rheingold]
"BMW.Rheingold.Programming.Enabledâ€=â€Trueâ€
"BMW.Rheingold.Programming.PsdzDataPathâ€=â€..\\..\\..\\PSdZ\\data_swiâ€
"BMW.Rheingold.Programming.ExpertModeâ€=â€Trueâ€
Rheingold location
Directory of c:\Rheingold\PSdZ
06-Apr-18 22:13 <DIR> .
06-Apr-18 22:13 <DIR> ..
29-Mar-18 19:35 <DIR> bin
29-Mar-18 19:35 <DIR> binx64
06-Apr-18 22:13 <DIR> data
16-Mar-18 09:25 <DIR> data_swi
29-Mar-18 19:35 <DIR> host
29-Mar-18 19:35 <DIR> hostx64
FULL SW
Directory of c:\Rheingold\PSdZ\data_swi
16-Mar-18 09:25 <DIR> .
16-Mar-18 09:25 <DIR> ..
16-Mar-18 09:52 <DIR> psdzdata
Lite SW
Directory of c:\Rheingold\PSdZ\data
06-Apr-18 22:13 <DIR> .
06-Apr-18 22:13 <DIR> ..
06-Apr-18 22:13 <DIR> psdzdata
Need purchase the Rheingold BMW ISTA+ BMW Diagnostic & Programming function just contact us freely.
http://obd2trade.com/2018/04/20/how-to-solve-bmw-ista-4-1-programming-is-not-possible/
Posted by: youobd2 at
12:53 PM
| No Comments
| Add Comment
Post contains 428 words, total size 6 kb.
March 11, 2018
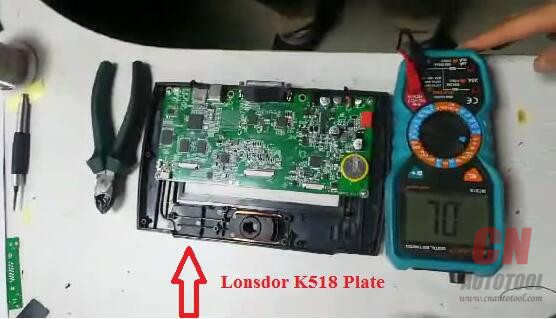
Topic: how to remove the capacitance on Lonsdor K518ISE PCB from CnAutotool so that you can use your own power supply and avoid the machine smokes.
Tools to use:
Digital multimeter
pencil
pliers
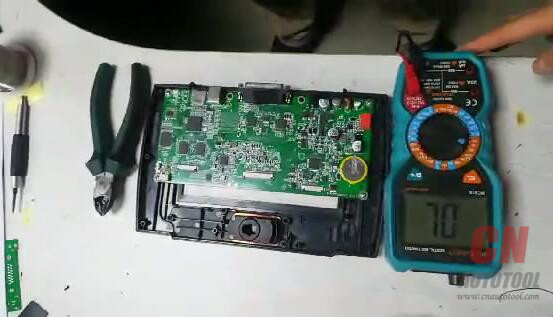
It's key programmer Lonsdor K518ISE plate.
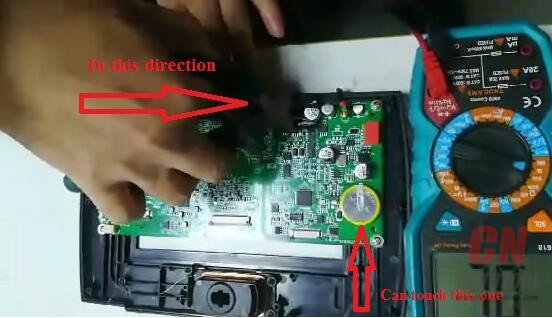
Tips (Very Important):
You hands are not allowed to touch any part of the Lonsdor K518ISE plate except the yellow round one.
Please follow the below picture to operate, please pay attention to the direction.
Please be gentleto remove the capacitance.
Now we use the multimeter to test the resistance of this port and see if the resistance is right.
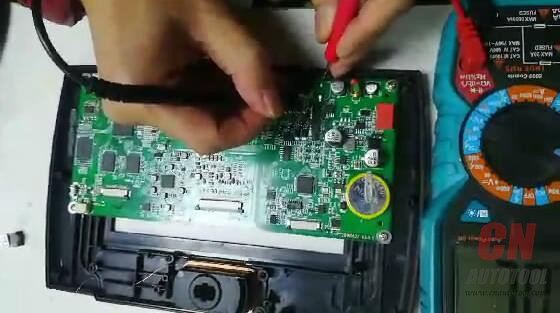
Done.
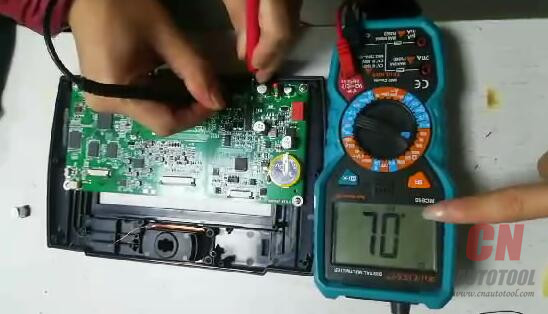
http://youobd2.blogattivo.com/The-first-blog-b1/Lonsdor-K518ISE-Update-American-car-models-list-b1-p151.htm
Posted by: youobd2 at
04:45 AM
| No Comments
| Add Comment
Post contains 113 words, total size 2 kb.
February 22, 2018
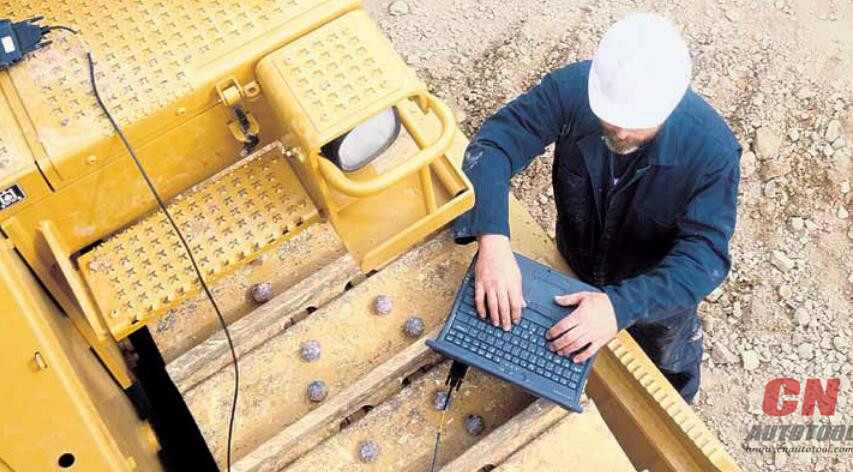
Maintain Productivity and Control Cost
Quickly reduce engine and machine downtime, control costs and schedule
repairs more efficiently by diagnosing problems using Cat?Electronic
Technician (ET).
Cat ET is easy to use. The software accesses information from the
electronic control modules on Cat engines and equipment. Using CAT ET,
technicians can view status parameters, logged codes, active codes,
perform functional tests, and record and view data logs of equipment
operation.
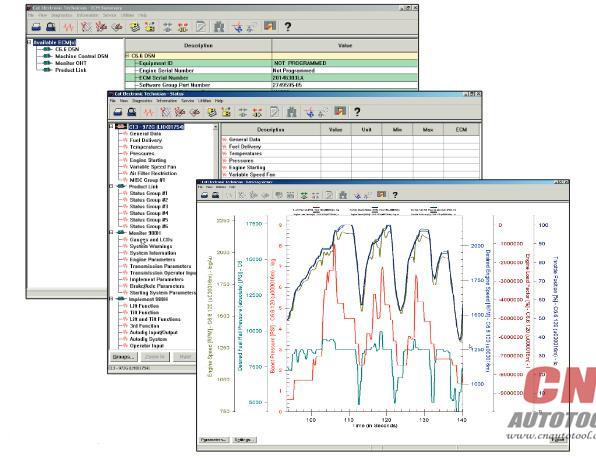
Optimize Profitability
* View active and logged diagnostic codes to quickly identify faulty sensors.
* Review logged event codes to show engine overspeeds, high temperatures, and more.
* Monitor fuel consumption.
* Perform diagnostic tests to quickly identify the root cause of problems.
* Calibrate key components to ensure maximum operating efficiency.
* Use Data Logger to record real-time data.
* View previously recorded data logs to monitor trends in the health of your equipment to ensure peak performance.
Maximize Efficiency
* Search help options to guide every task.
* Retrieve engine data quickly for fuel used, miles traveled, idle time and hours operated.
* Display status of engine speed, throttle position, timing advance, fuel flow and more.
* Check anDiagnostic Tool electronic control module’s configuration and change user settings.
CAT DEALERS DEFINE WORLD- CLASS PRODUCT SUPPORT
We offer you the right parts and service solutions, when and where you need them.
TheCaterpillar Electronic Technician network of highly trained experts can help you maximize your equipment investment.

Posted by: youobd2 at
12:51 PM
| No Comments
| Add Comment
Post contains 241 words, total size 3 kb.
February 19, 2018
Take Peugeot BSI 2004 HO5 odometer adjustment for example.
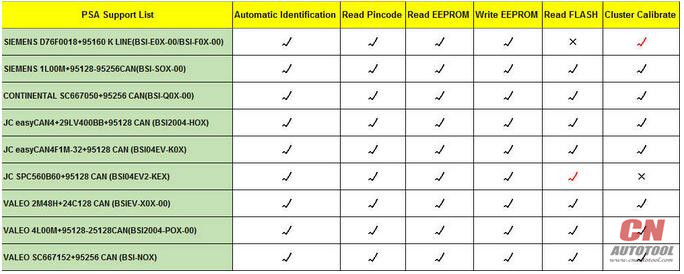
Guide:
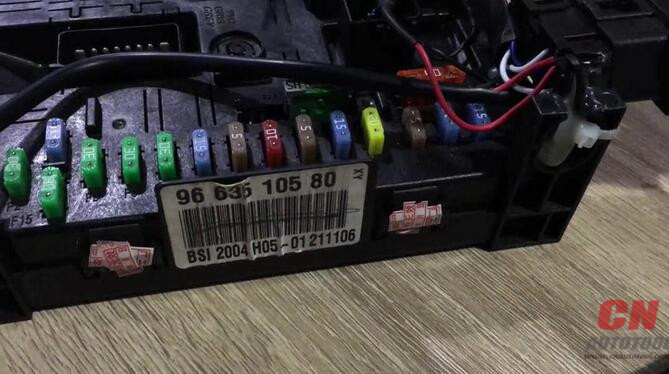
This is Peugeot BSI 2004 HO5 type removed from the car.
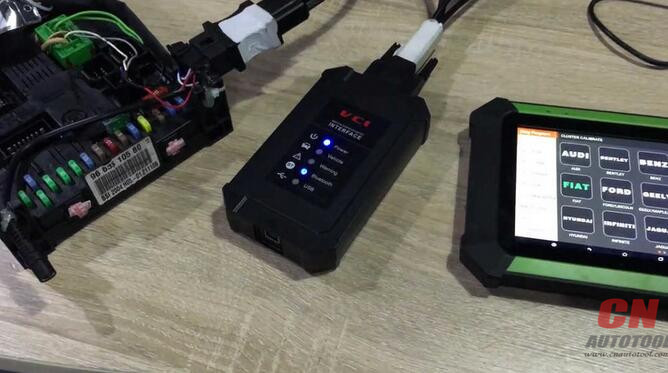
Connect X300 DP / X300 Pro 3 with the VCI box and BSI box.
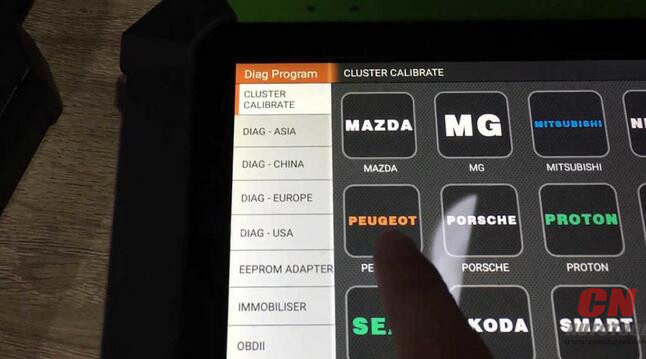
Tab "Cluster Calibrateâ€, then "Peugeotâ€.
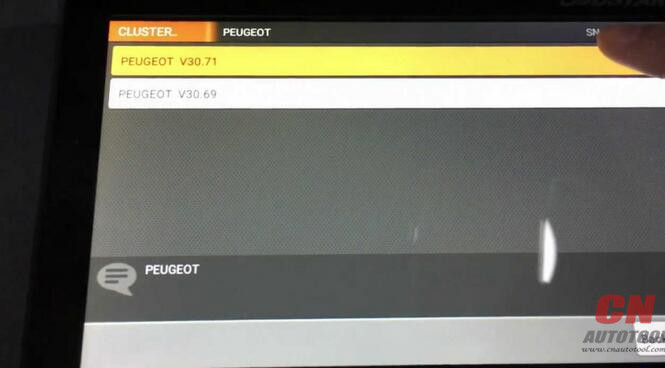
Tab the latest version.
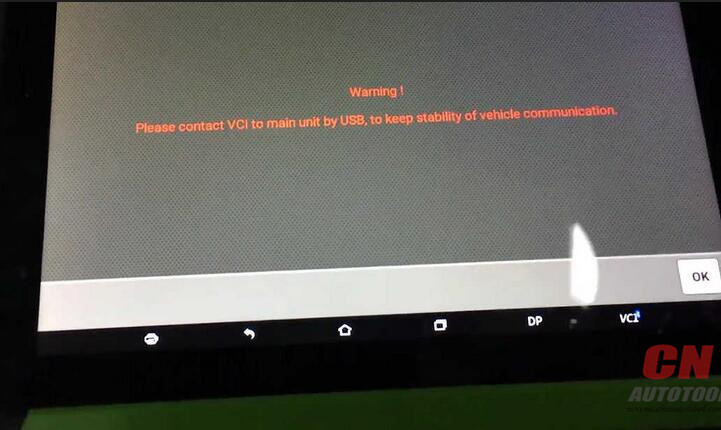
Warning! Please contact VCI to main unit by USB, to keep stability of vehicle communication.
Tab "OKâ€
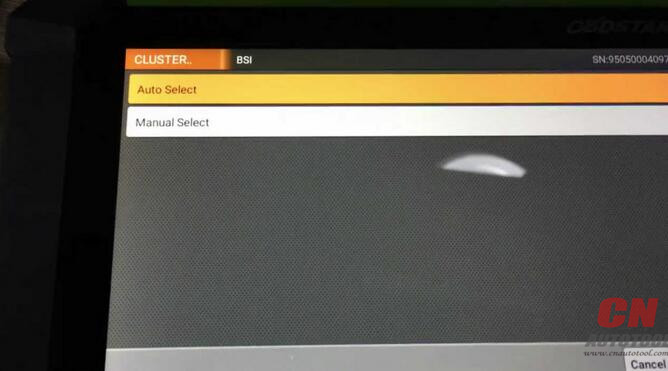
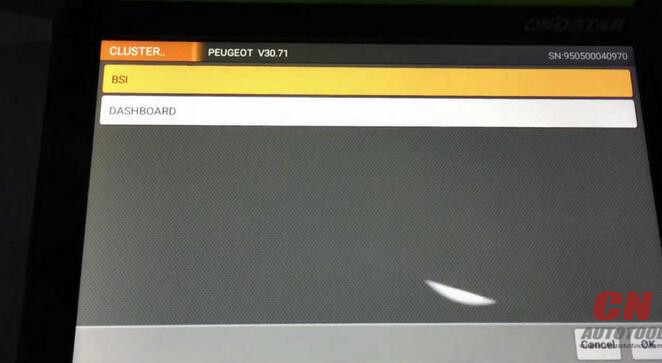
BSI (cluster calibration)
Option "Auto select†and "Manual selectâ€: If you don’t know what specifi type of BSI, you can tab "Auto selectâ€, if you know the BSI type, tab "Manual selectâ€.
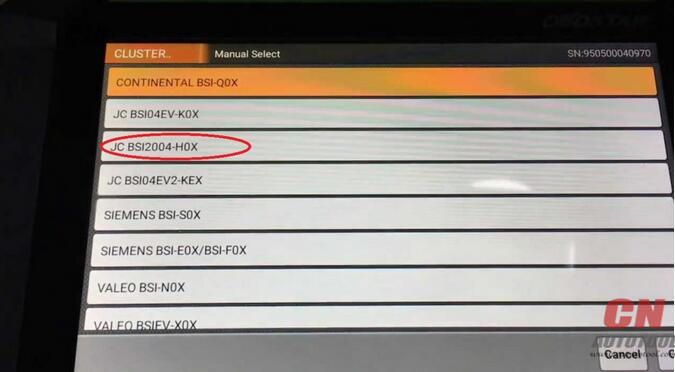
Tab the third option "JC BSI2004-H0Xâ€

Switch ignition on
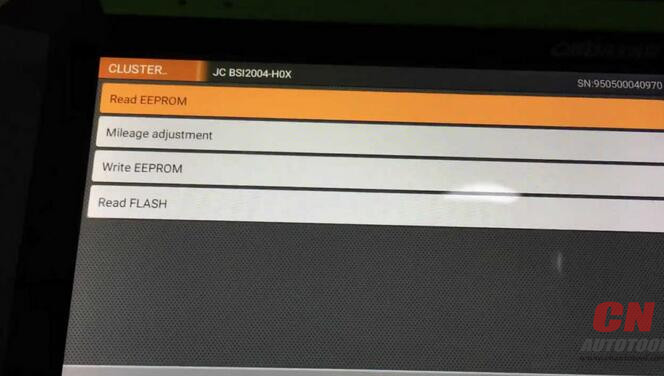
Next is to operate one by one: Read EEPROM, Mileage adjustment, Write EEPROM, Read Flash.
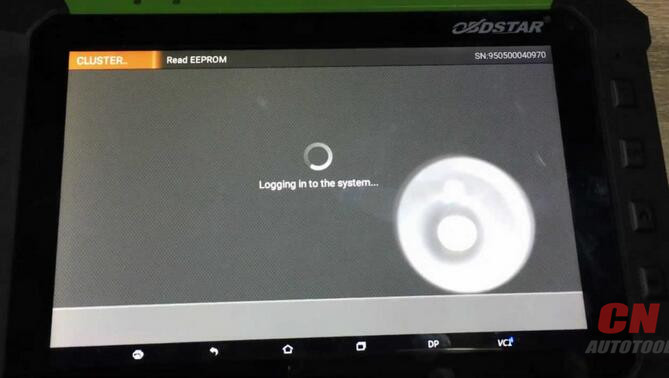
Communicating…
Logging in to the system…take 1-2 minutes.
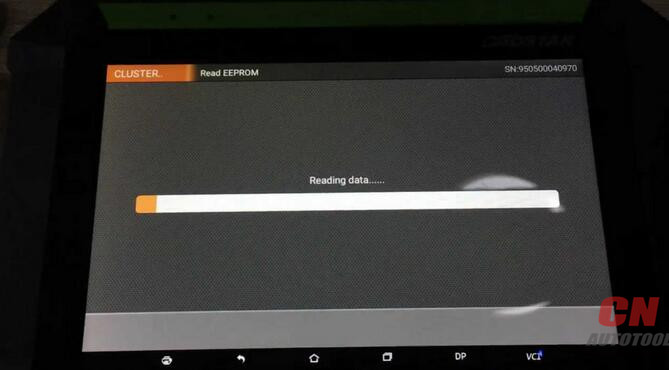
Reading data…
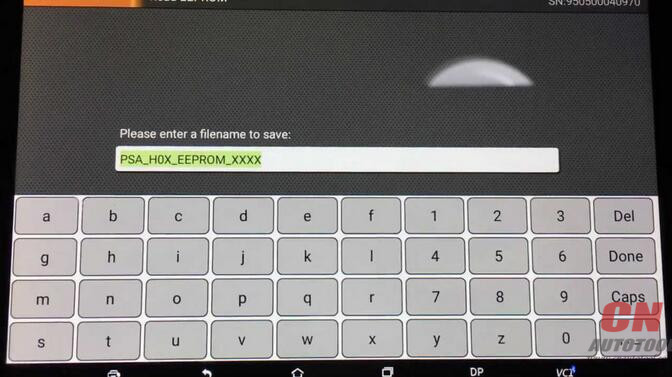
Please enter a file name to save.
You should take note this file name.

Input value:… tab "OKâ€

The file name that you enter already exists, whether to cover? tab "Yesâ€
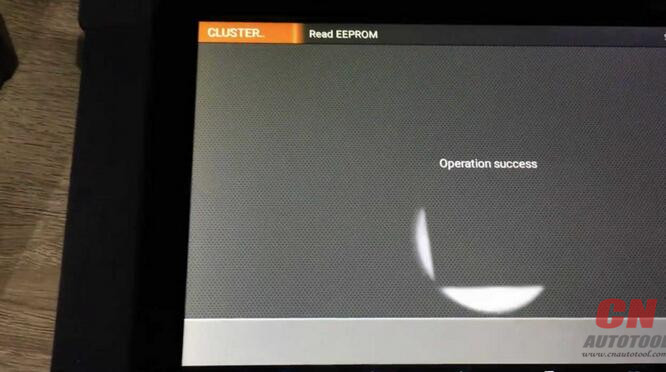
Operation succeed.
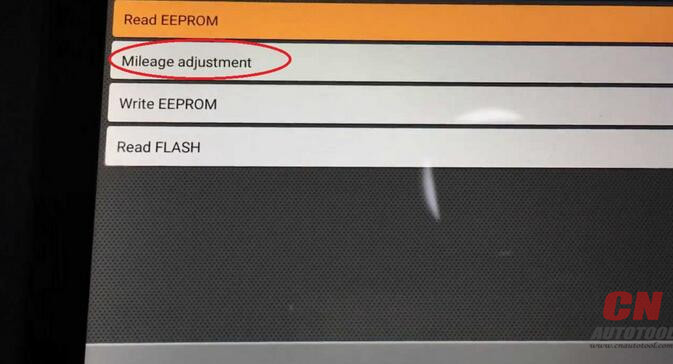
Back to tab "Mileage adjustmentâ€
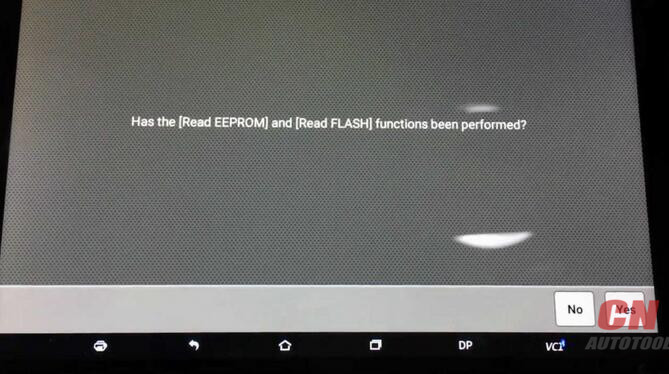
Has the "Read EEPROM†and "Read Flash†functions been performed? tab "Yesâ€
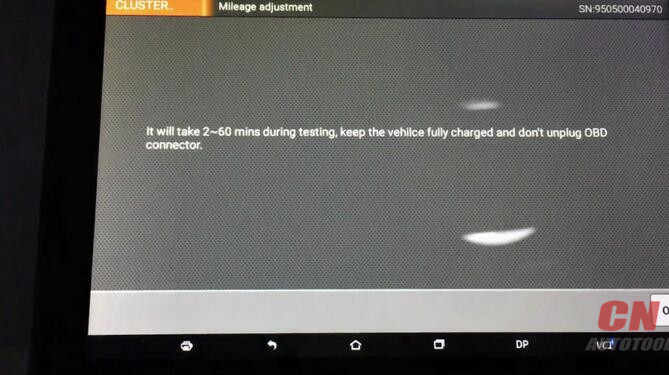
It will take 2-60 mins during testing, keep the vehicle fully charged and don’t unplug OBD connector.
Tab "Yesâ€.
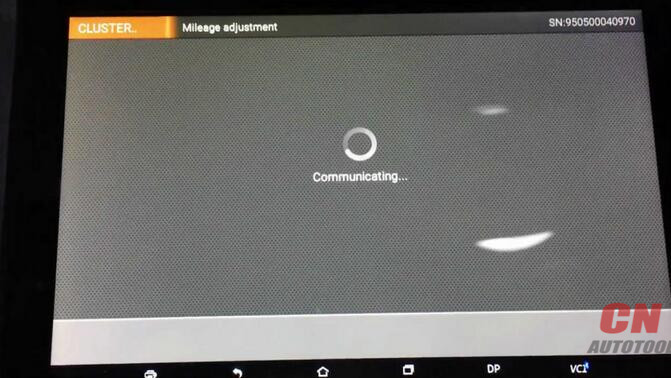
Communicating…

Current mileage: 3000 km
Please confirm the mileage correctly and press ENTER to contine.
Tab "Yesâ€.
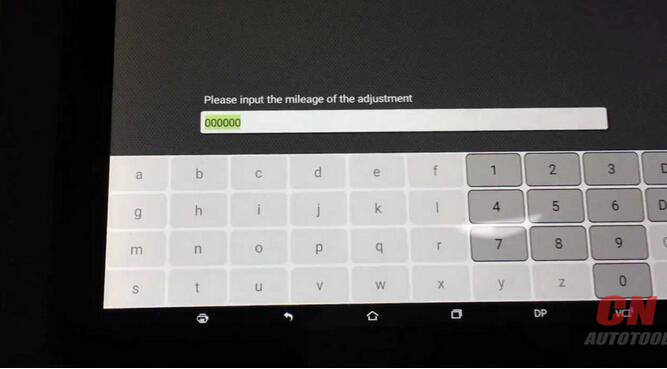
Please input the mileage of the adjustment.
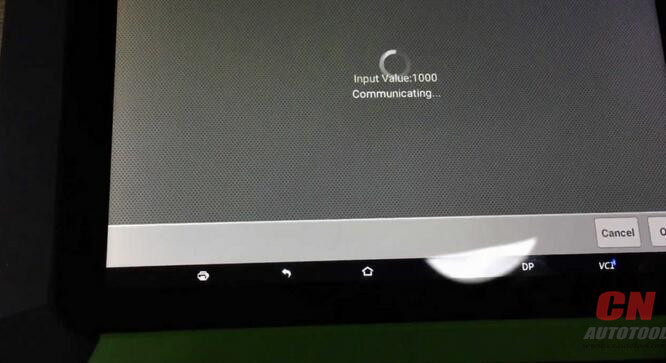

Communicating…
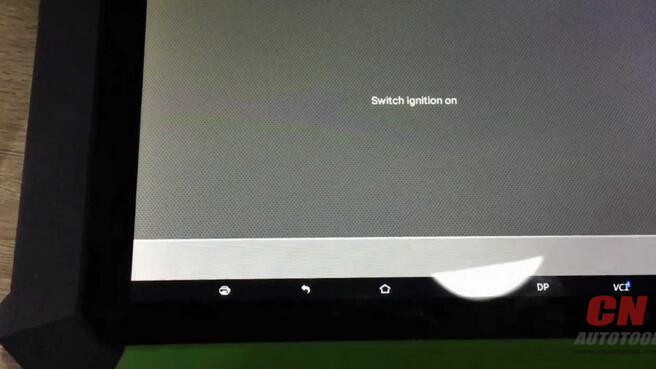
Switch ignition off.
Switch ignition on.
Communicating…
Adjustment success.

Posted by: youobd2 at
11:56 AM
| No Comments
| Add Comment
Post contains 271 words, total size 8 kb.
February 11, 2018
This section describes the general procedure to connect the tablet with the J2534 ECU programming device via Ethernet connection. To establish successful communication, you need to set up the network configuration on the display tablet.
1.If not already done, power up theAutel OBD2 MaxiSys display tablet.
2.Connect the MaxiSys Display Tablet to the J2534 ECU programming device with the accompanied Ethernet serial cable.
3.Select the VCI Managerapplication from the MaxiSys Job Menu.
4.Select the Wired Network.option on the Connection Mode list.The Ethernet Setting screen displays on the right section.
5.Select a connection type:
DHCP–obtains the LAN IP address automatically
Manual–allows you to enter IP address manually
6.If Manual is selected, you need to set the IP address on your own.
NOTE:If you are not sure about the specific IP address values, please contact your network administrator.
7.Tap Apply to set up the wired network connection.
When the wired network is successfully connected, the connection status is displayed as Connected, and the two status lights at the corners alongside the Ethernet Ports on the display tablet illuminate. The solid amber light indicates steady connection, and the flashing green light indicates active communication, between the units. TheAutel MaxiSYS Elite navigation button at the bottom bar shall display a green tick icon after a few seconds, indicating the MaxiSys Elite diagnostic platform is ready to perform vehicle diagnosis.
Posted by: youobd2 at
04:34 AM
| No Comments
| Add Comment
Post contains 238 words, total size 2 kb.
32 queries taking 0.053 seconds, 162 records returned.
Powered by Minx 1.1.6c-pink.

