



June 23, 2019
Tested successfully!Lonsdor K518 key programmer is able to add a smart key to BMW CAS3++ system.
Here’s the programming instruction in detail (with images)…
Lonsdor K518ise: Immobilizer – BMW
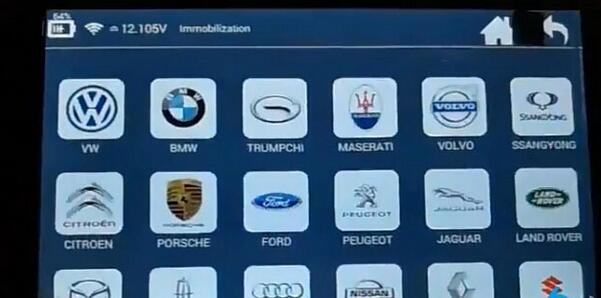
Select from type: CAS2/CAS3 series
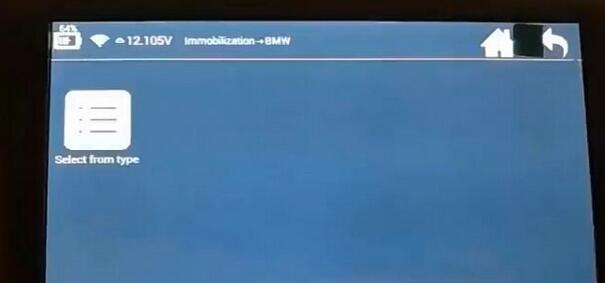
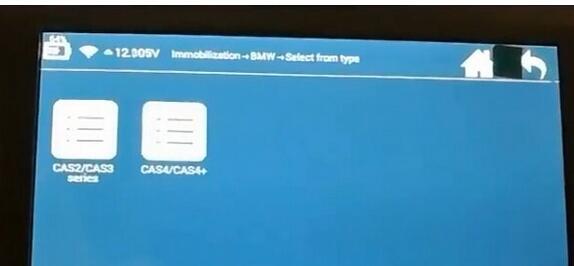
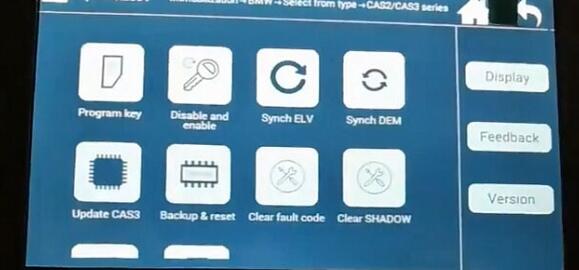
Program key
Will start to make a dealer key
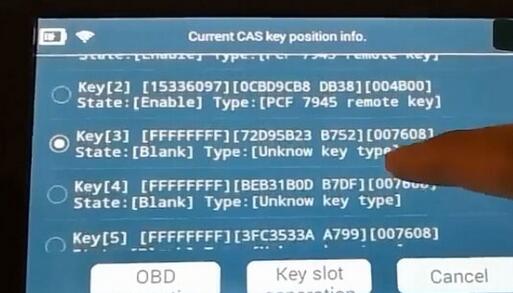
this can add one key (select blank position)
this can replace the original key (choose non-blank position)
this can generate a key via OBD or K518 slot

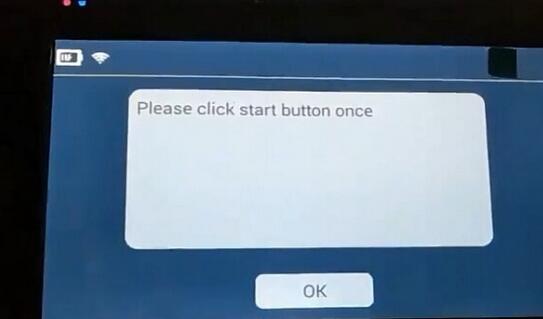
Pls press the Start button once
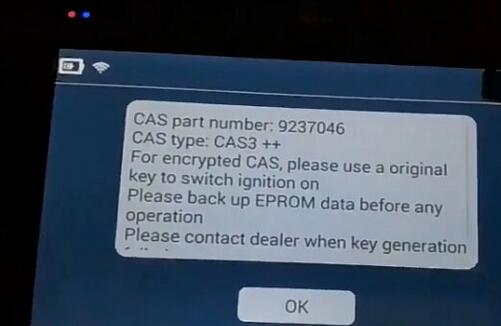
CAS part number: *******
CAS type: CAS++
For encrypted CAS. pls use an original key to switch ignition on
Pls back up eeprom data before any operation
Pls contact the dealer when key generation failed
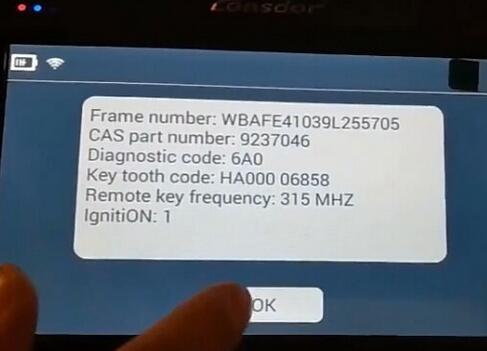
Lonsdor read out frame number, cas part number, diagnostic code, key tooth code and remote key frequency and ignition
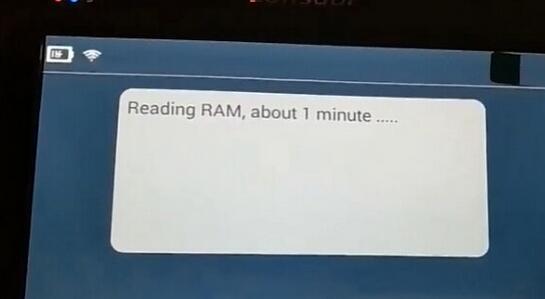
Reading ram, for about 1 min…
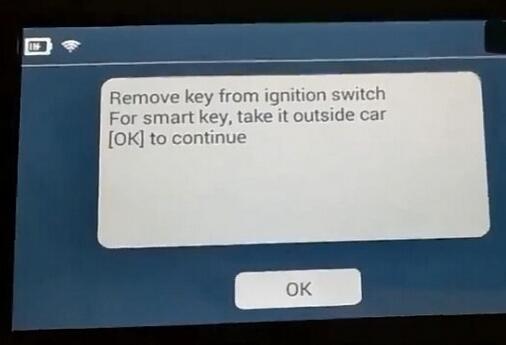
Remove the key from the ignition switch
For a smart key, take it outside the car
Ok to continue
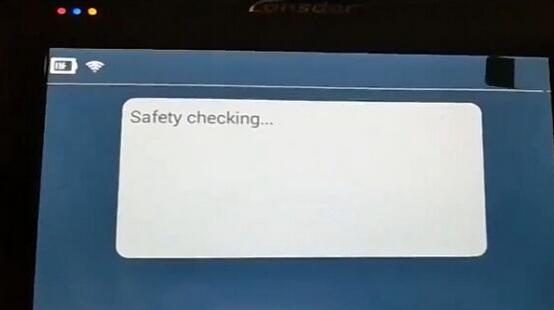
Safety checking…
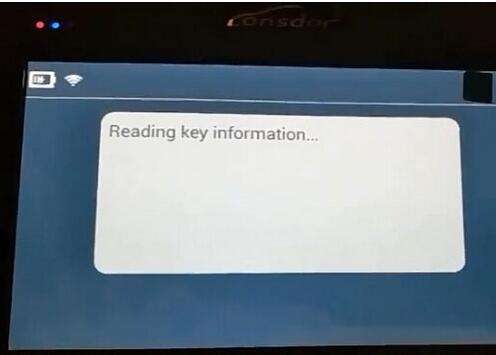
Reading key information…
Current CAS key position info: Key 3
Note: If the key is an original key, pls pre-pro-process it first.
If the key has been programmed but failed, pls do key unlocking and CAS key data restoring first

It’s a remote key
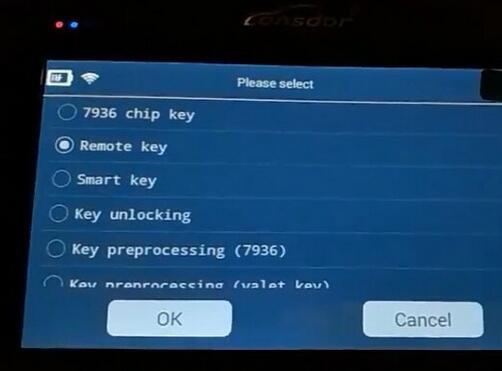
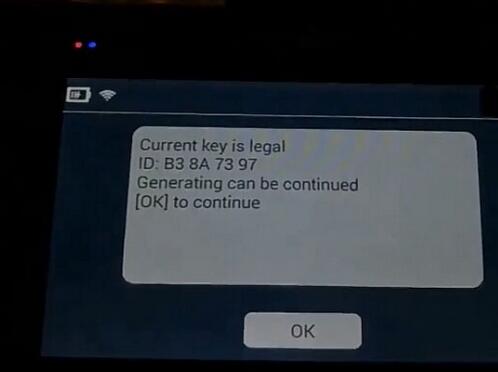
Pull K518 key slot to the right and insert the key to program (to identify id the key is legal and to pre-process

Current key is legal
Generating can be continued
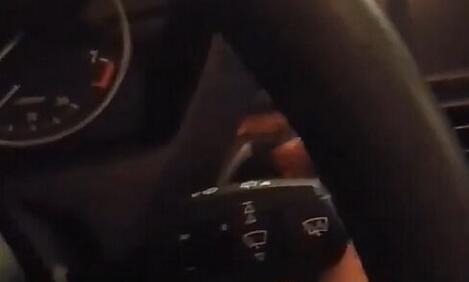
Pls insert the key for programming into the car slot

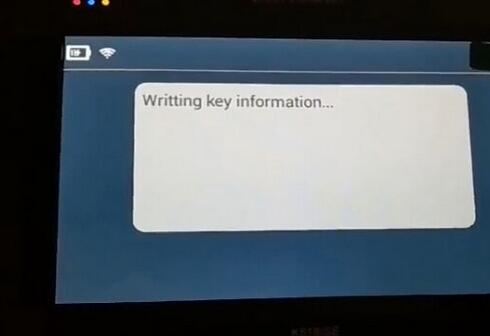
Writing key data…
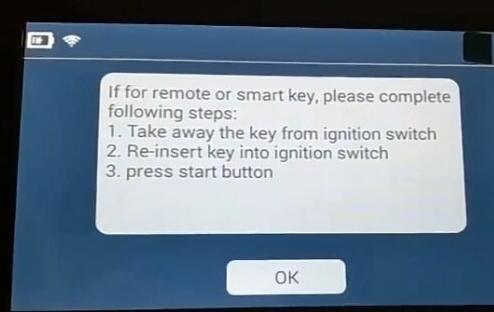
If for a remote of smart key, pls complete following steps:
take away the key from theition switch
re-insert the key into the ignition switch
press the start button
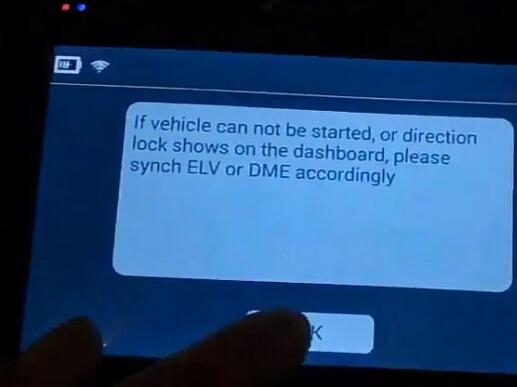
If the vehicle cannot be started, or the direction lock shows on the dashboard, pls synch ELV and DME accordingly
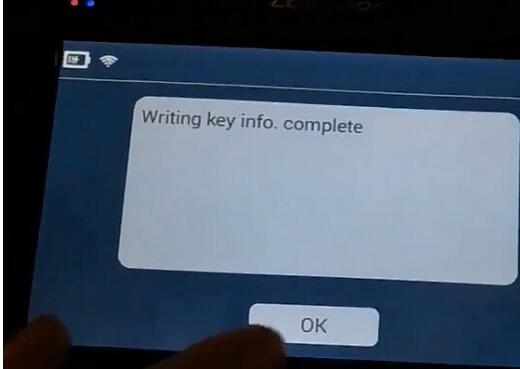
Writing key data – completed!
Job’s done!
Lonsdor K518ise successfully added a CAS3++ smart key!
Posted by: youobd2 at
09:33 AM
| No Comments
| Add Comment
Post contains 317 words, total size 9 kb.
June 16, 2019
1.First of all, the language of the Android Tablet need to change from Spanish to English.
Double check System setting —- language —-English
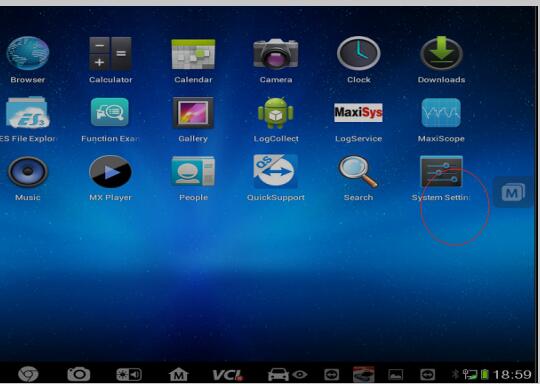
2.The language of Diagnostic need to change.
To change the language from Spanish to English.
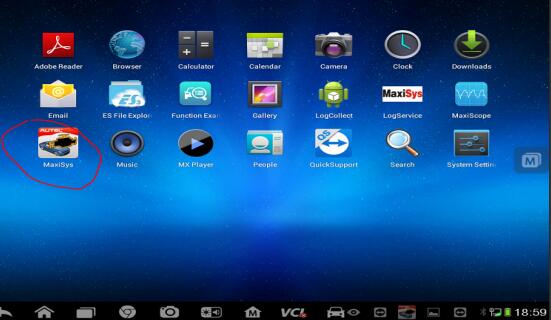
Step 1: Click at Maxisys.
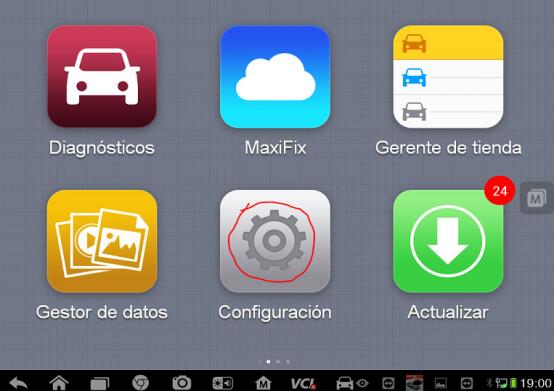
Step 2: Click at "Settingsâ€.
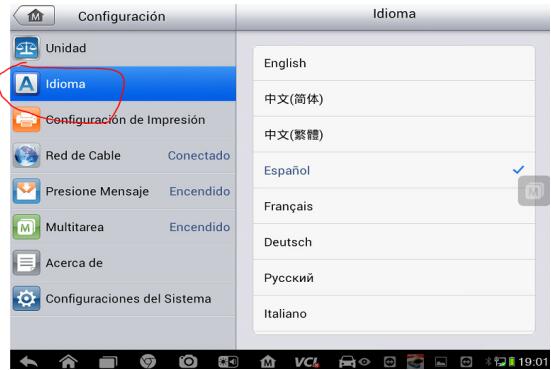
Step 3: Click at " Languageâ€
Step 4: Select " Englishâ€
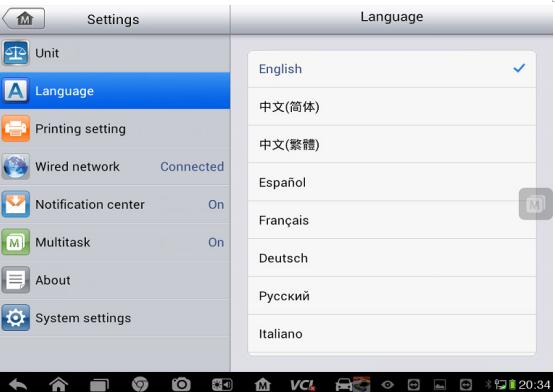
Then you can see that the language is in English now.
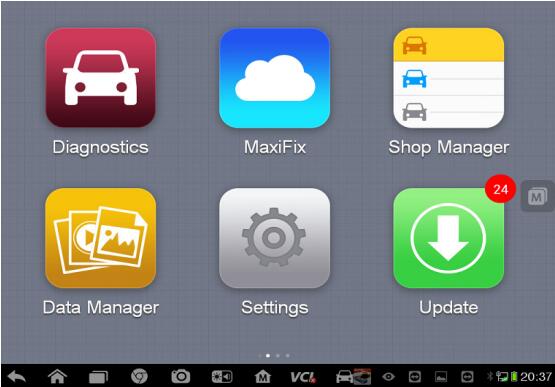
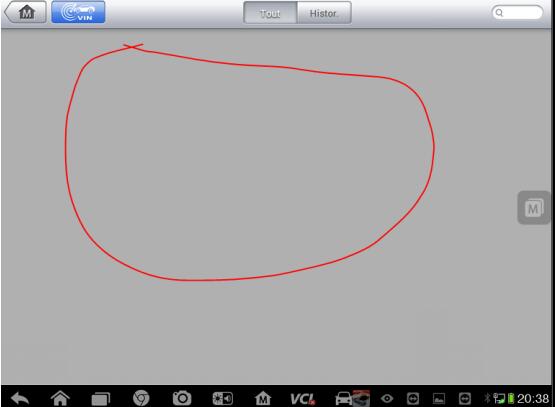
After changing language to English and if you found it is blank here(Maxisys—Diagnostic).
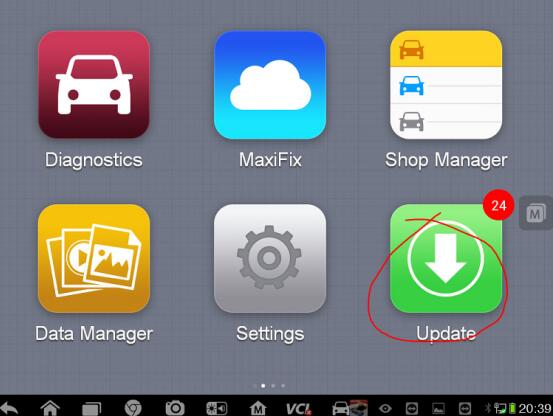
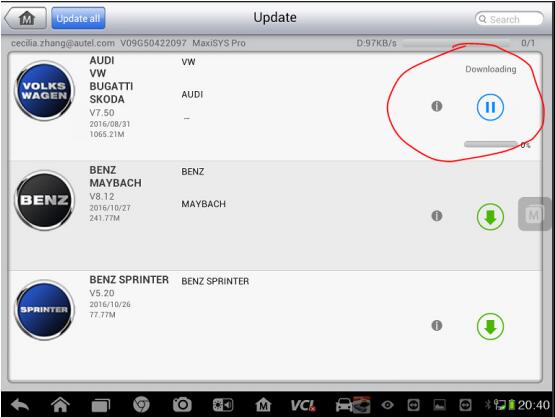
Please go to Update and select vehicles software and reload them.
the video of How to change language and updateAutel Maxisys
Posted by: youobd2 at
10:49 AM
| No Comments
| Add Comment
Post contains 111 words, total size 4 kb.
June 07, 2019
In this CGDI MB Prog programmer instruction,OBD2TOOLwill show you how to use CGDI MB programmer to add new keys for old Mercedes Benz W202 W208 W210 kline 38 pin car from 1997-1998.
Procedures:
Step 1:Calculate Password
Connect CGDI MB Programmer to vehicle and your laptop,then run CGDI MB software.
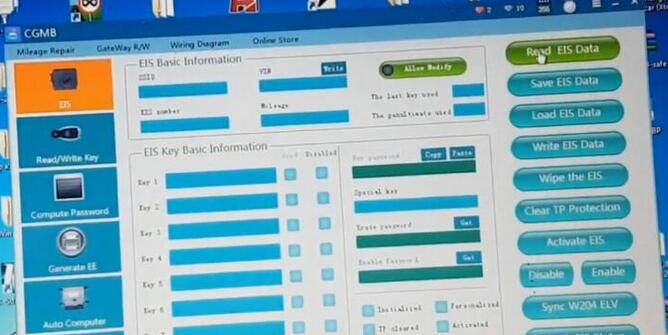
Select [EIS] menu,then click [Read EIS Data]
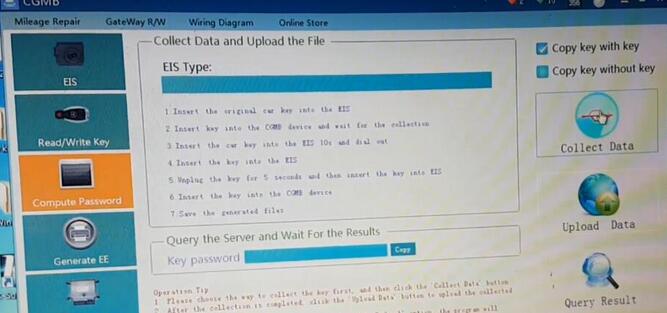
Go to [Compute Password] menu,then [Copy key with key][–>Collect Data]
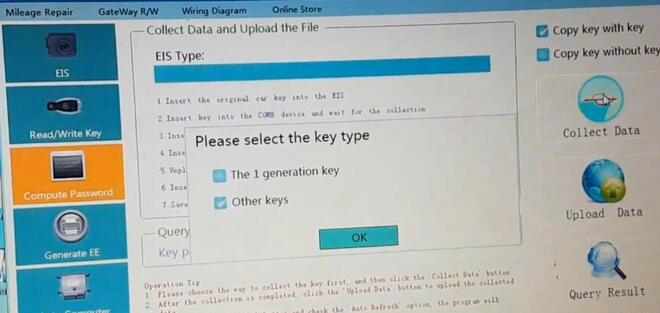
Select key type:Other keys,click [OK] to continue
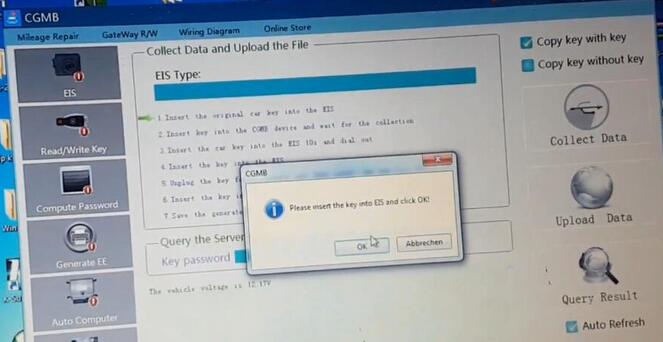
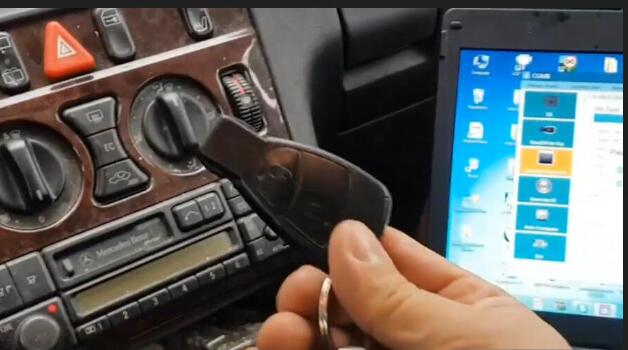
Please insert the key into EIS and click [OK] to continue
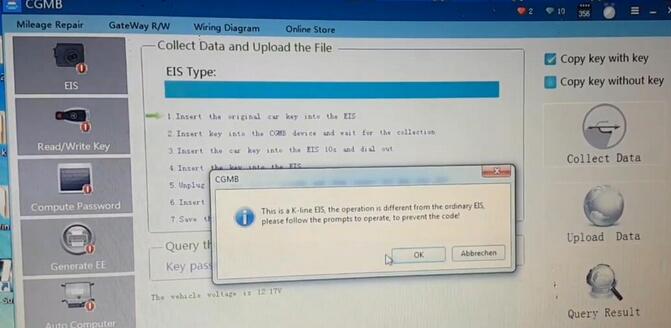
This is a -Kline EIS,the operation is different from the ordinary EIS,please follow the prompts to operate,to prevent the code!
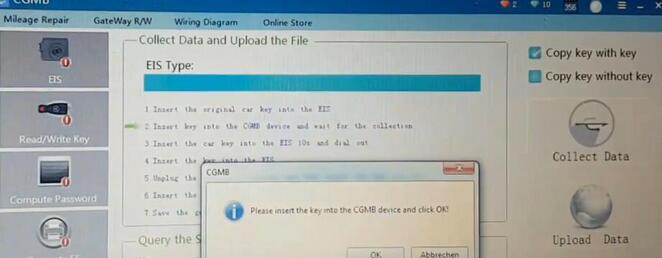
Please insert the key into the CGDI MB device and click [OK] to continue
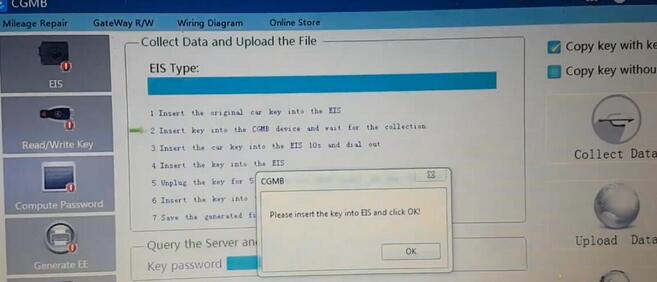
Wait until it prompt you to insert the key into EIS and click [OK]
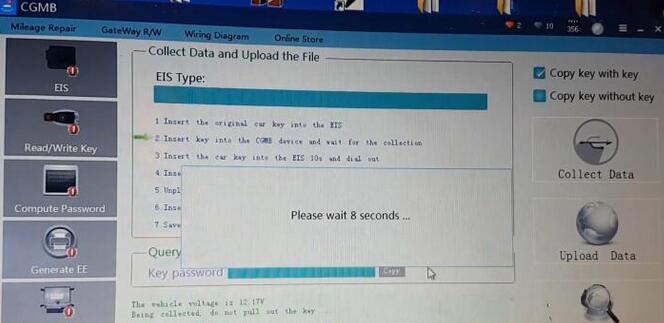
It will ask you to wait several seconds
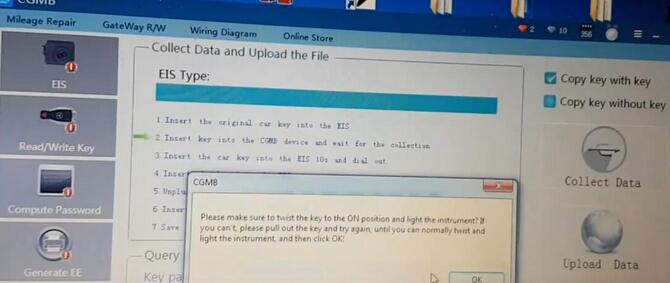
Then prompt you to make sure the key to the ON position and light the instrument?If you can’t,please pull out the key and try again,until you can normally twist and light the instrument and then click [OK]
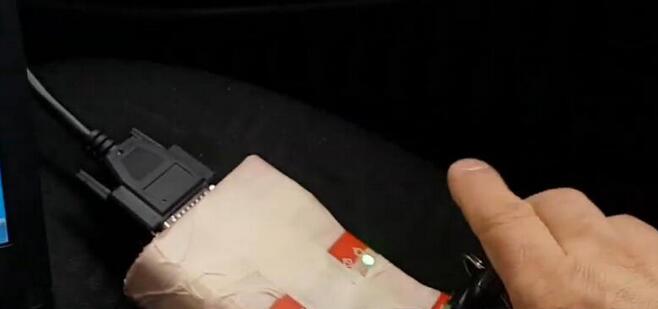
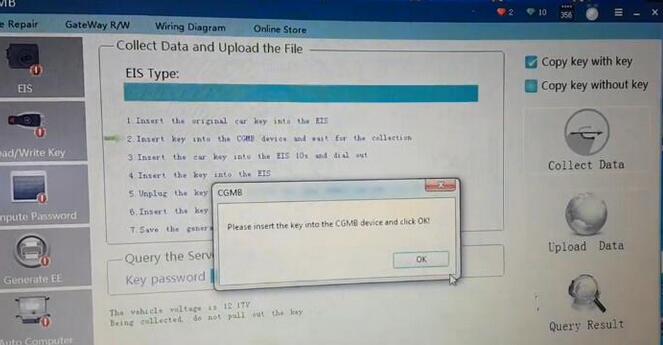
Please insert the key into the CGDI MB device and click OK
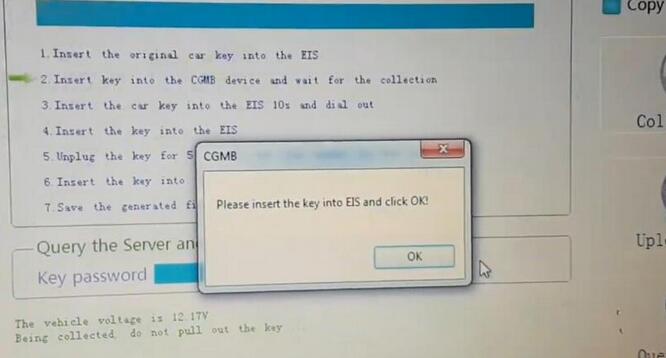
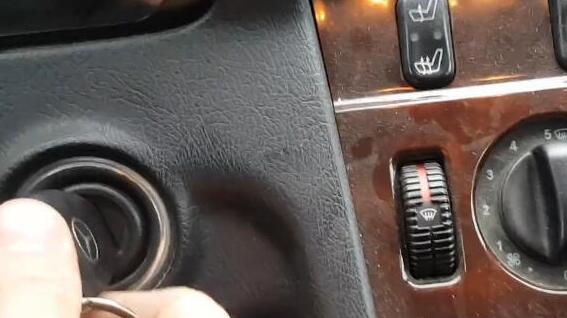
Now you need to insert the key into ESI again,then click [OK]
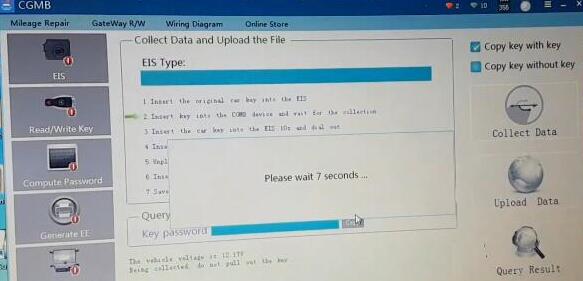
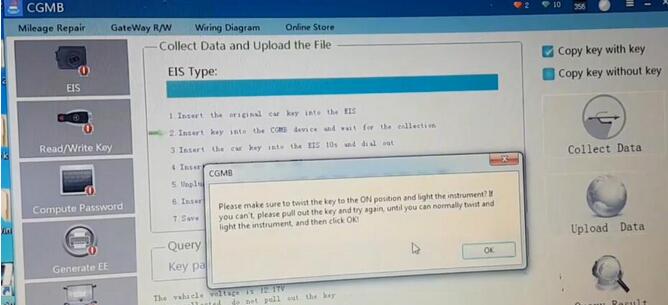
Perform it again,click OK
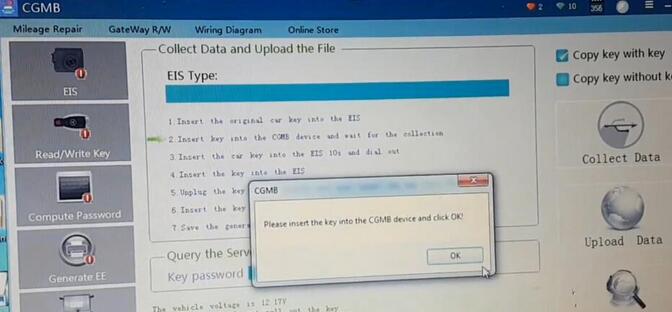
Insert the key into theMB Key Programmer,then click [OK] to continue
If it prompt yo with same operation instruction,just follow it.
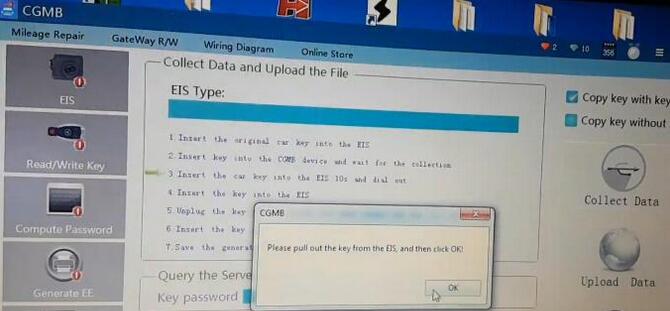
Insert the car key into the EIS 10s and dial out
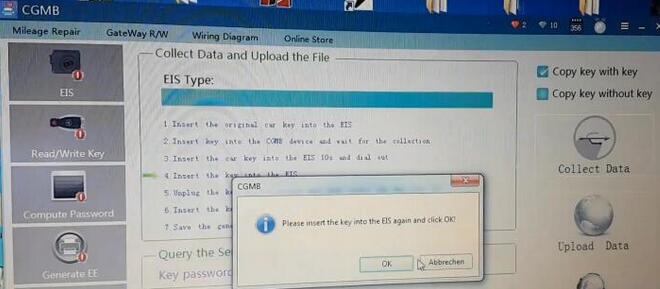
Please insert the key into the EIS again and click OK
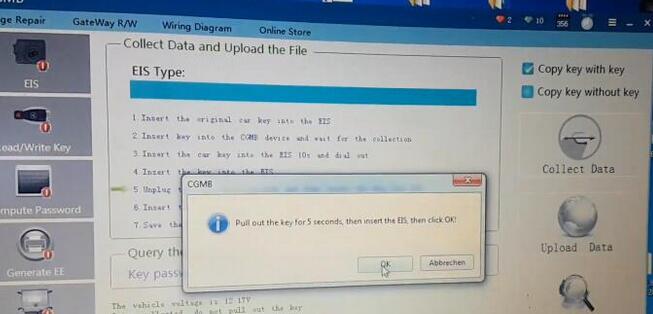
Pull out the key for 5 seconds,then insert the EIS,then click OK
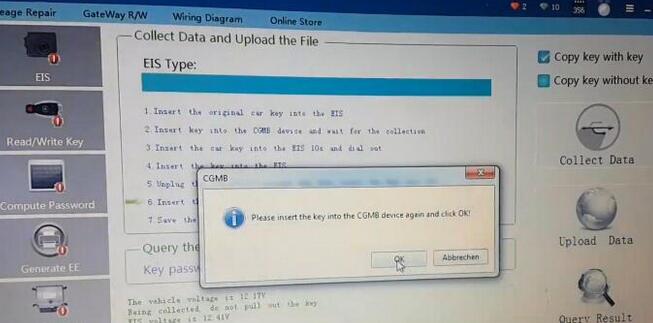
Please insert the key into the CGDI MB Benz device again and click [OK]
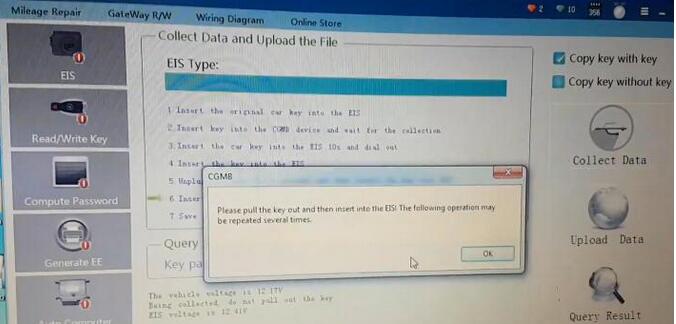
Please pull the key out and then insert intot he EIS!The following operation may be repeated several times.
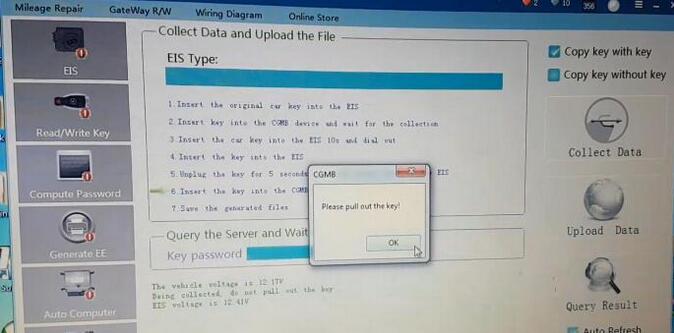
Please pull out the key
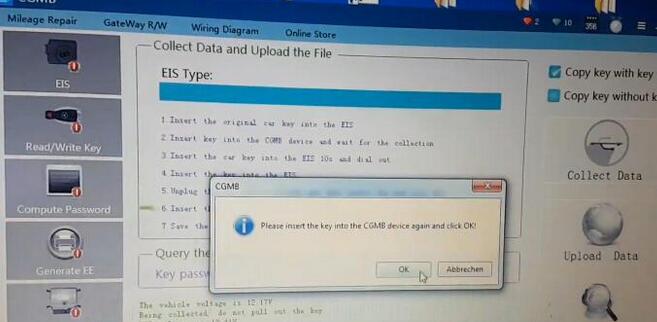
Please insert the key into the EIS again and click OK
….
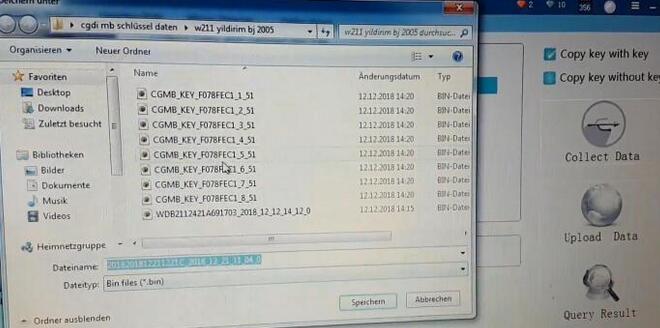
Now save the generated files
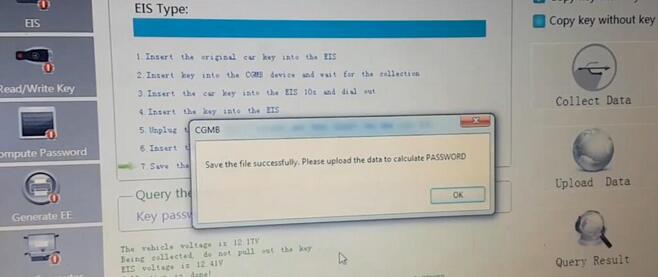
Save the file successfully,please upload the data to calculate PASSWORD
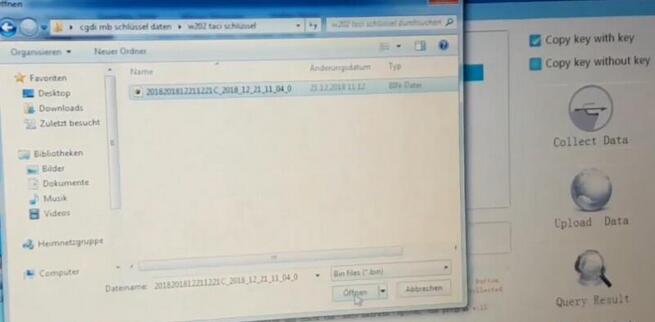
Click [Upload Data],then upload the file you saved just now
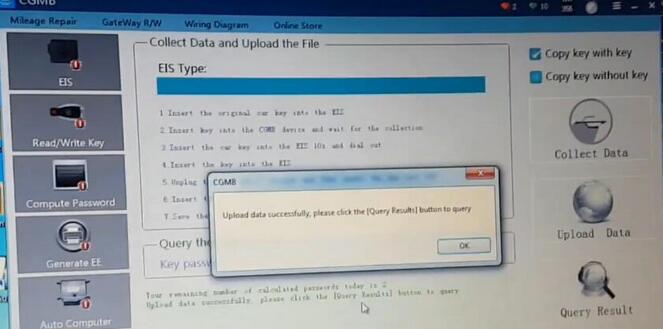
Upload data successfully,please click the [Query Result] button to query.
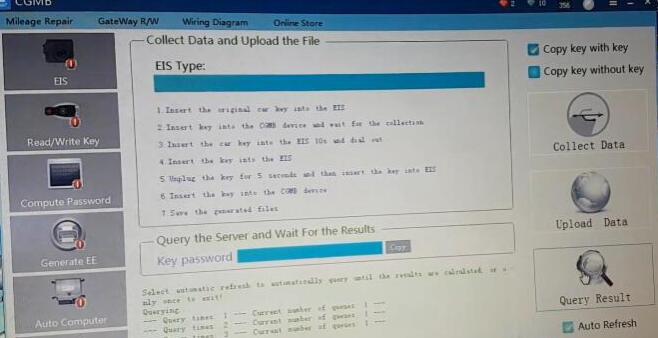
Click [Query Result],it will take you several minute to query result
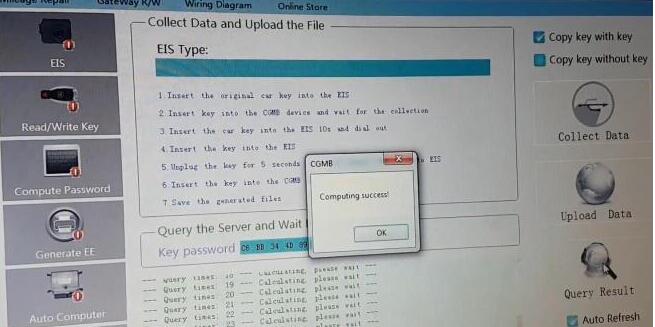
Computing success!Click [OK] to continue
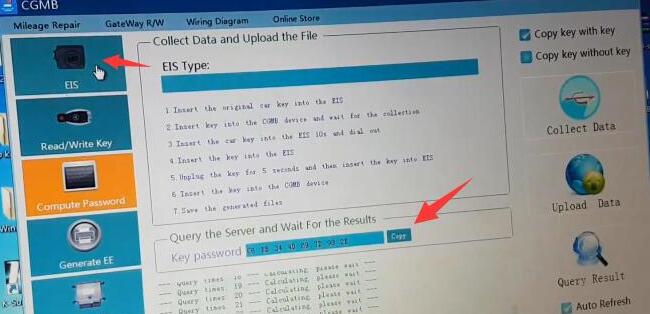
Here we get password,click [Copy] button,then select [EIS] menu
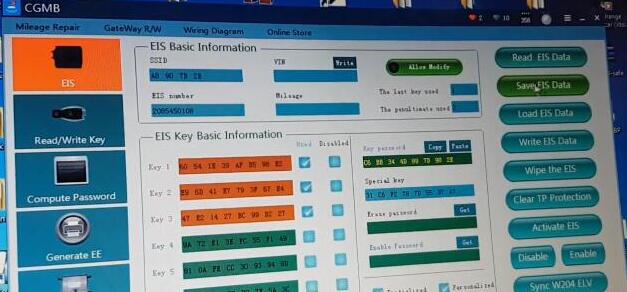
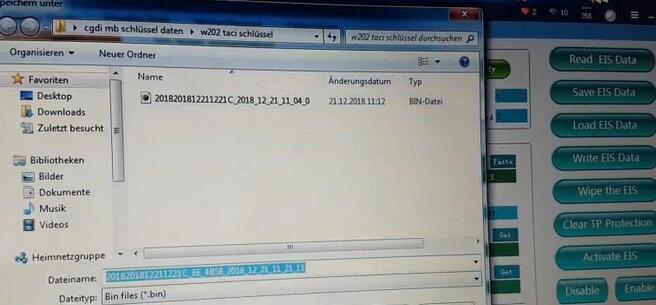
Click [Paste] button to paste password,then click [Save EIS Data]
Step 2:Generate Key File
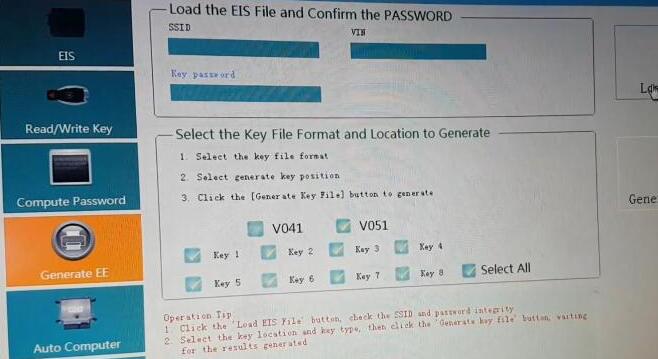
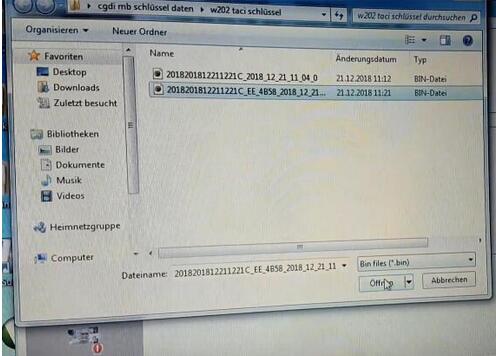
After saving EIS data successfully,select [Generate EE] menu
Select key file format "V051â€,then click [Load EIS File] you saved just now
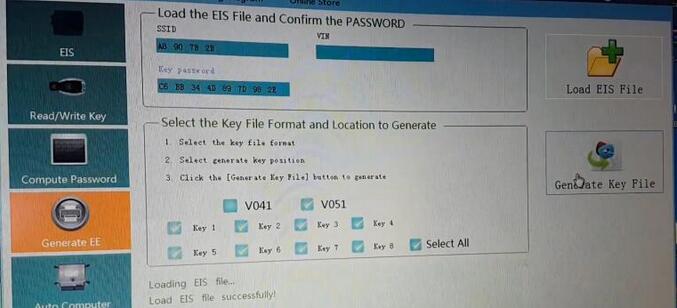
Click [Generate Key File]
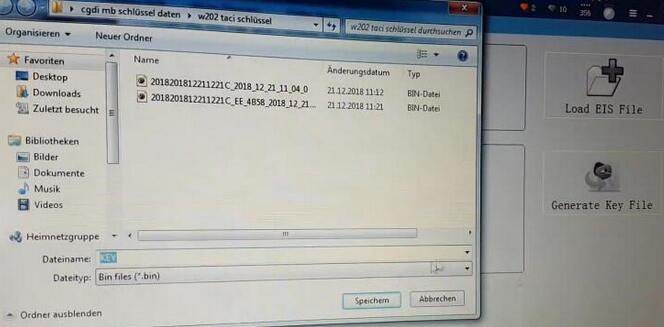
Now,save the key file generated
Step 3 rogram New Key
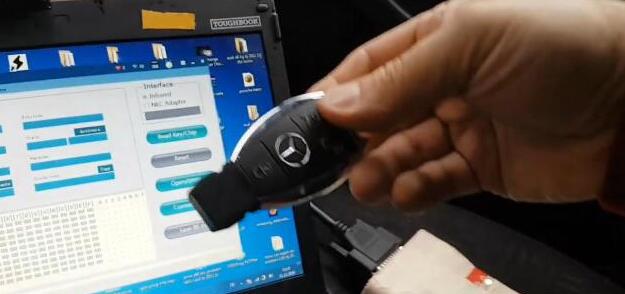
Insert the new key into CGDI MB device
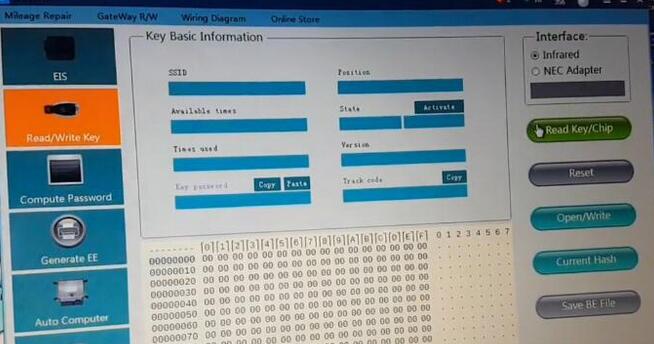
Select [Read/Write Key] menu,then click [Read Key/Chip] button
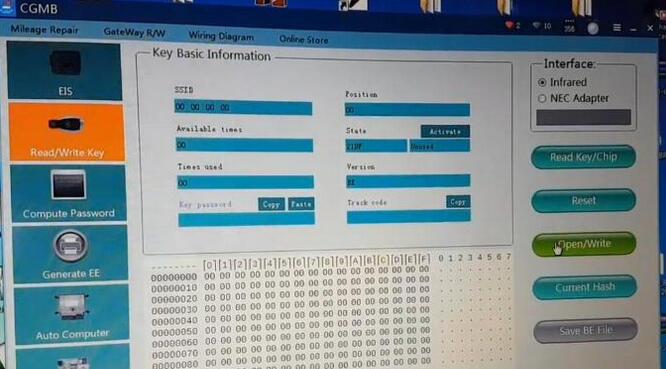
Click [Open/Write]
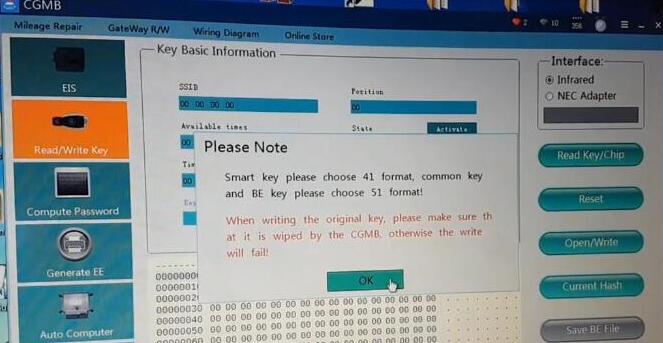
And it prompt you to choose key type format:41 format and 51 format,click [OK] to continue
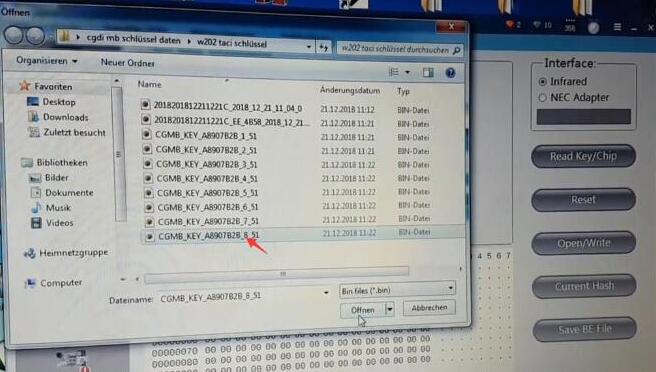
Select a key file to write
Write success!Click [OK] to continue
Test new key on vehicle,it can light instrument and start the engine!
Done!
Posted by: youobd2 at
06:41 AM
| Comments (1)
| Add Comment
Post contains 444 words, total size 19 kb.
May 29, 2019
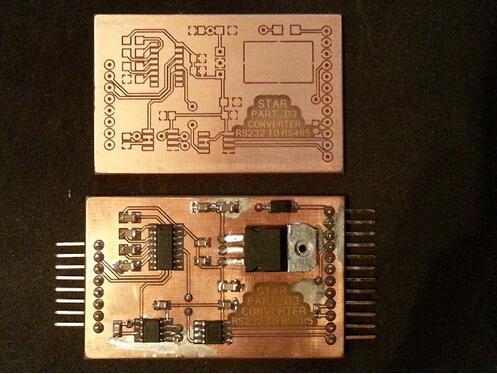
Finally, had the RS232 to RS485 converter cable wiring diagram so I managed to resolder the wire contacts that connect to the Mb Star C3 multiplexer side.
The cable I bought from ebay had crappy solder points that only worked for a few times before breaking off, and disconnected from the connector/plug.
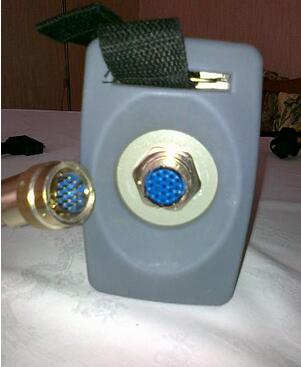
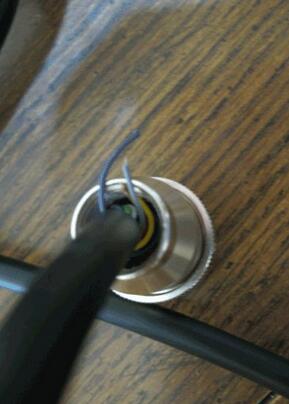
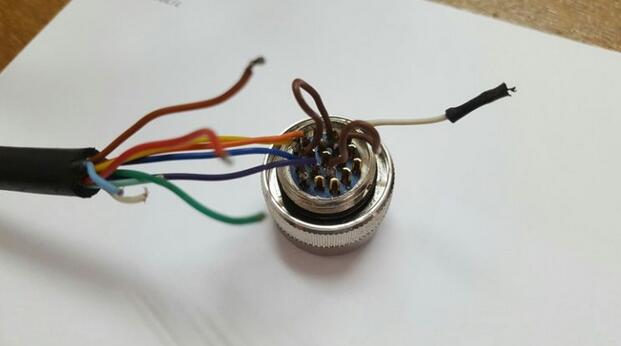
I can line up the wires with connector and reference it with the ABCDEFGHI..etc on the multiplexer if I knew which color connect to which pin on the cable connector. Unfortunately there are too many wires loose in there for me use trail and error.
Reference: RS232 to RS485 cable pinout
RS232 cable pinout:
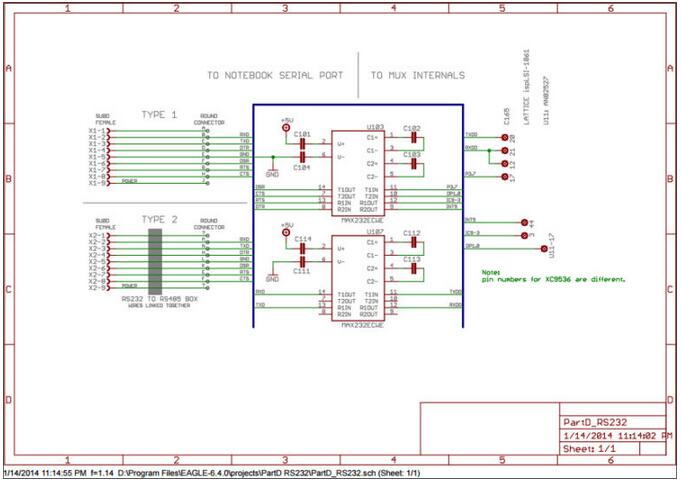
if i good see,this 232 box emty
check com to 485
1-
2-N M
3-N
4-H
5-LPST
6-K
7-F
8-G
9-J
RS485 cable pinout:
electrically isolated RS485 communication interface to the PC serial port
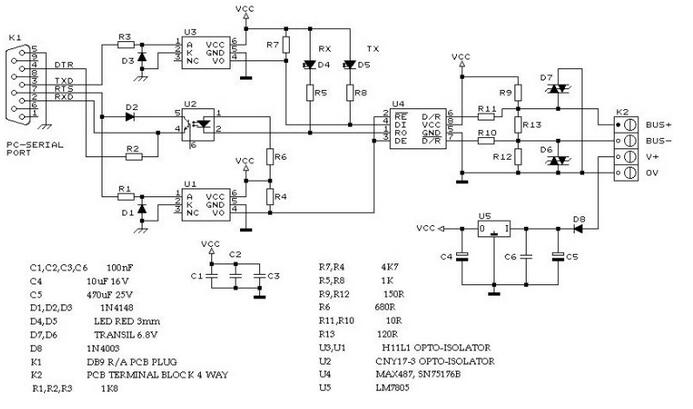
EIA-485 cable usually made with twisted pair (like EIA-422) and may span up to 1200 metres. The recommended arrangement of the wires is as a connected series of point-to-point nodes, a line or bus. Ideally, the two ends of the cable will have a termination resistor connected across the two wires and two powered resistors to bias the lines apart when the lines are not being driven. The value of each termination resistor should be equal to the cable impedance (typically, 120 ohms for twisted pairs).
The pinout, simply put, is that colors connect to the following pins:
Purple – Pin 8
Yellow – Pin 5
Orange – Pin 9 (or Pin 4), on one schematic I looked at they are bridged.
Looking at that schematic (I’ll link to it below), purple connects to "G†(which is not the G on the cable because the letters are flipped in the key on the schematic!). It looks like Yellow connects to "Râ€.
With the help online, I’ve fix the cable.
I’ve tested my cable and it works now. Great!
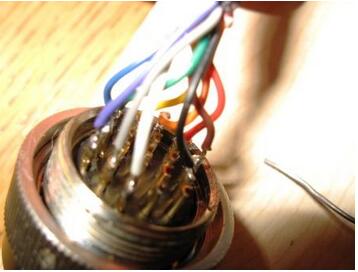
wiring instruction here…definitely easier to understand…good for those not very well versed in reading schematics above… Wish it helps
If the cable is unluckily broken to death, recommend you all to use the one with golden box from mbstartool. It’s said that that’s the best quality RS232-RS485 cable.

Posted by: youobd2 at
01:19 PM
| No Comments
| Add Comment
Post contains 377 words, total size 5 kb.
May 19, 2019
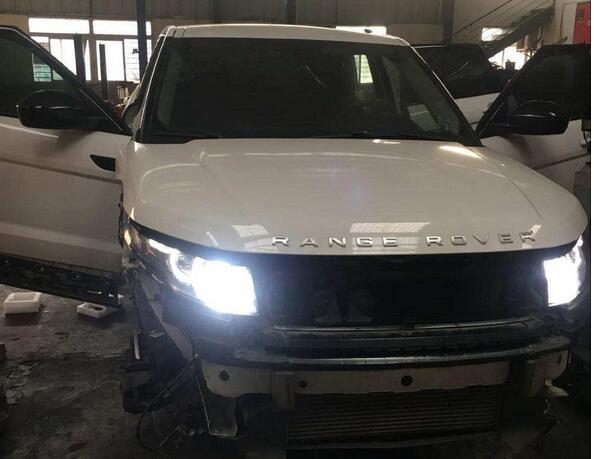
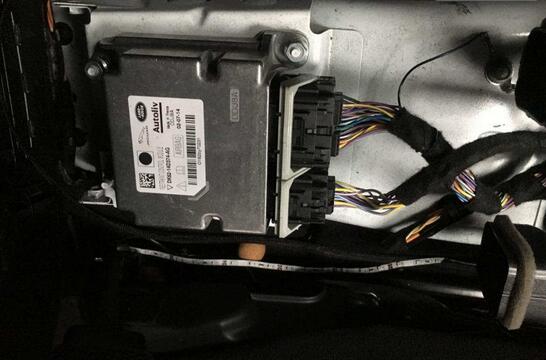
2014 Land Rover Aurora with airbag NO. DK62-14D374-AG, use CG100 Pro III to repair the airbag without any problem.
Car type: 2014 Land Rover Aurora
Airbag No: DK62-14D374-AG
CG100 Pro III repair airbag on Land Rover Aurora 2014:
1.Check the vehicle.
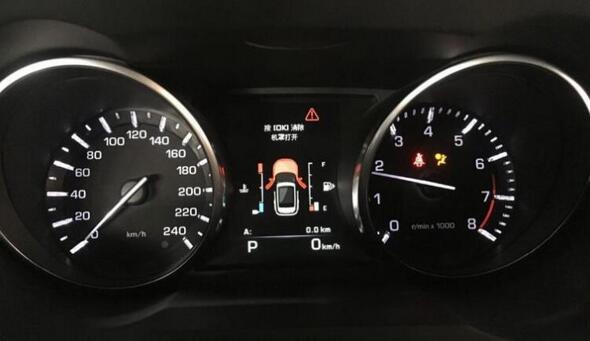
2.The airbag lights on all the time.
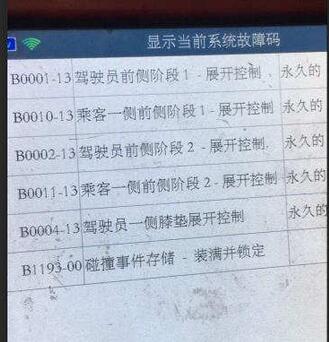
3.Access professional decoder detection and clear the DTC.
4.Disassemble the car, find the airbag computer board, confirm the chip.

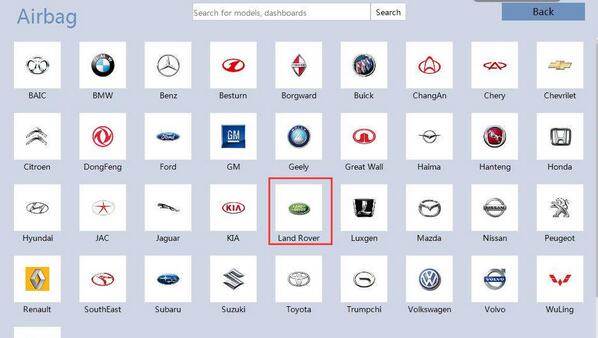
5.Open the software, enter the corresponding operation interface, find the physical wiring diagram.

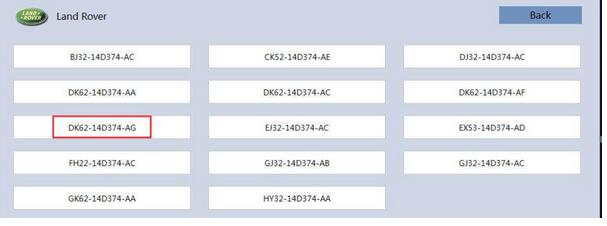

6.Perform physical wiring in a no-current environment and confirm that it is correct before
powering on. After reading the data, please save the original data! If the software supports
automatic repair, please repair it at the prompt of the software; if the software does not support
repair temporarily, please select the custom operation the first time consult the manufacturer’s
technical staff ( E-Mail: Sales@obd2tool.com).
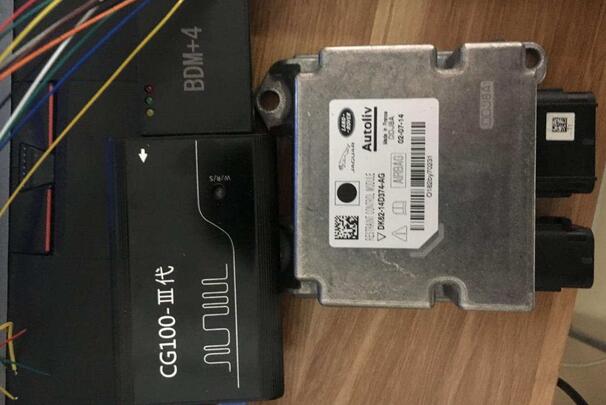
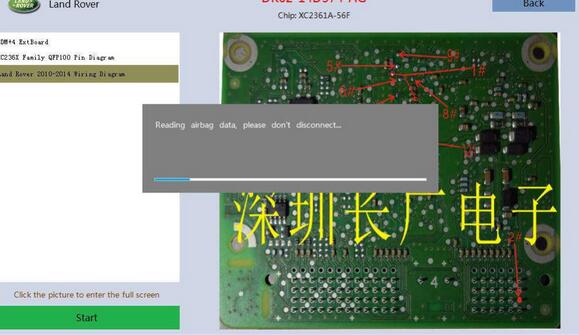
(Note: Please do not touch any cable when it is reading.)
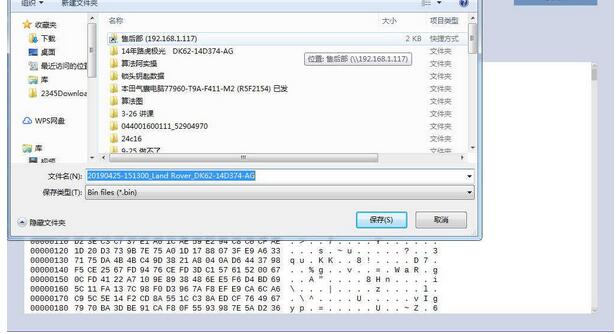
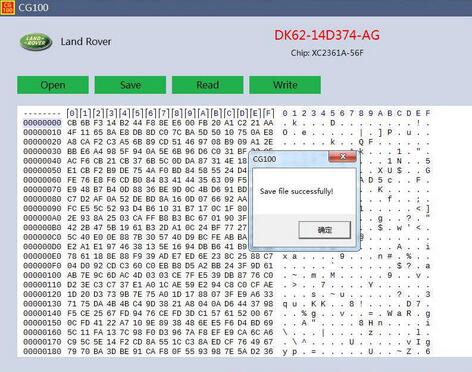
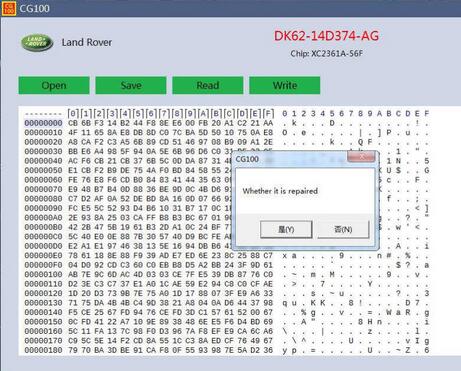
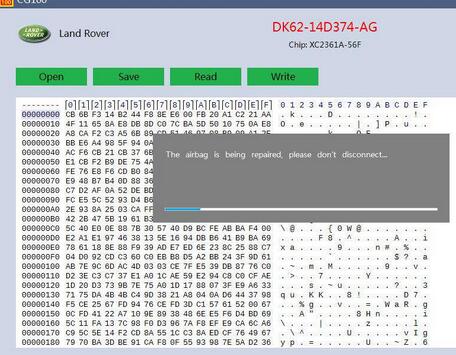
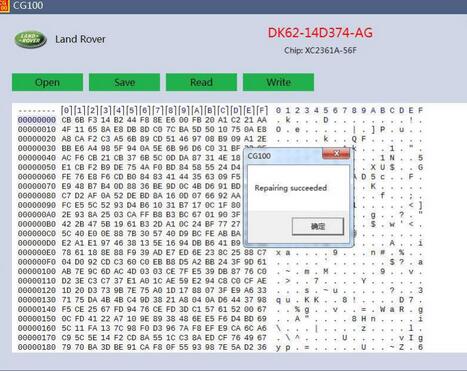
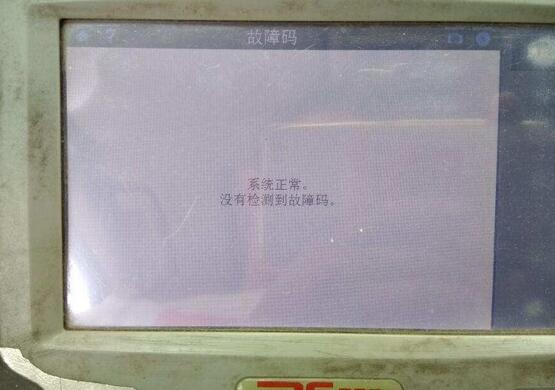
7.After the repair succeed, please put the airbag computer board back to the car. Connect Land Rover special inspection SDD detection, it did not show any DTC.
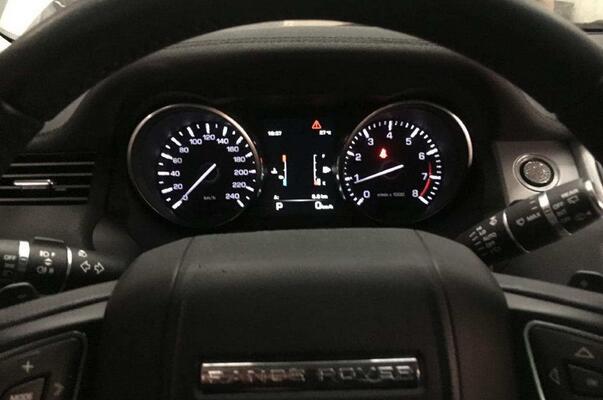
8.The airbag light is off.
9.The airbag repaired successfully by CG100 Programmer.
Done
Posted by: youobd2 at
08:31 AM
| Comments (1)
| Add Comment
Post contains 205 words, total size 7 kb.
May 12, 2019
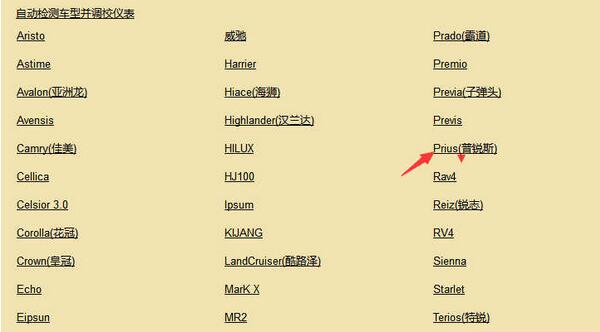
Toyota Prius 2005 KM reading & writing Digiprog 3 has problem,orange 5,Carprog,Digimaster 3 are all ok, go on reading for instruction.
Car model and year: Toyota prius 2005y dash
Purpose: Read and write KM
Tool to test:
1. digiprog 3: Failed
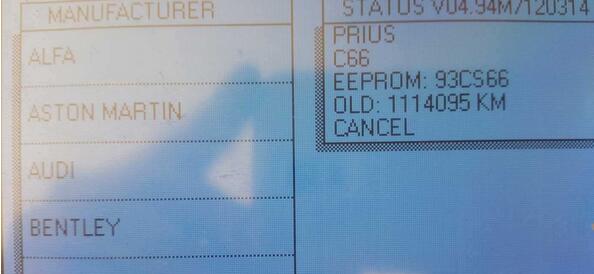
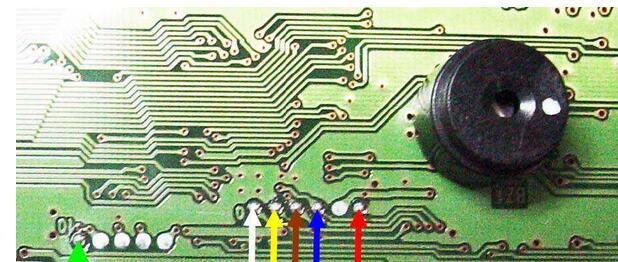
Using soldering points as it is showing in manual. After reading I got wrong mileage 1114095km…original mileage is 275 000km. but after writing that km which you need, dash shows everything ok in car.
2.orange 5 programmer + nyo : success
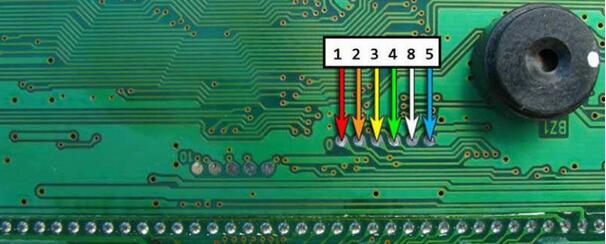
I read it with orange 5 programmer without any problems. Calculated with nyo, as landruiser 93c66. Attached 100% working pinout reading in circuit, maybe someone would be useful this post in the future
3.Carprog full firmware V8.21 : success
Carprog is ok for tis dash–prius 93c66
Change KM Toyota Prius 2006 93C66 for example:
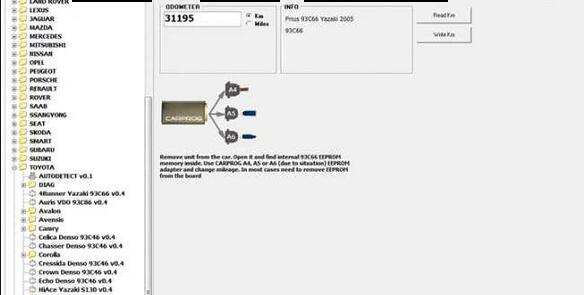
Remove unit from car. Open it and find internal 93C66 EEPROM memory inside.
Use the Carprog A4, A5 or A6(due to situation) EEPROM adapter and change mileage.
In most cases need to remove EEPROM from the board.
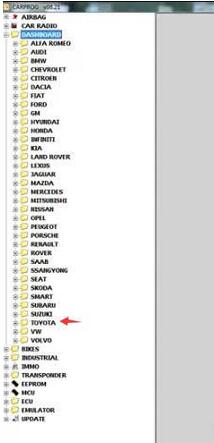
Open carprog full software
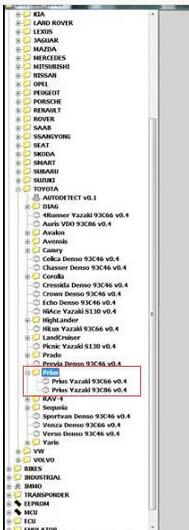
Select Dashboard->Toyota->Prius->Prius Yazakj 93C66 v0.4
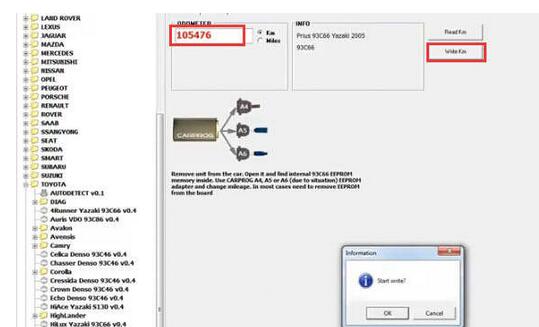
Manually enter mileage you desired
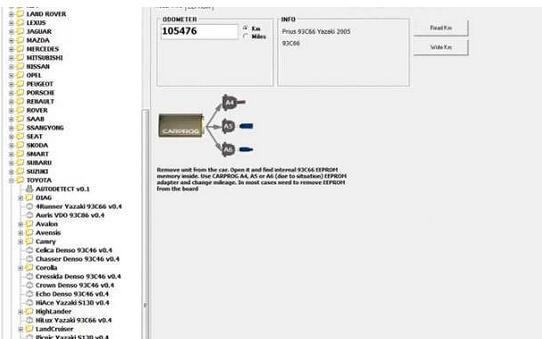
Press Write KM
Write KM success.
4.Yanhua digimaster 3 : success
I recommend Yanhua digimaster 3, it works for Prius 93c66.
Method: it needs to dismantle the dashboard and read the data.
Posted by: youobd2 at
09:27 AM
| No Comments
| Add Comment
Post contains 228 words, total size 5 kb.
May 01, 2019
LAUNCH X431 V is a new diagnostic tool release by Launch tech. It composed of an X-431 V pad computer, a protection sleeve, a DBScar diagnostic connector and many OBD1 to OBD2 connector. It communicate with your car by DBSCAR connect with bluetooth, it read car DTC and do diagnose function by the launch X431 Pro Pad computer, it achieves launch X431series full car model and full system diagnose function, it can replace launch X431 Diagun III or launch X431 IV.Meanwhile, taking advantage of mobile internet, it integrates more application and service, such as creating maintenance data base and case library, providing instant maintenance information, establishing public and private maintenance social circle etc. As a result, it builds a broad vehicle diagnostic community, which helps you to share vehicle maintenance knowledge online, exchange vehicle maintenance experience online and provide vehicle maintenance related service support online. This will be another revolution raised by Launch in the vehicle diagnosis industry.

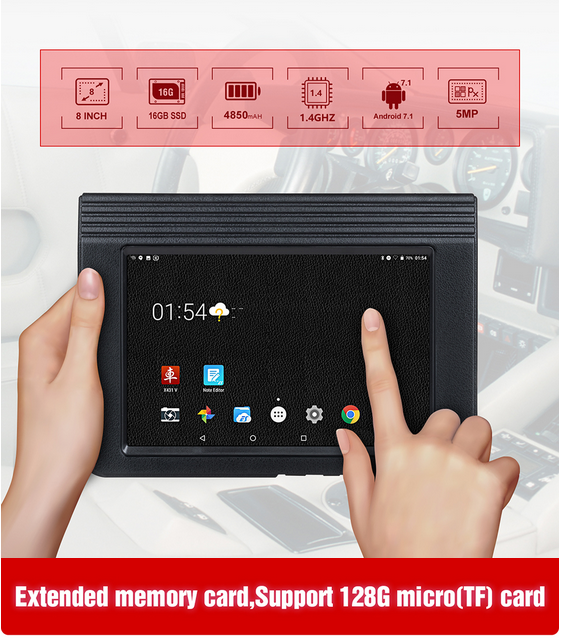
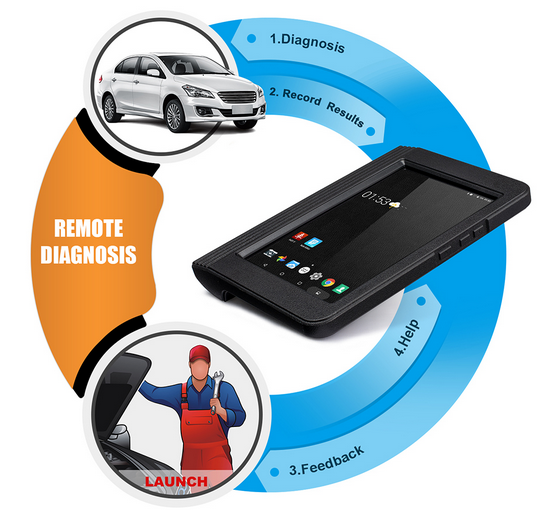
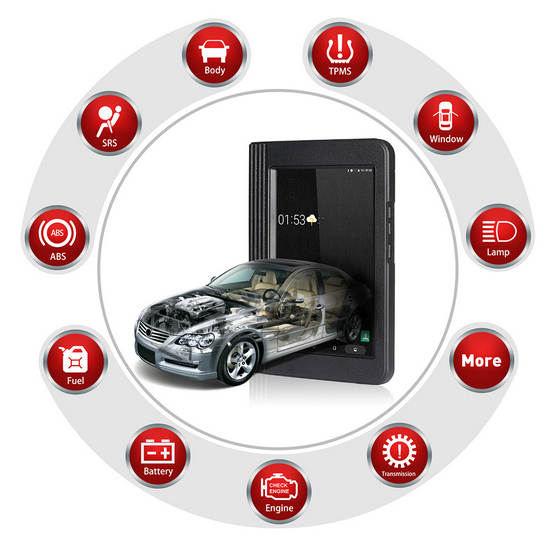
Launch X431 V 8 inch is a new Android-based vehicle trouble diagnostic device developed for internet applications. it inherits from LAUNCH’s advanced diagnosing technology and is characterized by covering a wide range of vehicles , featuring powerful functions, and proving precise test result.
Through the Bluetooth communication between vehicle diagnostic connector and variant mobile intelligent terminals , is achieves X-431 series full car model and and full system vehicle trouble diagnostic which includes Reading DTCs, Clearing DTCs ,Reading Data Stream , Actuation Test and Special Function
Top 9 Reasons to buy X431 V 8″:
1. Completely replace X431 V 7inch and have bigger screen.
2. Support multi-language: English, Italian, Chinese Simplified, Chinese Traditional, German, Japanese, Russian, French, Spanish, Portuguese, Polish, Turkish, Dutch, Greek, Hungarian, Arabic, Danish, Korean, Farsi , Romanian, Serbian, Finnish, Swedish, Czech
3. Support communicate with vehicle via Bluetooth, Bluetooth distance: 10M(Without Obstacle)
4. Support full system diagnosis and fast running speed,Reasonable PDA design, easy to carry
5. Supports up to 96 car brands about 220 car models from European, USA and Asian
6. Free Update online for 2 years, after 2 years it is 499USD/year. Dealer code: 755D
7.No need to open registration authorization. No IP, no country and language limitation.
8. Support Remote control diagnosis function via CC number.
9. If your Bluetooth OBD2 connector is broken under the warranty, we will send you new one without any charge.
Comparison between X431 V 7″ and X431 V 8″:
1. X431 V 8″ have bigger screen size, better view.
2. X431 V 8″ has bigger Bluetooth adapter with LED indicator.
3. X431 V 8″ has higher hardware configuration.
Launch X431 V Update:
Let’s you update your diagnostic software more efficiently.
Launch X431 V Vehicle List:
Changan, Daweoo, Huachen, Lexus,Ford, ZhongXing, Bently,Euro Ford,Jatcy,VAZ,Porsche, QIRUI_TY,Maserati,BMW,GM,Seat,Isuzu,Jinlong, USA Ford,Lancia,Peugeot,Suzuki,HM, Maybach,Luxgen,Toyota,VW,Changan, Audi,Citroen,Honda,Land Rover,Liuwei_TY,XINKAI,BXFIAT,Smart,JPIsuzu,Kia,Renault,
Skoda,Sprinter, Rover,Weili, Bugatti, EOBD,Hafei,Haoqing,Nissan, Xiali, Zhongshun, Romeo,AustFord, Acura, Mercedes-Benz, Changhe,Fiat,Volvo,
Mazda,Zhongtai,Jaguar,Opel, Rolls Royce,Chrysler,Daihatsu, Flyer,Hyundai, BXGM,Subaru, Ssangyong,Ferrari, Infiniti,Dacia,Saab, GAZ,JIAO,Mitsubishi,AU Holden,MAHINDRA,MARUTI,TATA,PROTON, PERODUA(PERODUA),QOROS
Posted by: youobd2 at
08:53 AM
| Comments (1)
| Add Comment
Post contains 487 words, total size 5 kb.
April 19, 2019
At first sight, the AUTEL MS906TS looks a whole lot like an ordinary tablet. With an 8-inch LED display and dimensions of 10 x 6.9 x 1.4 inches, this OBD2 scanner fits in a hand as comfortably as any tablet. It has a weight of just 2.42 pounds, so carrying it around shouldn’t be a problem.
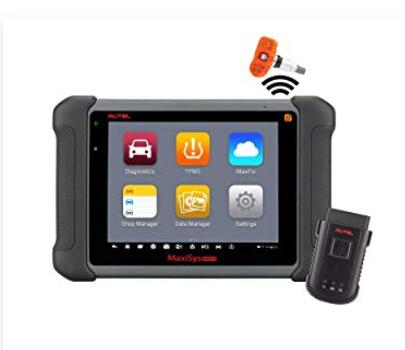
Portability of a diagnostic scanner is very important, especially for auto technicians. Ideally, you want a device that you can walk around with, whether inside your shop or out in the field. That’s exactly the kind of convenience offered by the lightweight and compact size of the Autel MaxiSYS MS906TS.
More importantly, its build with professional mechanics in mind. Pretty much every Autel MS906TS review will tell you that this device is packed with all the features needed for use in a professional auto shop. That includes a 6-core Samsung Exynos T5260 processor and 2GB of RAM for fast processing of diagnostic data.
What’s In the Box?
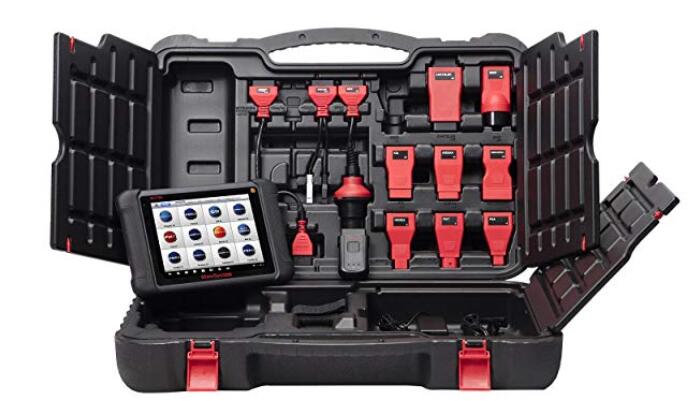
The Autel MS906TS is shipped as a complete package with all the connectors and accessories that you need. Alongside the scanner itself, you also get the main OBD2 connector as well as vehicle-specific adaptors for GM/Daewoo-12, BMW-20, Mitsubishi/Hyundai, Benz-14, PSA-2, Benz-38, Nissan-14, VW/AUDI-2+2, Chrysler-16, Fiat-3, Kia-20, and Honda-3.
Note that the MaxiVCI V100 is also included for wireless connections. Connectors and adapters are cables that link the tablet with the car’s on-board computer when plugged to the OBD2 port. If you want to connect wirelessly you can do so using either Wi-Fi or Bluetooth.
In that case, you plug the MaxiVCI V100 to the OBD2 port, activate its Wi-Fi or Bluetooth and then pair it with the Autel MS906TS scanner. After pairing the scanner will be able to communicate with the car’s on-board computer wirelessly.
Also included in the package is a user manual, reference guide, light fuse, cigarette lighter, packing list, mini USB cable, compact disc (CD), AC/DC external power adapter and a soft cloth for cleaning the parts. All the components are neatly organized in a black carrying case.
Why Should You Buy Autel MS906TS?
So far in this Autel Maxisys MS906TS review, we have seen that this scanner is a well-built device that is super-fast. It also comes complete with all connectors and accessories. Well, those would pass as two motivations to buy the scanner. How about we look at more convincing reasons why it makes a good buy.
Professional-Level Diagnostics
The Autel MaxiSYS MS906TS does everything, from reading codes to ECU programming and everything in between. Once connected, it automatically pulls the VIN details of a car. From there you can proceed to read and clear codes or check for other faults in ANY car system.
It supports a plethora of service functions like TPMS reset, oil service reset, EPB reset, DPF reset, camshaft gear learning, SAS calibration, injector coding, BMS service etc. Additionally, the Autel MS906TS performs bi-directional tests for ABS, lamps, actuators, auto bleeding, idle up manual control, automated tests, function tests and pretty much every other bi-directional test you can think of.
A Little Something About Bi-directional Tests
Essentially, Autel MS906TS is a professional bidirectional scan tool. The scanner can perform system tests as well as actuate injectors, relays, and coils. By doing so the MaxiSYS MS906TS helps you determine the efficiency of that particular system. It does so by sending and receive commands to and from the system.
As a user, you can observe how the system parameters change in real-time. That will tell you whether it is performing optimally. For example, a bi-directional ABS test will allow you to send commands to the ABS system, in the same way, the car’s on-board computer would.
By observing how that system responds to the commands, you can determine whether it would respond to the ECU’s commands as required. If not then it means there’s a problem that needs fixing. If so then your ABS is clean as a whistle.
Back To Professional Diagnostics
As far as the actual professional functions, you can use the MaxiSYS MS906TS for adaptations, matching, coding and relearns. Things like key coding, ECU coding, ECU programming, TPMS relearn and any sensor relearn should be a breeze with this diagnostic tool. There’s a built-in 8MP camera with a flashlight to help you illuminate dark parts during diagnostics.
The Autel MS906TS provides freeze frame data in addition to live data. If you are more comfortable with graphical data you have the option to view PIDs as full-screen waveforms. Besides, it allows you to print and/or save the data. There’s a built-in memory with a 32GB SSD storage capacity for holding the data.
Finally, the built-in 10000mAh lithium polymer battery keeps the scanner going even when it’s not connected to a power source. You may need that kind of service when you are using Bluetooth or Wi-Fi to run diagnostics.
Built-In TPMS Antennae
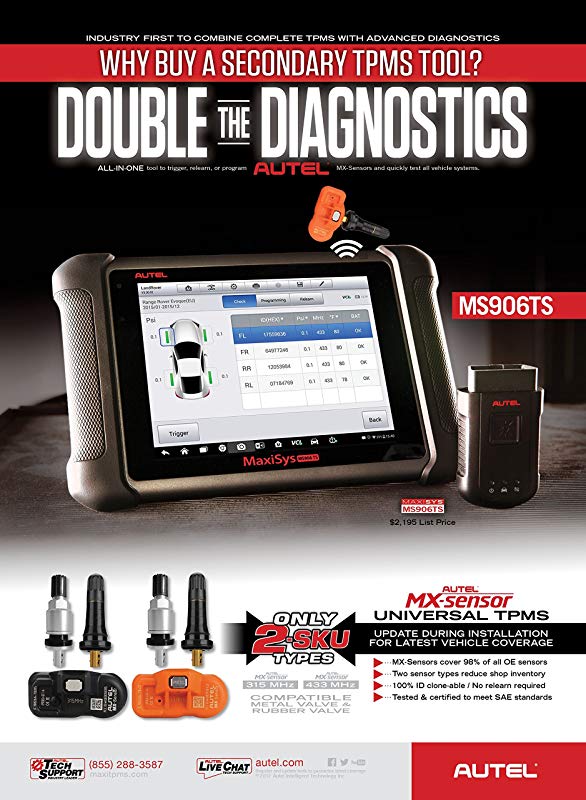
This is the one feature that sets this device apart from other Autel scanners like the MS906BT, MS906 and even the costlier MS908. Built with an integrated TPMS antennae module, the Autel MS906TS is not only capable of triggering OEM TPMS sensors but can also program TPMS sensors and perform TPMS sensor relearns.
In other words, this device can transfer new TPMS sensor IDs directly to a vehicle’s ECU. If you are an auto mechanic you understand that most foreign cars usually require a comprehensive relearn procedure before being sold or used locally. When it comes to TPMS relearn, the MS906TS will initiate the process automatically and save you from the hassle of doing it manually.
Extensive Connectivity
Although it comes with OBD2 adapters, the Autel MS906TS also supports Wi-Fi and Bluetooth connections. In other words, you can ditch the cable completely and use a wireless connection to run diagnostics.
It uses Bluetooth 2.0+EDR and 802.11 b/g/n Wi-Fi. This type of Bluetooth is not only built for secure connections but it also supports Enhanced Data Rate (hence the EDR) for faster data transfer. The only problem is that it’s only suitable for short-range data transfer.
Luckily the MS906TS offers a solution for that. The 802.11 b/g/n Wi-Fi module covers a fairly long distance. With speeds of up to 54Mbps, this connection lets you run diagnostics from outside the car.
Note that you will need an OBD2 dongle that supports Bluetooth, Wi-Fi or both for you to use this scanner’s wireless connections. That’s a small cost to pay considering how enhanced your mobility will be.
While Bluetooth and Wi-Fi are the most important connections, at least as far as diagnostics, they are not the only ones supported by the Autel MS906TS. It also features USB 2.0, Mini USB 2.0, SD Card, HDMI 1.4a and Class1 ports.
Wide Vehicle Coverage
The functions above make the case for the Autel MS906TS. But to top it all off, the scanner has an impressively wide vehicle coverage. It works on over 80 brands of OBD2-compliant vehicles, domestic and foreign.
That means if a car was manufactured after 1996 then it should be compatible, provided it has the 16-pin OBD2 port. For a complete list of covered vehicles please visit Autel’s website. You can reach them for inquiries regarding the compatibility of your car.
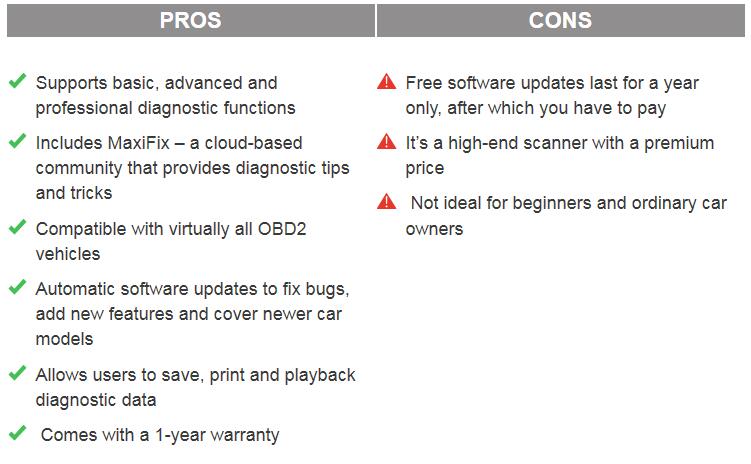
Autel MS906TS Vs MS906BT Vs MS906 Comparison Chart
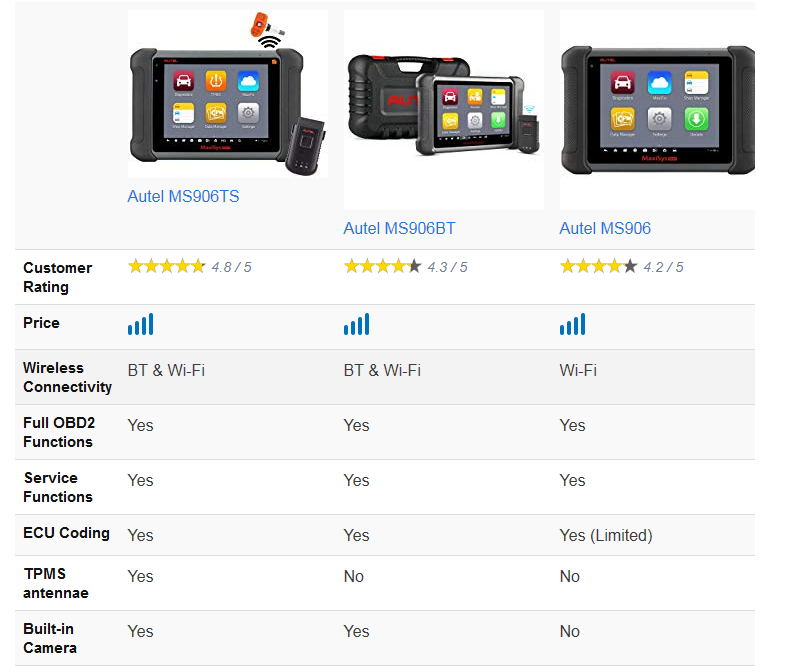
Posted by: youobd2 at
03:50 AM
| No Comments
| Add Comment
Post contains 1218 words, total size 9 kb.
April 07, 2019
Lonsdor K518ISE Software Optimization:
1. VW IMMO2 &IMMO3〠Read PIN】
2. VW IMMO4: Enable more dashboards to auto-identify immo type
3. Skoda IMMO2 & IMMO3 [Read PIN]
4. Skoda IMMO4: Enable more dashboards to auto identify mmo type
5. BMW CAS: CASL is available: CAS2/CAS3 〠Delete key】.
6. BMW FEM/BDC: Suport swfl_00002419_071_010_040,swfl_00002419_080_010_010
software version
7. Toyota: Optimize menu [Select from vehicle]
8. Dodge/Chrysler/JEEP & Honda
9.Hyundaiï¼Kia: Optimizeã€Read46 chip PIN】and〠Read PIN code (46 smart
card)】, support obtaining PIN via LKE decoding
10.BYD: [Generate working key], support generating SK via LKE to obtain PIN
1. Porsche: Optimize key programming procedure.For Bote(2005-2011)/Cay-
man(2005-2011)/997(2005-2010)/911(2005-2010),support bypass programming with LKE.
Lonsdor K518ise Latest Update SCION
Posted by: youobd2 at
03:32 AM
| No Comments
| Add Comment
Post contains 108 words, total size 1 kb.
April 01, 2019
If you buy full set MB star Compact C4 and Benz star c3 from us, we will activate xentry, EPC and WIS before we send the parcel to you.
You also can buy the keygen from this link:
https://www.obd2tool.com/goods-335-MB+SD+Connect+Compact+4+Star+Diagnosis+Tool+Plus+Dell+D630+Laptop.html
MB SD Connect C4 Dell D630 version:
Now I will show you how to activate the EPC and WIS. Follow below steps, you will find the activation for EPC and WIS are so easy:
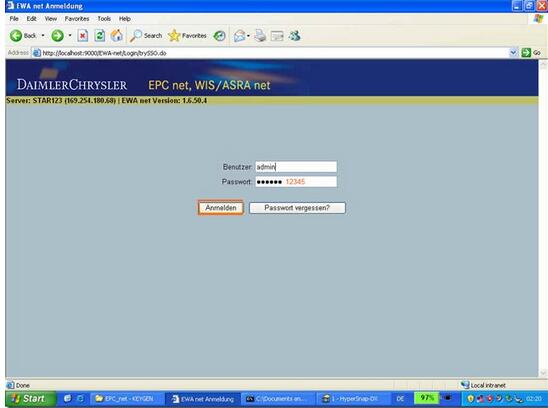
Step 1: Open EWA.net, you can find it on desktop or in Internet Explorer "Favorites†folder. Enter the User Name as admin, Password as 12345.
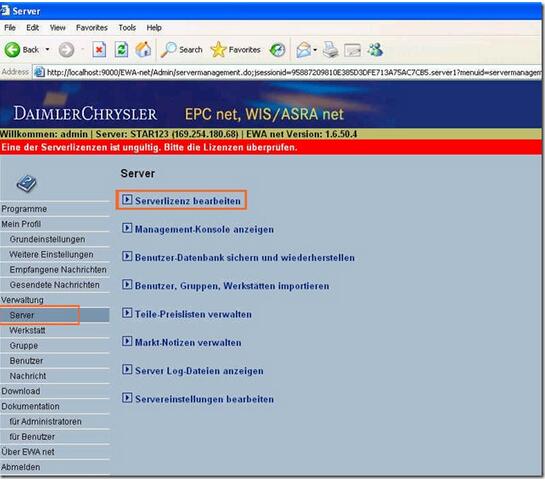
Step 2: Click the Server, and then choose Serverlizenz bearbeiten.
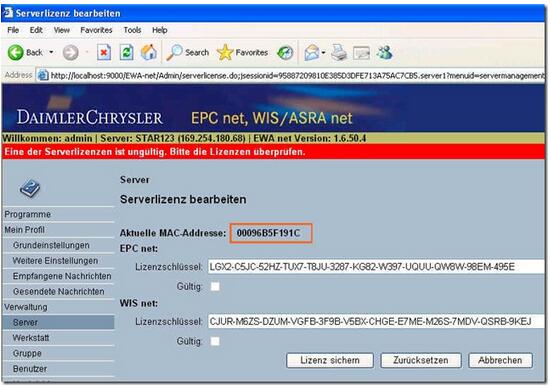
Step 3: Get the MAC-Addresse (also named Lan-ID)
Step 4: Open your EPC_net-KEYGEN folder, it is on your desktop. Then run EWA_kg.
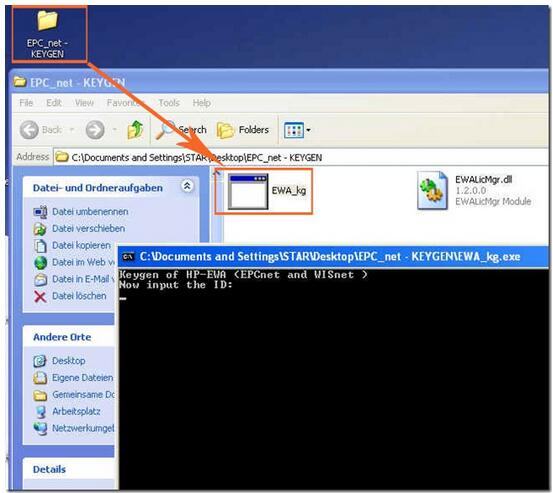
Step 5: Input the MAC-Addresse /Lan-ID (you have got it on step 3) , Expiration year, Expiration day, Expiration month and Number of Users. For year, day and month, you can input any number you want to. E.g. 2020.01.01 or any other date.
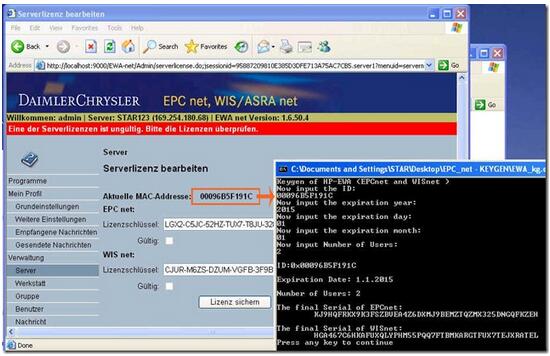
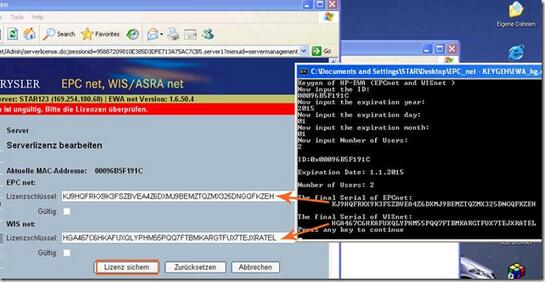
Step 6: Input the Serial OF EPCnet and Serial of WISnet to EWA.net Serverlizenz bearbeiten. Then save the change.
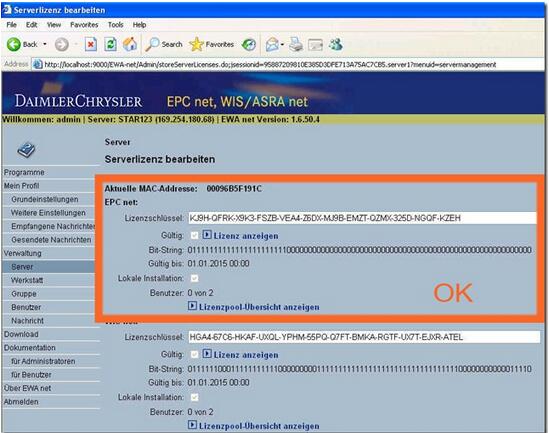
Now all have done, you can enjoy your EPC and WIS now.
Posted by: youobd2 at
09:55 AM
| Comments (1)
| Add Comment
Post contains 216 words, total size 3 kb.
March 27, 2019
How-to: Renew Chervolet Cruze smart key 7952E by OBDSTAR X300 DP PLUS (Key master DP Plus) tablet.
Chip Type: Chip 46
Smart key type: 7952E
Frequency: 434MHz
Disassemble the remote key
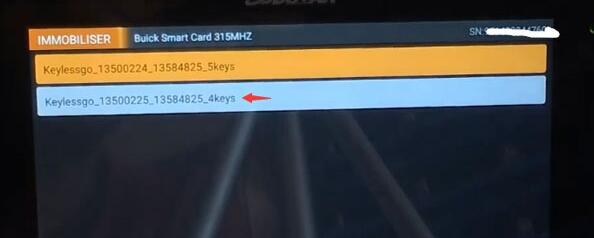
In X300 DP PLUS, select Diag Program-> Renew Key->GM->Buick Smart Key 315MHz->
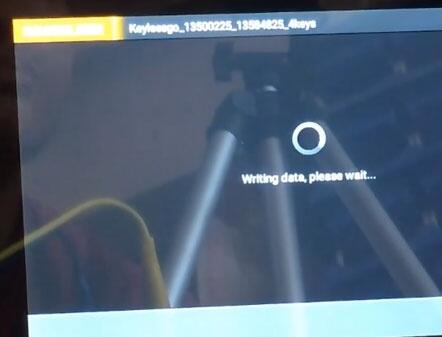
Keylessgo_13500225_1358425_4keys
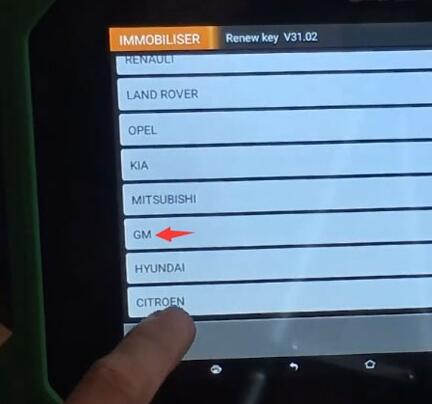
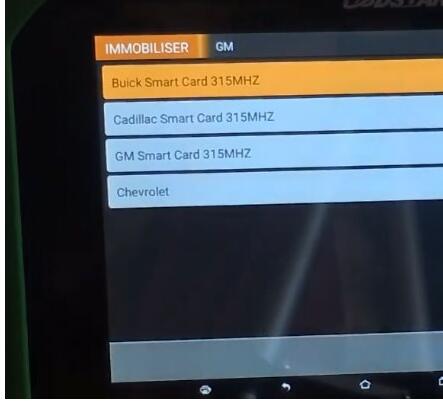
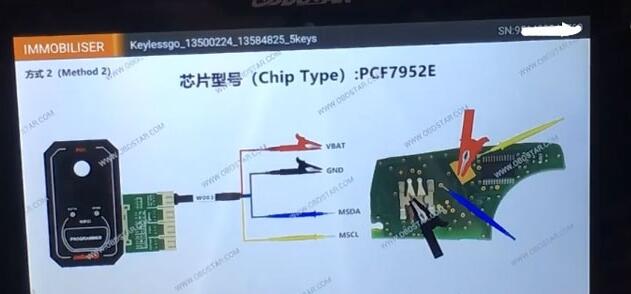
Then check the wiring connection
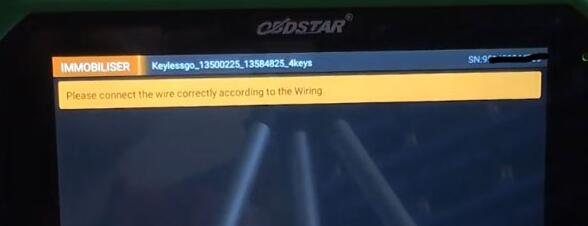
Connect test probe with OBDSTAR P001 adapter and X300 DP PLUS
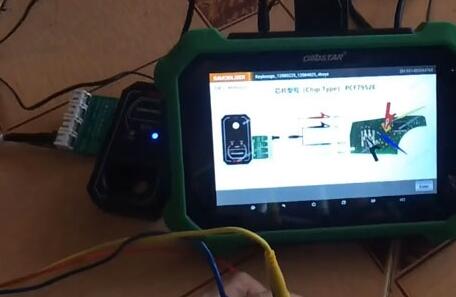
Press Enter to write data
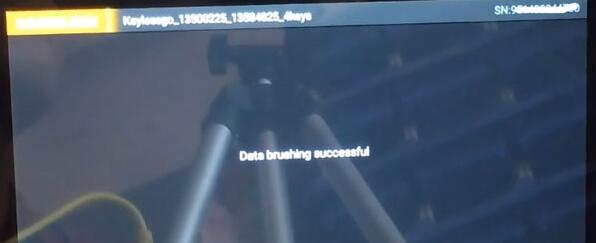
Renew key success
Posted by: youobd2 at
04:00 AM
| No Comments
| Add Comment
Post contains 79 words, total size 5 kb.
March 15, 2019
CG-100 V5.0.3.0 Update details:
1. Mileage(8 Pin), added support model:
BAIC Weiwang M50 A00062144
Baojun 730 23950964
Baojun 310 23979787
Baojun 560 23981822
Baojun 730 23930731
Baojun 310 23893177
Brilliance-auto V3 QZB1061C
Brilliance-auto Junjie TW80000316
Brilliance-auto V6 QZB1091B
BUICK LaCROSSE 13518371
BYD S6 3820010F
CHANGHE CHANGHE BEIDOUXING ZY-ZB112B-13 34100D6DJ30
Dongfeng Fengshen AX3 Z410010J-F0500 QZB1068
Dongfeng Jingyi X5 94103-01 BM3-3820020
FAW BenTeng R9 3820015ABK01
FORD Transit ZB168F1T
GEELY Yuanjing X6 451003 QE17WT1K16791
GEELY Yuanjing 94206-05
GEELY Yuanjing 942210-270
GREAT?WALL Havel H6 3820400AKZ54A
GREAT?WALL Havel H1 38200100XG83XA
GREAT?WALL Havel H2 3820100XSZ08B
GREAT?WALL Havel H6 3820100AKZ54A
Haima M6 FC5A-55-430
HYUNDAI VERNA 94003-D0010
JMC Yusheng GP2-10849-MA II
MITSABISHI Outlander MM0059-502
NISSAN Venucia T90 3230796-9
OTHER CHINESE CAR ZHOGNXINPICKUP G001268 3820010-1510 V3820
OTHER CHINESE CAR ZHOGNXINPICKUP G001268 3820010-1511 V3820
SUZUKI S-CROSS 34100-66MA0-00
TJFAW XIALI N5 83800-TBA20
TOYOTA PRADO 4000 83800-0G022-A
TOYOTA COROLLA 83800-F2A50 II
TOYOTA PRADO 80800-6AG80-B
TOYOTA Sienna 83800-08590-00
TOYOTA COROLLA 83800-F2U50
TOYOTA Highlander 83800-0E660
TOYOTA Yaris 83800-0DX40
TOYOTA LAND CRUISER 200 83800-6AD30-F
TOYOTA CROWN 83800-0N160 II
WULING Rongguang 23888822
WULING Rongguang ZB169N-C
WULING hong guang S 23902989
WULING Rongguang V 23957308
WULING Hongguang S1 23902135
ZOTYE Z300 3820010-A01
ZOTYE T300 3820010001-M12 3820BL
2. Mileage(8 Pin), algorithm update:
GREAT?WALL Havel H2_3820100XSZ08A
HYUNDAI VERACRUZ 94003-3J390
3. Added search function features in 9S12, Atmel, MB91, M35080, Airbag, ECU, BCM, Amp, and Other pages.
Added search chip functionality to the Programmer page.
4. Now connection is interrupted when MAC724x chip erase, will prompt an error message.
Posted by: youobd2 at
07:59 AM
| Comments (1)
| Add Comment
Post contains 243 words, total size 2 kb.
March 06, 2019
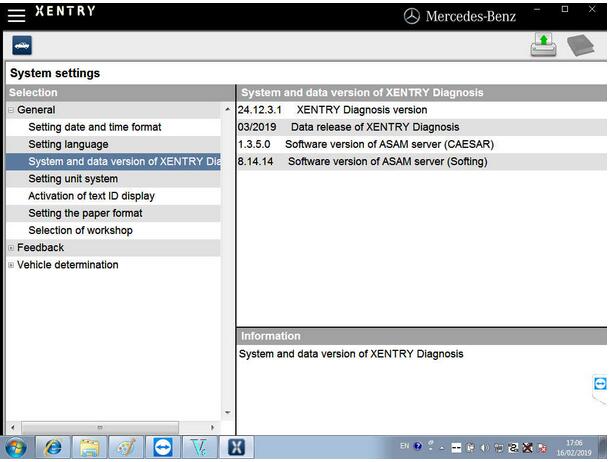
Post supplies Mercedes-Benz Xentry.OpenShell.XDOS 2019.03 (19.3.6) free download source and reliable source.
Newest Xentry V2019.03 is for Mercedes Star diagnosis, DAS XENTRY V2019.03 software is available with hdd or ssd version. 2019.03 Mercedes star diagnosis with EPC,WIS ,Vediam, Dtc, Starfinder win 7 software with new mercedes starfinder online software and mercedes das xentry 2019.03.
V2019.03 Xentry download:
Link 1. free XENTRY DAS OPENSHELL ( 03-04/2019 ) – Mega
XDOS (03.2019) Smallville.rar
XENTRY Diagnostics Open Shell 03-04 2019-Torrent.rar
password: ROTURBO_VAS5054-@-cartechnology
OLD Key & New Key is working but Not 100%
This version need ; 2221-45 & 3.91 Error Fixed Solution
Other need ; DAS Blacklist Fixed Solution + DAS License 0 Fixed Solution
Windows 7-8-10 x86 & x64 System SUPPORT NOW
OLD key activation information
– This your RISK %100
– Blocked SCN Access Acount
– Xentry & DAS System Error
– always it need 2221-45 fixed & 3.91 fixed solution
Link 2: Tested and working version
SSD version
HDD version
Software Version: 2019.03
Update: HDD back to update, or purchase new HDD replacement
PC Requirements: Dell/ Lenovo/ Panasonic etc.
CPU: Intel Core 2 Duo Processor or equivalent, i5 CPU is much better, 2.2GHz or faster core speed
RAM: 4GB RAM minimum
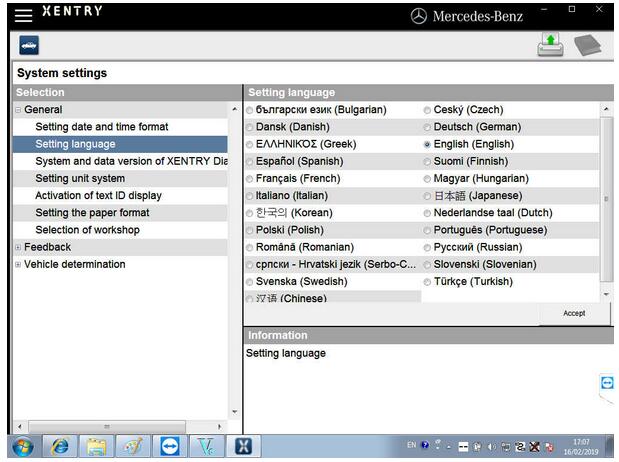
Language available: English, Croatian, Czech, Danish, Dutch, Finish, French, German, Greek, Hungarian, Italian, Japanese, Korean, Polish, Portuguese, Romanian, Russian; Spanish, Swedish, Turkish, Chinese
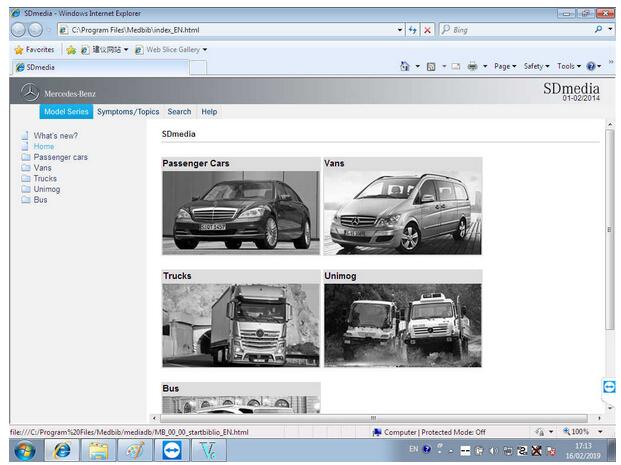
Star Diagnosis Xentry Software coverage:Works on Mercedes vehicles, included: Cars, Buses, Trucks, Sprints, Smarts etc. till 2019
Compatible Hardware:
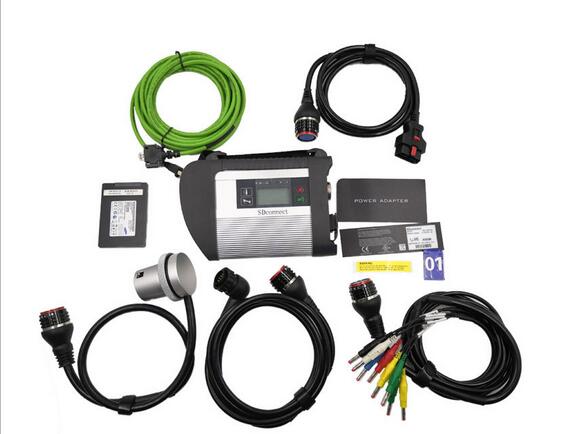
1. Star Diagnosis SD Connect MB Star C4
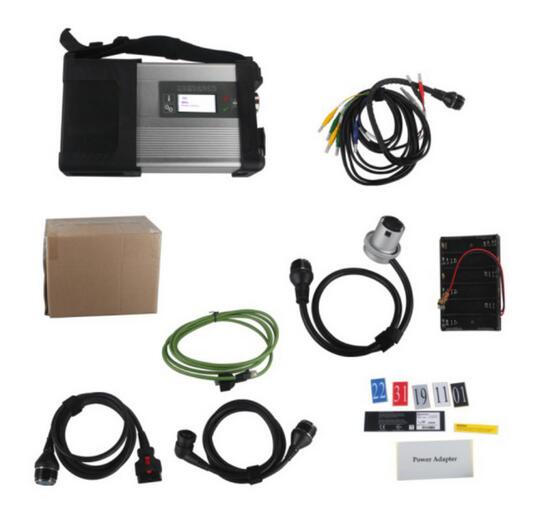
2.MB STAR C5star diagnosis tool for Benz car and truck
3.MB STAR C6 DoIP
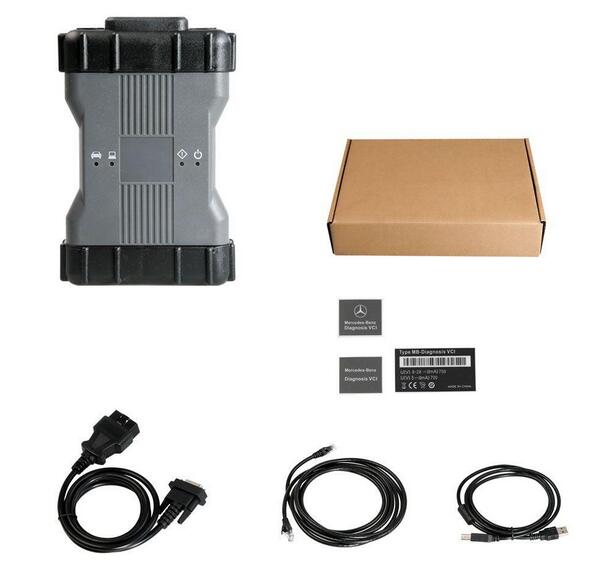
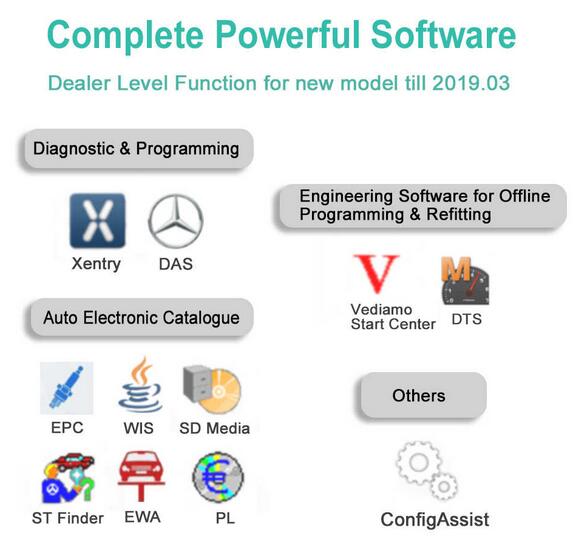
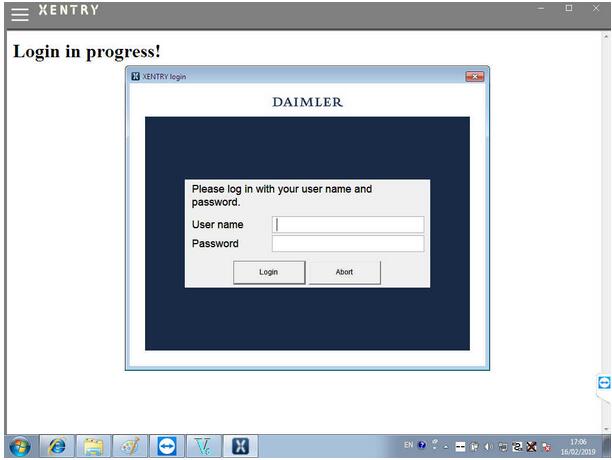
Xentry diagnostic complete powerful software:
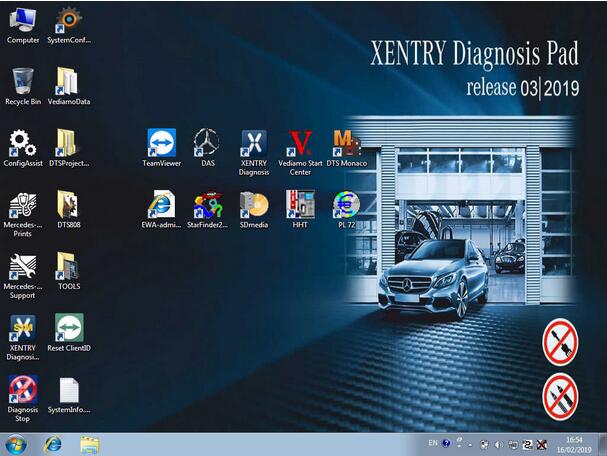
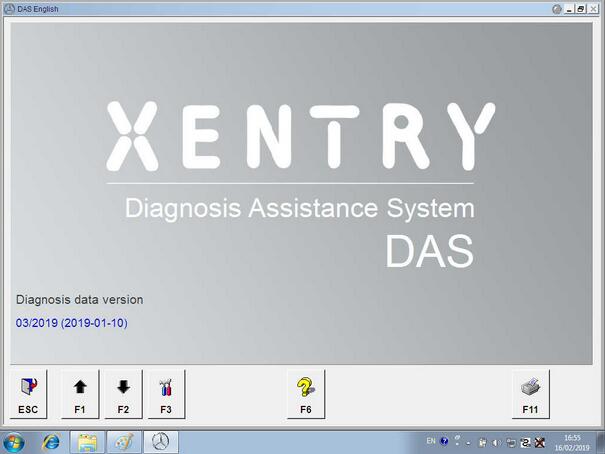
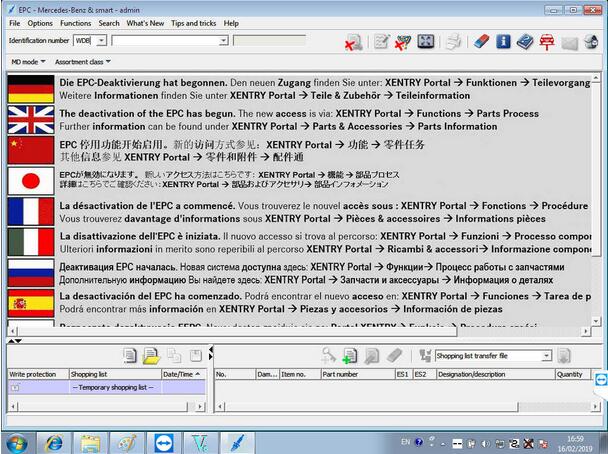
EPC software diagnostic for Mercedes Benz.
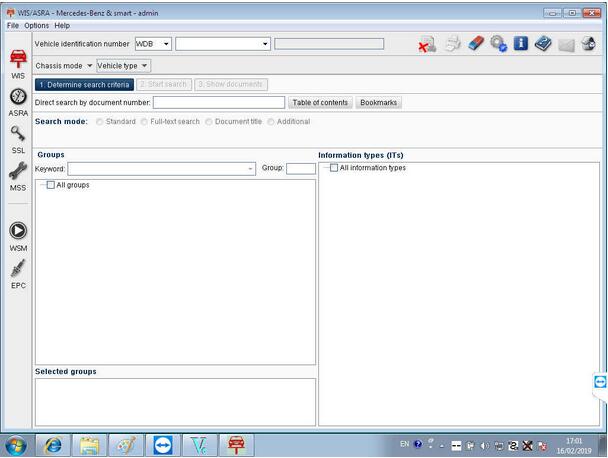
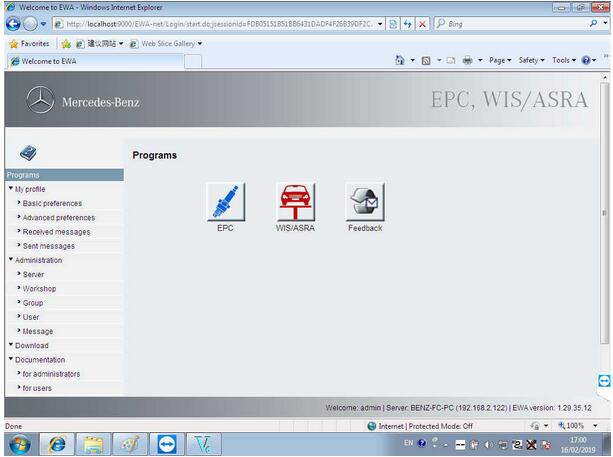
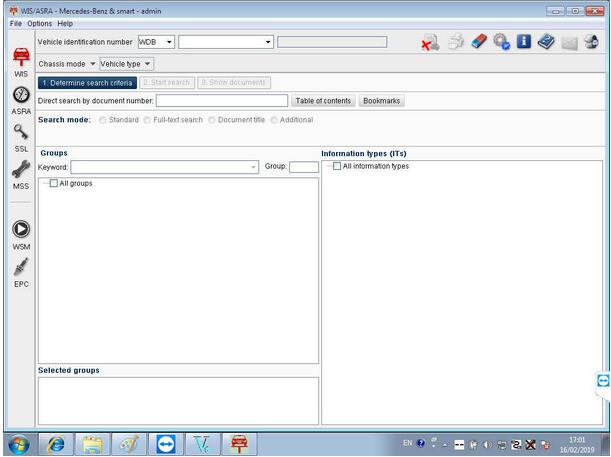
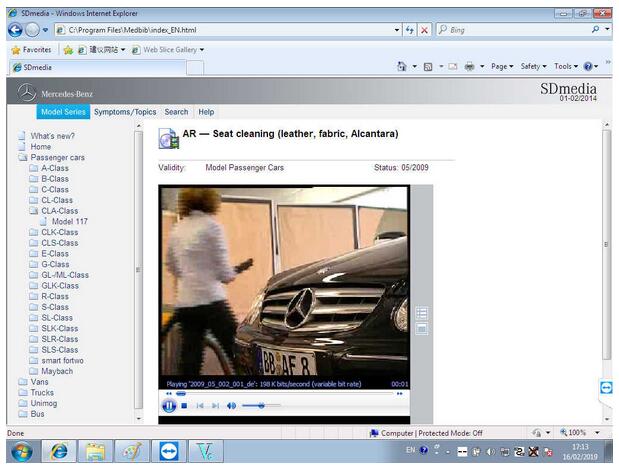
WIS/ASRA software diagnostic for Mercedes Benz.
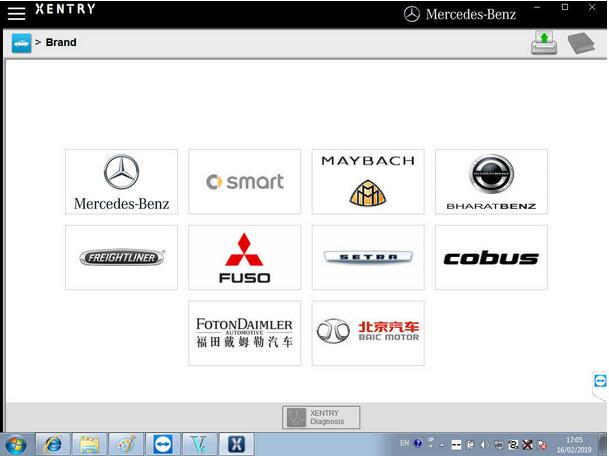
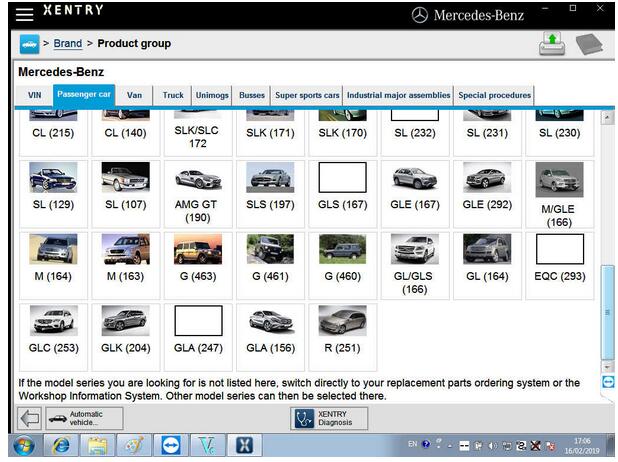
Xentry software V2019.3 workable car brands.
Posted by: youobd2 at
01:13 PM
| Comments (1)
| Add Comment
Post contains 293 words, total size 8 kb.
Step-by-step procedure on Nissan Altima 2006 program key with Nissan Consult III Plus special diagnostic tool and NSPC001 pin code reader.
Tools to use:
Nissan Consult 3 diagnostic scan tool + Security Card immobilizer for Consult iii
NSPC001 Nissan Automatic Pin Code Reader
Nissan PIN CODE is needed when programming keys. So first of all connect the NSPC001 Nissan pin code reader into the OBD diagnostic socket. Read the 5-digit BCM code and transfer it to 4-digit pin code (NSPC001 has the function). Write down the pin code. Disconnect the pin code reader.
Guide:
Plug Nissan Consult 3 scanner to the computer and vehicle with USB or Bluetooth connection
Insert key into the key hole, turn ignition ON with engine OFF
Start Consult-III software on the desktop
Click on "Connect†button on VIMI selection screen to connect with VI
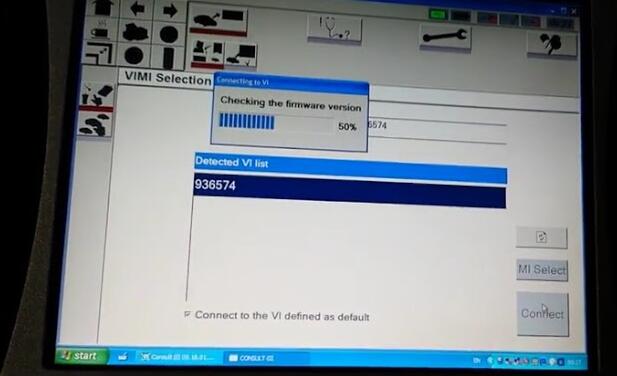
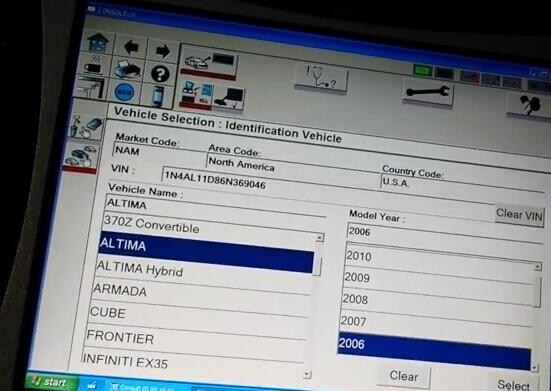
When the computer and vehicle establish good communication, the Consult3 software will display VIN info.
Choose Nissan model and year, confirm vehicle information.
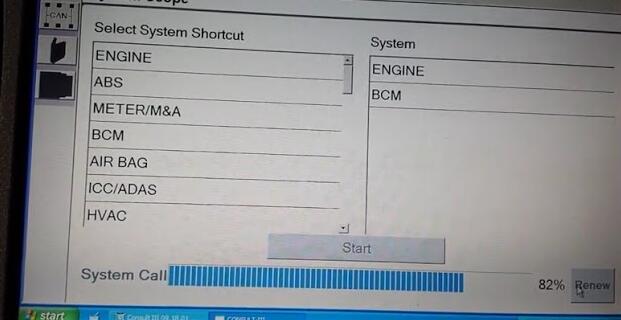
Wait until the Nissan Consult module to access all control modules, Engine, BCM, Transmission, Airbag etc. The car dashboard will illuminate and the indicator lights on Consult 3 will flash.
Click Diagnostic icon to welcome to Direct Diagnostic Mode program
Tick Key programming icon (NATS SELECT DIAG MODE) on the left menu, plug the Security card and press START
(There are two options under NATS SELECT DIAG MODE, Select C/U INITIALIZATION.
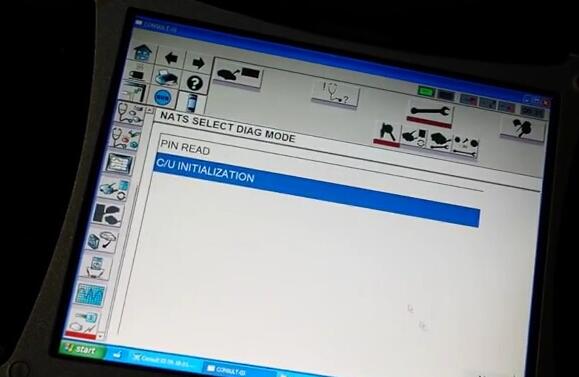
Push START BUTTON after enter password
Manually enter the pin code
Initialization completed
Follow system prompts until key programming procedure is done completely.
Posted by: youobd2 at
12:40 PM
| No Comments
| Add Comment
Post contains 264 words, total size 3 kb.
February 25, 2019
What is the AVDI recognized by Xentry?
Xentry Mercedes Passthru is different from from regular Xentry openshell. Xentry passthru does not use SDconnect toolkit. When you launch the program it will give you a dropdown where you can choose which J2534 device you want to use.
How to use Xentry Passthru?
If you got the Xentry Passthru installed, there is a tool which will do the dirty work for you.
Normally it is not linked or doesnt have desktop shortcut but resides (at least in my installation)
under
C:\Program Files (x86)\Mercedes-Benz\xentry\bin\SelectPTDevice
IF you have installed your passthru (would that be AVDI or anything else) with correct drivers, registry entries etc it will just present you with list of options and you select your VCI from dropdown list.
Heard good things about AVDI J2534 compatibility (real thing, don’t know about clones) so it shouldn’t be a big deal. Recently i have tried to use BOSCH KTS560 as passthru and it works perfectly okay.
For curiosity, i did also test the 20-euro MiniVCI that gets normally bundled with Toyota techstream packages. to my surprise it also works albeit slow and sometimes freezes the application. This one can be actually made to work even with old DAS like 2009, 2012….it’s just matter of proper settings in cal.ini and slave.ini
For DAS/Xentry users:
Old thread – but do not run the SetPassThruDAS.exe, as it was written for DAS/Xentry for Windows XP, and not Openshell or Xentry Passthru. All you need to do is install a fresh OS (Windows 7 Enterprise x86 or x64 SP1) ideally on a physical laptop, connect the AVDI device to the USB port and run the SetupInterface_yourserialnumber_PASSTHRU_xxxxxxx.exe and Next through the setup process. If you have a current version of the Passthru software, you will see a grayed out option for installing drivers for DAS that you cannot select, but do not be concerned about that. It will detect the AVDI, and install the appropriate J2534 dll files in the Windows\System32 directory. Then continue installing your Passthru software provided on the Blu-ray from Daimler. It will take a while to install, and once it verifies your hardware ID and installs your StartKey, launch Xentry Passthru from the icon it creates, and it will prompt you first thing as to what interface you want to use. You will see Abritus72AVDI ABRITES CommanderPT (your serial number here) in the drop down box. Select that device, and that is all their is to it. Xentry should automatically communicate with the vehicle.
Posted by: youobd2 at
02:32 PM
| No Comments
| Add Comment
Post contains 426 words, total size 3 kb.
February 18, 2019
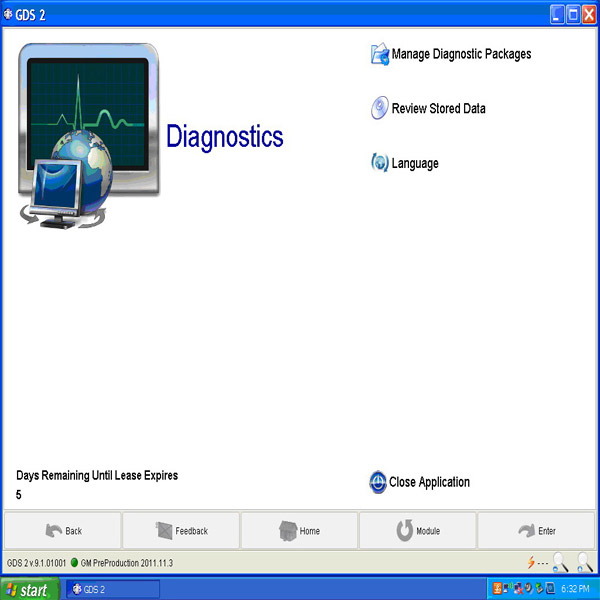
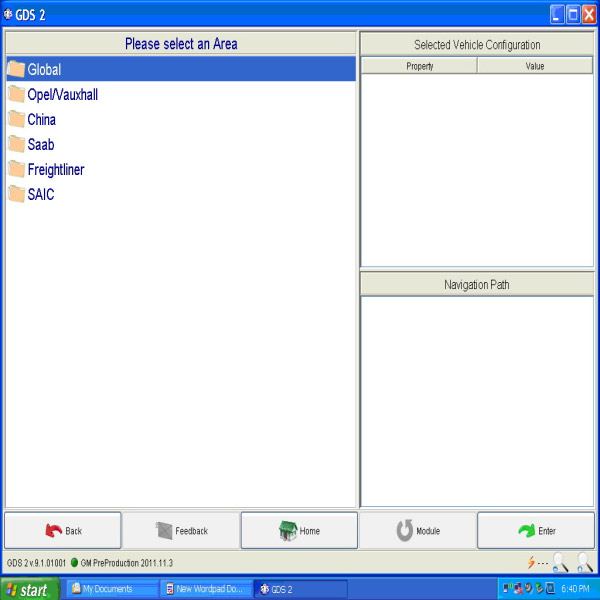
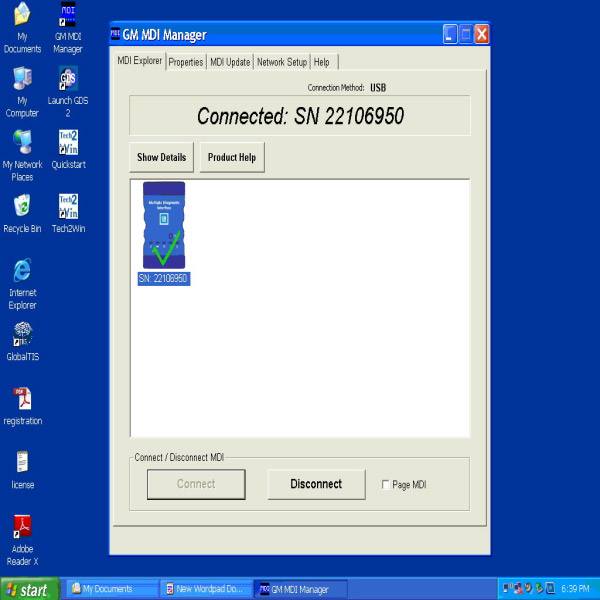
HOW WILL THE GM MDI BE USED?
The new GM MDI can be used only in the Pass-Thru method. This means you can use it as your programming tool, while your Tech 2/CANdi remains available for diagnostics and other duties.
The GM MDI is initially being introduced with Pass-Thru programming capabilities only. It can be used to perform Pass-Thru programming on all vehicles built since 1996 and will support all vehicles into the future.
The GM MDI will be required to perform diagnostics on selected NAO vehicles for model year 2009. Diagnostic software is scheduled to be released for the GM MDI during the fourth quarter of 2008.
Regulations require programming procedures to be compliant with SAE Recommended Practice J2534. The GM SPS is compliant with SAE Recommended Practice J2534, and the GM MDI is compliant with the portions of SAE J2534 that are applicable for GM vehicles.
What protocols does the GM MDI support?
For immediate use — At present, vehicles have two buses on the 16 pin connector
(high speed and low speed GMLAN). The GM MDI communicates using all of the existing GM protocols, the same as the Tech 2:
– UART
– Class 2
– KWP2000
– GMLAN (CAN)
Beginning with the 2008 model year vehicles, Pass-Thru will be the only programming method available. (Remote will continue to be available for previous vehicles.)
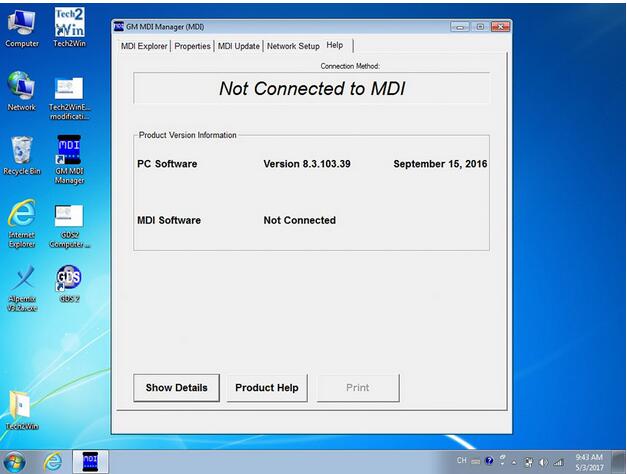
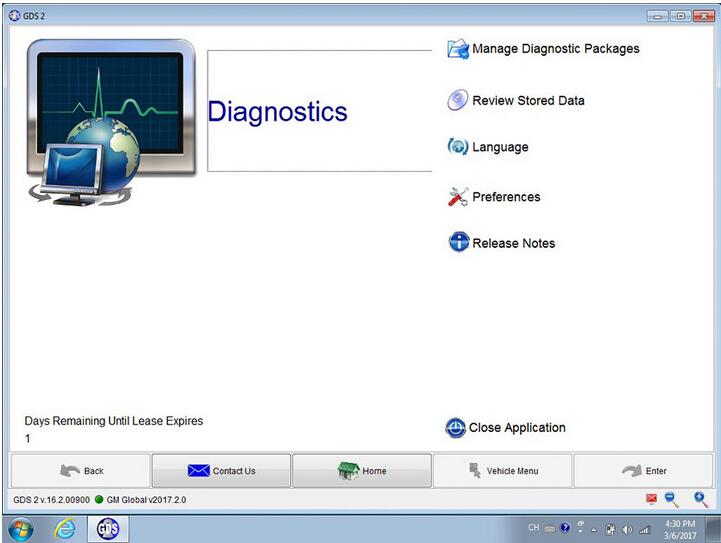
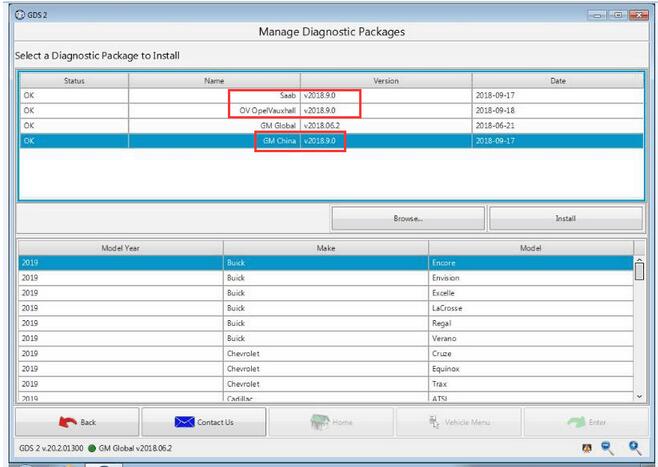
How to solve when it doesn’t connect the MDI?
Posted by: youobd2 at
08:18 AM
| No Comments
| Add Comment
Post contains 243 words, total size 3 kb.
Posted by: youobd2 at
08:10 AM
| No Comments
| Add Comment
Post contains 6 words, total size 1 kb.
February 09, 2019
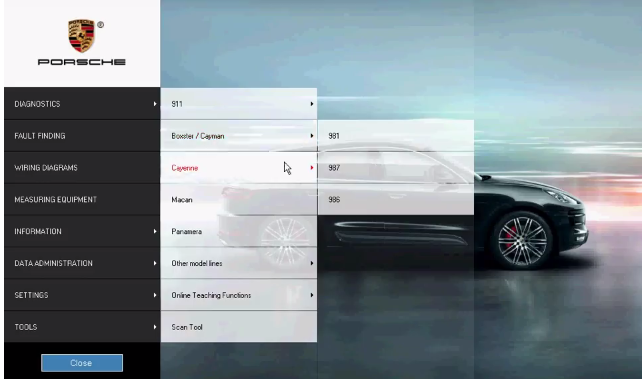
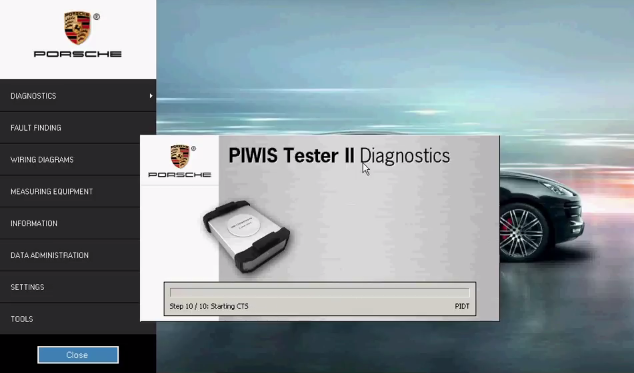
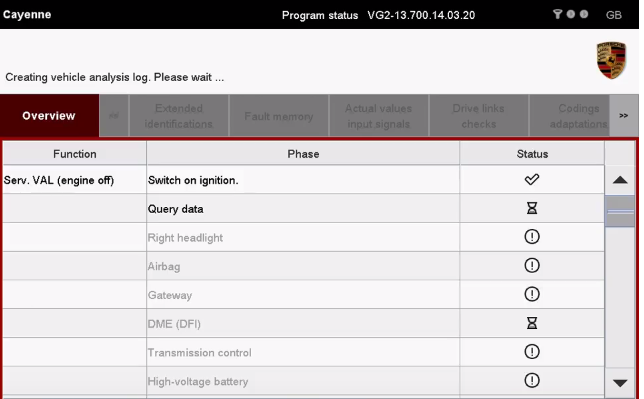
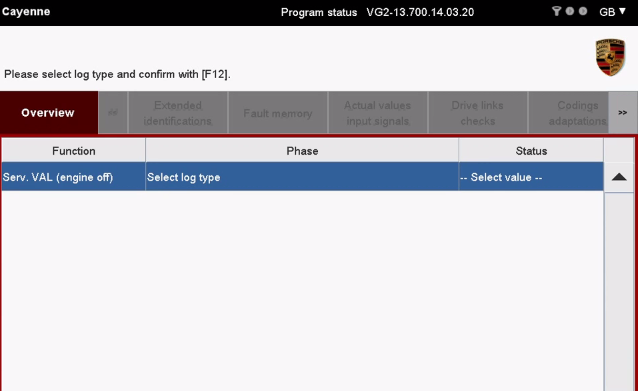
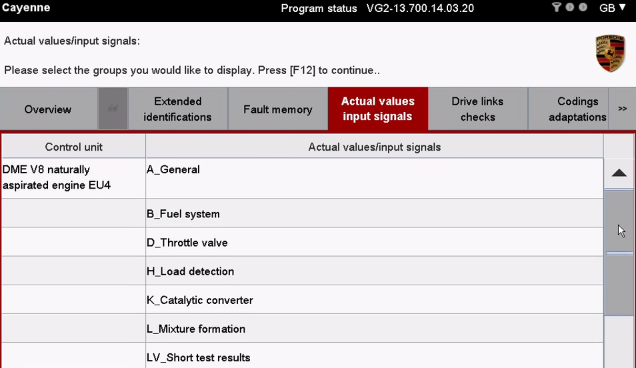
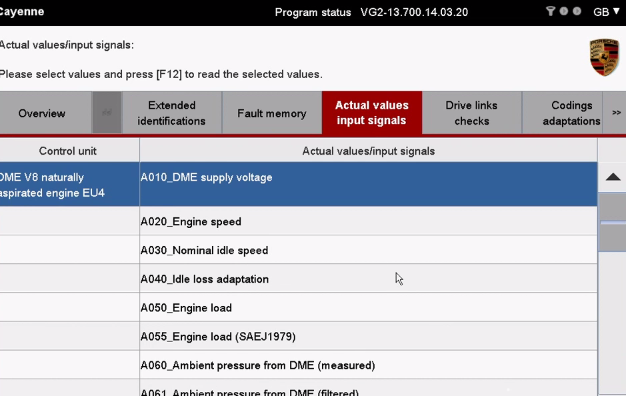
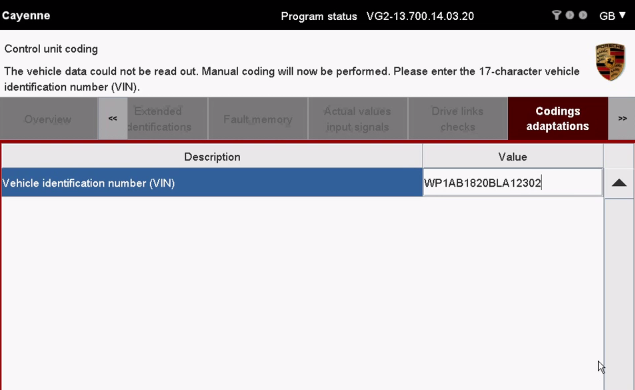
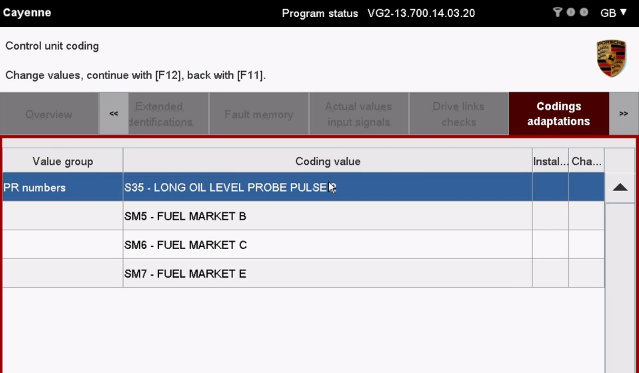
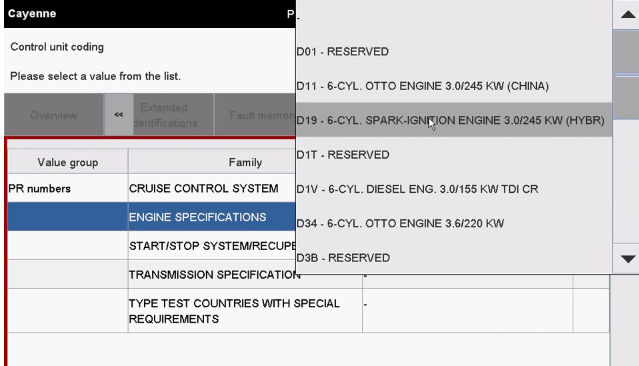
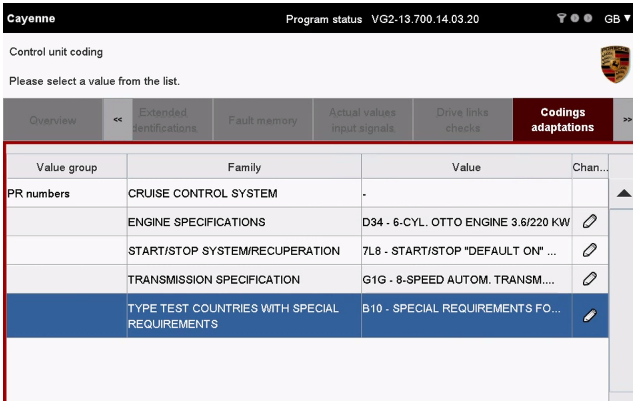
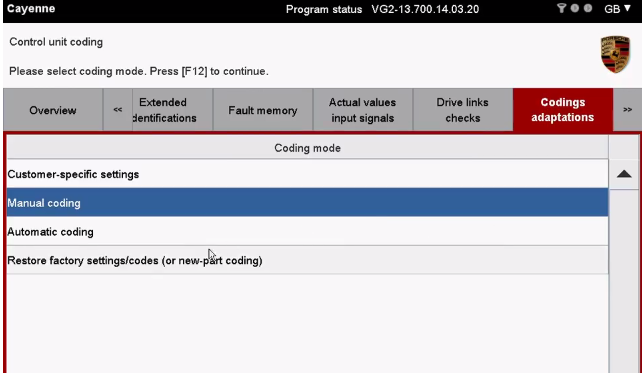
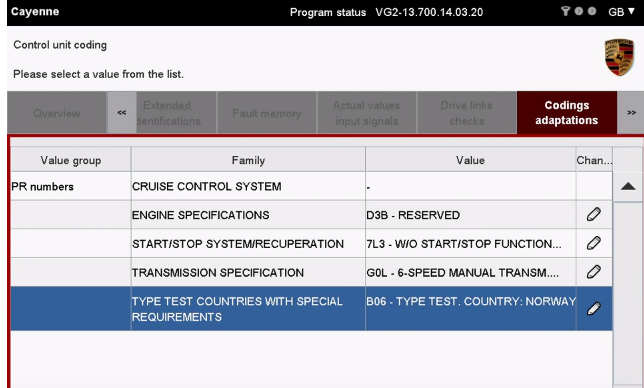
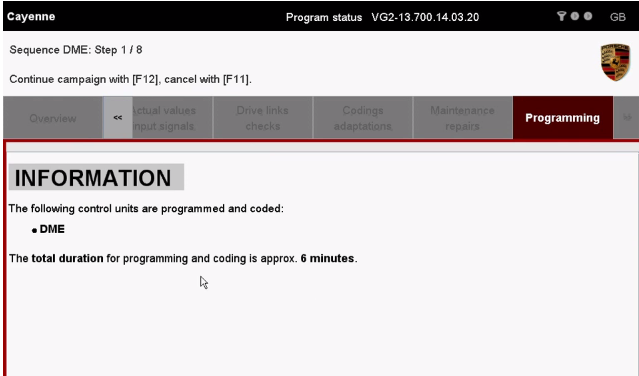
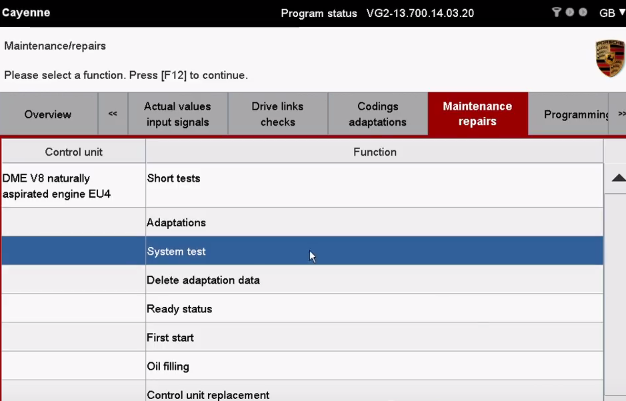
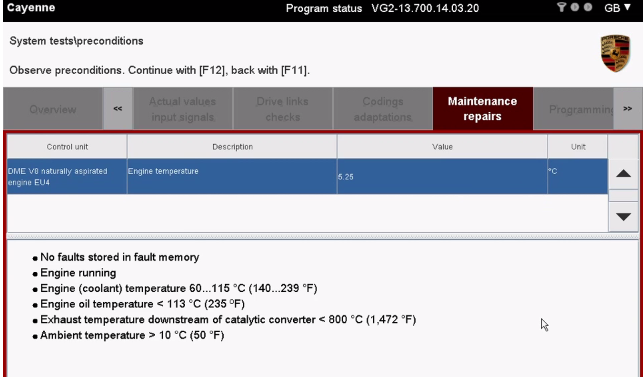
In this article we show you how to use Porsche Piwis Tester II work with Cayenne engine module, and read the live data, delete fault codes etc, for more details please visit:www.obd2tool.com



Posted by: youobd2 at
07:54 AM
| No Comments
| Add Comment
Post contains 41 words, total size 8 kb.
February 04, 2019
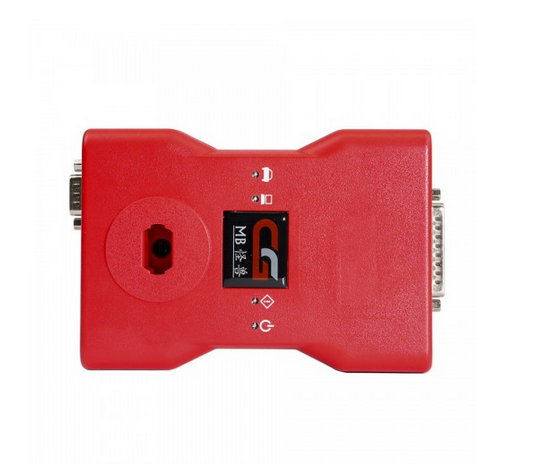
CGDI MB latest version V2.8.1.0 is confirmed to program new keys via K-line to 202/208/210, 203/463/639 when all keys are lost.
Free download Cgdi mb 2.8.1.0 software:
http://www.cg100iii.com/benz/Benz_Setup.exe
Confirmed to work with cgdi mb hardware:
CGDI mb V2.8.1.0 released notes on 19th Dec,2018
1. Added K-line all lost collection support EIS Model
202/208/210, 203/463/639
2. Optimize the Keyless repeatedly plug collecting process
Fix problems that can cause program errors in specific situations in the collection.
3. Optimize network connectivity and improve server connectivity stability.
4. Software display language increases regional restrictions.
Posted by: youobd2 at
02:25 PM
| No Comments
| Add Comment
Post contains 101 words, total size 1 kb.
January 30, 2019
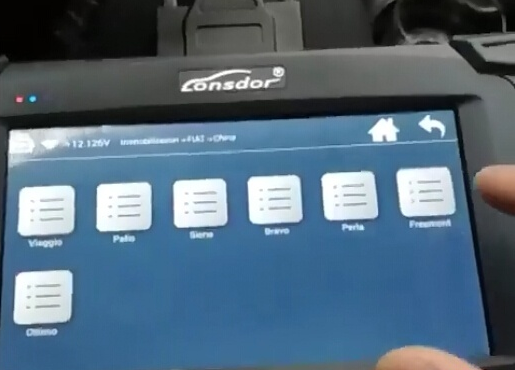
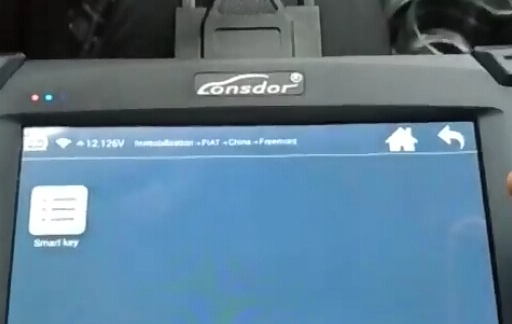
I’ve successfully read pin code and add a smart key to a Fiat Freemont with Lonsdor K518ISE Key Programmer.
(Note: The model is under 90 days free trail. You need to subscribe to use after 3 month.)
Connect K518 Auto Key Programmer host with vehicle via obd socket
Turn ignition to ON position
Select Immobilizer->Fiat->China->Freemont->Smart key->Read Pin Code
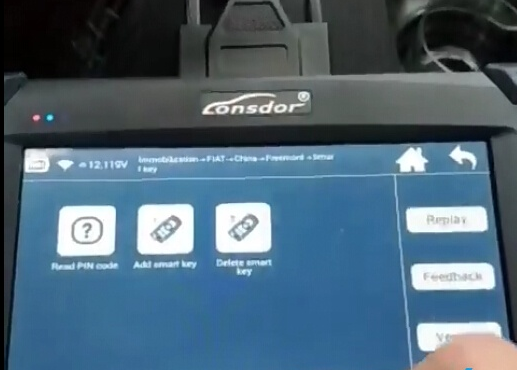
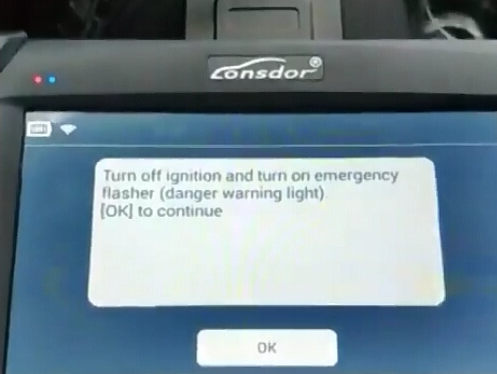
Turn ignition off and turn on emergency indicator
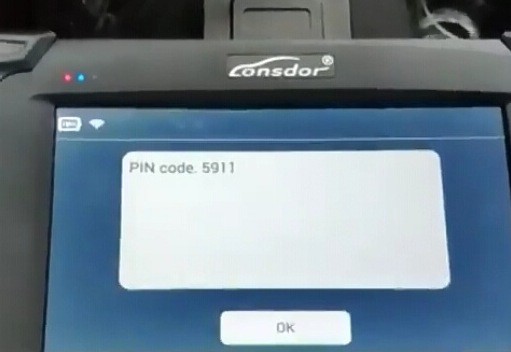
Read 4-digit pin code success.
Select Add Smart Key
Turn ignition off and turn on emergency indicator
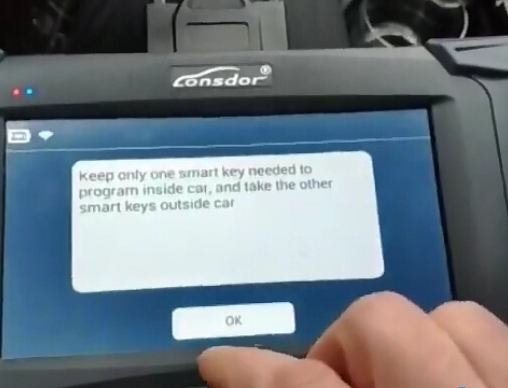
Keep the smart key need to be registered in car, take other keys outside the car
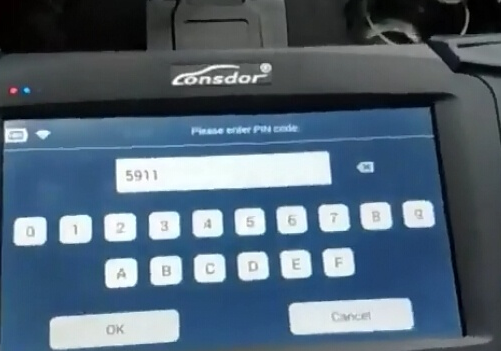
Lonsdor K518 will auto fill in pin code read previously
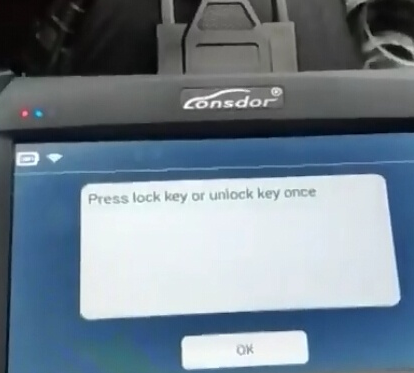
Press LOCK or UNLOCK button once
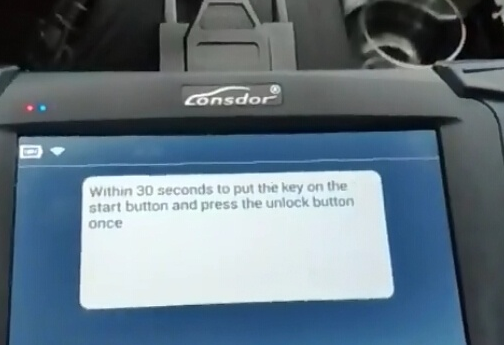
Put the key on the Start button and press UNLOCK button once within 30 seconds.
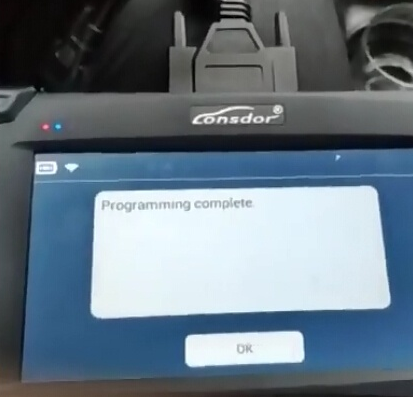
Programming completed
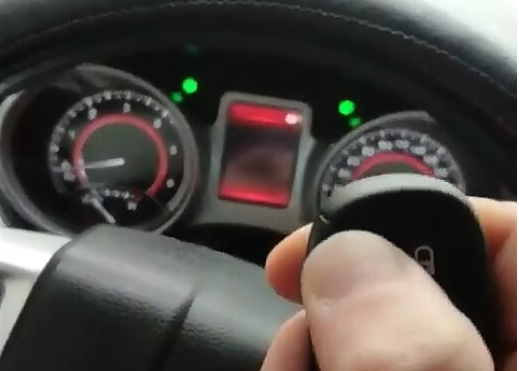
Test the smart key.
It is working.
Posted by: youobd2 at
05:55 AM
| No Comments
| Add Comment
Post contains 151 words, total size 4 kb.
39 queries taking 0.1892 seconds, 169 records returned.
Powered by Minx 1.1.6c-pink.

