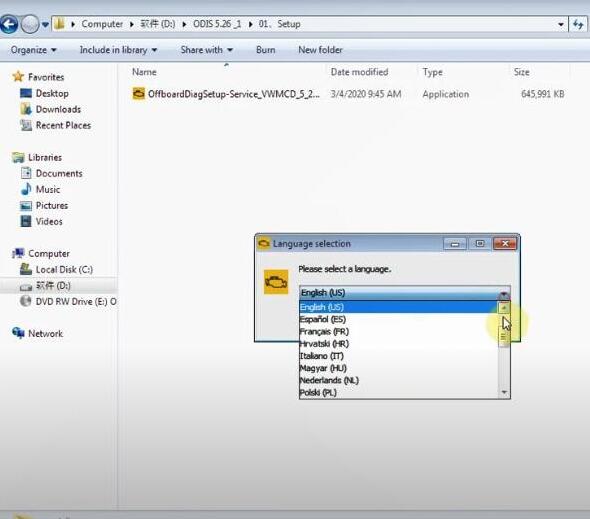
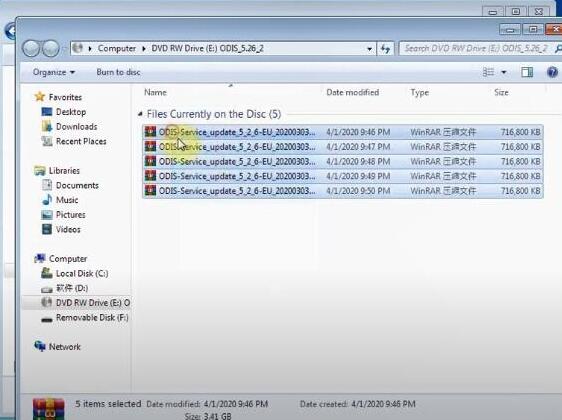
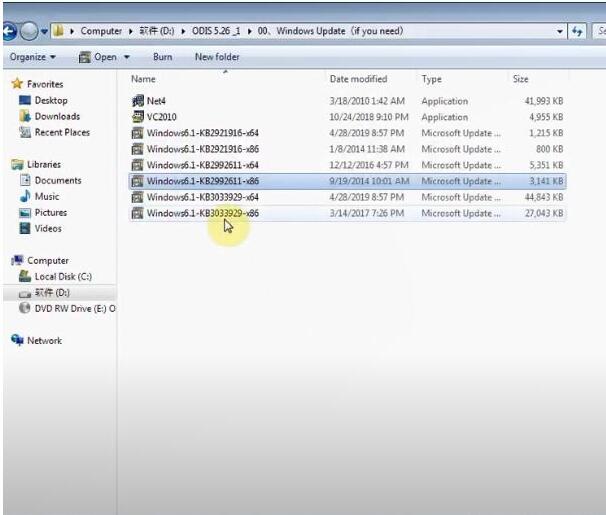
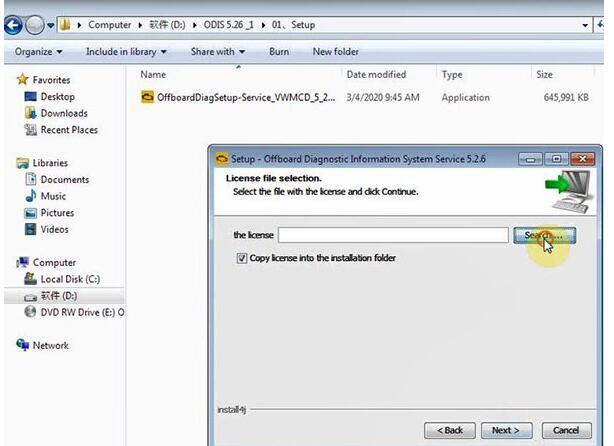
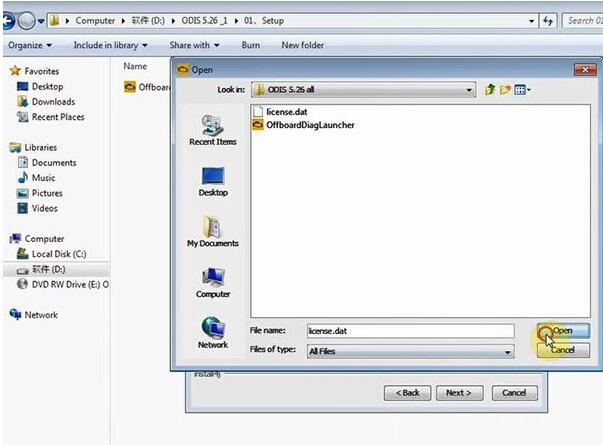
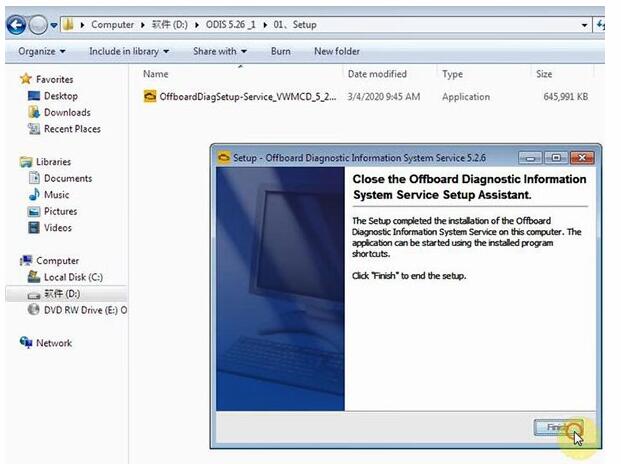
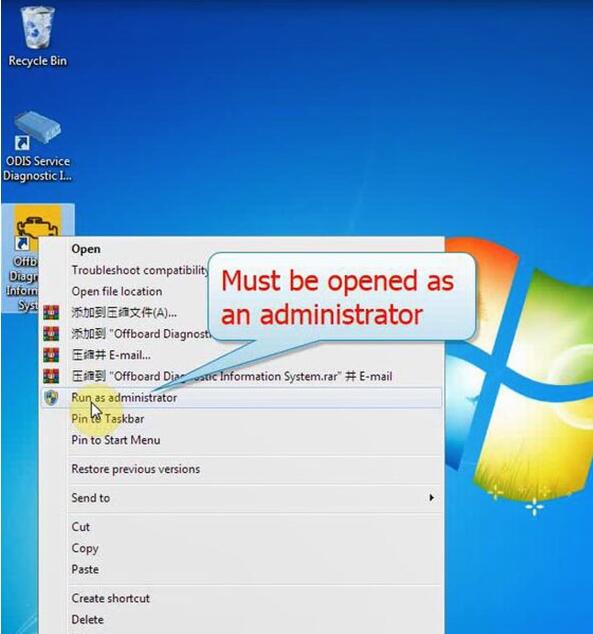
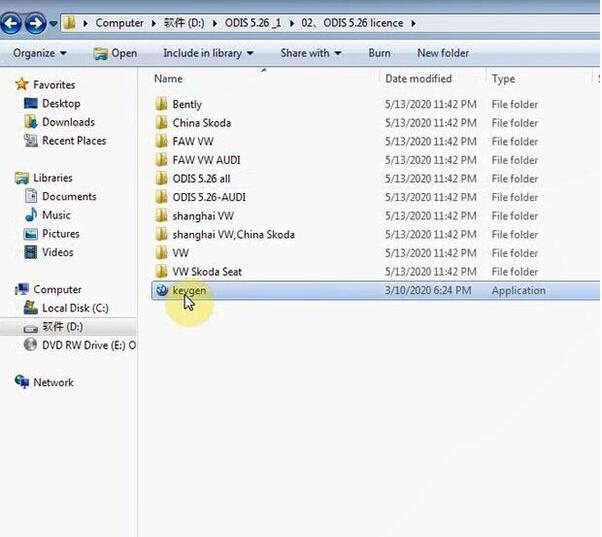
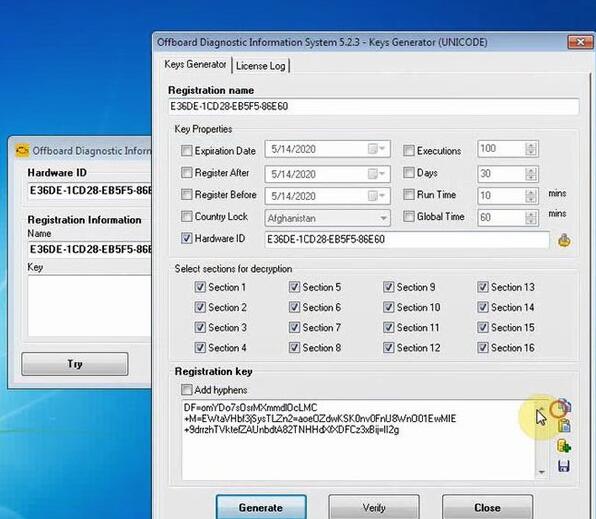
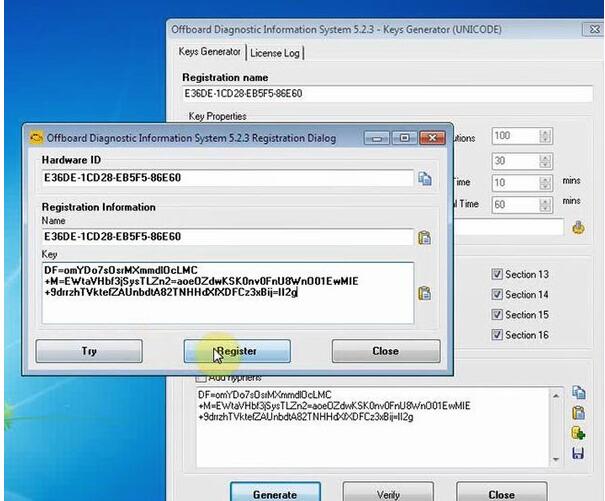
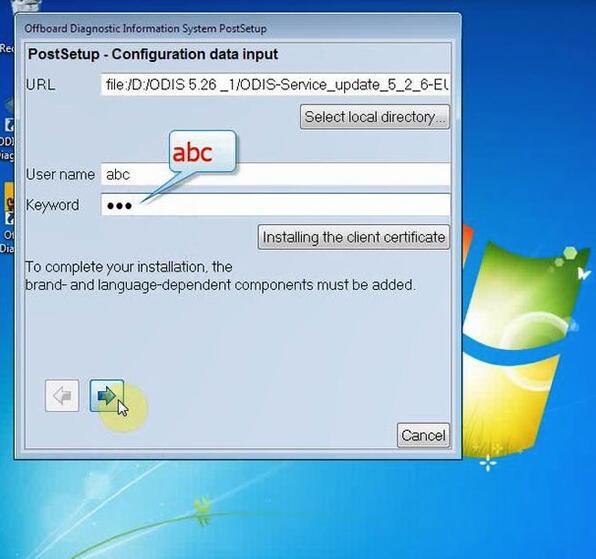
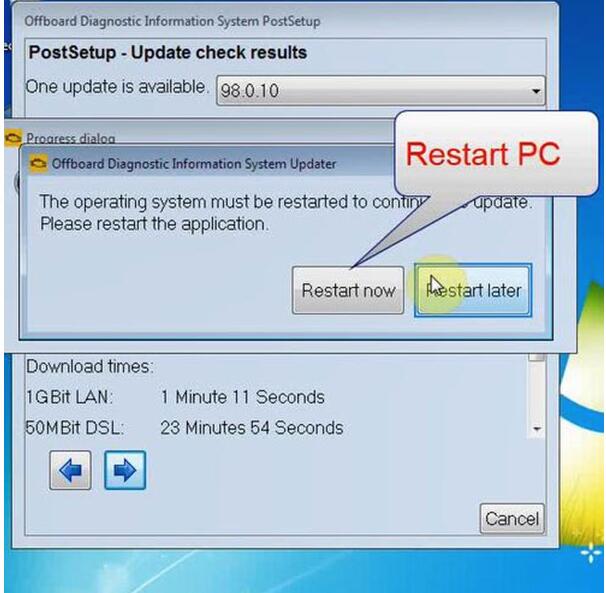
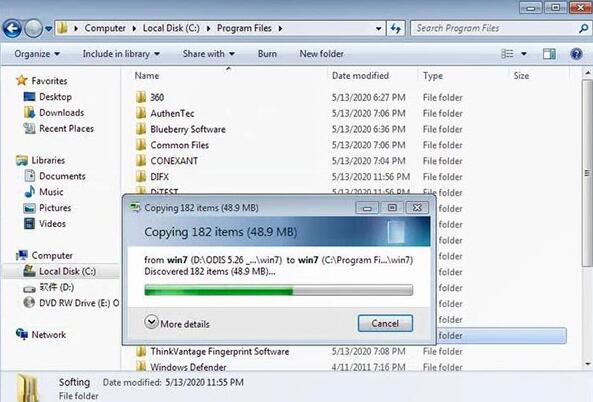
DOWNLOAD AND INSTALL ODIS 5.26 FOR VAS61545054A ON WIN710
The newest ODIS software has been updated to V5.26 which works with VAS 6154 and VAS5054A on Win 7 & Win 10 32 bit/64 bit.
What’s new in ODIS 5.26?
(1)ODIS Software Version: 5.26 for Full Brand till 2019.12 (also includes 5.16 for each brand till 2019.
(2)ETKA: 8.0 (2018.11)
(3)Elsawin: 6.0 (2016.1)
(4)ODIS Engineering: 11.0
(5)VCDS Software Version: 19.6.2
(6)OS System: Win7, Win10 32bit/ 64bit
The old software version all come with win7 system, most of customers know that the VAS5054A doesn’t support to use with win10 system, but with this 5.26 version is ok to use on Win10.
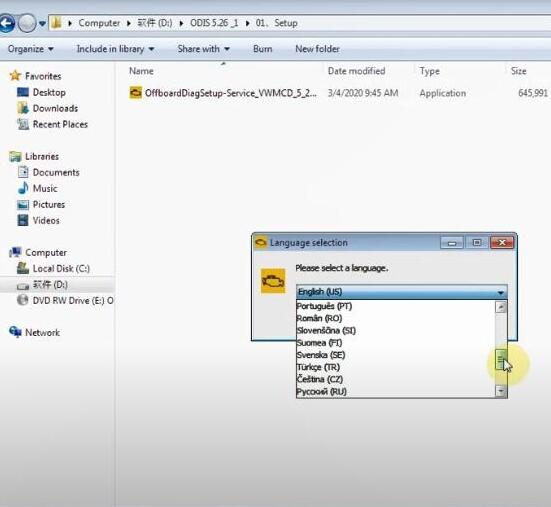
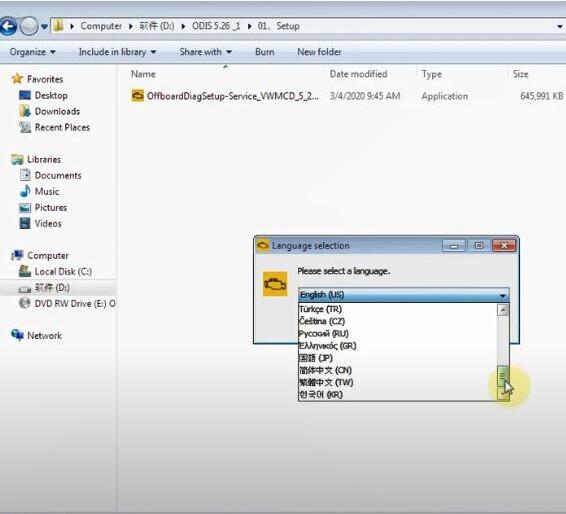
(7)Multi-Languages:
English/Japanese/Portuguese/Romanian/Korean/Dutch/Polish/Turkish/Spanish/French/Italian
Croatian/Danish/German/Swedish/Finnish/Slovenian/Czech/Russian/Greek/Chinese
(
Support Vehicles: VAG Group includes Volkswagen (Shanghai VW, FAW-VW, VW Commercial Vehicles etc.), Audi, Lamborghini, Bentley, Skoda, Seat, Bugatti, MAN total 11 brands.
(9)Compatible Hardware: VAS5054A (Item No.SP33-B, SP33-BO), VAS6154A
Where to download ODIS 5.26 Postsetup 98.0.160?
The download links offered below are testing ok, no dead links.
Size: 18KB
0.MS_Visual_C++2010 for W10
0.Prerequirements x64 W7
0.Prerequirements x86 W7
1.OffboardDiagSetup-Service_VWMCD_5_2_6-B52_6_0_2
2.ODIS-S 5.2.6 Patch+License-Full After Unrar this the password for the 7zip archive is as always fantomel
3.PDU-API_fix_x86+x64 for W10
5.Bad VAS5054A Patch
5a.Softing_PDU-API_1.20.42 for clones
EN SFD-Manual for UMB.pdf
EN Windows 7 Announcement UMB.pdf
supportnews-en.pdf
1
I don't think this would still work since there is already a Windows 10 software. I make sure to keep the Windows software updated because that is where my files and programs would work properly. I also play a lot of online games and they always ask for you to have the latest software so that it could be compatible with the game. You can check out these unblocked ship games, but my favorite one has to be Among Us. It's the perfect game to play with friends during the quarantine. Click here to download the Among Us wallpapers that come with it.
Posted by: ghost19 at November 11, 2020 06:02 AM (vQoj0)
2
I was recommended this blog through a friend from school. No one understood my problem, but I looked at your blog and solved the problem. I will share information about to my friends. I like your blog very much. good luck. https://meoktwi.com
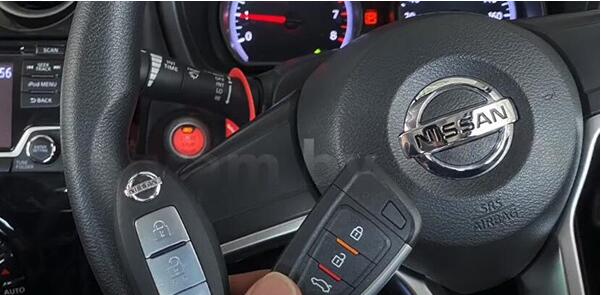
XHORSE KEY TOOL MAX PLUS AUTEL IM508 ADD SMART KEY TO NISSAN NOTE 2019
In this post, you will learn how to add a new smart key on 2019 Nissan Note by Key tool Max and Autel IM508 key programmer.
What you need:
Nissan Note 2019
Nissan Note working key
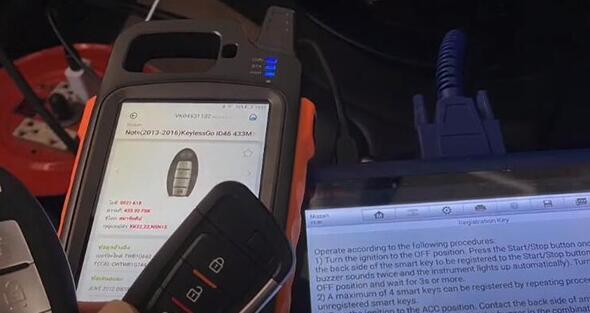
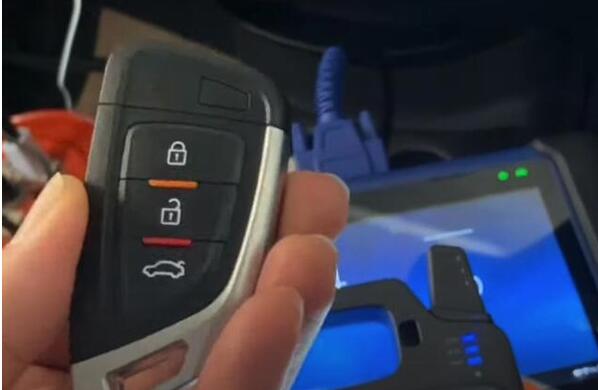
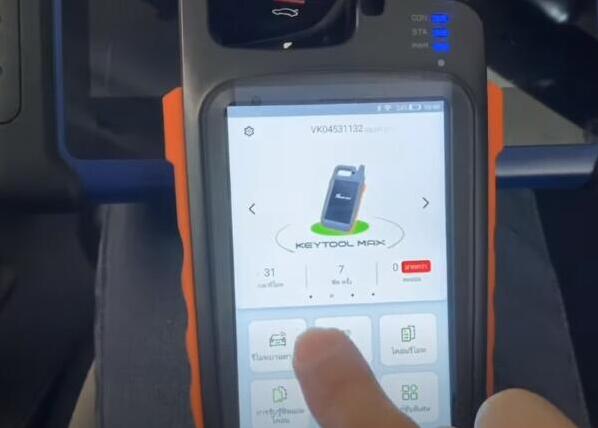
VVDI smart remote Xhorse VVDI key tool Max
Autel MaxiIM IM508 auto key programmer
Main steps:
1.Generate ID46 chip with Key tool Max:
2.Add new smart key with Autel IM508:
Go ahead…
1.Generate ID46 chip with Key tool Max:
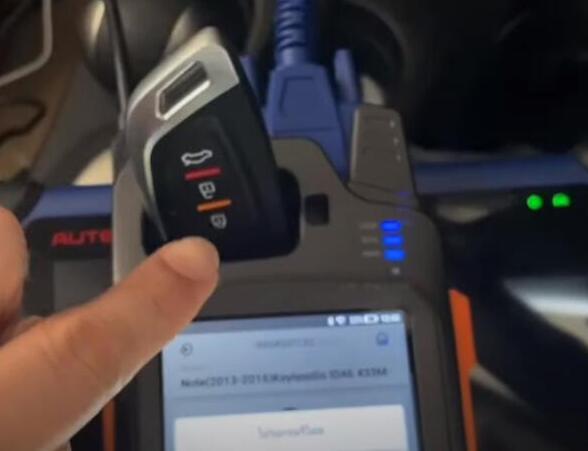
Put battery into this VVDI smart remote and plug it into key tool max coil
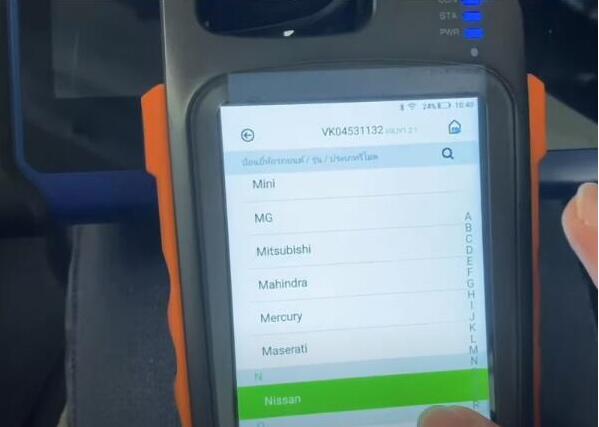
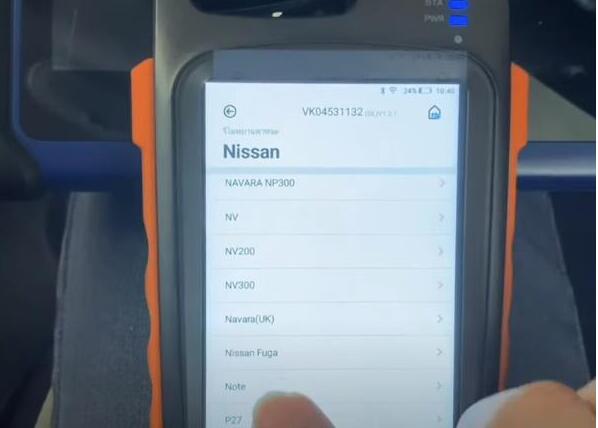
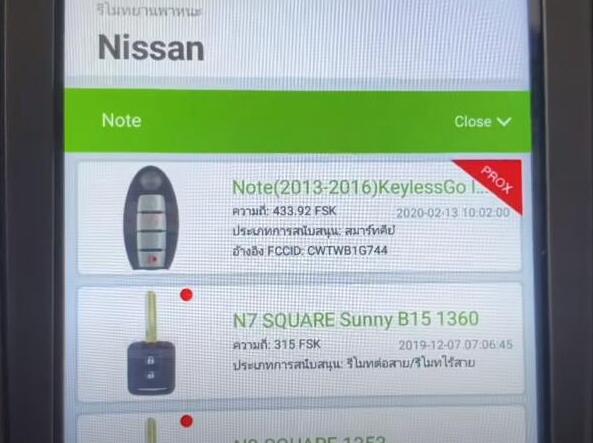
Select Vehicle remote-> Nissan-> Note-> Note (2013-2016) KeylessGo ID46 433M4433.92MHz FSK
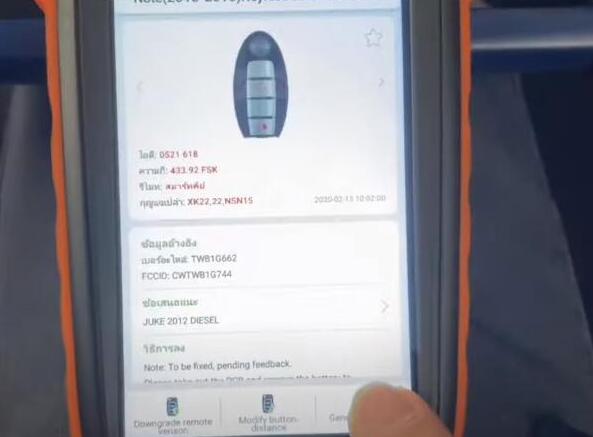
Part number: TWB1G662
FCCID: CWTWB1G744
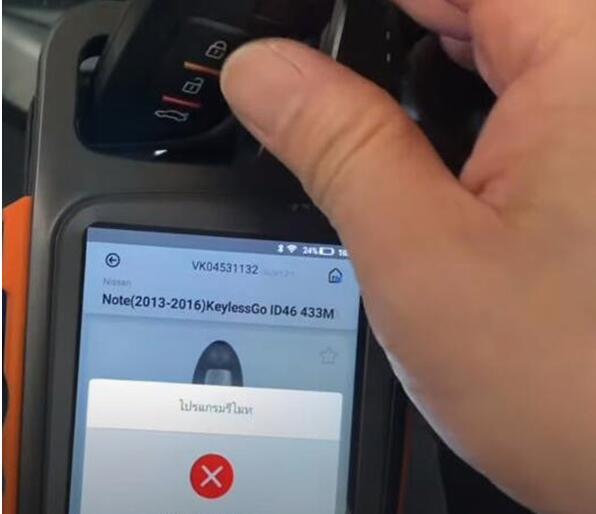
Then press Generate remote
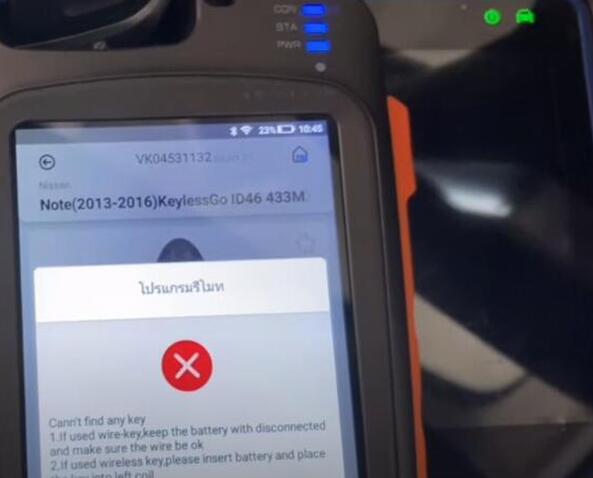
If it failed to generate, check whether the key put well firstly
And pay attention to the caused reasons:
1.If used wire-key, keep the battery with disconnected and make sure the wire be ok.
2.If used wireless key, please insert battery and place the key into left coil.
Put the smart remote correct side on coil antenna, and then it can generate
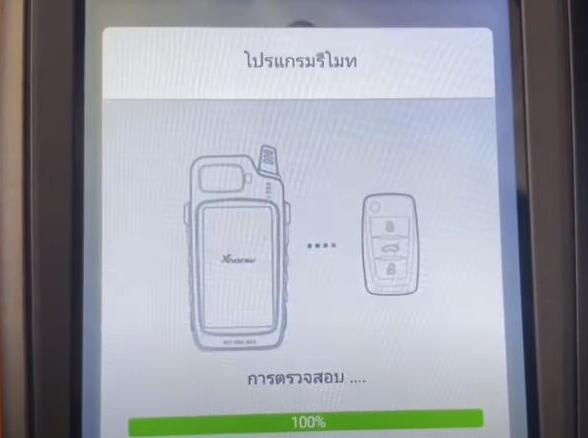
It will take a little time to write smart remote…
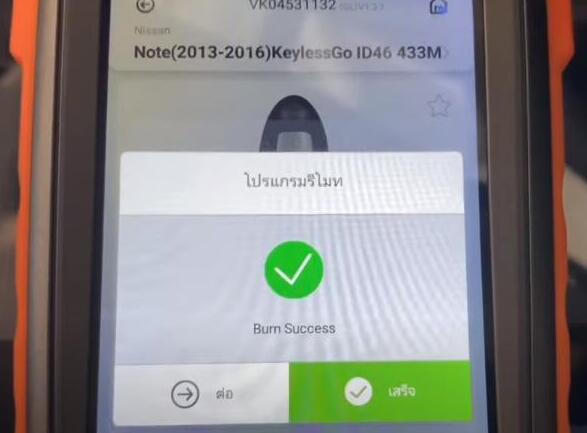
Burn success
2.Add new smart key with Autel IM508:
Connect Autel IM508 to the vehicle
Run MaxiIM application
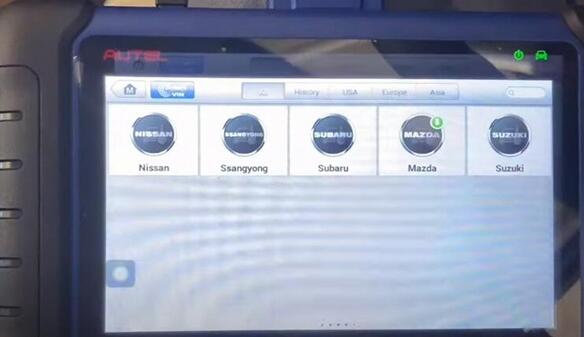
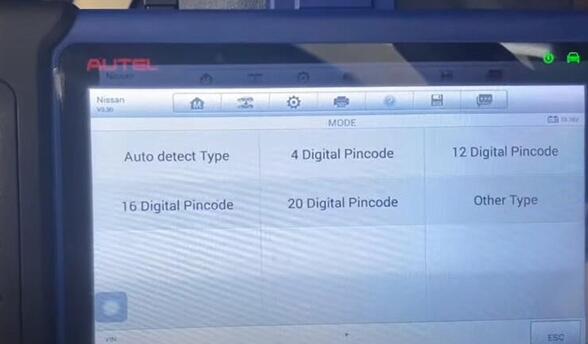
Select IMMO-> Nissan-> System Selection-> Auto detect Type
Follow the prompt on the screen to turn on the hazard warning light and open and close the driver door once.
Scanning vehicle system… (This step will take some minutes, please keep patient)
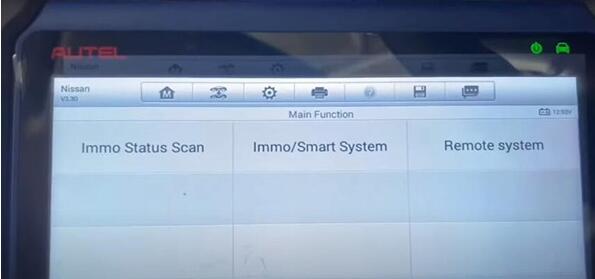
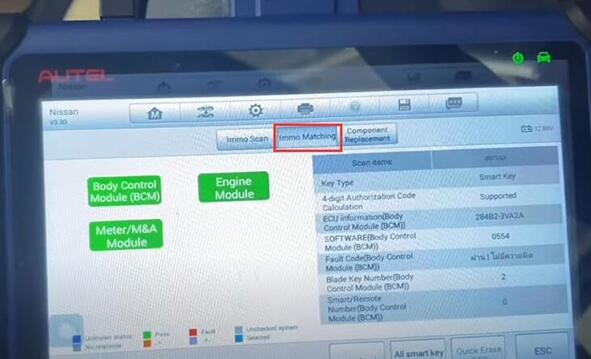
Select IMMO Status Scan
Smart key and 4 digits authorizations code support
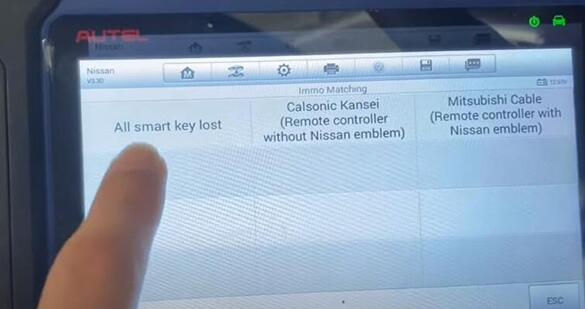
Press IMMO Matching-> All smart key lost
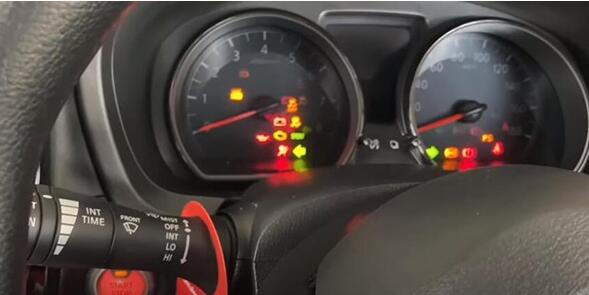
Set the vehicle as the following status and the press [OK]
-Ignition switch or power switch: LOCK
-Hazard switch: ON (for preventing BCM from entering into CAN communication sleep mode)
-P (A/T) or neutral (M/T)
-Battery voltage: More than 12V
-Steering: Turn on and turn off the cab door once, Not in fully locked
Then go to next procedure.
Pay attention to the prompt:
"This procedure erases all registered key ID. Therefore, all of the customer’s keys should be obtained before starting this procedure. Do you want to continue?â€
Click [YES] to continue
Then you will hear steering lock release sound…
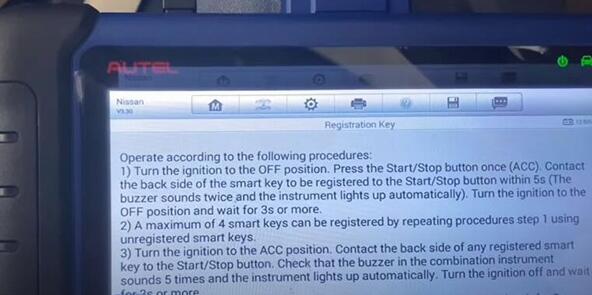
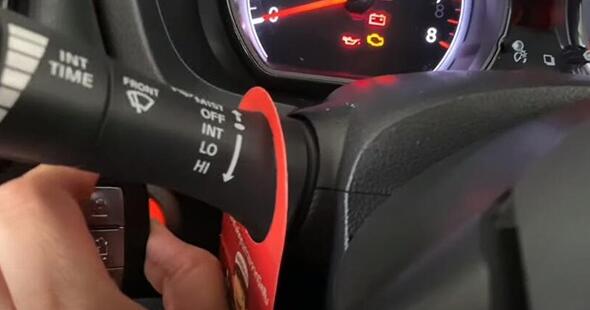
Press push-button ignition switch for 2 seconds or more and turn ignition switch to the ON position
Follow the procedures on the screen to operate one by one
Thank you for this interesting thread about the toggles and switches, much appreciated. For anyone interested, the latest version of this trending multiplayer, impostor themed game is now available with a click away. This game has been part of the top games during quarantine because of its pretty basic pretense and little mechanical skills needed. Its gamepage is attached within this comment for your convenience. Among us is truly worth it, now start incorporating it to your weekly game nights!
Posted by: johnfavors557 at November 10, 2020 09:29 AM (yj7t6)
1) Programming of a Renault CAPTUR phase 2 (201
with the OBDSTAR succeed
2) Renault Talisman, 2017 year, all keys lost, make dealer key and
program smart card OK. It’s safe, easy and quickly, you need reading
BCM, precode your new card, and coding this card.
3) All key lost Scenic 4 2017 done by obdstar x300dp plus. You learn
flash first but with obd renault adapter. If you don’t have the
converter you have to plug the card without connecting the OBD but by feeding in 12 v the tablet.
4) AKL capture 2016 done by obdstar. With the converter green adapter.
5) Renault scenic 2019 all keys lost succeed. Need safe battery voltage.
6) Kadjar 2016 read pin and add a new key succeed. update to new version (30.87). Now all works perfect.
7) OBDSTAR cannot do Renault Kwid AKL, only copy, i just tried.
Renault Master 2010 All lost Key in a minute!!! Pin code is needed. Very very good!!!
Renault Master 2010 All Lost Key
9) I have X300 DP Plus and this is the list of successful Renault keys programmed:
Megane 3, year 2010 and 2012
Laguna 3, 2011
Espace 5 , year 2016 and 2017
Megane 4, 2016
Duster 2014, 2015, 2016
Koleos 2014
Clio 4, 2015
ISTA – P: 3.67.1.006 with Engineer Programming,supports the programming of BMW motorcycles and electric vehicles can program F/G/I/K chassis for car (through the ICOM, not other cable )
Vin: V2020.2.15
BMW ETK: 2020.01
BMW KSD: 2020.01 Multilanguage
BMW FSC Navigation Code Generator
BMWAiCoder for BMW Coding
What is Vehicle and Key Memory (CKM)?
On customer request, various vehicle settings can be changed by means of coding on certain E-model series (e.g. E46, E6X). Some settings (Key) are allocated to a certain key (max. four keys), e.g. heating/air conditioning/ventilation while other settings (Vehicle) apply globally to the entire vehicle, e.g. antitheft alarm system.
Vehicle and Key Memory settings can be selected under the "CKM†tab after determining the native measures plan in the "Vehicle†menu.
Note:
Due to different legal stipulations, there may be national differences in possible CKM settings. Factory settings may also vary from country to country.
Note:
When replacing control modules, it may happen that individual data in the CKMsettings are not automatically restored. Before replacing a control module, theCKM settings in the vehicle must be printed out so that these can be restoredafter the control module has been replaced.
BMW E70, E71, E81, E82, E87, E88, E90, E91 E92, E93, F01 F02MINI R55 and R56
On these model series, all Vehicle and Key Memory functions are programmed directlyin the vehicle (please refer to "Personal Profile†in the Owner’s Manual: individualsettings for a maximum of 3 remote control units via the display in the instrument clusteror via the Central Information Display).
BMW E38, E39, E46, E52, E53, E60, E61, E63, E64, E65, E66, E83, E85 and E86MINI R50, R52 and R53Rolls-Royce
The procedure for programming the Vehicle and Key Memory is described below. Thebasic prerequisite is that all control modules on a vehicle are programmed to the currentsoftware status:
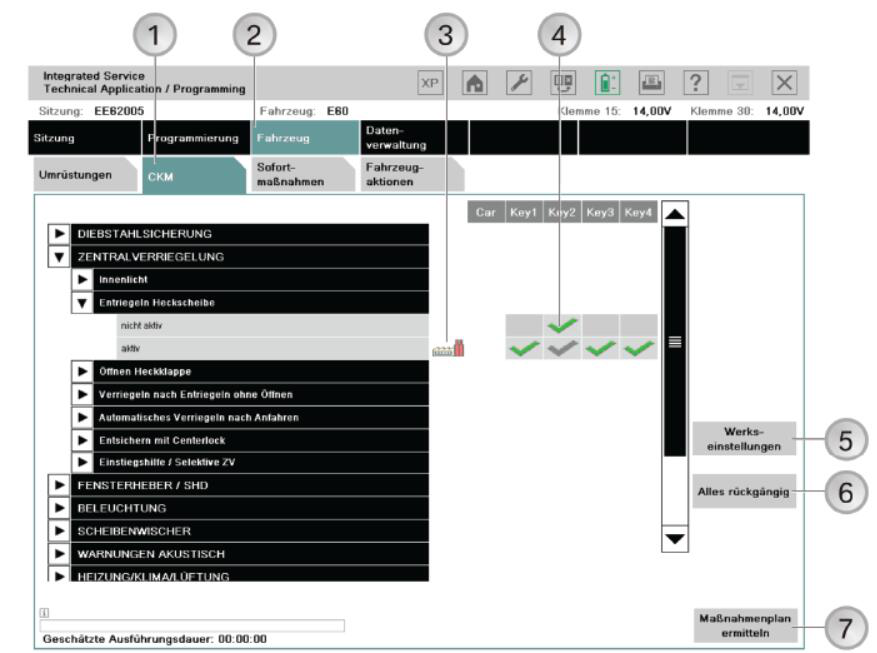
Two or more parameter keywords (e.g. active, inactive) are assigned to a function or afunction keyword. The current setting is shown by a selected checkbox next to theparameter keyword and can be changed by the service technician. Key functions can beset individually for the max. 4 keys. The factory setting is represented by acorresponding symbol next to the parameter keyword.
The CKM functions are divided into a maximum of three levels of hierarchy. Main group(e.g. central locking), group (e.g. unlocking rear window, boot/rear lid) and an optionalsubgroup (e.g. lids after ignition on).
Vehicle and Key Memory
1 "CKM†tab
2 "Vehicle†menu
3 Symbol for "Factory settingsâ€,shows the factory setting of the function
4 Tick – the green tick shows the selected setting of the function,the gray tick shows the active setting of the function
5 "Factory settings†button,establishes the factory settings for the vehicle and keys
6 "Cancel all†button,cancels all settings
7 "Determine measures plan†button
Note:
You can print out the set CKM values. Printing out the CKM settings could cause values that have been entered in the list but not yet stored in the vehicle to be lost,making it necessary to re-enter them. It is advisable to print out the CKM settings at the start of programming and if necessary immediately after completing CKM reprogramming.
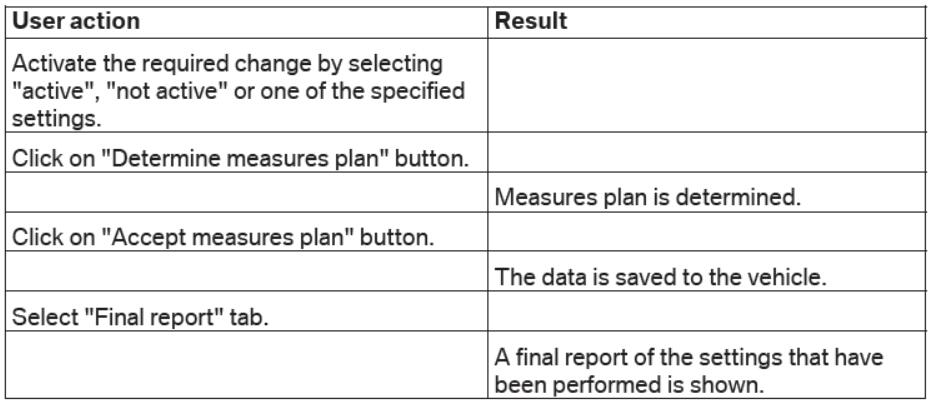
Procedure for changing CKM settings
Note:
The selected settings for the Vehicle and Key Memory are retained even when the control modules are reprogrammed or encoded. If the CKM backup or restore cannot be successfully performed, this will be seen in the final report.
1
I didn't know that this kind of amazing software exist, I am so amaze how this software can use to edit some settings is a car. If you are looking for new games to play this 2020 you should check out Among Us game - it is a great game to play if you want so action and mystery. This is my favorite game right now because I can with my friends from abroad. There are also among us backgrounds that you can get for free
Posted by: Ruairidh at November 10, 2020 09:03 AM (bGFdU)
How to program Porsche Cayenne keys with K518SE K518S
Lonsdor K518 support Porsche Cayenne key programming including program smart key and make dealer key.
Details:
1. Program smart key: to program smart card (please make dealer key first);
2. Make dealer key: use the backed up BIN data to make the non-dedicated key to be dealer key.
Basically, there will be 4 parts in the whole help file: Function, Reference, Attention and Operation.
Function
1. Program smart key: to program smart card (please make dealer key first);
2. Make dealer key: use the backed up BIN data to make the non-dedicated key to be dealer key.
Reference
Chip type:Dedicated smart card
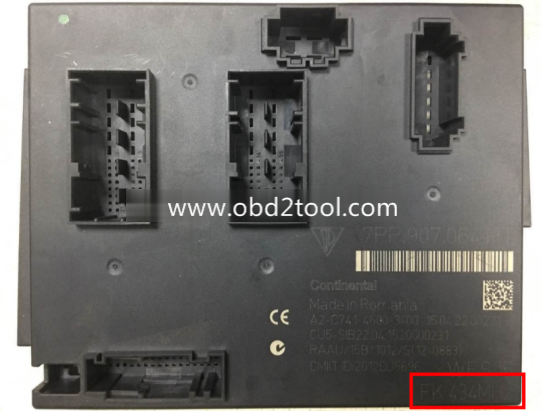
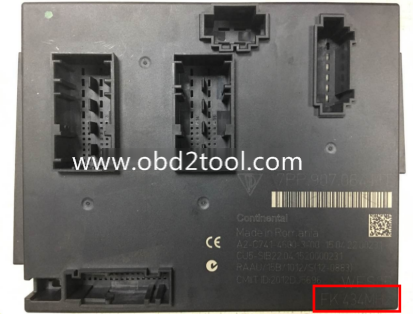
Frequency:315/433/434 frequency (please check the logo in the lower right of the lid of the BCM box)
Key embryo no.:31
Code requirement:Dismantle & read BCM to make dealer key
Key generation:Program smart key complete, remote will automatically generated
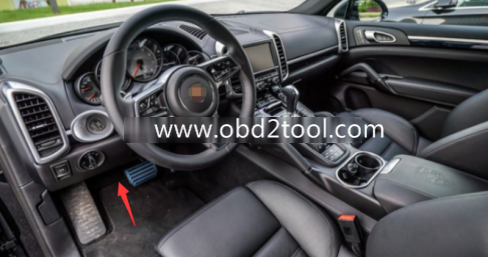
Under the steering wheel (BCM position):
BCM is located at the bottom left of the steering wheel, please note the frequency type, basically there will be 315/433/434,
The following picture is for 434 frequency:
11-15 Cayenne Car Model
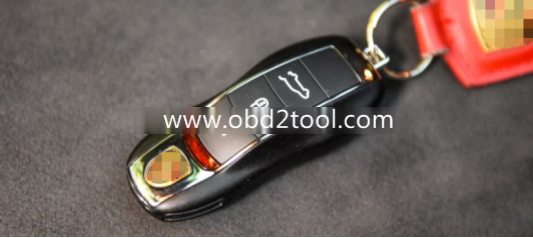
The car key
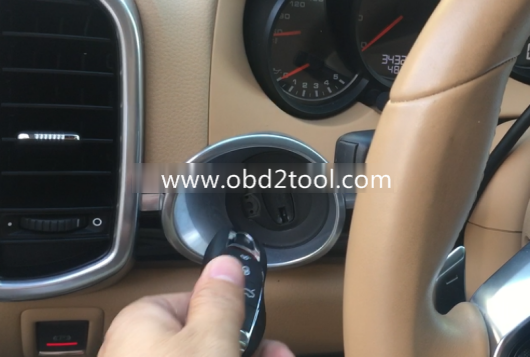
The induction keyhole
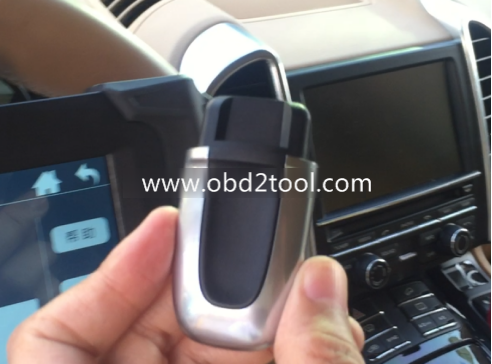
The mechanical knob key inserted into the induction keyhole
Attention
1. All the keys need to learn, or it will not be able to start the vehicle, it is recommended to learn the original car keys first,and then learn the new key, battery must be well installed.
2. The newly added key must be either the dealer key made via the car BCM data, or the key ordered back through the VIN code.
3. When learning key, it is required to insert the key into the induction keyhole, to learn a smart key, remove the machanical rotate key from the induction keyhole if any and then insert the smart key to program.
Operation
Step 1: Use the programmer to read and write BCM data and save it as bin file;
1. BCM is located in the lower left of the steering wheel, please pay attention to view the frequency type, usually there will be 315,433,434 frequency (below picture is for 434):
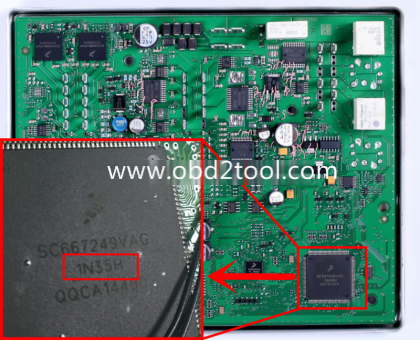
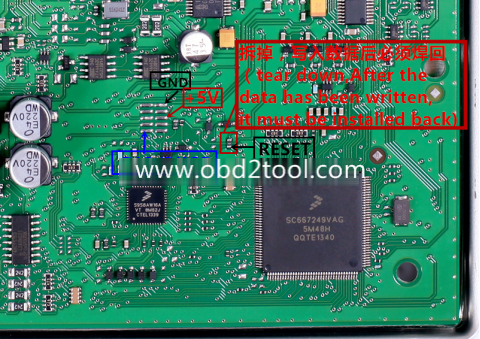
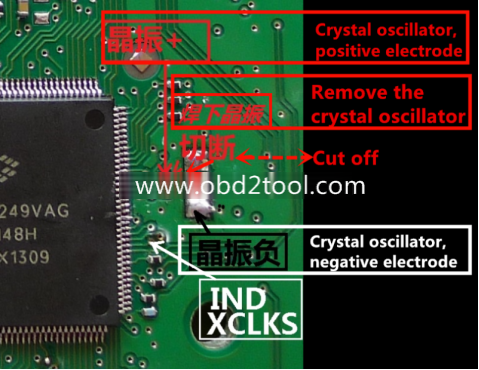
2. Read the BIN (D-FLASH / EEPROM) file with the programmer specifically for reading BCM. Please pay attention to the type here: namely 1L15Y 2M25J metal crystal, or 5M48H 1N35H ceramic crystal (red mark):
3. Please refer to the following picture to wire:
Step 2: Copy the bin file into K518ISE: please use the USB cable to connect the K518ISE to the computer, open the device internal memory, find the folder "customfile†and copy the bin file into it (as shows below).
Note: bin file suffix "bin†must be lower case letters, directly put the file into the folder rather than create a new folder:
1
I don’t think it is necessary to even bother with this generator since this will become obsolete very soon when the next generation consoles come out sometime in December or very early next year. I would suggest that you would wait a little bit until the new consoles come out and then buying the newest version of this game so that you can enjoy it fully and without any interruption since the developers would probably support the roblox free download in chrome for the foreseeable future and they would very likely cut support for old games like this one. You can check out the release schedule of the new consoles when you click here.
Posted by: greenbeen at November 10, 2020 11:13 AM (FNEw5)
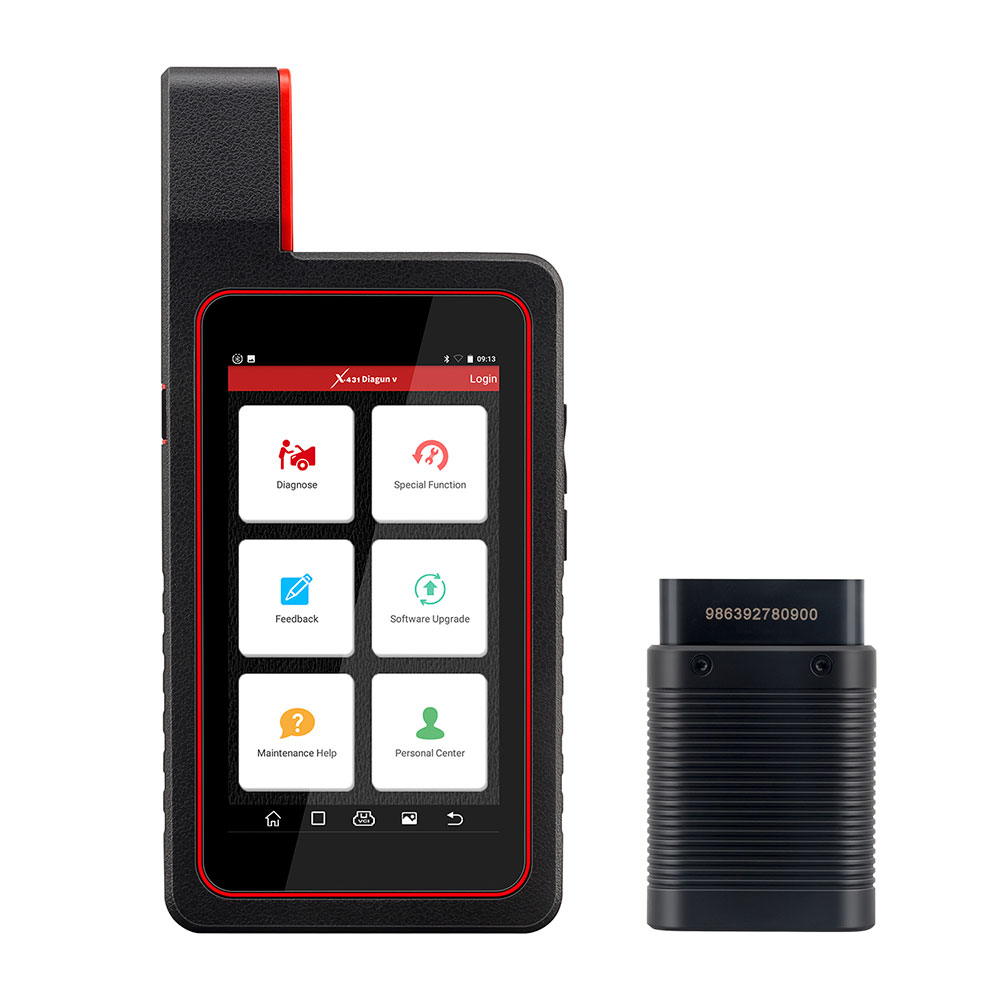
"I had bought Launch X431 Tool from China many years ago.This tool
working stable,it is save time and convenient for me to diagnostic cars
with Launch X431 diagun.I love it so much.But time had pass and the software become older.Is there any way to update my tool?â€
CnAutotool.com can help you
to update your launch x431 tool.No matter how old is your tool,no matter
where you buy the tool,no matter your tool is original or copy
version,we can help you to update your Launch X431 diagun/diagun
III,X431 IV,X431 GX3/MASTER,X431 TOOL,X431 Super scanner.
The most important is you have to offer us the correct serial number of your Launch X431.
You have to read the serial number from your smart box. Buyer must leave
us the right SN when placing the order. We make the update only for the
SN with the order. Once the update file is finished,NO money refund if
the problems caused by the wrong SN offered from the buyer.
How to check the SN of your X431 device? Very Important!
Please read the following instructions carefully!
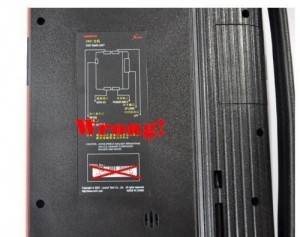
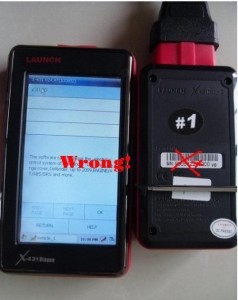
Pls don’t look the SN lable of X431,it is wrong!
How to Get the correct SMARTBOX serial number :
1.If your Launch X431 device is Win CE system(example X431 diagun,diagun 3,X431 solo)
1).Power up your X431 device.
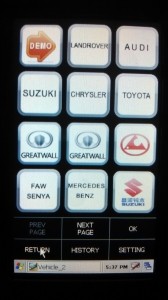
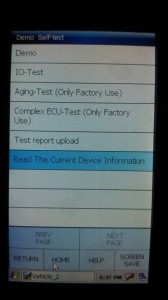
2).Select the Demo software on the software list
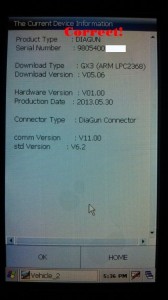
3).Clikc the "Read The Current Device Informationâ€
4).You can see the correct Serial Number of your X431 device
2.If your X431 device is Linux system(example X431 Master,x431 iv,X431 Tool,Heavy duty,gx3 etc)
1).Power up your X431 device.
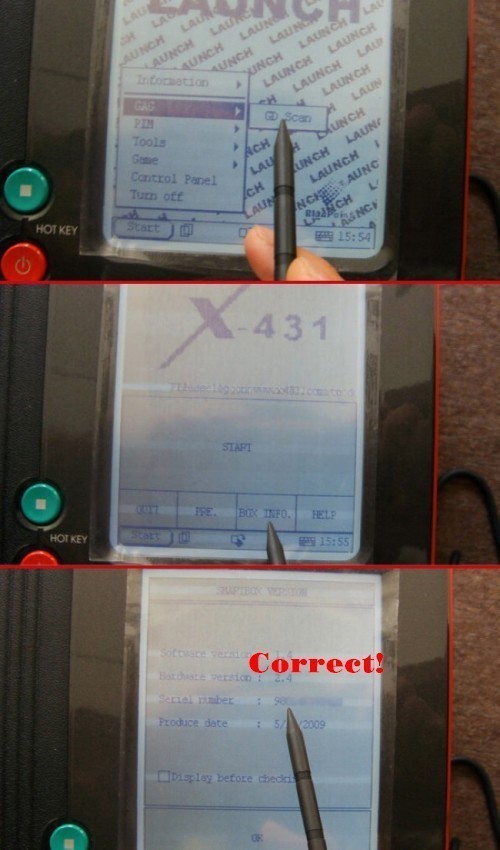
2).Click Start??> select GAG ??> click GD Scan
3).Clikc "BOX INFO.â€
4).You can see the correct Serial Number of your X431 device
Our engineer can design the newest software for you according to your serial number.We will send you the Launch x431 software by Email.
"I had bought Launch X431 Tool from China many years ago.This tool
working stable,it is save time and convenient for me to diagnostic cars
with Launch X431 diagun.I love it so much.But time had pass and the software become older.Is there any way to update my tool?â€
CnAutotool.com can help you
to update your launch x431 tool.No matter how old is your tool,no matter
where you buy the tool,no matter your tool is original or copy
version,we can help you to update your Launch X431 diagun/diagun
III,X431 IV,X431 GX3/MASTER,X431 TOOL,X431 Super scanner.
The most important is you have to offer us the correct serial number of your Launch X431.
You have to read the serial number from your smart box. Buyer must leave
us the right SN when placing the order. We make the update only for the
SN with the order. Once the update file is finished,NO money refund if
the problems caused by the wrong SN offered from the buyer.
How to check the SN of your X431 device? Very Important!
Please read the following instructions carefully!
Pls don’t look the SN lable of X431,it is wrong!
How to Get the correct SMARTBOX serial number :
1.If your Launch X431 device is Win CE system(example X431 diagun,diagun 3,X431 solo)
1).Power up your X431 device.
2).Select the Demo software on the software list
3).Clikc the "Read The Current Device Informationâ€
4).You can see the correct Serial Number of your X431 device
2.If your X431 device is Linux system(example X431 Master,x431 iv,X431 Tool,Heavy duty,gx3 etc)
1).Power up your X431 device.
2).Click Start??> select GAG ??> click GD Scan
3).Clikc "BOX INFO.â€
4).You can see the correct Serial Number of your X431 device
Our engineer can design the newest software for you according to your serial number.We will send you the Launch x431 software by Email.
1
Do these GPS trackers work even when the car has been stolen from the parking lot? I want something that has the same functionality as Lojack but much much cheaper. Also, can thieves easily disable this tracker once they steal my car? Where do you usually place the tracker in the car? Is it easily accessible or do you need a special tool to gain physical access to it? I just want to make sure since I am going to be buying a pretty expensive car this week and I want it to be as secure as the question of "when was monster legends made?†I would also like to have cute among us crewmates as mejis integrated in the tracker so that I can easily use it while they download among us para pc in the car.
Posted by: greenbeen at November 11, 2020 07:48 PM (FNEw5)
For For Isuzu G-IDSS Export 2018 – Isuzu Diagnostic Service System
Product Description
Global Isuzu Diagnostic Service System (G-IDSS) is designed to support Isuzu Commercial Vehicles. Vehicle /
engine configurations and controller systems will be supported for
future vehicles. Program supports Isuzu manufactured product models of
2007-2018 year.
Export (all regions except Norht America) and Domestic.
G-IDSS functions are:
Service Infomration:
Diagnostics (Engine, Transmission, Chasis, Body);
Controller Programming.
Region: Global Languages: English, Spanish, Chinese, German, French, Japanese OS: Win7 x32, Win7 x64, Windows 8 x32,win 10 Quantity of CD: 1 DVD
Date of update: 01/2018
How To Use The G-IDSS USB-Link main screen will be displayed at the start of every Isuzu Diagnostic
Service System (IDSS) session. The main screen consists of the
following:
Select OEM, Model Year, Engine Model and Engine Type drop down menus
Enter Engine Serial Number window
Internet Updater button
Recent Engines Loaded window
Recent Service Bulletins window
From the main screen, the user can perform the following:
Manually select the engine model, etc . through a series of drop-down menu boxes click Load Engine.
Manually enter the Engine Serial Number or click Find Engine button.
Automatically read the Engine Serial Number by clicking the Request Serial Number button.
Click one of the 30 most Recent Service Bulletins listed.
Click one of the listed Recent Engines Loaded selections.
Package includes:
1pc x G-IDSS program(Diagnostics activation.reflash not activation)
1pc x IDSS USB-Link 1 adapter
1pc x USB cable
1pc x 6-pin/9-pin American cable
1pc x G-IDSS OBD2 cable
1pc xISUZU Cable With DC 2.1 Famale
1pc x CANBUS 3pin
I really don’t get the significance of numerology. I mean, it’s just numbered right? I don’t people from ancient times considered their significance when they were incorporating it to their literature and scriptures. I think it had something more to do with psychology rather than divinity or the supernatural. Like I have a certain affinity to a certain number because either it’s my birthday or my favorite player is wearing it on his jersey and that he will install among us download para pc. I don’t have any deep emotional feelings attached to it aside from what I have mentioned. If you want to really get down and dirty with numbers, I suggest that you play among us on pc now.
Posted by: greenbeen at November 11, 2020 05:23 PM (FNEw5)
CAT ET Diagnostic Adapter III Caterpillar Scanner Adapter 3 CAT ET Adapter III FAQ:
Q1 :Is the Cat Comm III compatable with the software CAT caterpillar ET 2019C Is this an actual caterpillar part or a knock off? Thanks
A1:
Yes, this is actually the genuine CAT adapter,It is also the ONLY
recommended adapter for CAT ET, but obviously other ones will work. It
will work fine for the version you have, and CAT caterpillar ET 2019C is
actually the newest version.
Q2:What is the difference between a
cat comm II & Cat Comm III. Is one just a usb connection and
one serial? Also, will this unit work with my Cat 3126B marine units?
Seriel no. 3GS01797 Thanks
A2:CAT Comm II was a serial port model,
but since computers are no longer made with serial ports, they changed
the design to a USB and called it a CAT Comm III. So you are correct.
This unit works with all CAT engines — Marine, on-highway, and
off-highway. On Marine units, I’m not sure where they put the plug, but
it should be somewhere near the ECM (Typically). It should be either a 6
pin or 9 pin connector.
Q3: Does this work with CAT 3500 natural gas engines and 3600 natural gas engines? Thanks.
A3: If those programs use CAT Electronic Technician (CAT ET) for the software, it will work.
Q4: Can the cat communicate3 also be used to read detroit and cummins engines if I have the correct software?
A4:Yes,
it reads both J1708 and J1939 so it can read both of those. Keep in
mind that this adapter only comes with the J1939 adapter end, so I would
recommend purchasing the J1708 adapter end from me as well if you plan
on connecting to some older stuff.
Q5:will this unit allow me all
access to the ecm to alter all areas eg set speed limiter to a lower
speed and is there a yearly lic fee.
A5: This device is what you
should use if you will be hooking up to both off-highway &
on-highway CAT engines. If you are strictly wanting to work on
on-highway CAT engines, I would rather see you purchase a Nexiq USB Link
.The Nexiq USB Link is universal (Works with CAT, Cummins, Detroit,
Allison, etc…), it is cheaper, plus it has bluetooth so you can go
wireless.
Q6: want to compare the communicator and some caterpillar ECMS could tell me if it works with them.
A6: This item works with all CAT ECMS — Off Road and On Highway, trucks and equipment
1
I have never seen a GPS tracker this thick before. Maybe if discretion is not a factor then you can use this but if you want to track someone or something without anyone knowing then this is not it. It is too big with respect to GSP trackers. There are a lot smaller and I think a lot cheaper alternatives than this. I think I saw some of those trackers on this link to play the game. I accidentally came upon this information while I was browsing the web on among us free and the article was clear as day.
Posted by: greenbeen at November 11, 2020 07:33 AM (FNEw5)
For For Isuzu G-IDSS Export 2018
Product Description
For For Isuzu G-IDSS Export 2018 - Isuzu Diagnostic Service System
Global Isuzu Diagnostic Service System (G-IDSS) is designed to support Isuzu Commercial Vehicles. Vehicle /
engine configurations and controller systems will be supported for
future vehicles. Program supports Isuzu manufactured product models of
2007-2018 year.
Export (all regions except Norht America) and Domestic.
G-IDSS functions are:
Service Infomration:
Diagnostics (Engine, Transmission, Chasis, Body);
Controller Programming.
Region: Global
Languages: English, Spanish, Chinese, German, French, Japanese
OS: Win7 x32, Win7 x64, Windows 8 x32,win 10
Quantity of CD: 1 DVD
Date of update: 01/2018
How To Use The IDSS main screen will be displayed at the start of every Isuzu Diagnostic Service System (IDSS) session. The main screen consists of the following:
Select OEM, Model Year, Engine Model and Engine Type drop down menus
Enter Engine Serial Number window
Internet Updater button
Recent Engines Loaded window
Recent Service Bulletins window
From the main screen, the user can perform the following:
Manually select the engine model, etc . through a series of drop-down menu boxes click Load Engine.
Manually enter the Engine Serial Number or click Find Engine button.
Automatically read the Engine Serial Number by clicking the Request Serial Number button.
Click one of the 30 most Recent Service Bulletins listed.
Click one of the listed Recent Engines Loaded selections.
Controller
Programming allows you to update and reprogram various vehicle
controllers based on part numbers and/or new available calibration
files. You can program the following types of controllers by selecting
Controller Programming from the TOC:
Package includes:
1pc x G-IDSS program(Diagnostics activation.reflash not activation)
1pc x IDSS USB-Link 1 adapter
1pc x USB cable
1pc x 6-pin/9-pin American cable
1pc x G-IDSS OBD2 cable
1pc xISUZU Cable With DC 2.1 Famale
1pc x CANBUS 3pin
Hey,
thank you for sharing this information with us! As a return, I would love to
share these wonderful games that I found while I was browsing the web. One is
called Among Us while the other is a role playing game, Gacha Life. Because of
my addition with the first game, I had this Among Us shimeji installed on my PC.
Basically, what it does is it shows Among Us characters while I surf the net. As
for the latter game, you can check out this Gacha Life download link.
Posted by: Sheena at November 11, 2020 06:03 AM (feM9T)
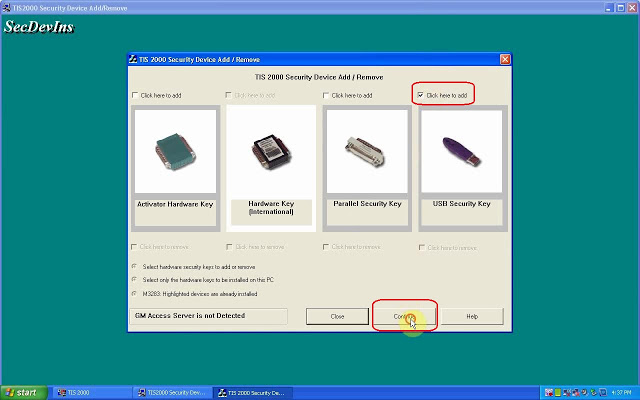
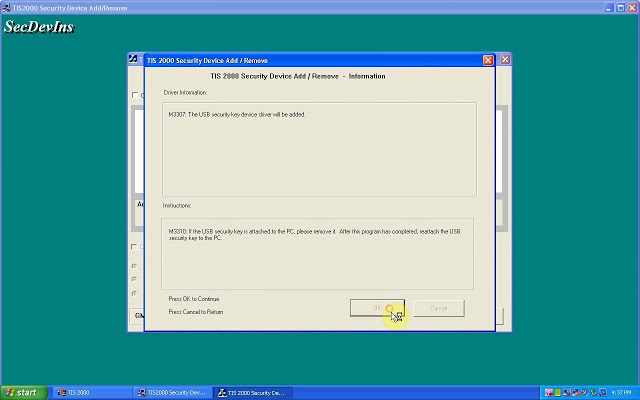
This article is on why need to crack Tis2000 software and how to crack TIS2000 for GM / Opel.
Why need to crack GM Tech2 Tis2000?
For GM Opel tis2000: use D630 computer, you can insert the USB dongle to use or use the patch to crack.
For Saab TIS2000: usually use IBM T30, for other computer you may get error message, need to insert the USB dongle, can’t use the patch to crack.
How to crack TIS2000 for GM / Opel:
Part 1: Insert CD2.
Insert TIS2000 CD into the computer, open DVD.
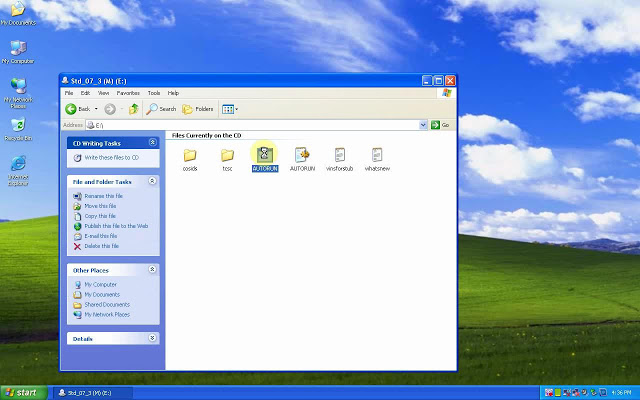
Open "AUTORUN†to setup.
Click on "Okâ€.
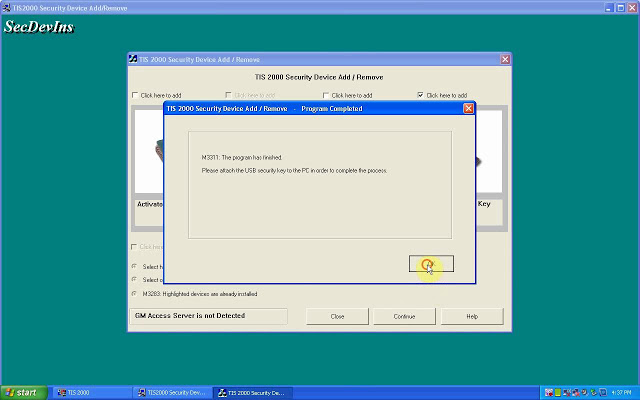
M3311: the program has finished.
Please attach the USB security key to the PC in order to complete the process.
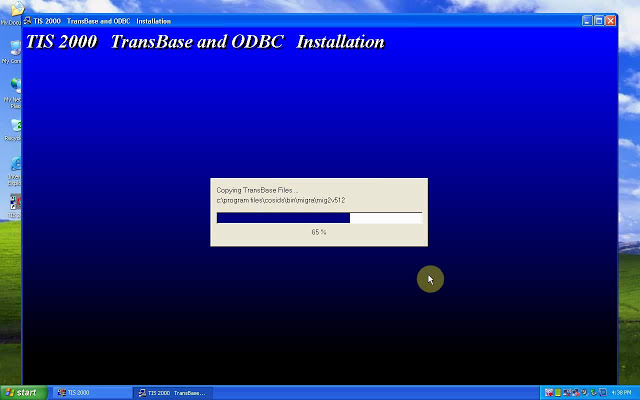
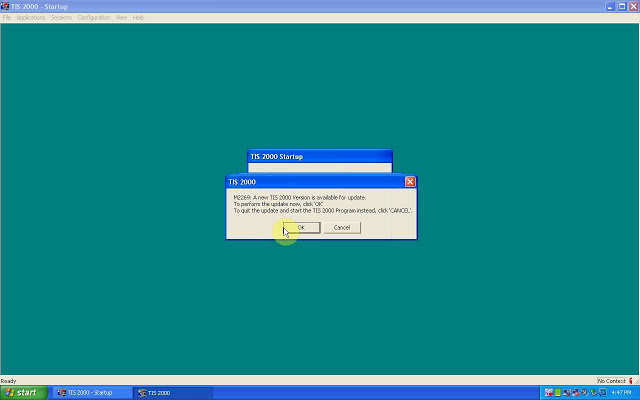
TIS2000 Transbase and ODBC installation.
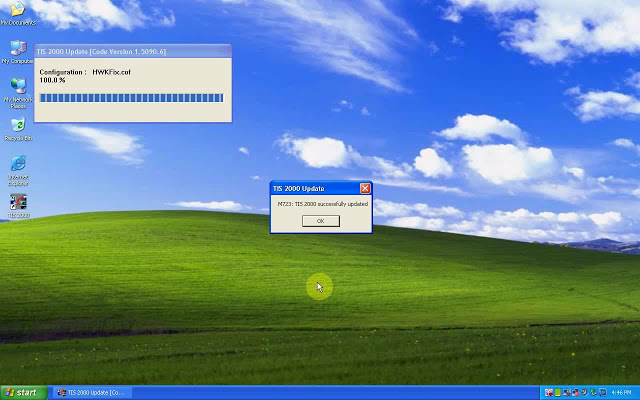
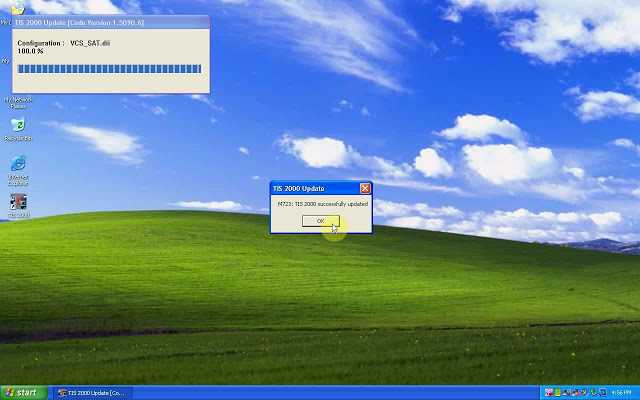
M723: TIS2000 successfully updated.
Part 2: Insert CD2.
M723: Tis2000 successfully updated.
Part 3: Insert CD3.
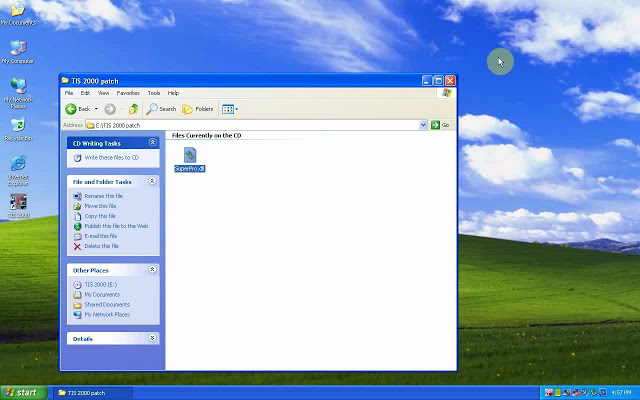
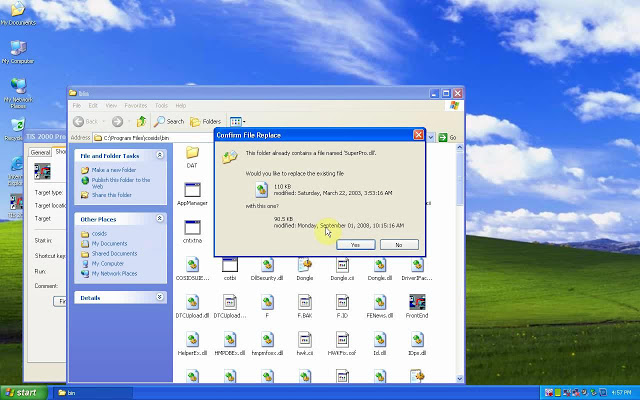
Open the cd, then "TIS2000 patch†to copy "SuperPro.dllâ€.
Right-click on "TIS 2000″, then "Find "Find targetâ€, then paste "SuperPro.dll†here.
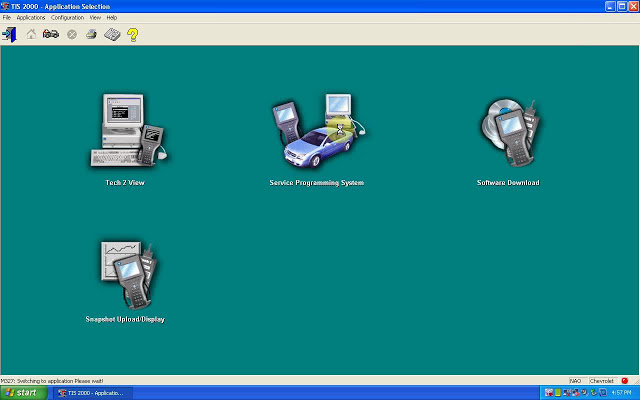
Part 4: open TIS2000.
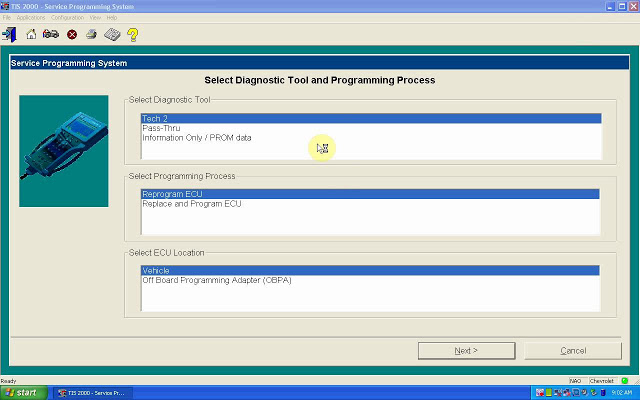
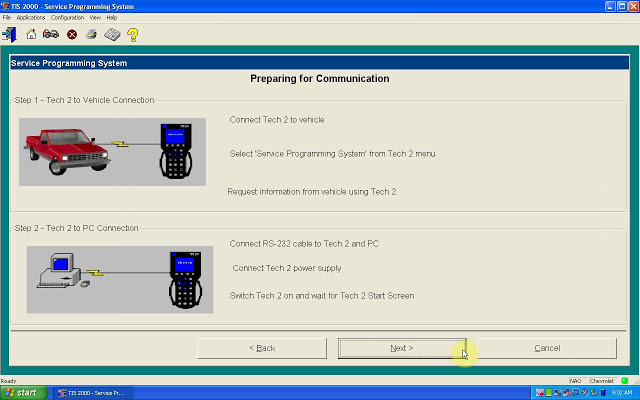
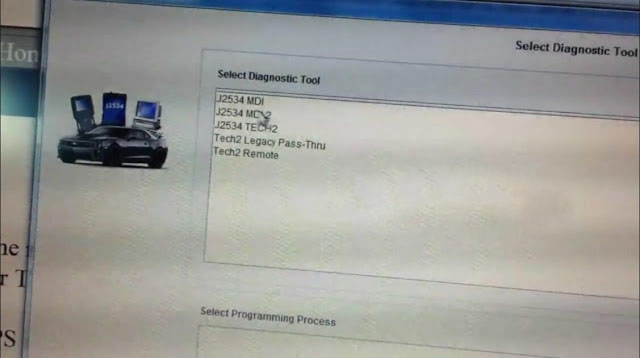
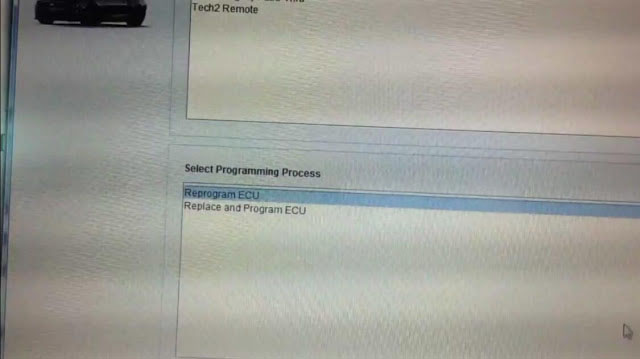
Enter the "Service Programming systemâ€.
Done.
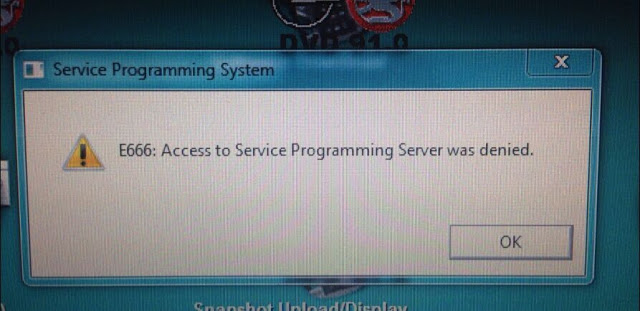
Note: If you done by following the above procedure one by one, you won’t get error †E666: Access to Service Programming Server was deniedâ€.
1This is a big help for us. Good thing you shared this here. I’ve been searching for this for weeks now. Sad thing is that I can’t afford to buy subscription that’s why I need the cracked version of this. My friends are also looking for this. They will be very excited to know that I found this already. While I was searching for this, I found this games you can play online . It’s really fun. You canvisitgames.lol to check out more games.
Posted by: CHurros at November 11, 2020 09:34 AM (Exn77)
Feedback:
1. First Impressions
this scan tool is a massive beast, in the pictures, it looks smaller but damn! This thing is hefty and looks like one of that TV walkman’s from the 80’s. hahaha
2. It can do so so much more than a simple OBD2 scanner:
The overall technical ability of this GM Tech2 Clone is amazing, I bought it to ensure my steering wheel was at zero after steering rack removal for a harmonic balancer; works great! After pulling DTCs from every single module in the car, I soon realized I had fault codes that a regular OBDII reader would never capture which is pretty awesome!
While playing around with it more, I found where you can adjust the engine idle RPM speed and adjusted it up to 625 from the pre-set 550 RPM. This minor adjustment to the idle speed actually made my Corsa Sport exhaust sound more throaty and aggressive at idle, you should try it. I wouldn’t think this small idle adjustment would damage anything.
FYI, I purchased Tech2 Clone came with the latestGM softwareversion 33. something…This version covers GM vehicles up to 2013. Keep in mind the Tech2 is only a diagnostic tool, used to test different modules and perform numerous tests as well as special functions that are extremely useful. If you want to program or re-flash a module such as the BCM, the Tech2 serves as a pass-thru device and you need a subscription from the AC Delco website to perform calibrations or updates to modules.
Read: SPS programming procedure
A word: Tech2 Clone can do so much more than a simpleOBD2 scanner.
Enjoy!
1
I'm not really that familiar with cars, but I do know that a corvette c6 looks great. I am not a car junkie but rather a tech/gaming junkie. I know all about the latest games and tech development out there. I recently found this pc game link for Among Us and it's been one of the best games I've played with my friends during the quarantine. I also got to play Gacha Life. I was so interested in the game and it did not disappoint. You can check the game out here: https://gachalife.io/
Posted by: ghost19 at November 11, 2020 01:41 AM (vQoj0)
WIFI CAT ET III Adapter Caterpillar ET3 New Arrival
The old bluetooth cat et adatper iii has stopped production, and
you may get the new WIFI CAT Caterpillar ET Diagnostic Interface
adapter to replace it, cnautotool.COM has WIFI CAT ET III Adapter
Caterpillar ET3 New Arrival.
WIFI Caterpillar ET3 Adapter III 317-7485 CAT ET III Diagnostic
Auto Scanner Tools CAT Communications Adapter III 317-7485
may be the most current generation on the CAT Communication Adapter
group, and replaces the CAT Comm Adapter II.This function is necessary
for some CAT ET (Electronic Technician) functions.
This
really is the only encouraged communication device for Auto Repair
Software program CAT, and also the only datalink device that should
permit you to correctly communicate with a CAT engine on dual datalinks.
Software program version: 2019C
Caterpillar ET 2019C (replaces CAT ET 2018b, 2019A,2019B) Electronic Technician Diagnostic Software :
Brand: Caterpillar
Region: WorldWide
Support Multi-languages:English, Chinese, Danish, French, German, Italian, Japanese, Portuguese, Russian, Spanish
Compatible
OS: Windows 7 32 bit, Windows 7 64 bit, Windows 8/8.1 32 bit, Windows
8/8.1 64 bit, Windows 10 32 bit, Windows 10 64 bit
Publication date: 10.2019 year
Support All cars of CAT
Caterpillar ET3 Adapter III Communication:
1.
Makes it possible for communication involving service tools and engine
controls making use of different data links such as J1939/11, DeviceNet
(future release), CAT DataLink, and J1708 (ATA) vehicle networks;
2. Flash program permits adapter firmware upgrades as more attributes turn out to be obtainable;
3. Utilizes J1939/11, high-speed data link (a part of ADEM III controls), substantially minimizing flash occasions;
4.
Automatically selects J1939/11 when flashing the engine (reduces the
flash time around 80%, from 14 minutes to three minutes).
For
anyone who is searching for wireless diagnostic interface for cat
engines, please it is possible to pick this new WIFI CAT Caterpillar ET
Diagnostic Tool III adapter from www.cnautotool.com
1
Hi, thanks for sharing. This seems like a really useful tool. I make sure to always have the necessary tools for my computer since I use it for work and gaming. I really love gaming on my PC because it's so much smoother. I love playing the Among Us game here. I even downloaded extensions and add ons to the game. You can open shimeji.io to check it out. And if you haven't downloaded the game, you can check the game here.
Posted by: ghost19 at November 11, 2020 03:09 AM (vQoj0)
How to Backup and Restore Autel MaxiSys Diagnostic Software
It is highly recommend you backup the Autel Maxisys diagnostic software data in your card. You can restore them in case of data loss/corrupt or accidental deletion. Here is what you need to know to get your MaxiSys (Pro MS908P,MS906,Maxisys Elite,MS908,MS906BT,Mini MS905 etc) back up and running.
1. If you have a current subscription…Run an update.
2. If your yearly subscription has expired…Restore from backup.
3. Don’t have a backup…Renew the subscription.
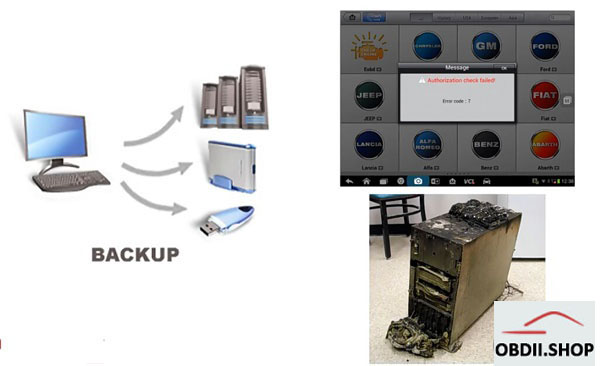
How to backup the Autel MaxiSys software?
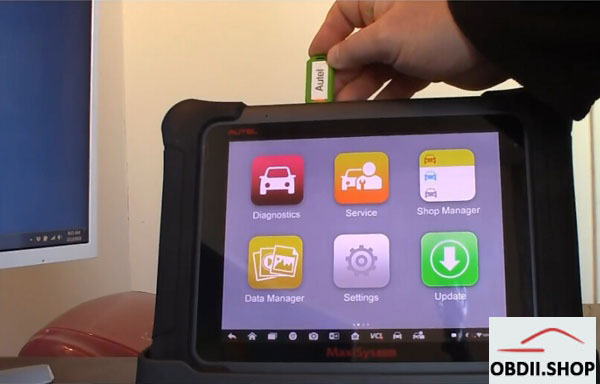
Prepare 32GB USB drive or Micro SD card
Insert the USB drive into Maxisys
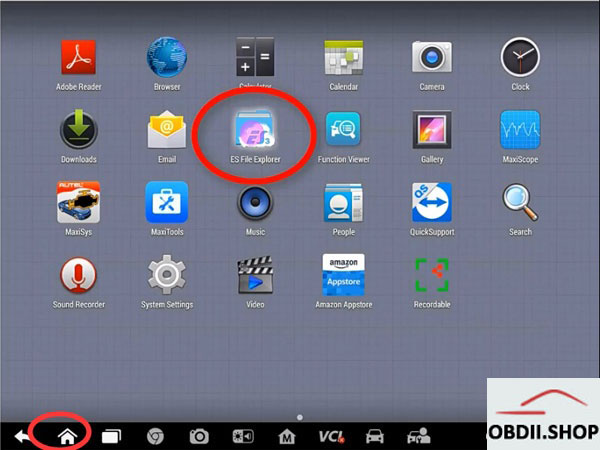
Click on Home button-> ES File Explorer
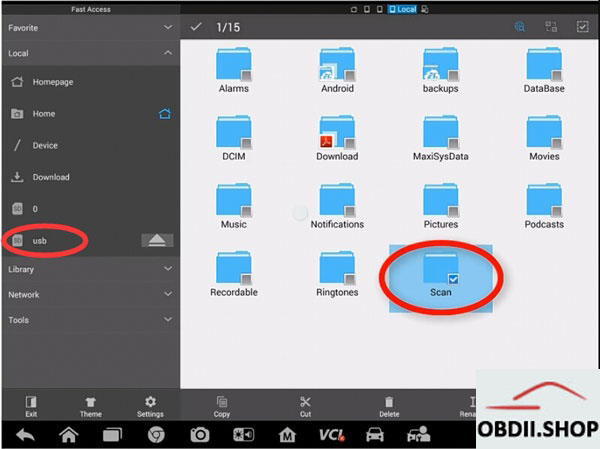
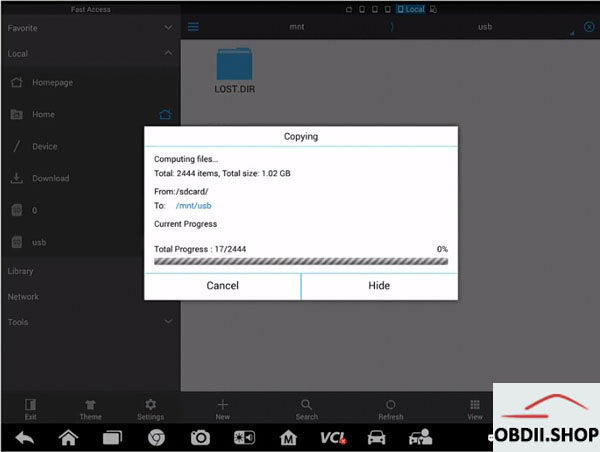
copy and paste the SCAN folder from the Autel tablet to the USB drive
To summarize, copy and paste the SCAN folder from the Autel tablet to a flash drive (thumb drive, SD card, etc…) that is 32GB. WARNING: The Autel devices will not recognize a flash drive larger than 32GB.
FAQ:
Q: Which Autel tablets support this method of backup?
A: All of Autel’s current Android-based tablets, including, all the MaxiSys 906, 908 pro, and even the mx808 and ts608.
Q: The video recommends a 32GB flash drive, can a larger one be used?
A: No. The Autel tablets will not recognize a flash drive larger than 32GB.
Q: How do I restore the files from a backup?
A: Copy the SCAN folder from the backup flash drive to the tablet.
Q: Can the backup be used to restore the Autel tablet after the subscription has expired?
A: Yes.
Q: Can I "lend†my backup to a friend?
A: No. The backups are tied to the serial number.
Q: When should I make a backup?
A: Make at least one backup before your current subscription expires. Ideally, make at least two backups:
– one to use
– another one to use in case the first one does not work.
1
If a tool can really pull this type of feat off then it would be very impressive and a very useful software for someone like me who does not like to deal with all these captcha mechanics being placed by website administrators to prevent people from spamming on their website. They are so annoying to deal with since most of them don’t make any sense and sometimes you literally need to be a rocket scientist to be able to solve the captcha to gain access to gacha life online free which will be available to get the Among Us Wallpapers By Run On PC.
Posted by: greenbeen at November 10, 2020 08:45 PM (FNEw5)
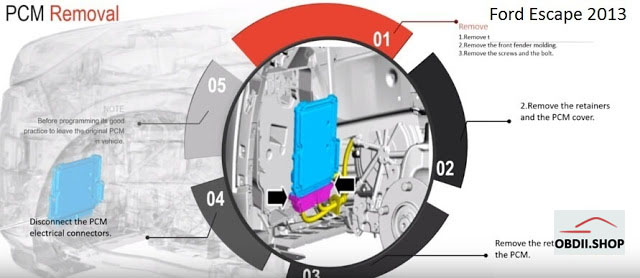
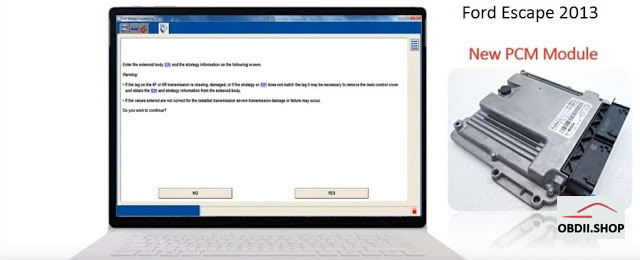
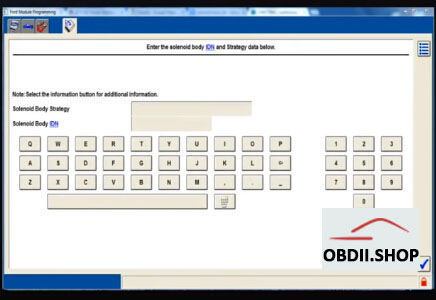
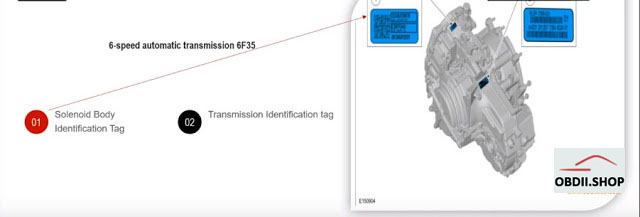
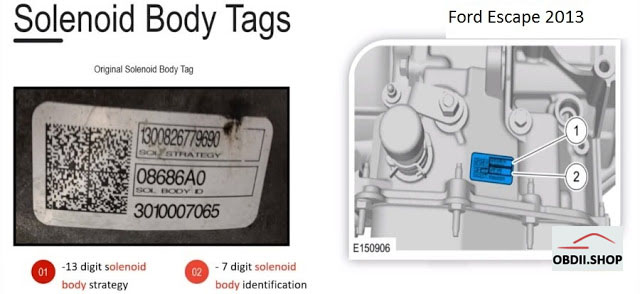
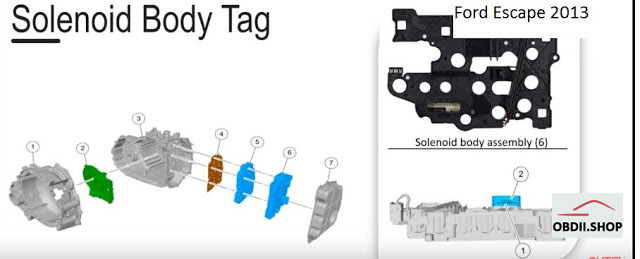
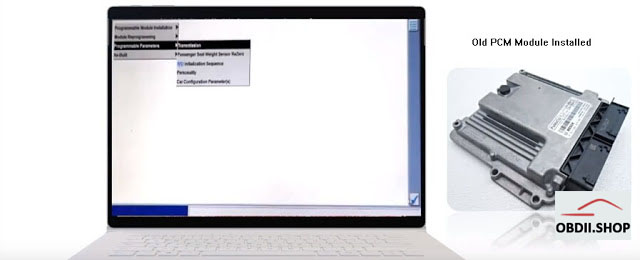
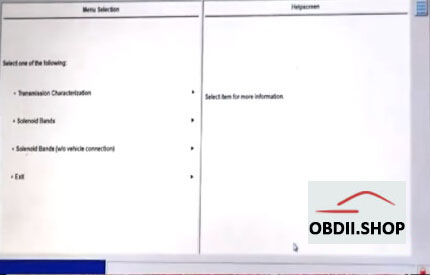
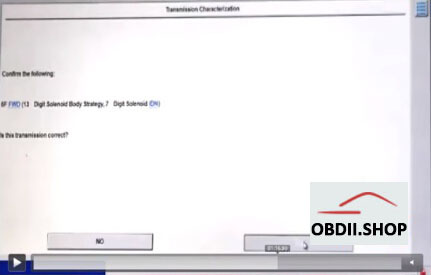
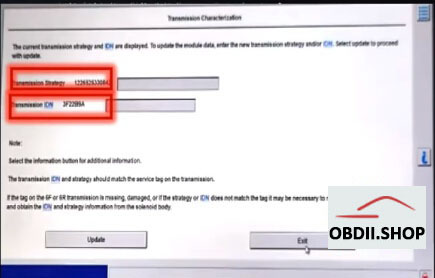
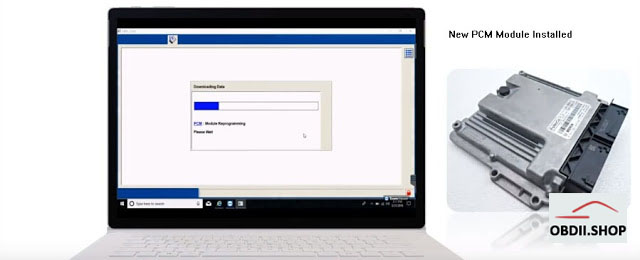
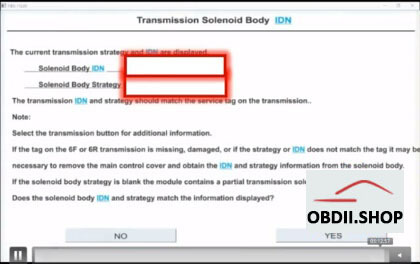
Background: client secured a new auto body repair contract and was going to attempt his first programming procedure on new pcm module. while assisting him we discovered Ford software was requesting the solenoid body id/ strategy code but could not retrieve this information since it was a new pcm module installed on the vehicle
How to:locate the solenoid body id/strategy code to complete pcm programming procedure
PCM removal
New PCM module
Solenoid body tags location
solenoid body tags:
Problem:
Cannot locate the body id tag
May need outsource to dealer
Loss of reputation/business relationship
Reset passive anti-theft system (PATS) parameter:
vehicle without keyless entry and push button start for the 2013 escape
* turn the ignition key cylinder from OFF to ON
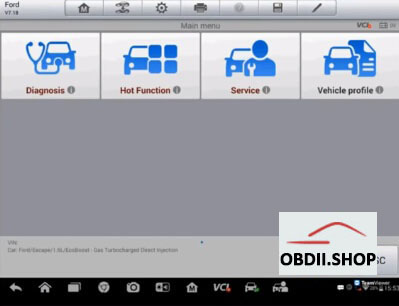
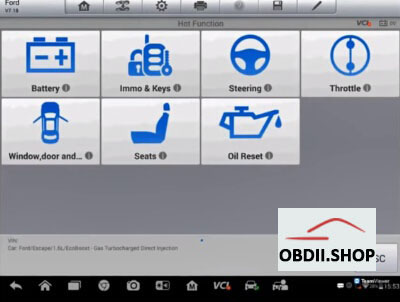
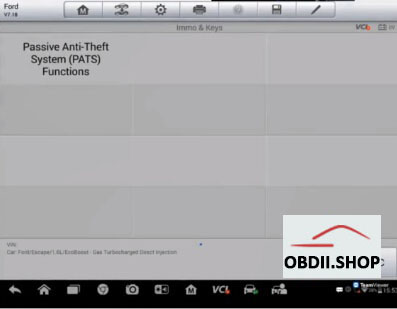
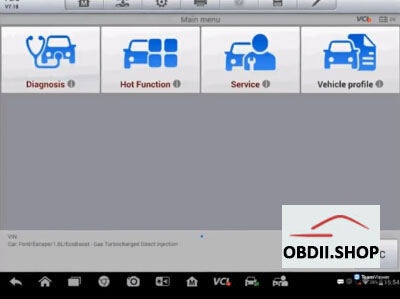
* in Maxisys Elite, select Hot function – immo – PATS functions and follow up the screen instructions to enter the PATS security access
* from the Elite, select "Parameter Reset†and follow the on-screen instructions
* perform the misfire monitor neutral profile correction procedure
3
Key success factors:
* always try to keep the original module on hand
* obtain access to repair technical information
* relax when you’re under pressure
* have a mentor if you are getting into programming for the first time
1
This tool is already obsolete since the phone that it is made for is already dead and no longer support by the manufacturer. Even the manufacturer has been dead and then revived for a while now. And I don’t think that people use any phone from Nokia anymore. People are usually gravitating to brands like Samsung, Apple, Google, or Xiaomi. Gone are the days that Nokia dominated the cellphone market. They are slowly being forgotten into oblivion by the huddled masses. I mean their devices can’t even do a simple play online and on pc anymore. Not even games when you follow this link to get the game.
Posted by: greenbeen at November 11, 2020 07:13 PM (FNEw5)
VAS 6154 MANUAL , INSTALLATION, WIRELESS DOWNLOAD,LICENSE FAQS
VAS 6154 diagnostic tool can be used for all VW Audi Skoda vehicles from 2000 onward including NEW & FUTURE MODLES under production via wireless network. Here have collected the common questions from customers and offered the related answers.
1
Audi vehicles have to be my favorite ones. They just look so sleek and cool whenever you are on the road. I don't much about these sorts of things though. It would be cool to know more about this. The only time I ever learn about these things is when I would play driving games. Speaking of which, if you are into online games, I highly recommend you check out this pc game link for Among Us. You can also click here to go download Gacha Club. Both of these games are really fun to play. A must try, indeed.
Posted by: ghost19 at November 11, 2020 08:36 AM (vQoj0)
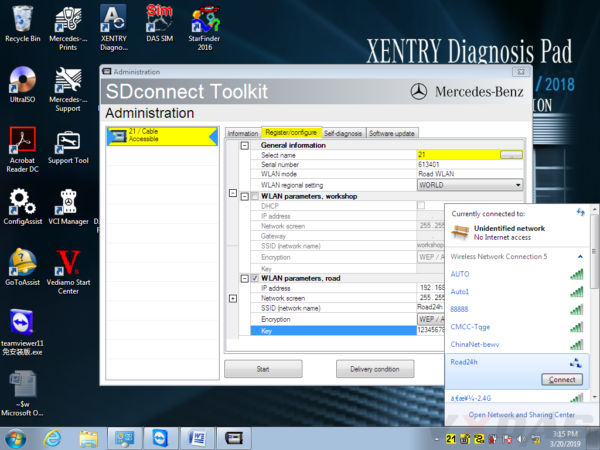
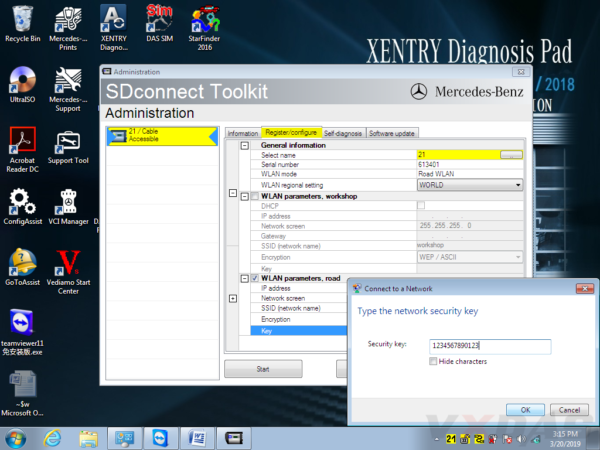
Mercedes SD C4 is professional diagnostic and programming tool for Mercedes Benz cars and trucks. When you received the C4/C5 multiplexer, you may would like to connect it with wireless for works.OBD2TOOL here provide full steps to set the wifi connection for you.
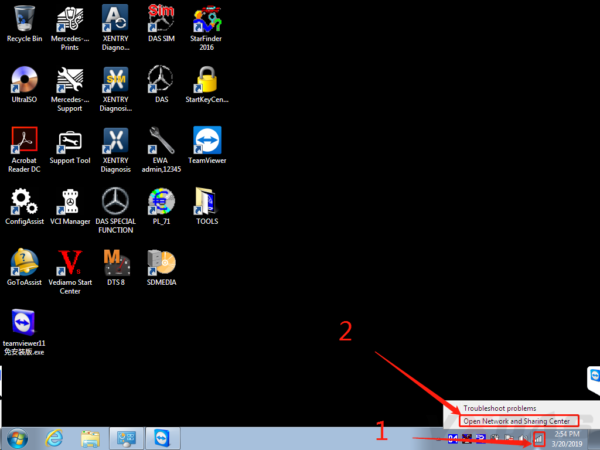
#1 Firstly, right click on the network icon, choose "Open Network and Sharing Centerâ€, as the picture shows below:
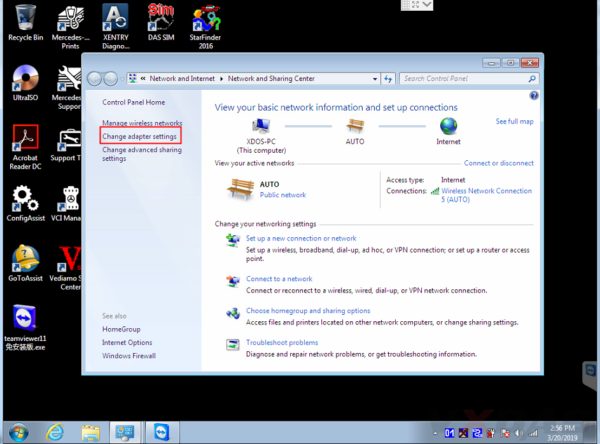
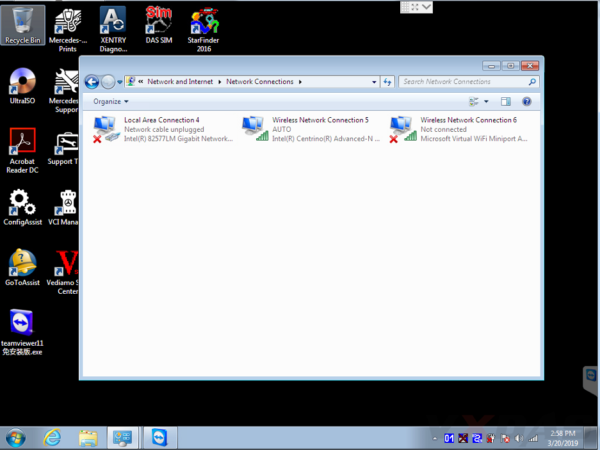
#2 Then choose "Change adapter settingsâ€.
Now it enters this place.
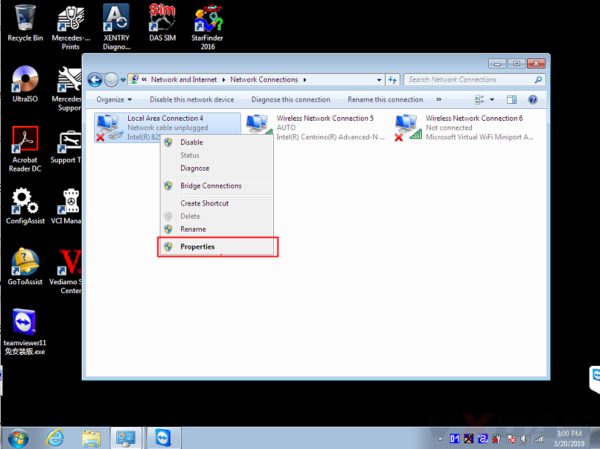
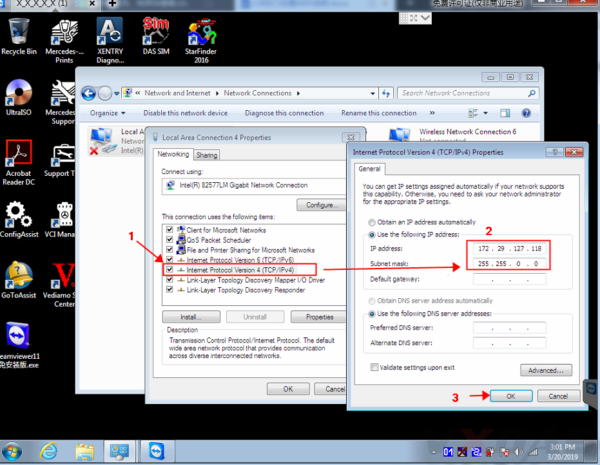
#3 Set wired IP address.
Right click "Local Area Connectionâ€, then click "Propertiesâ€.
IP address: 172.29.127.118
Subnet mask: 255.255.0.0
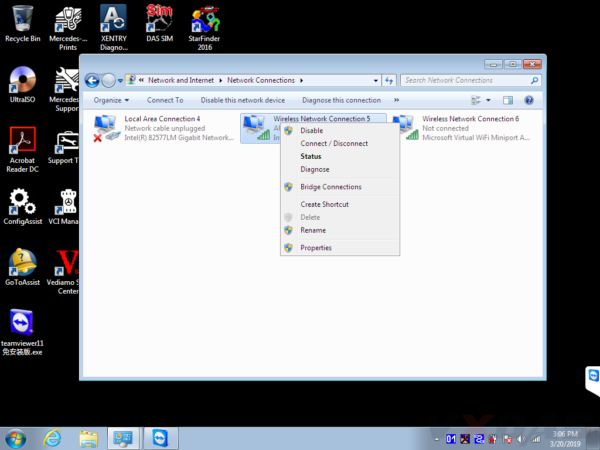
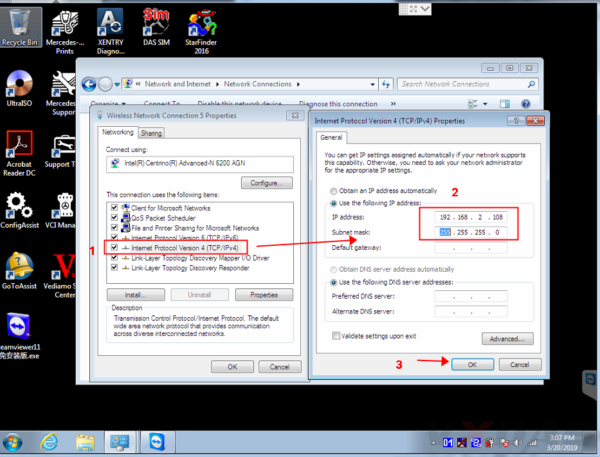
#4 Set wireless IP address. Right click "Wireless Network Connection†then click "Propertiesâ€.
IP address: 192.168.2.108
Subnet mask: 255.255.255.0
#5 Now you can set C4/C5 multiplexer Wifi connection password, first connect C4/C5 multiplexer to the car (ignition on), then connect lan cable to C4/C5 multiplexer and laptop.
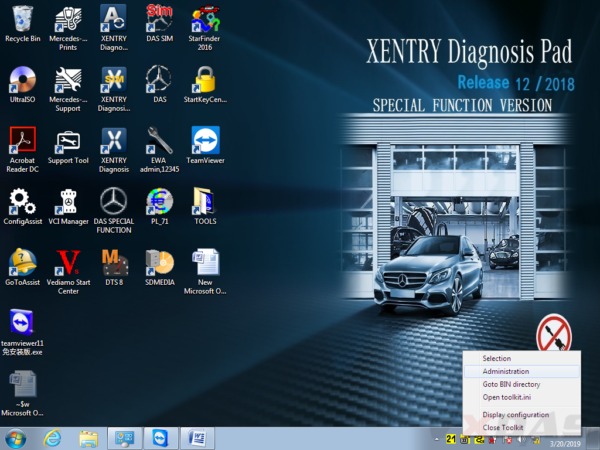
Right click the icon in the bottom right corner.
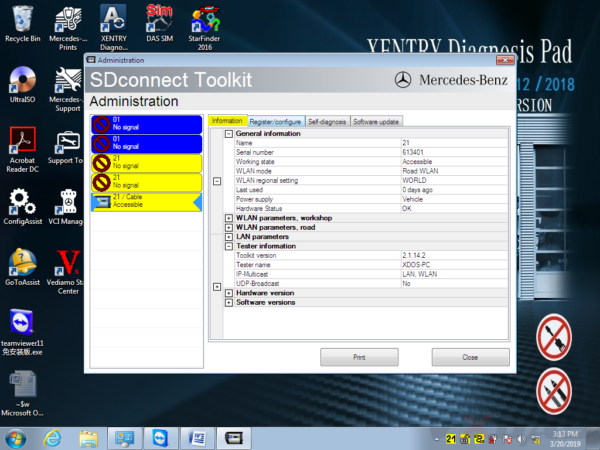
Then choose "Administrationâ€.
It will show this screen.
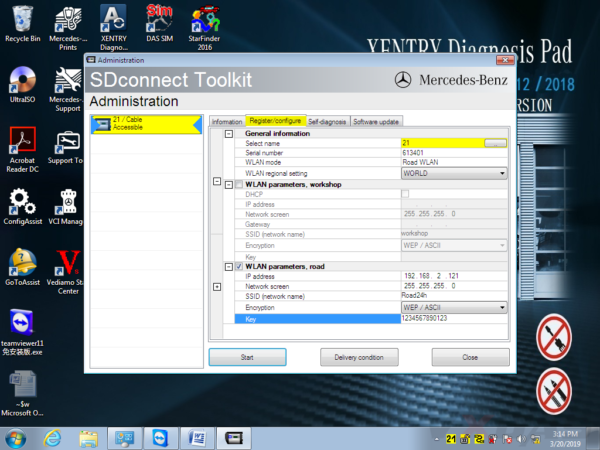
In Administration menu, choose "Register/Configureâ€.
Then put 1234567890123 in the KEY: 1234567890123 (total 13 numbers), then click "Startâ€.
Click the computer icon in the lower right corner.
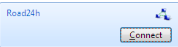
Find "Road24h†in the picture below.
Then Road24h in the Wifi place, click "Connectâ€.
Put the 13 digits password: 1234567890123 for the security key.
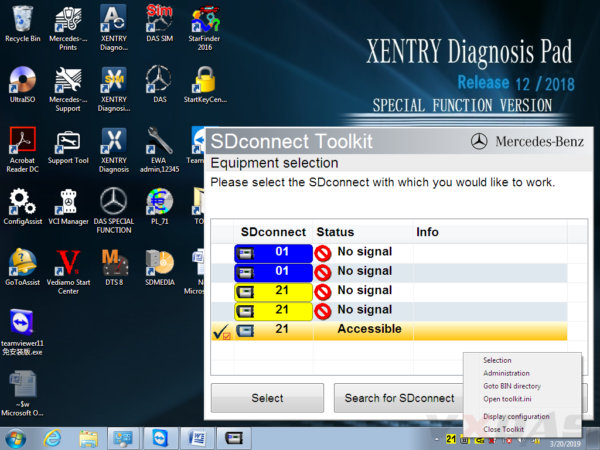
Now please right click this icon.
Then choose "Selectionâ€.
Disconnect the C4/C5 multiplexer and lan cable, then click this "Accessibleâ€.
Disconnect the C4/C5multiplexer and lan cable,click
And click "Selectâ€.
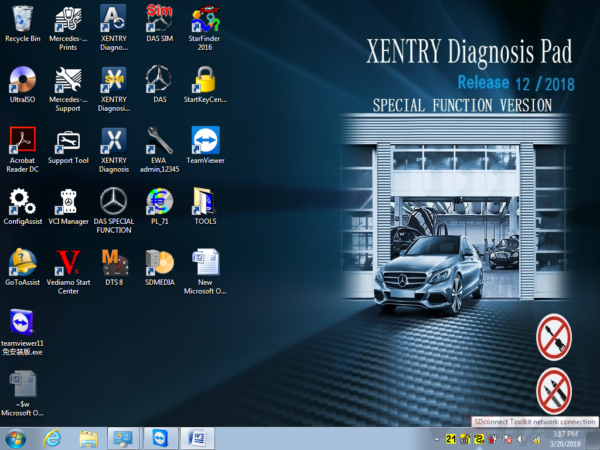
Then you can see these icons appeared in the bottom right corner.
Congratulations! You already finished the settings of wireless for SD C4/C5. Go to use it for testing and works!
Posted by: youobd2 at
04:27 AM
| No Comments
| Add Comment
Post contains 331 words, total size 11 kb.
2020.03v BENZ C6 Xentry Diagnostic OEM Star C6 Support DoIP
Benz C6is the new OEM xentry diagnostic vci multiplexer which can support DoIP while sd connect c4 can not. BENZ C6 xentry diagnostic vci comes with latest xentry software 2020.03v. Star c6 benz diagnostic tool can support both cars and trucks via obd.
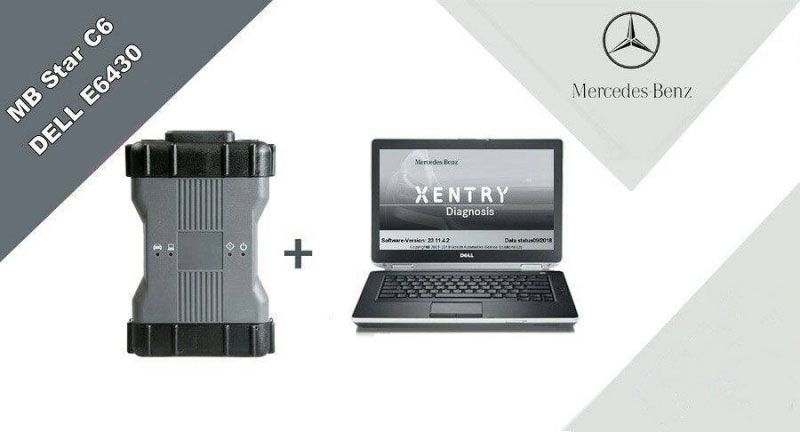
BENZ c6 XENTRY Diagnosis VCI acts as a Pass-through Interface, also called MB Star C6, For Benz C6 multiplexer to provide complete communication between a vehicle and theXENTRY softwareloaded on a PC. So you also can get the mb star c6 with laptop and software installed set from us, which will be ready to use, no activation needed.
Top reason to get benz c6 XENTRY Diagnosis VCI:
1. DoIP: Support DoIP
2.Support Vehicle: Mercede For Benz & Smart vehicles
3.Compatible Software: XENTRY/Das Software
4.Functions: Star Diagnostic & programming (SCN Coding)
What is DOIP?
DOIP is ISO 13400 diagnostic protocol
ISO 13400-1:2011 describes the general use cases and communication scenarios which are covered by an Internet Protocol-based vehicle communication standard. Each use case drives specific communication capabilities of the vehicle communication interface, for instance in order to be interoperable in an existing computer network.
The diagnostic communication over Internet Protocol (DoIP) protocol supports the standardized service primitive interface as specified in ISO 14229-2.
The descriptions in ISO 13400-1:2011 cover different application layer implementations, such as:
WWH-OBD (World-Wide Harmonized On-Board Diagnostics) as specified in ISO 27145-2 and ISO 27145-3.
The mercedes Land Rover JLR all use this new Diagnostic Protocol now.
Where need DOIP device?
when we test mercedes new car like w222 w205
In Audio\Comand section you can find DoIP test page.
If cable is DoIP you will see green mark that DEVICE is Ok.
Xentry will prompt you that other device must carry yellow marks.
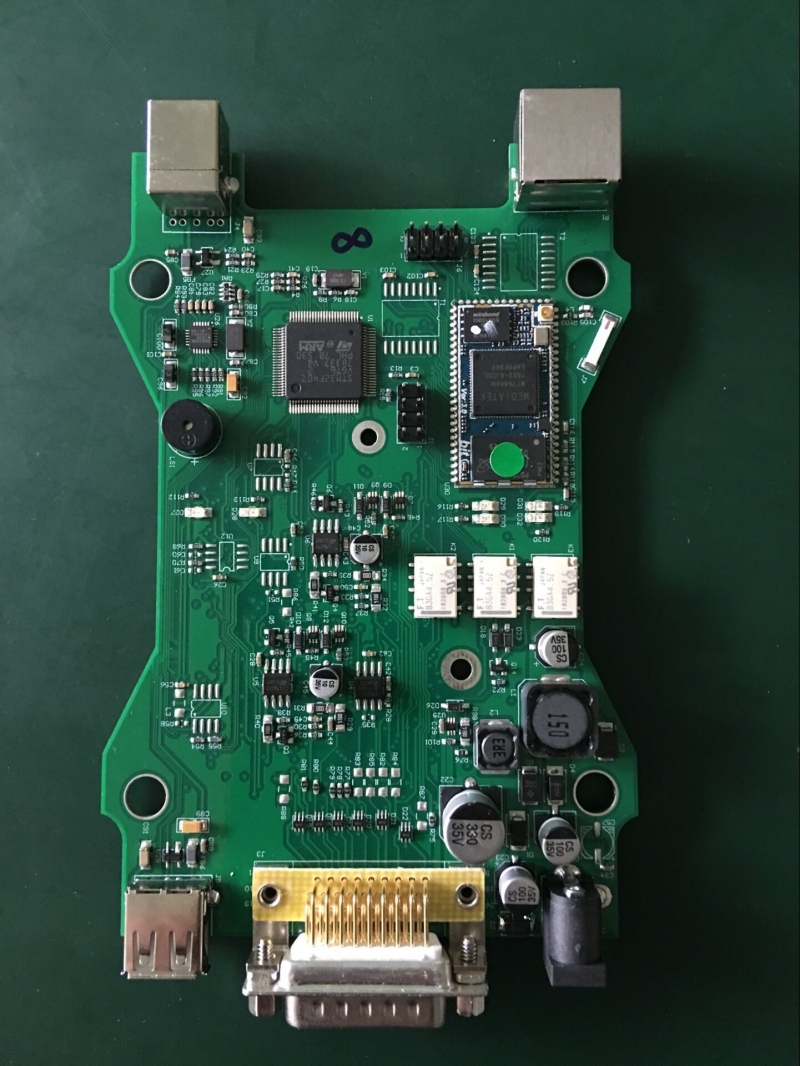
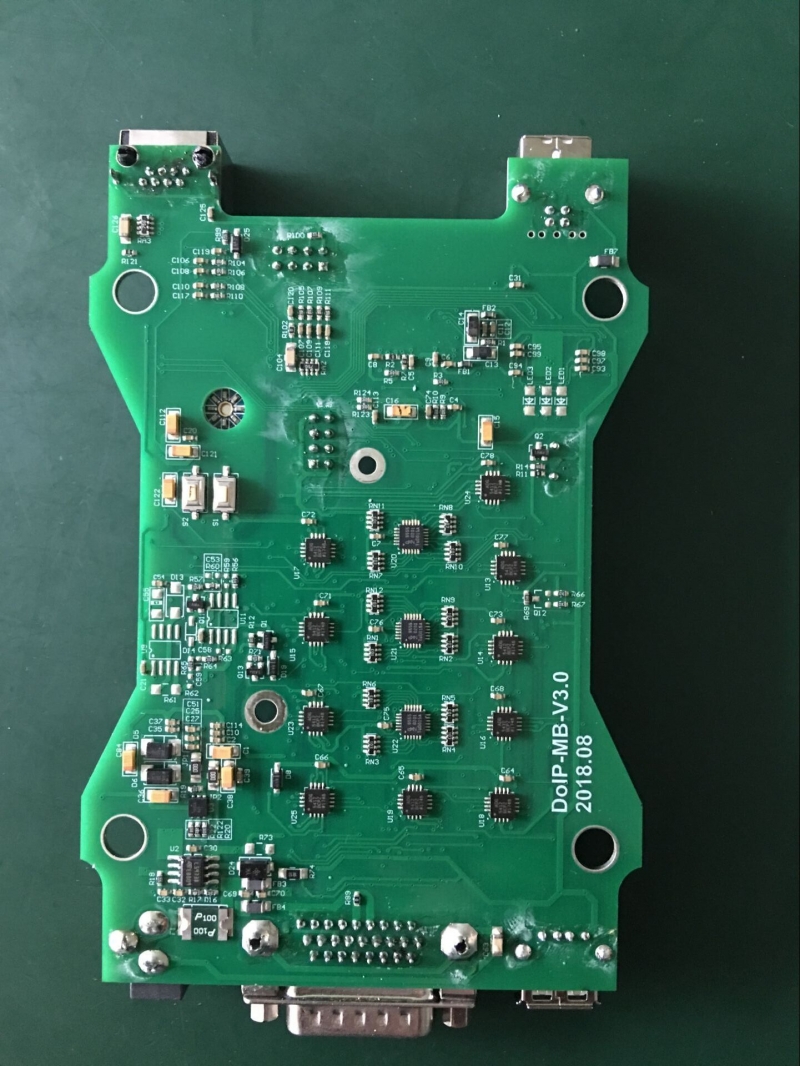
Star c6 benz diagnostic tool mainboard PCB Disaply:
Isuzu E-IDSS Engine Diagnostic Service System Download
What is Isuzu E-IDSS?
Isuzu E-IDSS is abbreviation of Isuzu Diagnostic Service System for Engine. E-IDSS Engineering Release is designed to support Isuzu Engines. With each new release of the E-IDSS program, additional vehicle engine configurations and controller systems may be supported. IDSS is designed to support Isuzu Motors. Engine configurations and controller systems will be supported for future engines.
How to Connect Isuzu E-IDSS Interface?
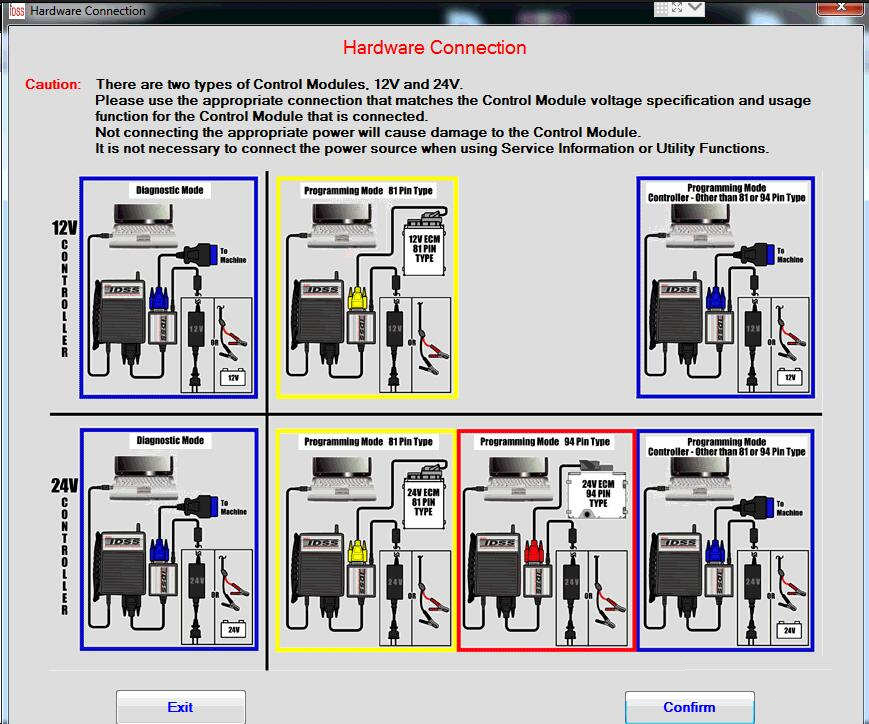
There are two types of Control module,12V and 24V.
Please use the appropriate connection that matches the control module voltage specification and usage function for the Control Module that is connected.
Not connecting the appropriate power will cause damage to the control module.
It is not necessary to connect the power source when using Service information Utility Functions.
How To Use Isuzu E-IDSS
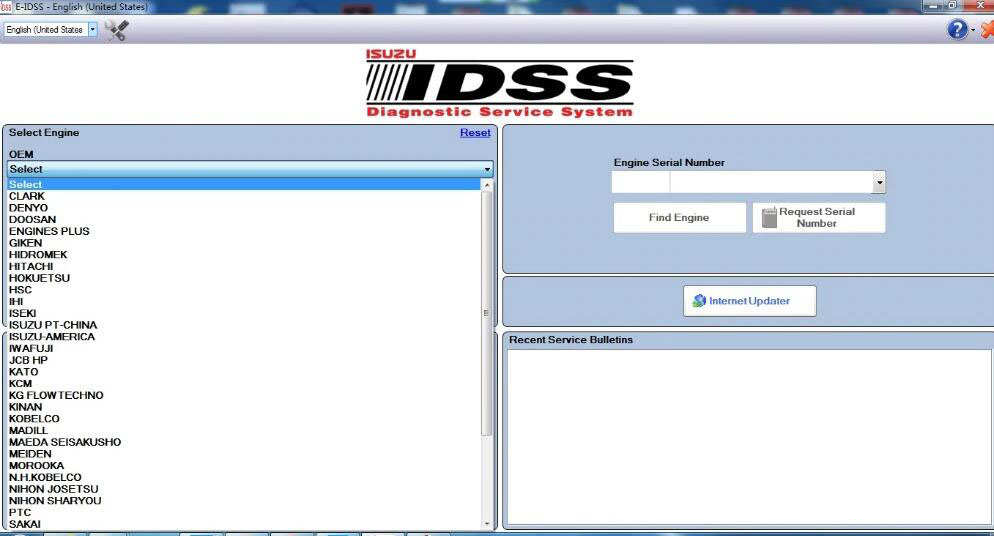
The IDSS main screen will be displayed at the start of every Isuzu Diagnostic Service System (IDSS) session. The main screen consists of the following:
Select OEM, Model Year, Engine Model and Engine Type drop down menus
Enter Engine Serial Number window
Internet Updater button
Recent Engines Loaded window
Recent Service Bulletins window
From the main screen, the user can perform the following:
Manually select the engine model, etc . through a series of drop-down menu boxes click Load Engine.
Manually enter the Engine Serial Number or click Find Engine button.
Automatically read the Engine Serial Number by clicking the Request Serial Number button.
Click one of the 30 most Recent Service Bulletins listed.
Click one of the listed Recent Engines Loaded selections.
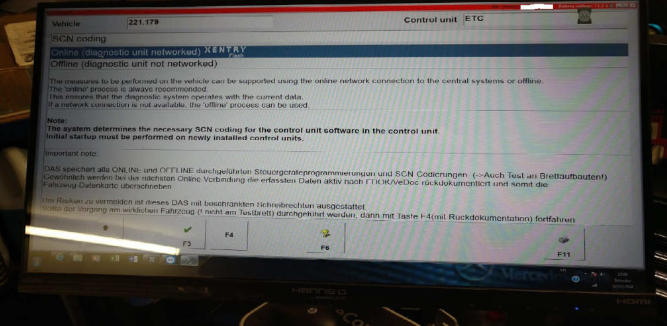
How To Solve Old Xentry Diangostic Software Cannot Work with Online SCN Coding
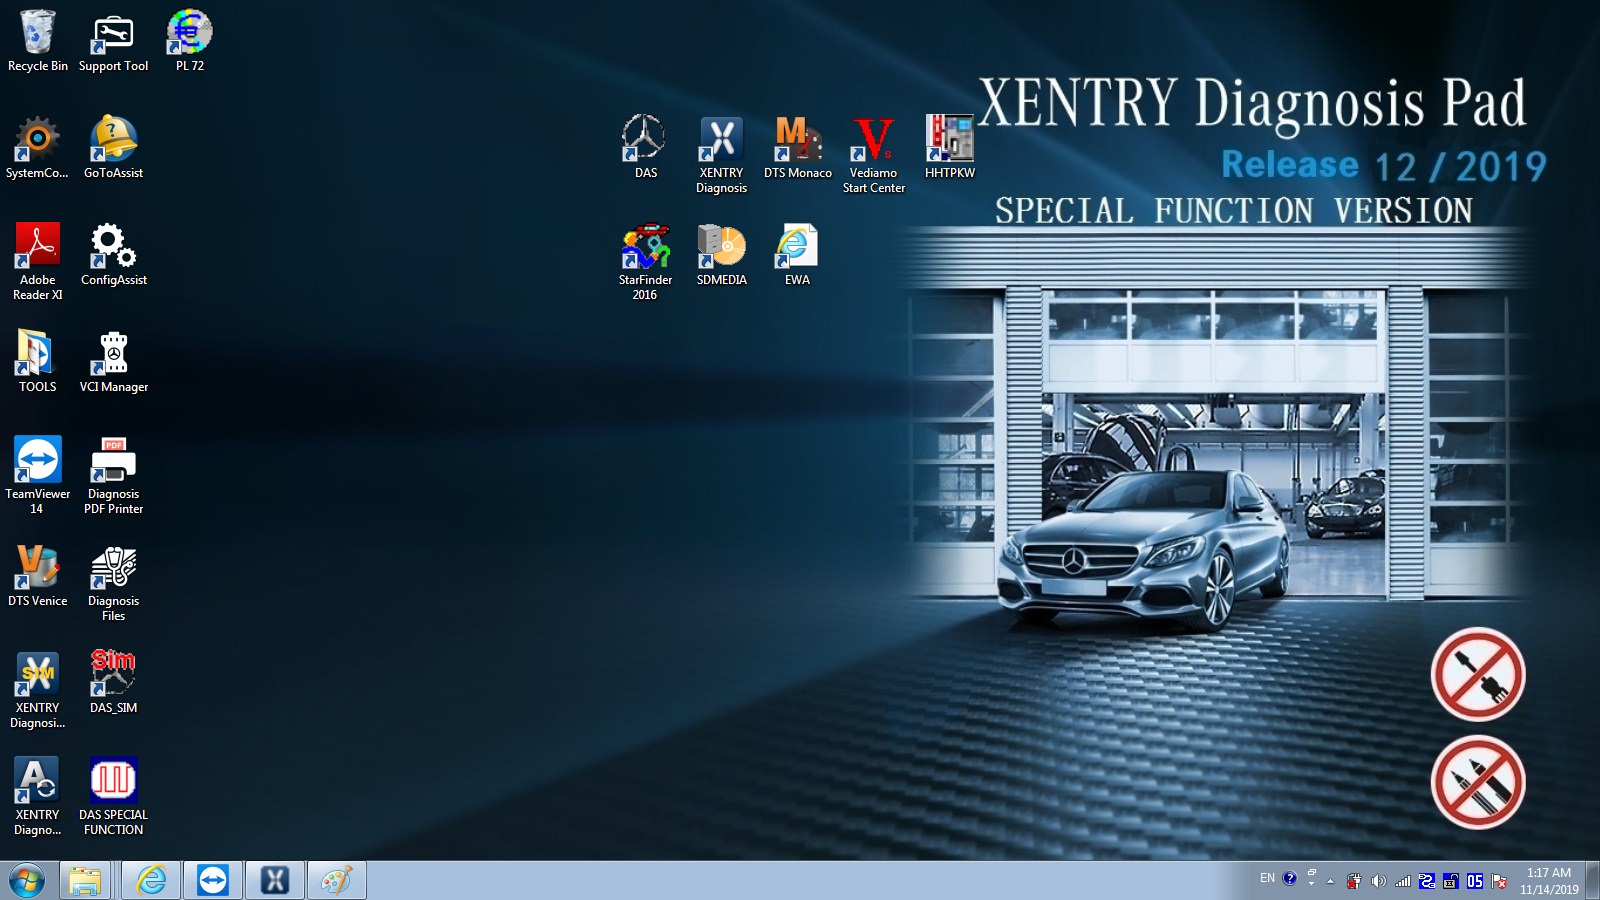
Xentry diagnostic and programming software for Mercedes Benz newly update to V2019.12.Some clients feedback that old xentry/das software cannot work with online SCN coding. Here,Obd2tool.com share how to solve old xentry diangostic software cannot work with Online SCN Coding.
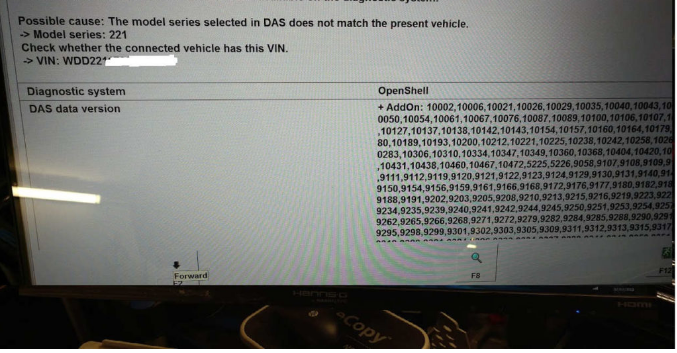
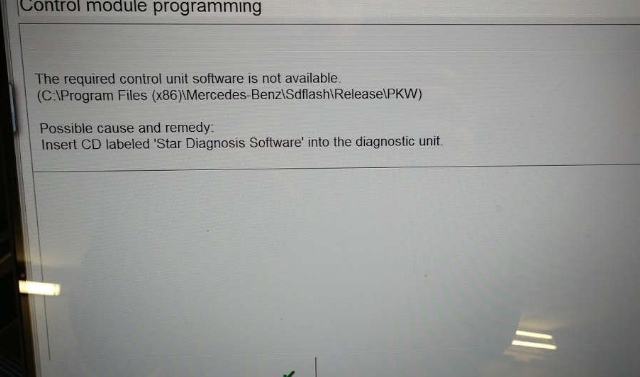
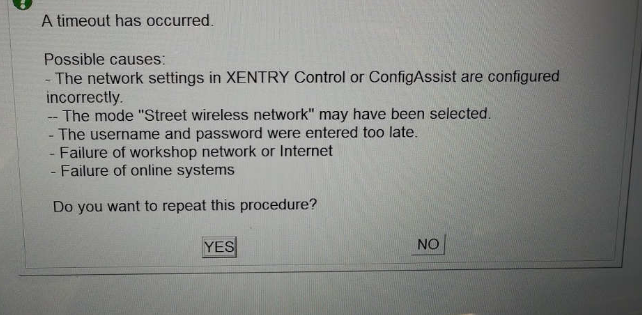
Xentry Diagnostic Software Cannot Work Online SCN Coding Error Showed:
Analysis Tech Support Team:
Your xentry diagnostic software cannot support online programming and got this error because of the xentry software is too old to support SCN coding.
Nnly xentry after 2018.9 software support SCN coding.
Solution of Old Xentry Diangostic Software Cannot Work with Online SCN Coding
Pls use the latest version xentry .