



March 21, 2022
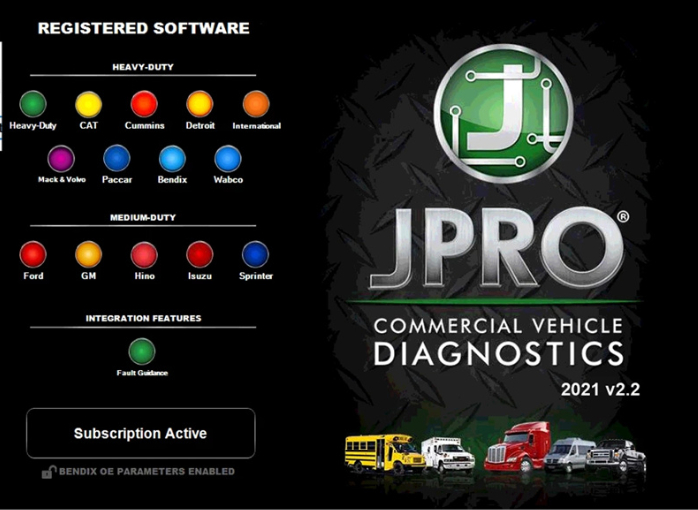
The focus of this update is to ensure technicians have all the tools necessary to maintain and repair the modern truck.
Noregon has announced the release of its first major update of 2021 for its flagship product, JPRO Professional. JPRO is an in-shop diagnostic and repair tool that allows fleets and repair facilities to triage, diagnose and repair all makes and models within a single application.
The focus of this update is to ensure technicians have all the tools necessary to maintain and repair the modern truck. Noregon enhanced coverage and introduced bi-directional tests for advanced driver assistance systems (ADAS) and added parameter adjustment capabilities for TPMS components.
JPRO Truck Diagnostic Tool Features:
1.Includes Heavy-Duty Modules: Mack, Volvo, Cummins, Detroit Diesel, International & PACCAR
2.Includes Medium-Duty Modules: Ford, GM, Isuzu & Sprinter
3.Bi-Directional Controls – Perform parameter changes (Mack &
Volvo), DPF Regens (Mack, Volvo, Cummins, Detroit Diesel, International
& PACCAR) & bi-directional tests with proprietary data &
faults
4.OE Level Fault Code Information – Display over 99% of
Heavy-Duty & Medium-Duty fault codes with detailed OEM level
component and trailer descriptions
5.Fault Management – Clears faults and diagnoses all vehicle components in a single, easy to use application
6.Vehicle Reporting – View and print log files, including: Vehicle Health, Trip Reports & LOV Reports
7.Store & Save Data – Record data log files for playback at a later time, even away from the truck
8.Total Vehicle Health Status – See the entire vehicle in one pass on
one screen + Up-to-Date – Provides 99% coverage of all heavy-duty truck
DTCs through 2020
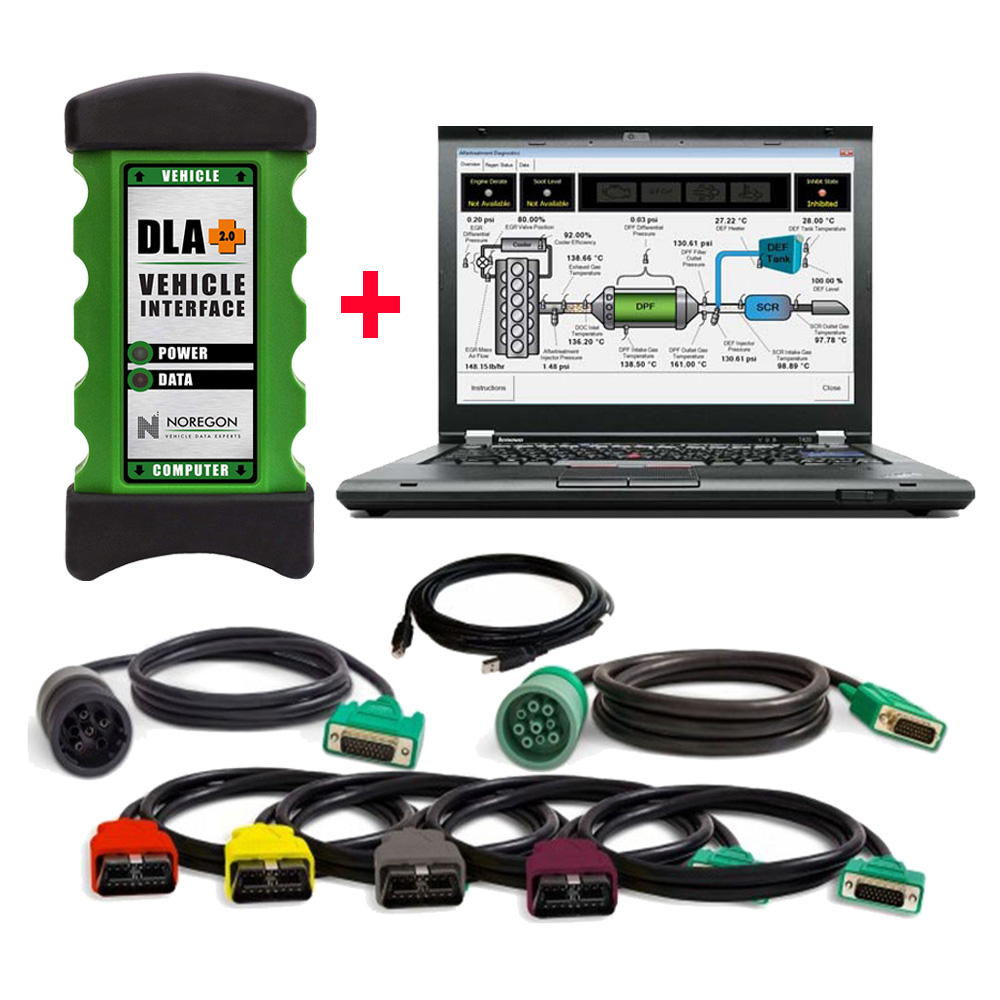
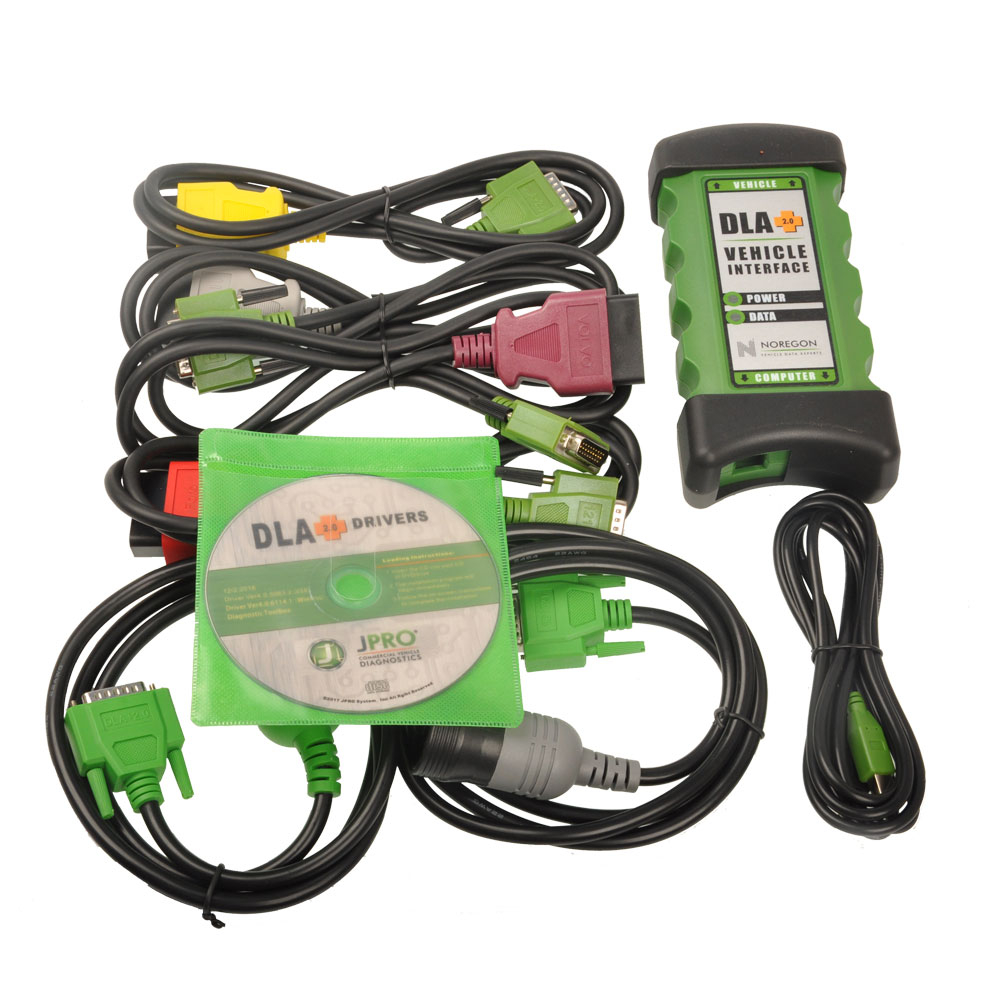
Jpro Diagnostic tool Packing list :
1.Second Hand Laptop Lenovo T420 Laptop (With JPRO Professional Diagnostic Software 2021 V2.2 & 2019V optional)
2.JPRO DLA+ 2.0 Adapter Cable
3.Heavy-Duty Vehicle Cables Type 2 Vehicle Cables (6-Pin & 9-Pin)
4.Medium-Duty Type-B OBDII Cables (Ford, GM, Sprinter/Hino/Isuzu, Mack & Volvo)
5.USB Cable
6.DVD(JPRO Software with keygen+ins)
7.Adapter Carrying Case
Second Hand Laptop Lenovo T420 Laptop Specification :
Brand: Lenovo
Condition: Used
Type: Laptop/Notebook
Screen Size: 14.0
Processor Type: Intel (R) Core(TM) I5-2520M CPU
Processor Speed: 2.50 GHz
Processor Configuration: Dual Core
Memory: 4GB
Compared with other laptop, this one is better quality and run faster.
FAQ
Don’t see your question answered below? Contact us!
1.What does JPRO do?
JPRO empowers diesel technicians to diagnose and repair all makes,
models, and components. JPRO reduces a technician’s dependency on OEM
software by offering industry-leading bi-directional controls, including
DPF regens, cylinder cutouts, parameter changes, and much more.
2.What trucks will JPRO work on?
For commercial vehicles, JPRO is an all makes, models, and components
solutions. For detailed information, check out our coverage chart.
3.Can JPRO adjust parameters such as road speeds or idle shutdown settings?
Yes! JPRO allows for many parameter adjustments, including max road and
cruise speeds, idle shutdown, PTO, VSS, Trip Information, and more!
Coverage varies by manufacturer, so please visit our coverage chart for
complete details.
4.What adapters work with JPRO?
For the most
reliable connection and functionality, we recommend a Noregon DLA+ 2.0
adapter but any RP1210C compliant adapter should work with JPRO.
5.If I buy JPRO, do I need anything else?
JPRO software requires a compatible Windows based PC, laptop, or
tablet, RP1210C compliant adapter, and the appropriate cable that
connects the computer to the vehicle’s OBD-II, 9-pin, or 6-pin port.
PLEASE NOTE: JPRO’s HD support for Mack and Volvo only supports the following adapters: • Noregon DLA+, DLA+ Wireless, DLA+ 2.0, DLA+ 2.0 Wireless, and DLA+ PLC • Vocom 88890300 • NEXIQ USB-Link, USB-Link 2
PLEASE NOTE: Ford, GM, Isuzu or Sprinter mediud-duty vehicle require any of the following adapters for connection: Noregon DLA+, DLA+ Wireless, DLA+ 2.0, DLA+ 2.0 Wireless
6.Do I need internet access for JPRO?
An internet connection is not necessary for connecting to the vehicle,
or for using many features in JPRO, but certain tools like Fault
Guidance and NextStep Repair require an active connection. Additionally,
setup, updates, license verification, or submission of information to
third-party warranty systems require internet access.
7.Can JPRO perform bi-directional vehicle tests?
Yes! JPRO comes loaded with industry-leading bi-directional tests for
the makes and models you commonly repair. For a full list of included
tests, visit our coverage chart.
8.If I have OEM software, why do I need JPRO?
Diagnosing on a component-by-component basis is time consuming in an
industry where time is extremely valuable. JPRO covers all components on
the vehicle to provide users with a holistic view of total vehicle
health.
Posted by: youobd2 at
06:30 AM
| No Comments
| Add Comment
Post contains 750 words, total size 8 kb.
March 09, 2022
Problem:
How to restore BMW icom next a2+B+C after a factory reset? LAN doesn’t work after reset.
Answer:
You need to restore it with usb drive, here is the file you need and how
to do it…… first restore then update …. you should search what is the
last version of ista that support F
1.https://mega.nz/file/tBYzVSBY#imbaH6NeLbV7n7dutVb3BMXYMGLVw0Ear-HqTXUUZTs
icom_01_37_00 .rar
2.Update firmware BMW ICOM A/A2/A3 (The next paragraph will list the details)
3.BMW ICOM A/A2/A3 Factory Restore (The last paragraph will list the details)
Step-by-step procedure on BMW ICOM A1-A2-A3 Factory Restore
Perform a factory reset if you face one of the following issues:
1.Single ICOM with at least one green LED, but does not become visible in ISTA
2.Single ICOM with at least one green LED, but it is not available in Connection Manager and therefore cannot be reserved
3. Single ICOM is not working in WLAN
4 .Single ICOM with at least one green LED, but Firmware Update is not possible neither via ISTA nor via ICOM Web GUI
Prerequisites:
1.USB flash drive. 2.0 with a minimum of 60 MB free space formatted with FAT32 (e.g. by Microsoft Windows)
2."ICOM_Restore.bin†file, which can be downloaded from this page. Make
sure you always use the latest file for the factory reset
Fix: Perform the following steps:
1.Copy the "ICOM_Restore.bin†file to the USB flash drive
2.Disconnect the network cable from ICOM A
3.If ICOM A is placed in an OBD II jack of the vehicle, then pull it out (ICOM A must have status offâ€)
4.Connect the USB flash drive to ICOM A
5.This step has to be done in a maximum time of 5 sec or the update process will not start:
Press the reset button on the ICOM A and hold it pressed:
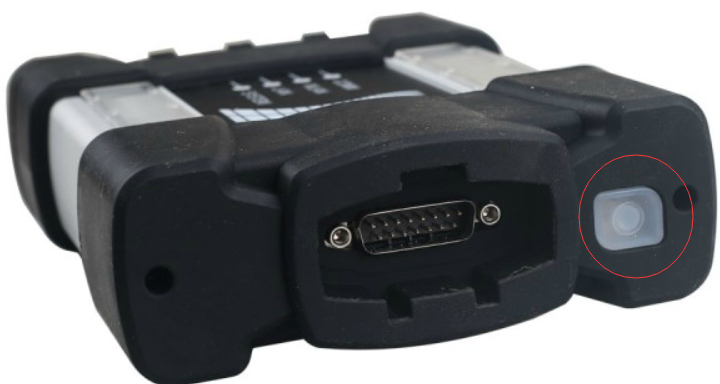
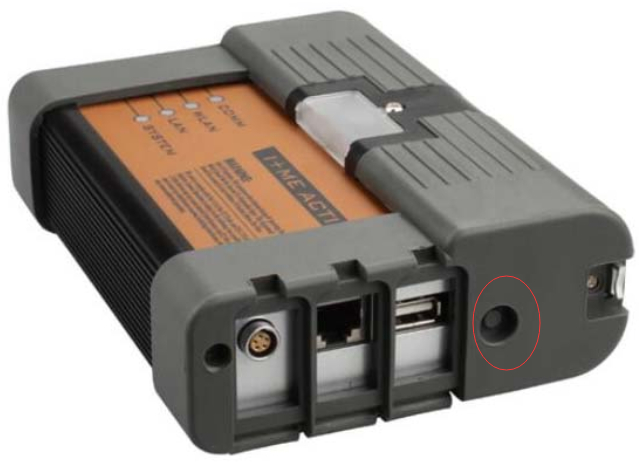
Connect ICOM A to the OBD II jack while the button is pressed (all LED will become red)
Release the reset button and then press it 3 times
The LEDs will flash red (if not, repeat the above steps)
The process is finished after 3 minutes
When the system LED is shining green, the update process is finished successfully
Disconnect to USB flash drive
6.Factory reset is done
7.Disconnect the ICOM A
8.Connect the LAN cable between the ICOM A and the network
9.Connect the ICOM A to a vehicle or external power supply
10.ICOM becomes visible now again in ISTA / work correctly again
Step-by-step procedure on BMW ICOM Upgrade:
1.First step is to make sure the LAN adapter is set to DHCP and is enabled, here is how to do it:
–Open Network Connections by clicking the Start button, and then
clicking Control Panel.in the search box, type adapter, and then, under
Network and Sharing Center, click View network connections.
–Right-click the connection that you want to change, and then click
Properties. If you’reprompted for an administrator password or
confirmation, type the password or provide confirmation.
–Click the Networking tab. Under This connection uses the following
items, click either Internet Protocol Version 4 (TCP/IPv4) or Internet
Protocol Version 6 (TCP/IPv6), and then click Properties.
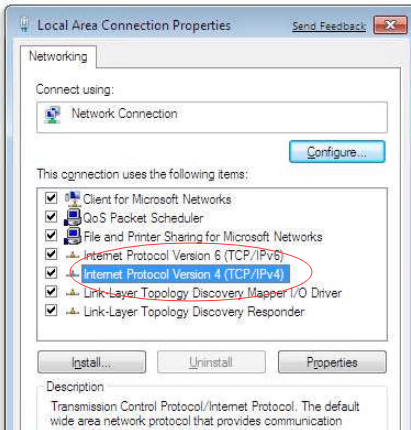
The Network Connection Properties dialog box
–To get IP settings automatically using DHCP, click Obtain an IP address automatically,and then click OK.
–To get a DNS server address automatically using DHCP, click Obtain DNS server
address automatically, and then click OK.
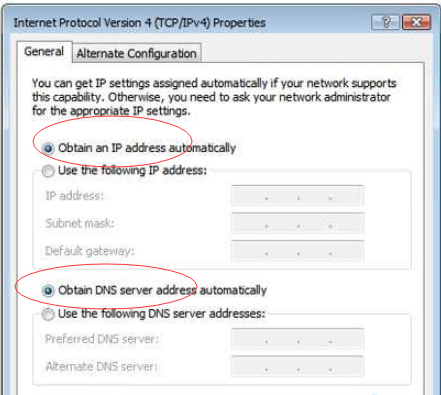
2.Connect ICOM to the car and to the UTP cable provided in the package
–there should be 4 green leds powered on
3.Check that the network adapter has an IP like 169.254….
4.Using the web browser go to http://169.254.92.38:60080
User: root Password: NZY1150263
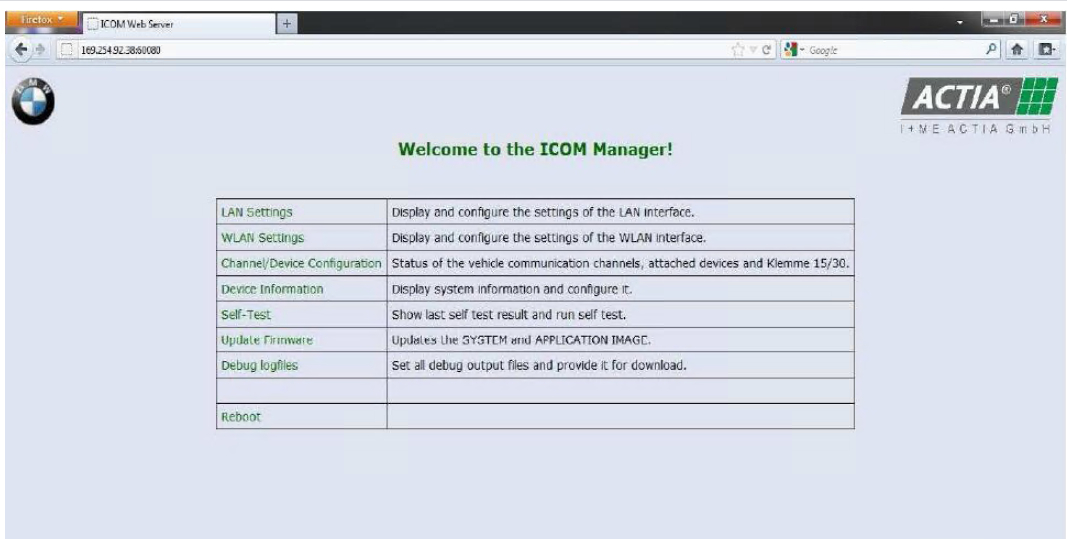
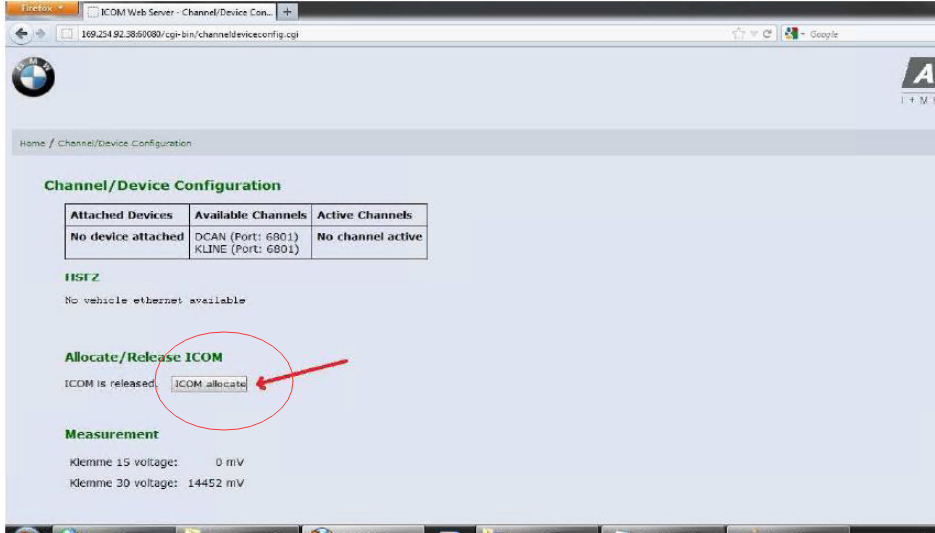
5.Select channels menu and click only once on the button available there:
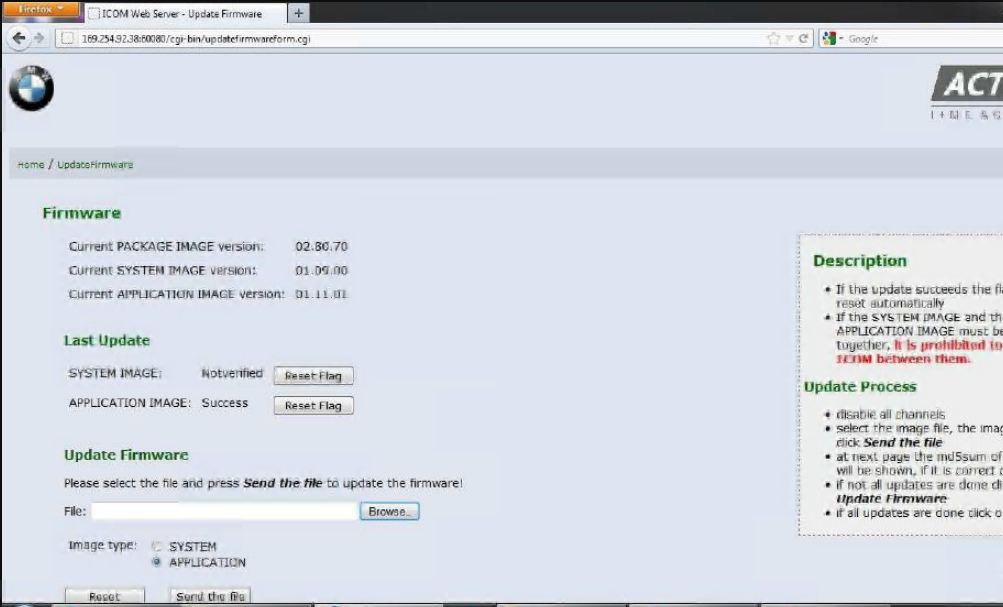
6.Go to firmware update and update with ICOM-BootImage-01-11-01.bin,
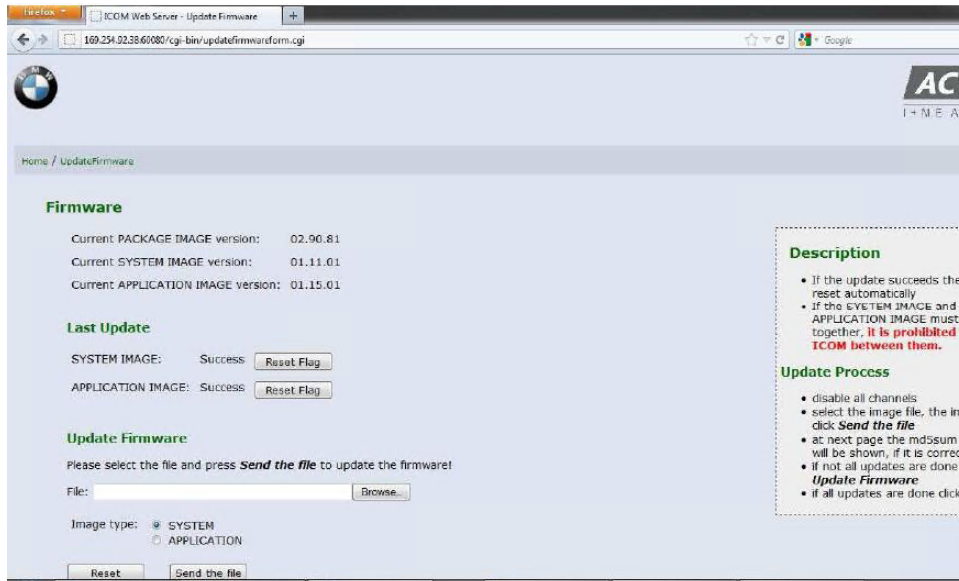
then with ICOMApplicationImage-01-15-01.bin, don’t reboot between parts:
— at the image type we have selected System, now Browse for the
ICOM-BootImage-01-11-01.bin and click on "Send the file†button and wait
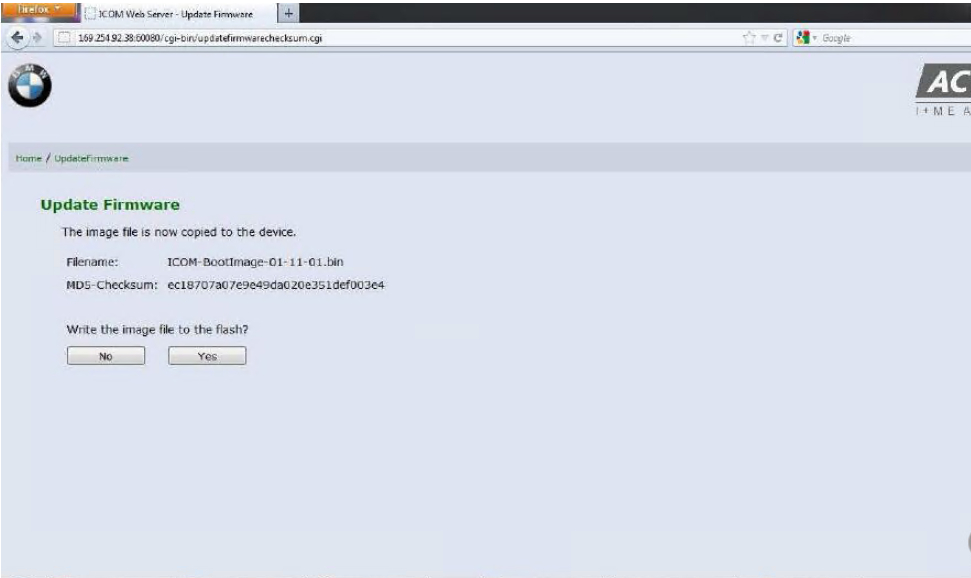
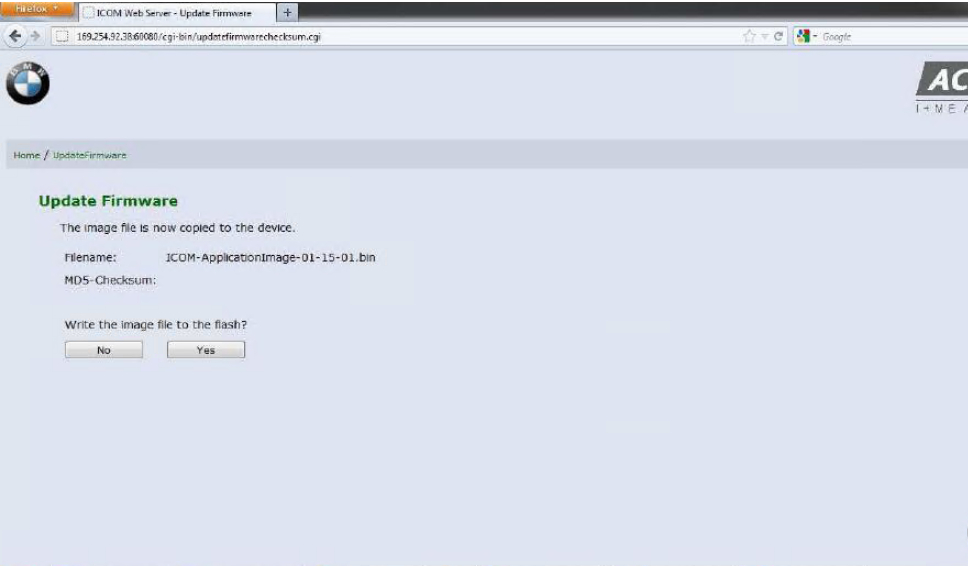
–click on Yes and wait
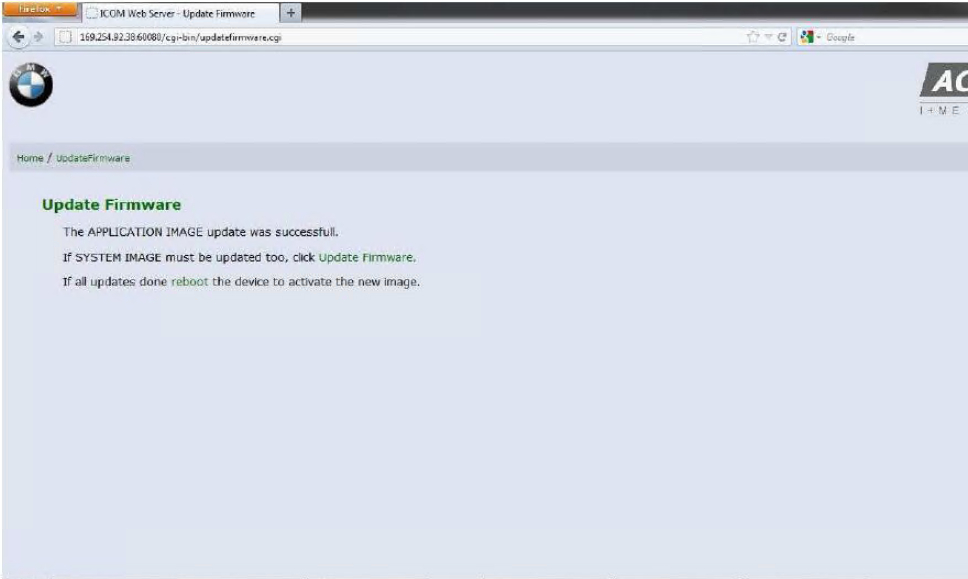
–now click on Update Firmware to go and update with ICOM-ApplicationImage-01-15-01.bin
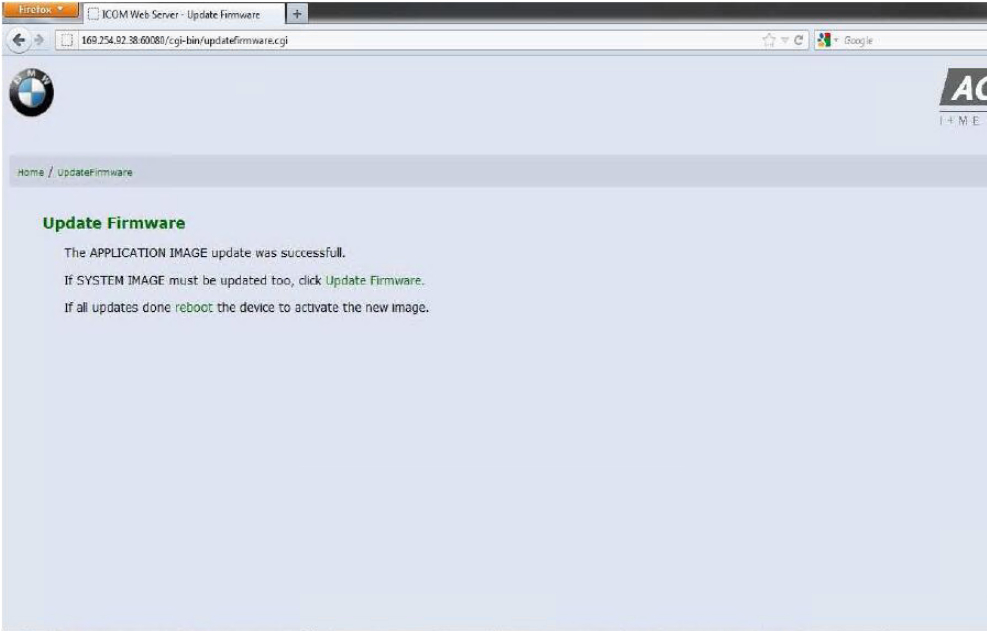
— at Image type check the option called APPLICATION and Browse for
ICOM-ApplicationImage-01-15-01.bin and click on "Send the file†button
and wait
–click on Yes and wait
7.Reboot ICOM
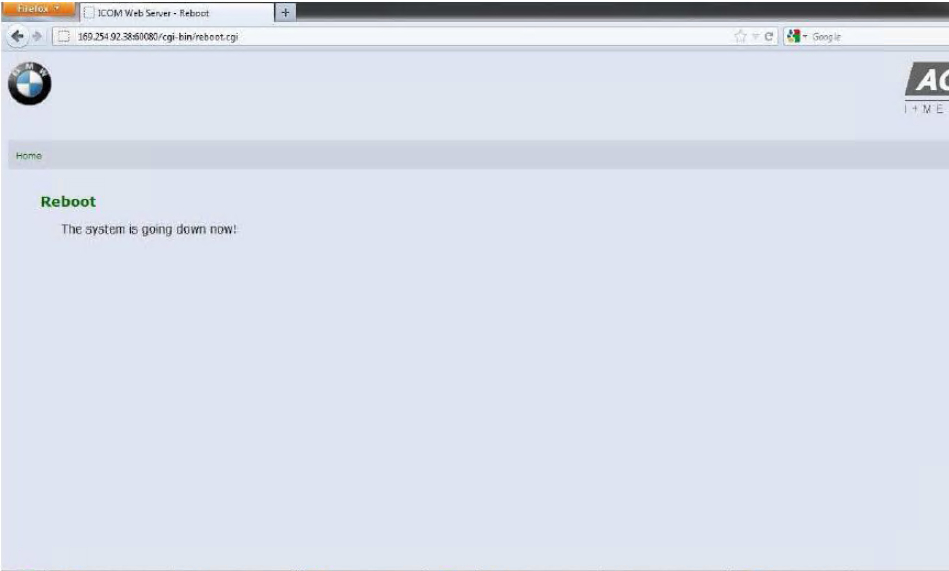
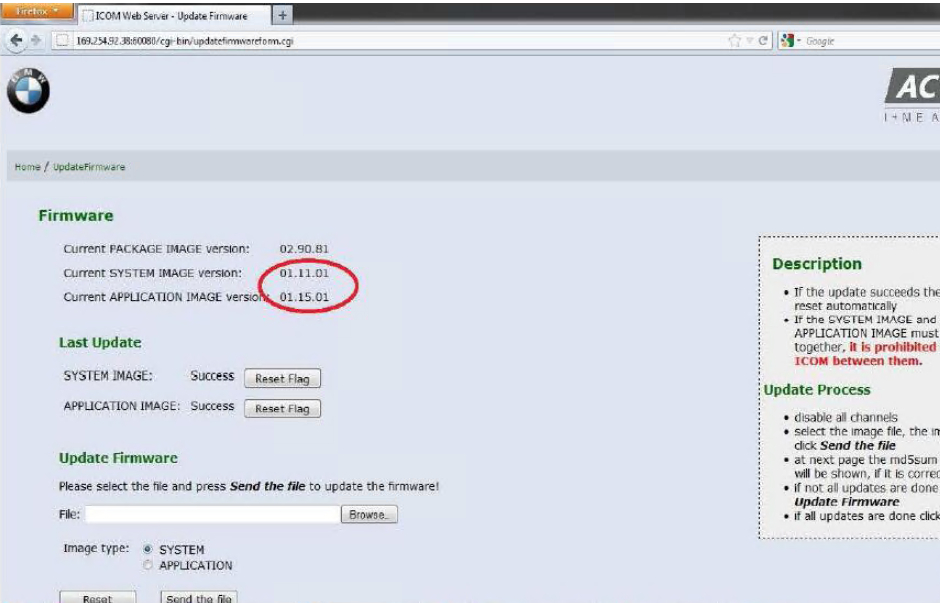
8.After at least 2 minutes press on Home button and go to Update
Firmware and check to see the firmware versions for boot is 1.11.01 and
application is 1.15.01:
Any need please feel free with us sale@cnautotool.com, thanks
Posted by: youobd2 at
02:04 PM
| No Comments
| Add Comment
Post contains 738 words, total size 11 kb.
32 queries taking 0.0403 seconds, 126 records returned.
Powered by Minx 1.1.6c-pink.

