



August 25, 2020
When you replace tire pressure sensors,you need to program it for your car.So here i want to show this instruction on how to use Launch X431 to program tire pressure sensor for Lexus ES250 2014.And here is a collection for TMPS projects:Tire Pressure Sensor Trouble Repair.
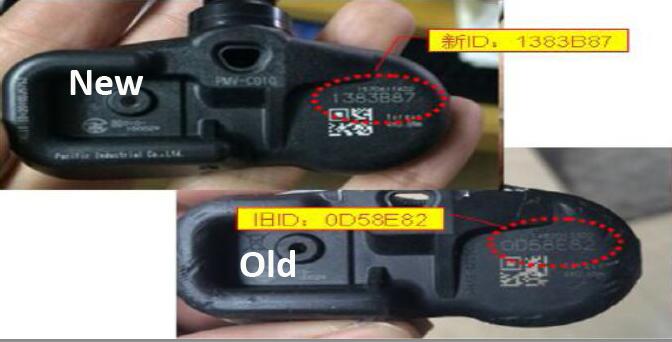
What You Need?
Launch X431 V+ pro3
Operation Procedure:
1.Switch on the ignition.
2.Select the Toyota Version V48.50.
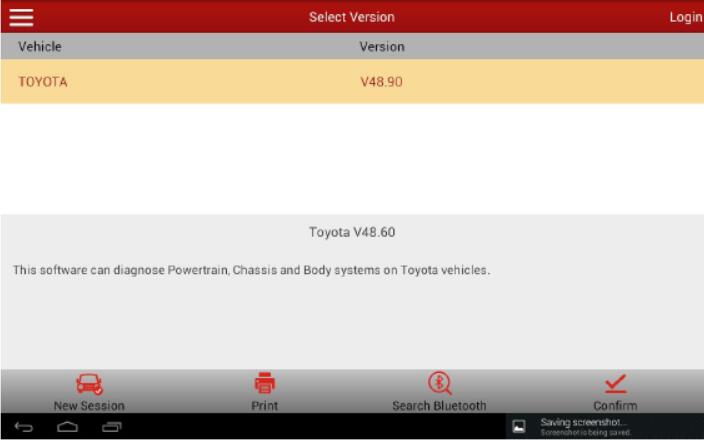
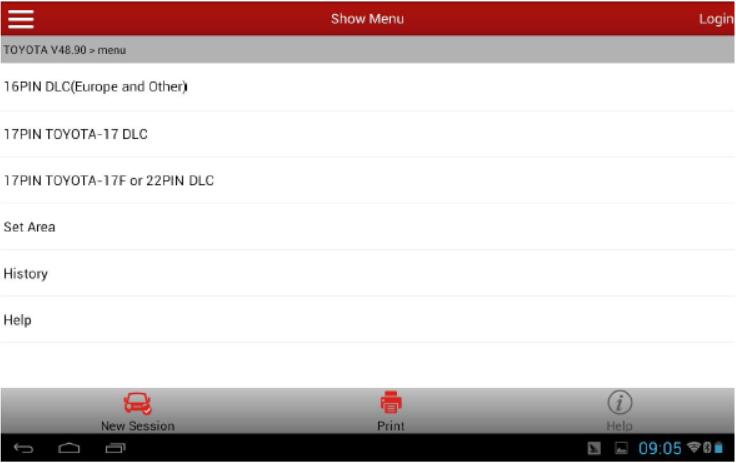
3.Select "16PIN Diagnostic Socket (Euro&RoW)â€.
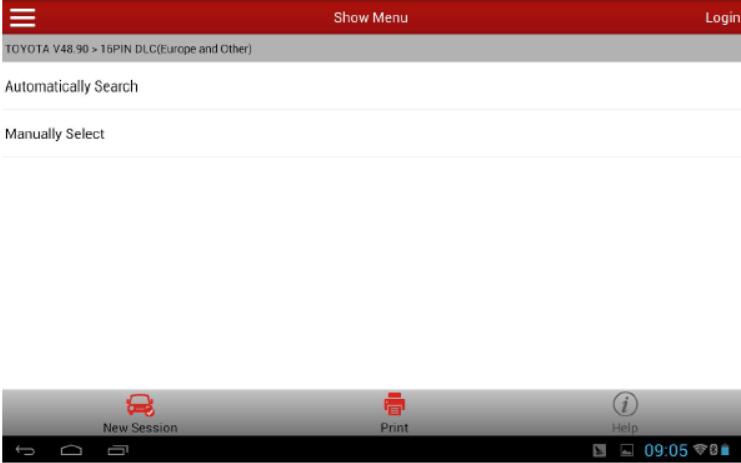
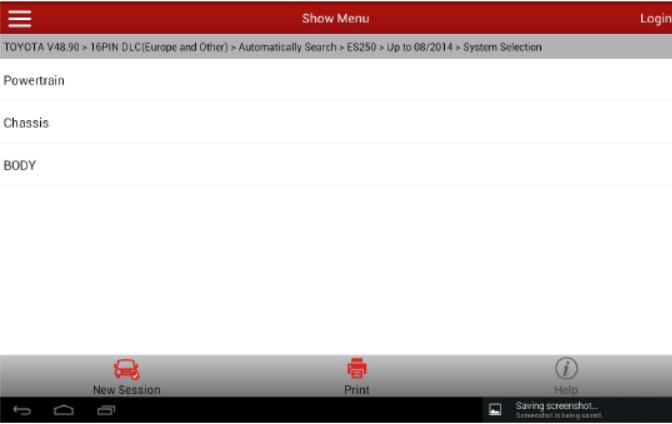
4.Select "Automatic Searchâ€.
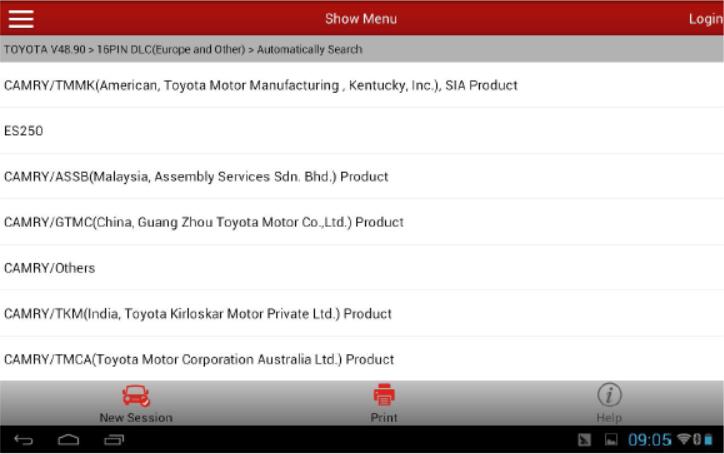
5.Select corresponding car model ES250.
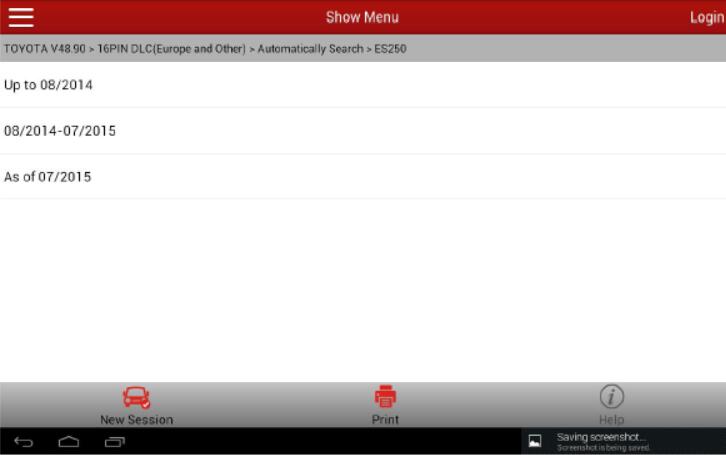
6.Select "Up to 08/2014â€
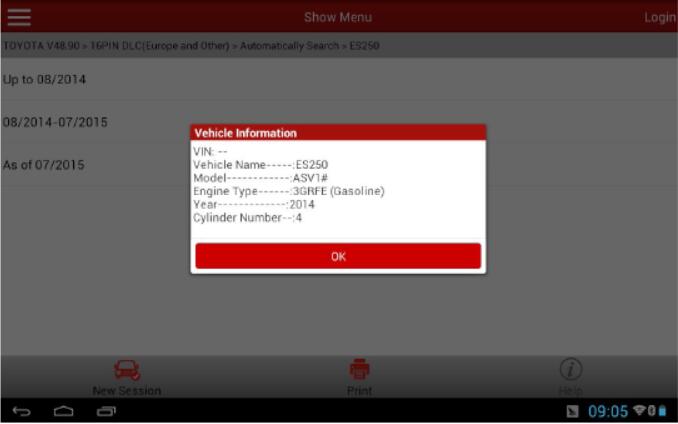
7.Displayed car model information is as below.
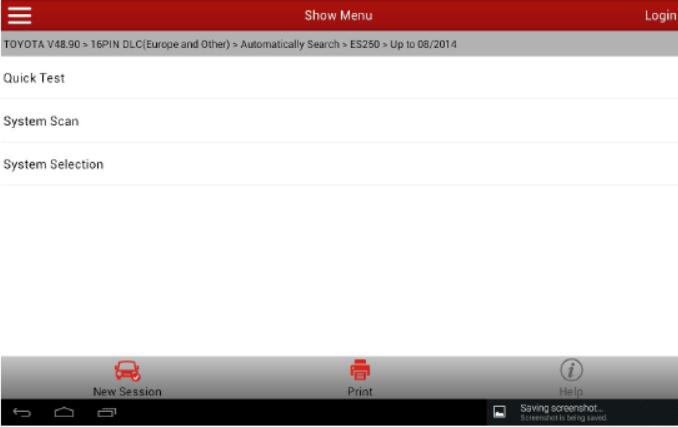
8.Select system selection.
9.Select chassis.
10.Select †ABS/VSC/TRC ".
11.Select "Read Data Streamâ€.
12.Select manual selection.
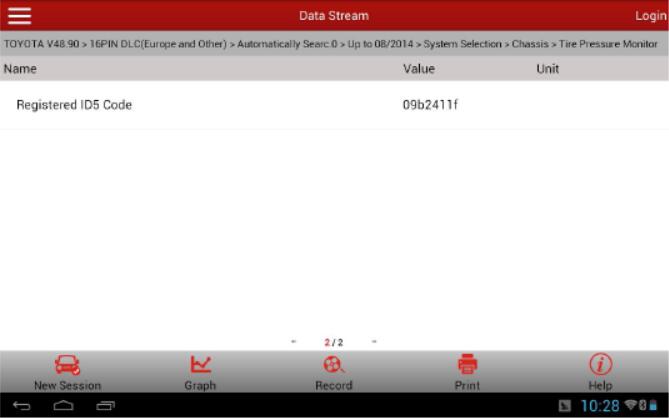
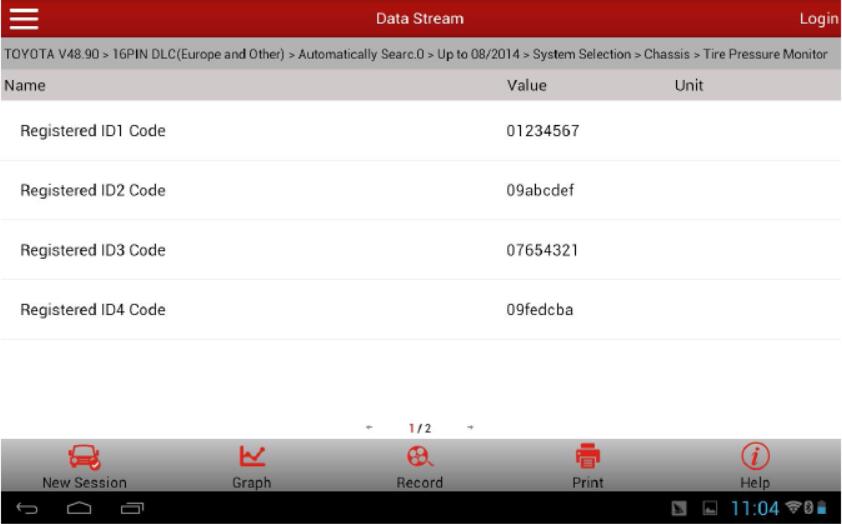
13.Select registered ID1 Code-ID5 Code (5 data streams) to read.
14.Write down the code value you read for later entry.


15.Select special function.
16.Select automatically scan the special function.
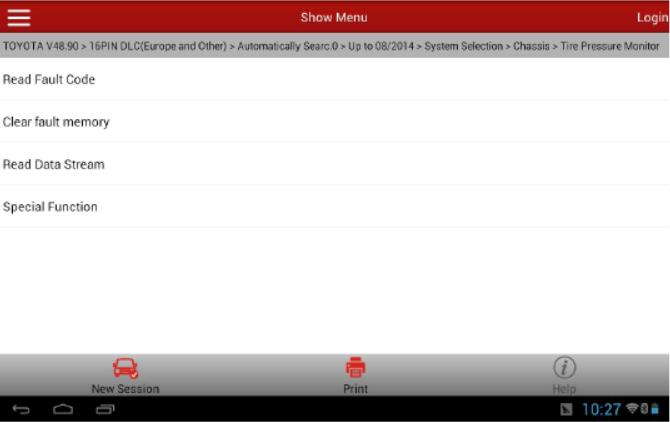
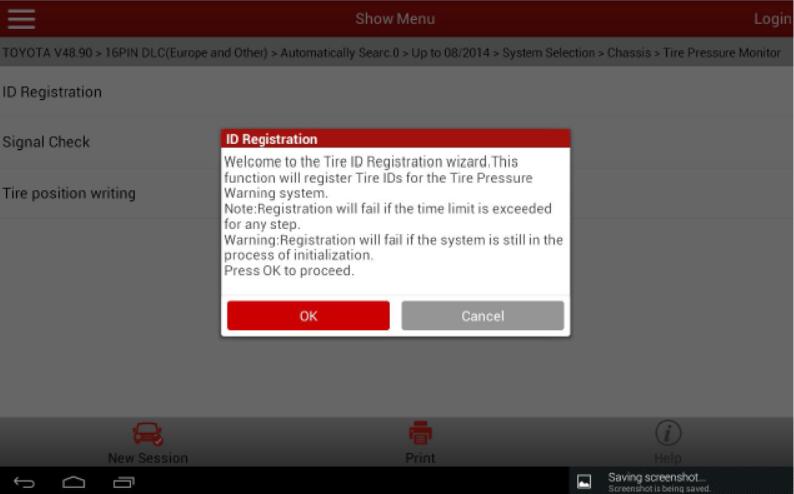
17.Select identification registration.

18.Select master tires and follow the prompts. Note, this vehicle requires to input 5 tire pressuresensor IDs.
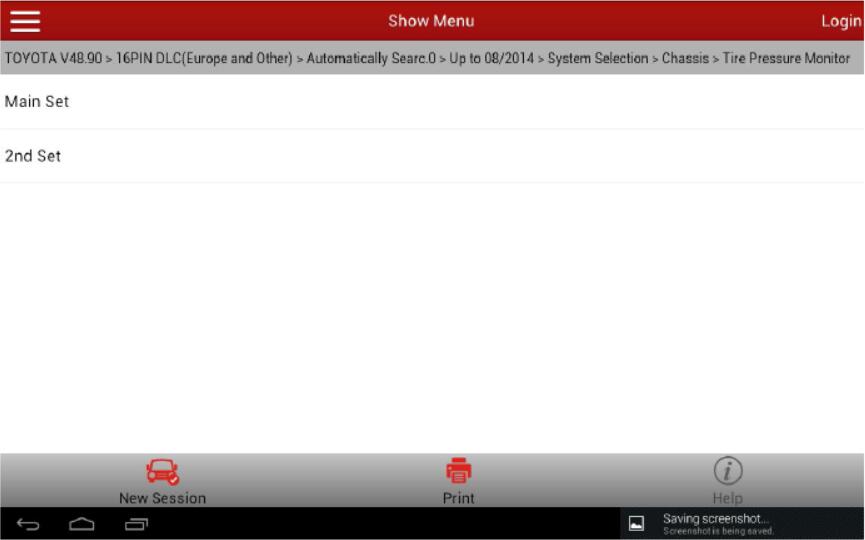
19.Select Main Set
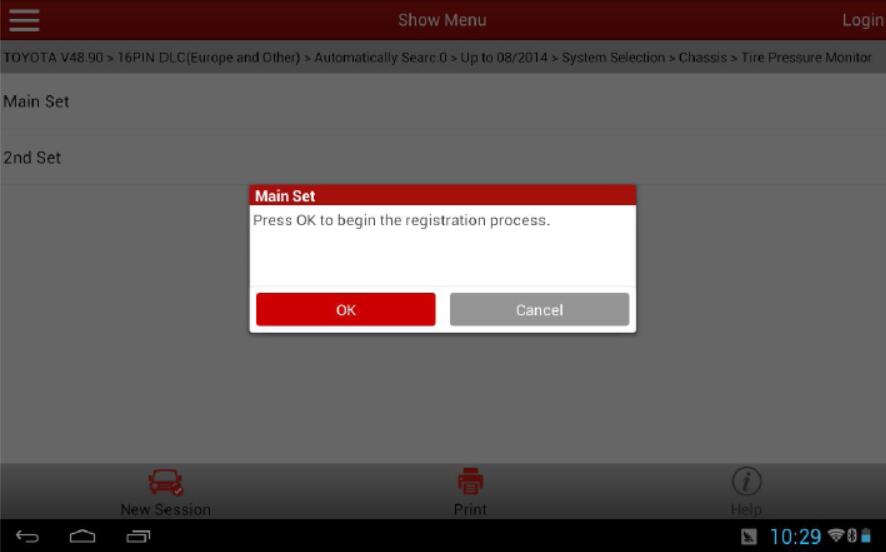
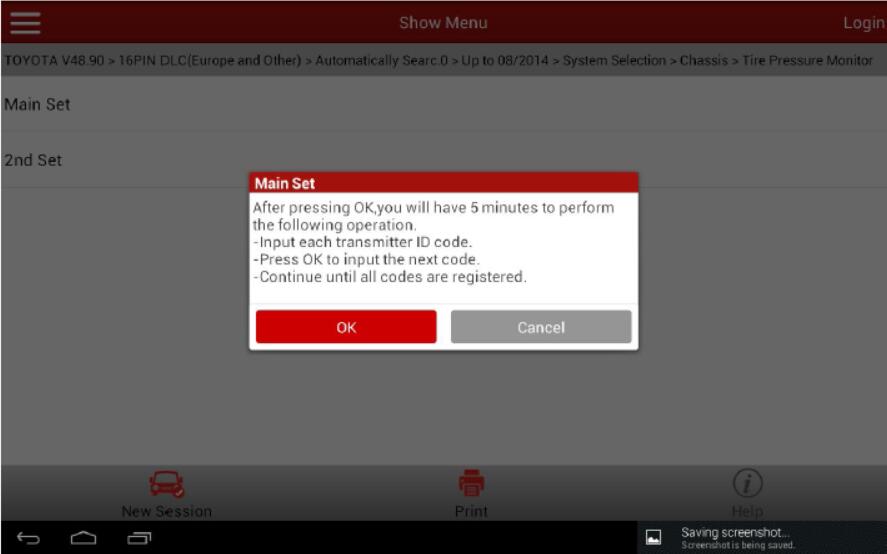
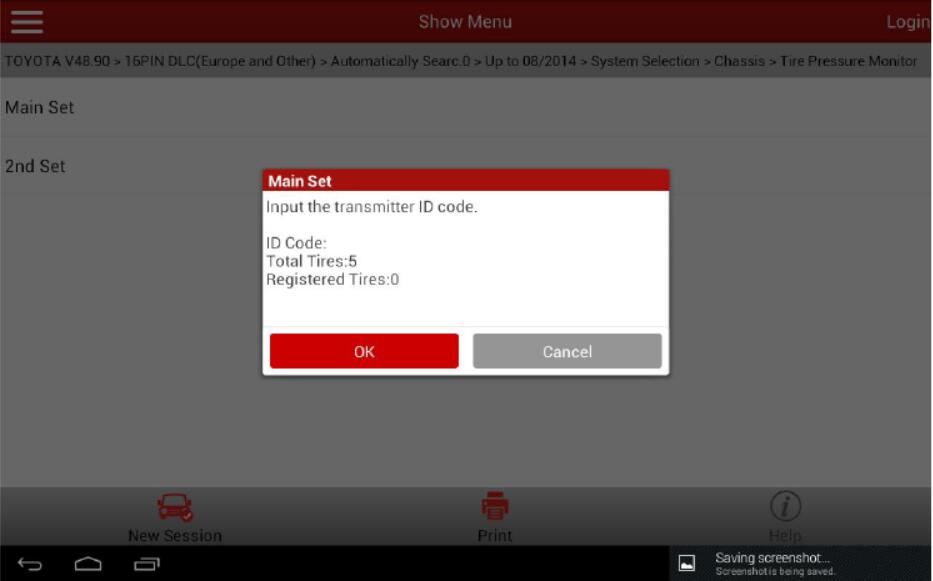
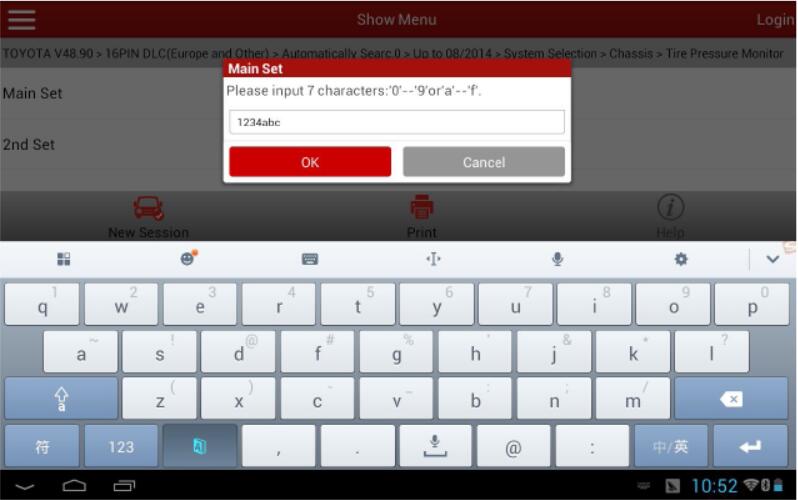
20.Input the ID1-ID5 codes according to the replacement of the tire pressure sensors. As ID1 is not replaced, input the original ID1 code "1234567â€.
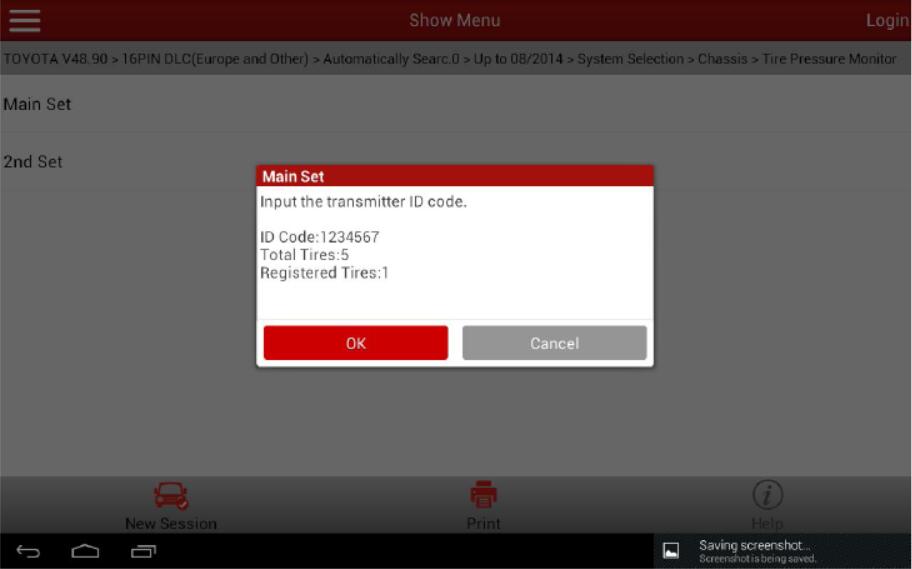
21.Input the ID2 code. As the ID2 tire pressure sensor is replaced, input the new code "1234567â€.For the new code and Picture 11 for the operation interface.


22.Input the original ID3 code "07654321â€.
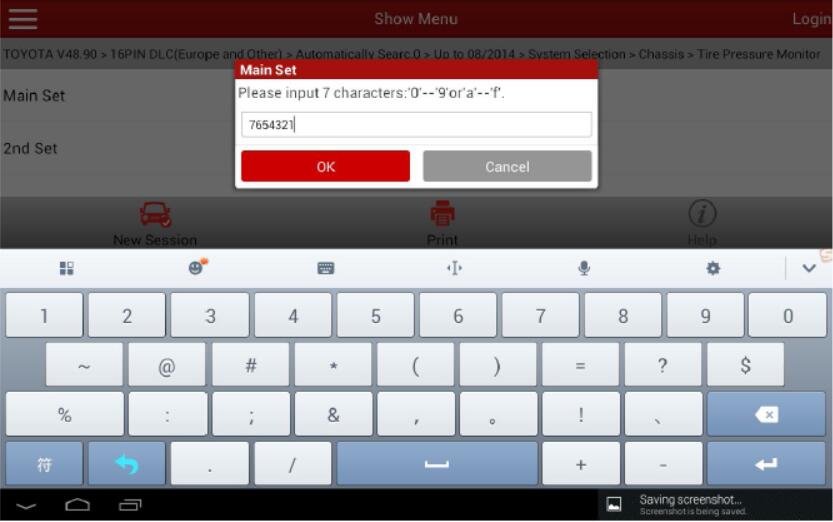
23.Input the original ID4 code "9fedcbaâ€.
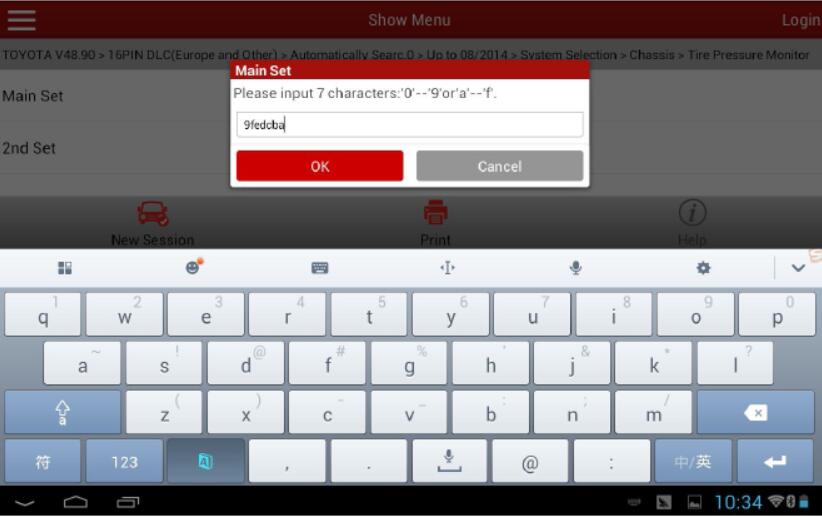
24.Input the original ID5 code "1234abcâ€.
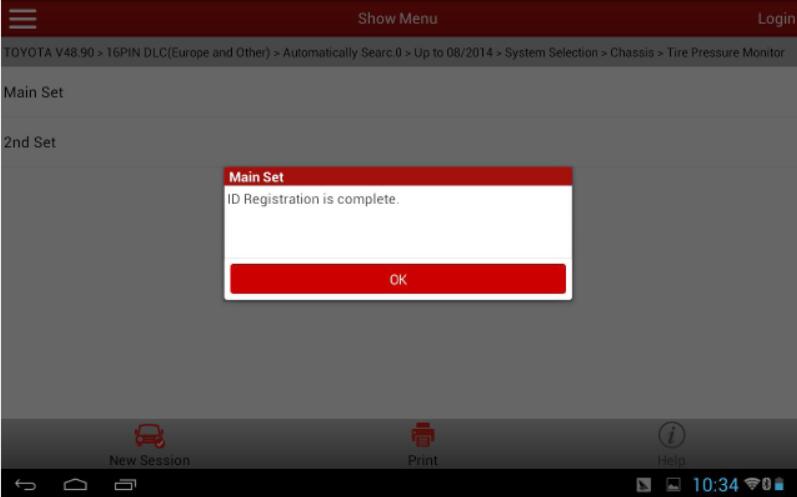
25.After successful entry, it prompts "ID login completedâ€.
26.Read the data streams of ID1-ID5 again to confirm each ID code has been successfully written.
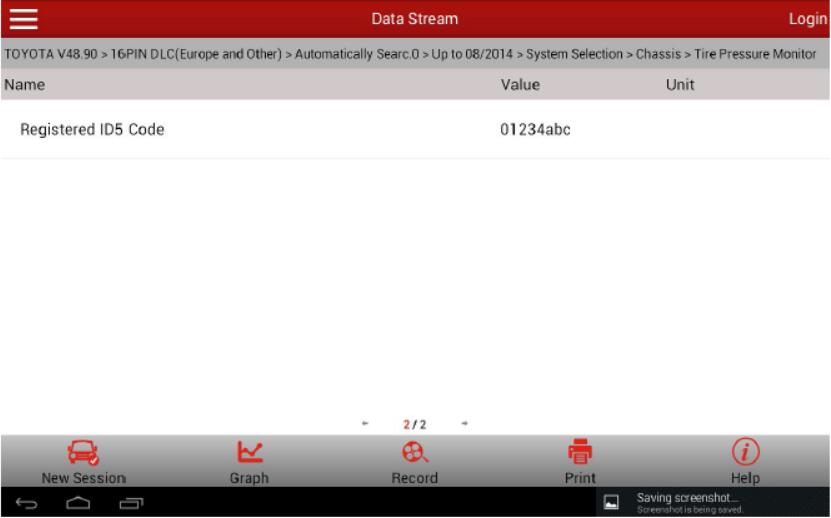
27.Drive the vehicle, everything is normal. Problem has been solved.
Posted by: youobd2 at
11:01 AM
| Comments (1)
| Add Comment
Post contains 269 words, total size 14 kb.
This instruction show you guide on how to use Launch X431 device to reset service light for Maserati Granturismo M145 2012.

What You Need?
Precautions:
1.Park the vehicle on a level surface. The installed sensor is very sensitive to the tilt of the vehicle, otherwise an incorrect measurement error will be displayed because the vehicle is not level.
2.The gear selector must be in P position.
3.After the engine runs, wait 10 minutes for making various vehicle operating indexes stable. After this time, the used individual sensor signal will give out the correct output.
Operating Instructions:
1.Turn the ignition to ON;
2.Select Europe;
3.Select the Maserati V10.03;
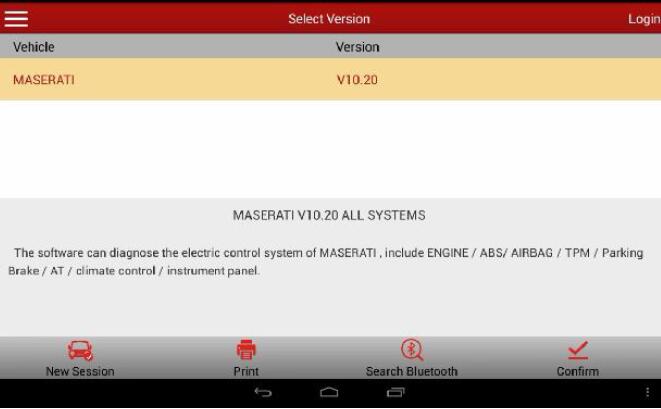
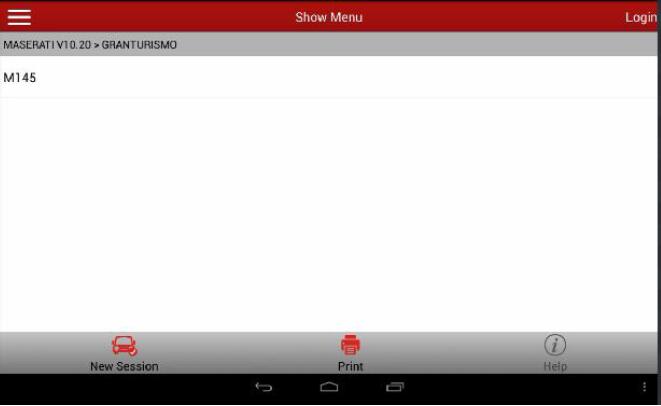
4.Select the GRANTURISMO model;

5.Select the M145;
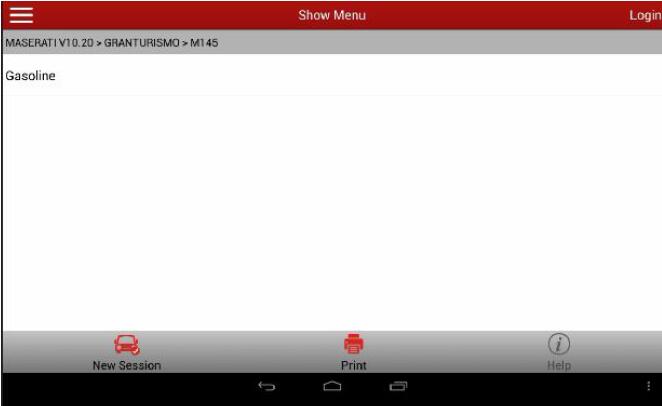
6.Select the Gasoline;
7.Select the System Scan;
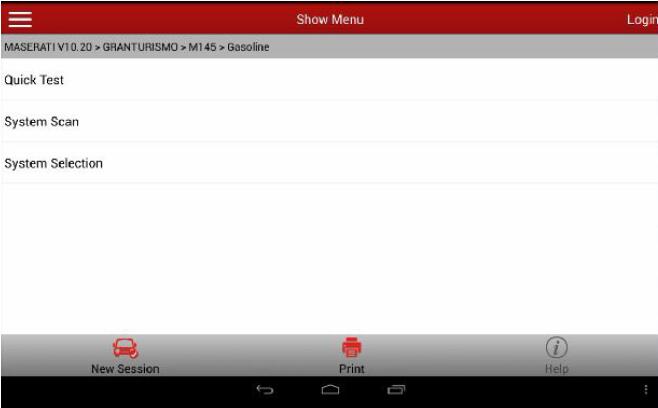
8.Select the Marelli Instrument Cluster;
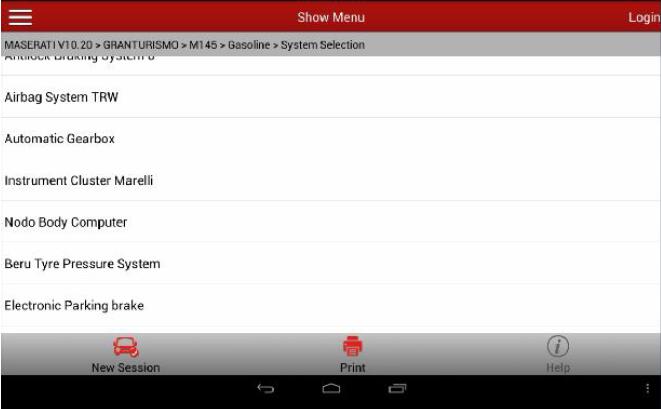
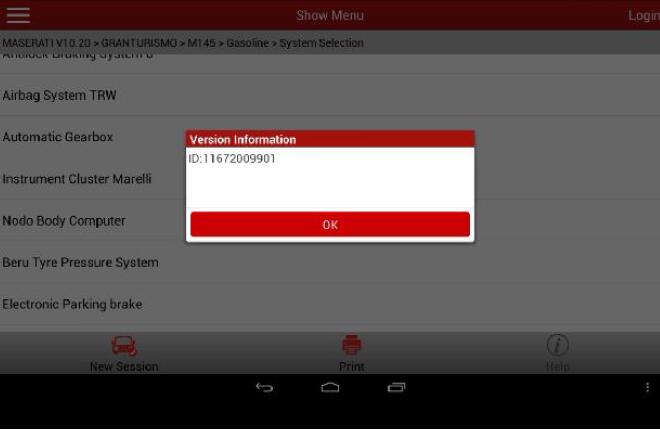
9.Read out the ECU ID, and select Confirm;
10.Select the Special Function;
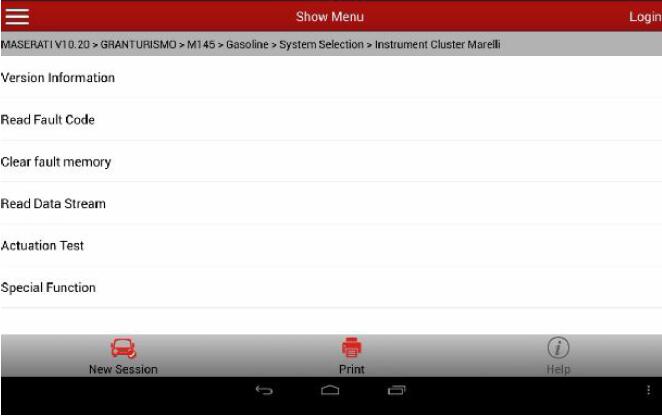
11.Select the Service Info Reset;
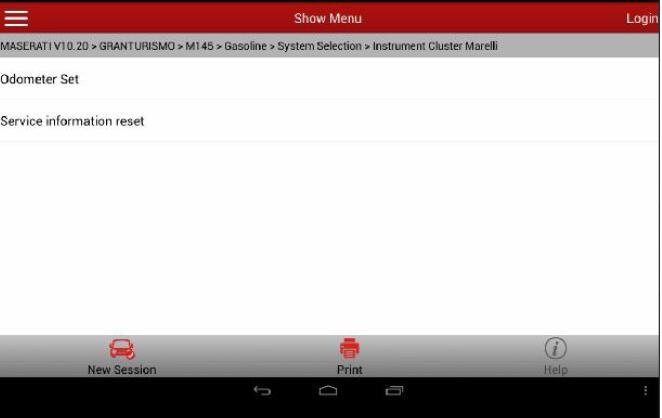
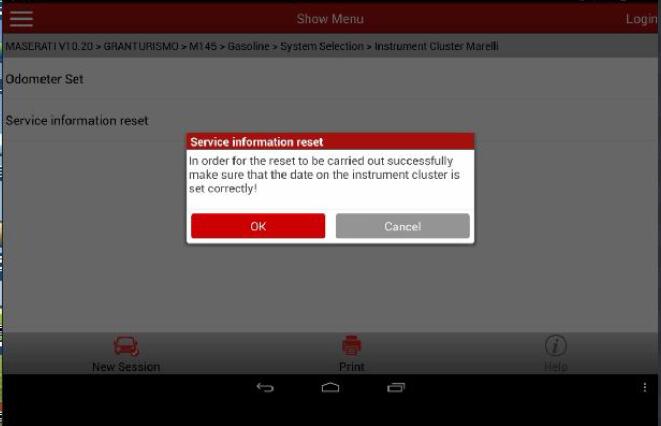
12.Pay attention to the reset service hints to ensure the date on the instrument cluster is set correctly;
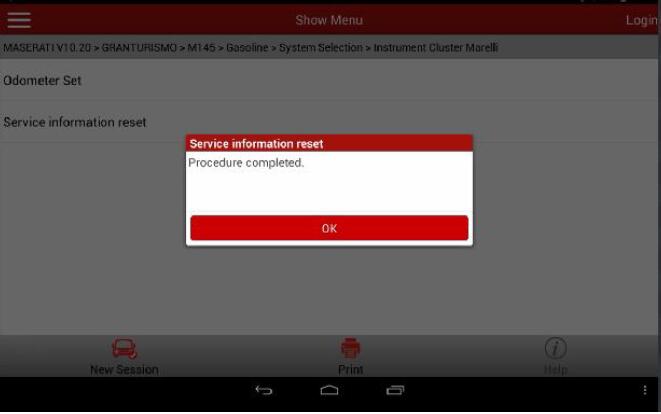
13.After confirmed, it indicates "Procedure completedâ€, then the operation ended.
Posted by: youobd2 at
10:43 AM
| Comments (1)
| Add Comment
Post contains 184 words, total size 6 kb.
August 22, 2020
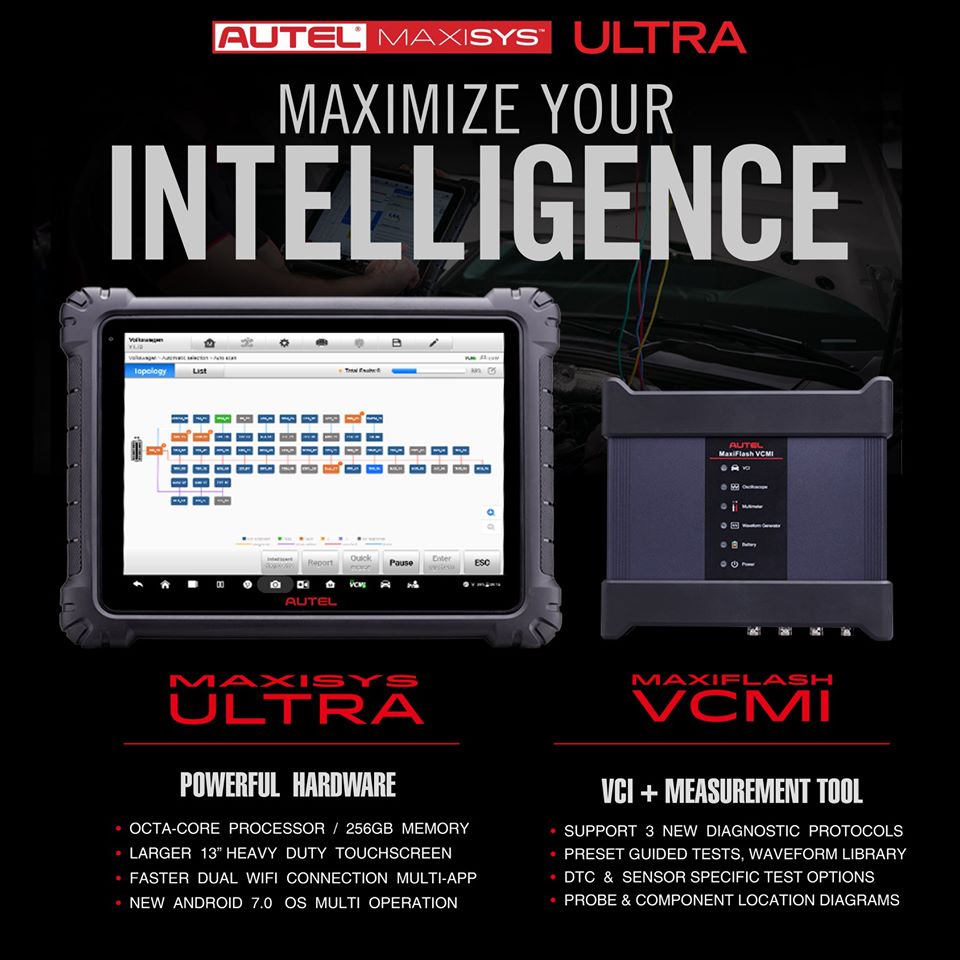
Autel US is proud to announce the release of its largest, most powerful and most solution-driven automotive diagnostics tablet in its history, the MaxiSYS Ultra.
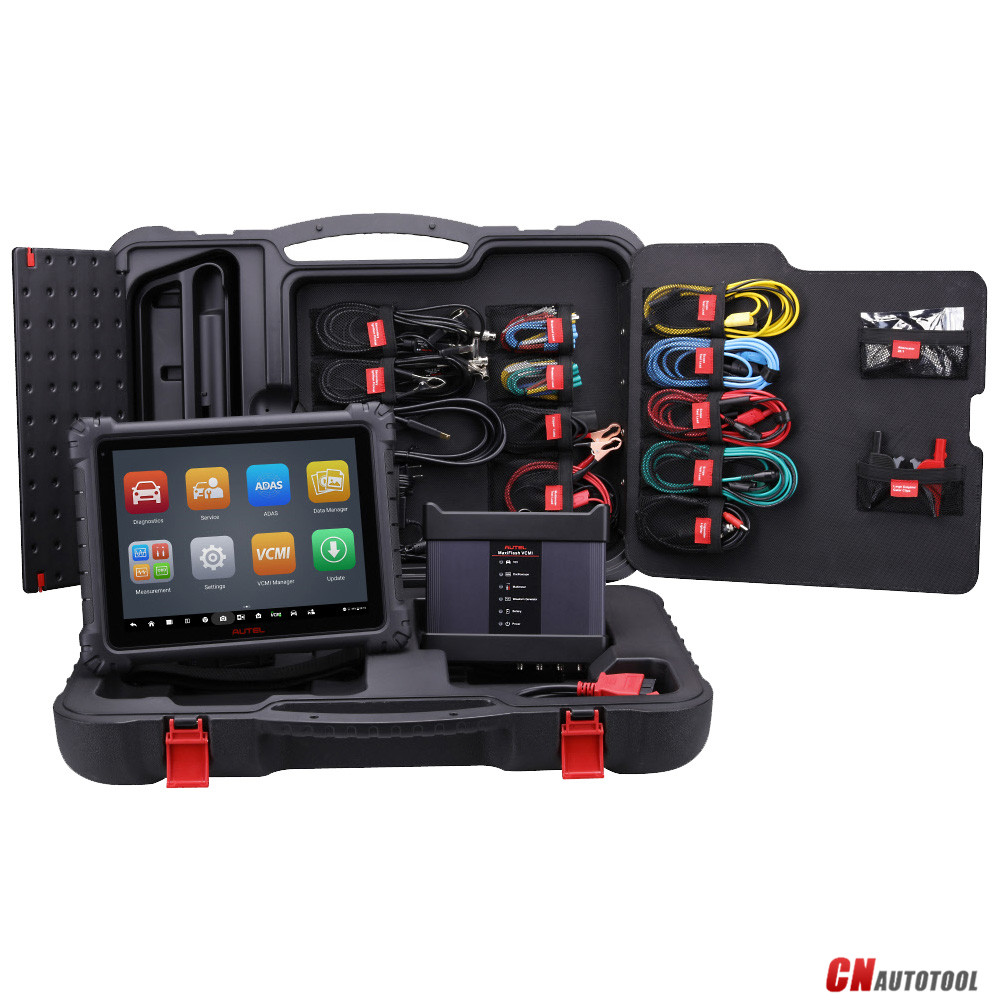
The Ultra is an impressive 12.9-inch, touchscreen tablet powered by an Octa-core processor (2.3GHz Quad + 1.7GHz Quad) with substantial 256GB built-in memory and features the MaxiFlash VCMI, a 5-in-1 communication and testing tool providing wireless vehicle communications between the vehicle and tablet and supporting the latest DoIP, D-PDU and Mega CAN vehicle communication protocols. The dynamic VCMI also functions as a 4-channel oscilloscope, waveform generator, multimeter and CanBUS tester.
MaxiSys UltraDescriptions :
1. Autel updates provide latest OE level coverage for more than 80 US Domestic, Asian and European vehicles, including supercar
2. Exceptional OE-Level functionality from comprehensive OBDII diagnostics & services to advanced ECU coding and programming
3. Automatic system and software updates with real-time push message notifications via internet
4. Interactive Data Logging sessions enable direct contact with Autel
Support for first-hand troubleshooting of diagnostic bugs and errors
5. One-stop multitasking designed for ideal management of workshop
operations to keep all data files, customer info, and vehicle records
well organized
6. Cloud-based Data Manager saves customer and vehicle records, scanner data and technician notes

Posted by: youobd2 at
01:59 PM
| Comments (1)
| Add Comment
Post contains 208 words, total size 3 kb.
August 11, 2020
It is possible to change change KM in Volvo V60 cluster. Depend of what tool you have. Here are instructions and pinouts provided.
VOLVO V60 HC12
Connector 51 is required
VOLVO V60 HC12
Remove the instrument cluster and remove the back cover.
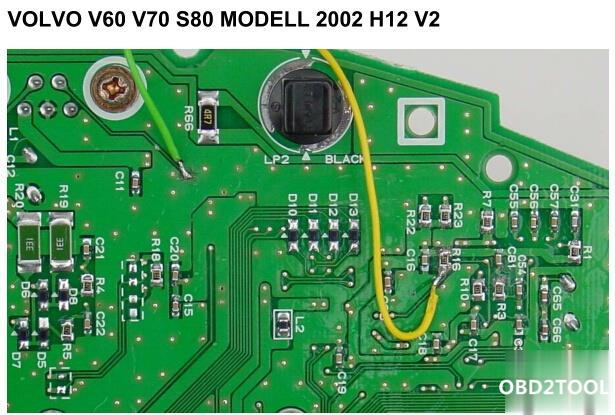
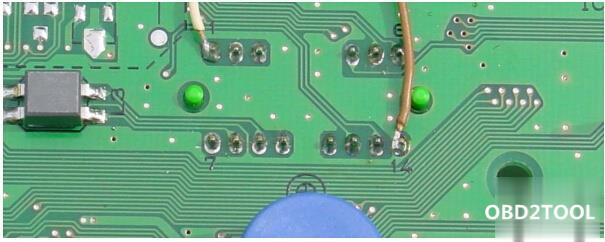
Solder from connector 51 the colors at the marked same color
Soldering points. Disconnect the conductor (pink arrow)
(PICTURES ON THE FOLLOWING)
Connect the plug to the Digiprog III odometer correction tool.
Select the program:
Car / Truck – VOLVO V60 HC12.
The Digiprog 3 v4.94 shows the old / wrong CM reading.
The new / correct KM stand program and ready.
After confirmation, the process is completed.
Solder all connections.
FINISHED.
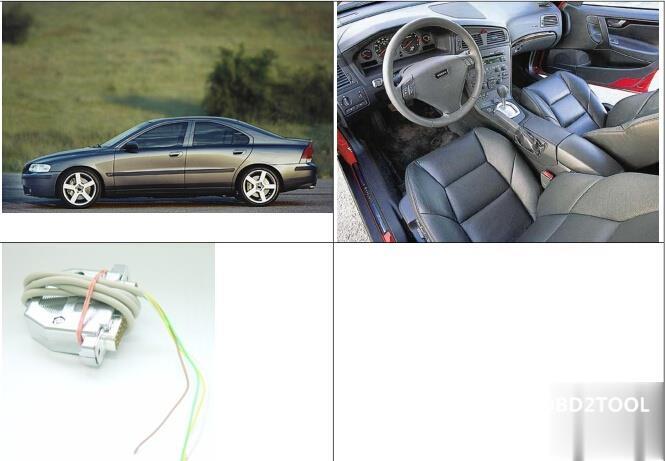
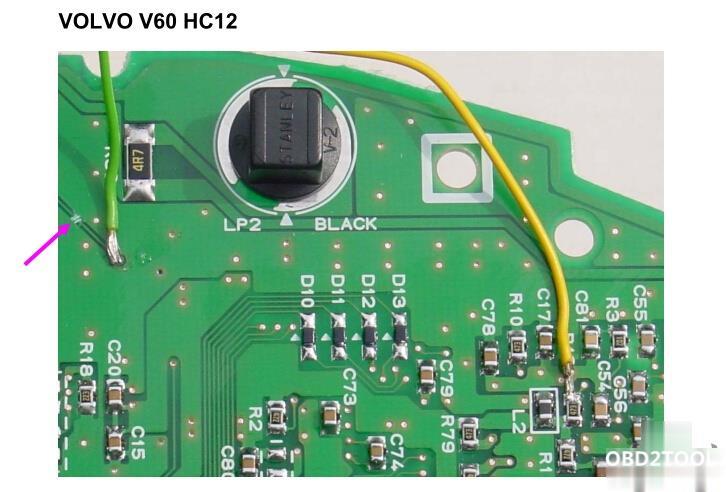
VOLVO V60 V70 S80 MOD. 2002 H12 V2
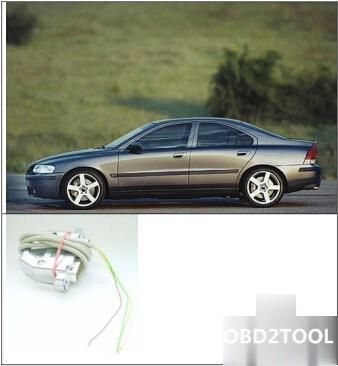
Connector 51 is required
VOLVO V60 V70 S80 MODEL 2002 H12 V2
Remove the instrument cluster and remove the back cover.
Solder from connector 51 the colors at the marked same color
Soldering points.
Connect the plug to the Digiprog3 V4.94.
Select the program: Car / Truck – VOLVO V70 HC12 V2.
The Digiprog shows the old / wrong CM reading.
The new / correct KM stand program and ready.
After confirmation, the process is completed.
Solder all connections.
FINISHED.
Posted by: youobd2 at
03:17 AM
| Comments (1)
| Add Comment
Post contains 210 words, total size 3 kb.
Here is success and failure experience of Audi TT 2003 KM change, using different odometer correction tools.
Car:Audi TT 8n 2003 D73
Super VAG:
I got connection but I only get error message from the device when I want to enter the mileage option.
It is very recommended tool to do that. So I bought one of it but with that tool nothing change.
It seems to work ok. I enter the mileage and continue. Then car-display restart and the Digiprog 3 says to remove fuse but nothing changed, still the same mileage. I tried also to disconnect the battery but it also not help, or did I removed the wrong fuses^^ I used 11 and 15 which are both for the speedometer. I also tried it separate, so only to remove one fuse.
Suggestion:
Regarding your cluster, it probably contains a MC912DG128ACPV MCU that contains the mileage data so you need a tool that can read and write that to that chip. Quite a few of the more well known tools can’t read and write to it over OBD (Chinese clones are some of the well known ones for corrupting this chip and causing the 999999 error). You should avoid taking risks with writing to this chip as it could corrupt your immobiliser/key data and then cause your car not to start, the immobiliser cutting the engine off.
If you want change mileage with a cheap tool, go to a man of his words to trust in.
Vag Tacho Pro U2008 HQ clone orDigimaster 3odometer correction master can be a good investment
Connection:
Note that: Different tools might have diff connections and colours of wires
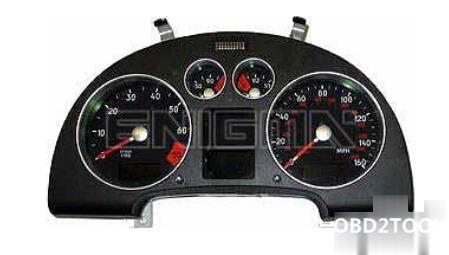
Dashboard:
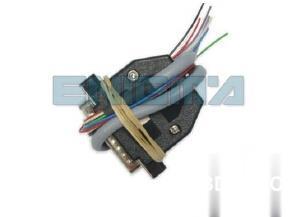
Required cable – C12:
How-to’s & connection:
1.Remove the dashboard and open it carefully.
2.Remove the back side of the dash to get to the main board and identify it.
3.Solder cable C12 to the points on the back of the dash mainboard
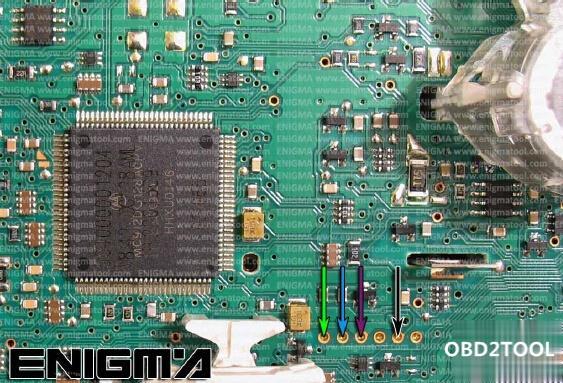
4.Make sure that the connection you made is secure.
5.Use the EDITOR to save memory backup data.
6.Press the READ KM button and check if the value shown on the screen is correct.
7.Now you can use the CHANGE KM function.
TRY ON YOUR OWN RISK!
GOOD LUCK!
Posted by: youobd2 at
03:12 AM
| No Comments
| Add Comment
Post contains 383 words, total size 4 kb.
August 10, 2020
How to Restore BMW ICOM Scanner? This post will show an obd2eshop customer’s solution to BMW ICOM Next restore when you has red LEDs turn on issue when running firmware upgrade. In order to solve your incident, please apply the following 12 steps:
Note: DO NOT UNPLUG the BMW ICOM Next emulator from the {OBD II} jack after an update via {ISTA}, a web interface or an emergency software update.
The {ICOM Next} starts with flashing green SYSTEM {LED}s. After about 10 seconds it shows red {LED}s for about 2 minutes. After this, the {ICOM Next} reboots due to a firmware update.
If the {ICOM Next} {LED}s remain red for more than 10 minutes, or if the {ICOM Next} is unplugged directly after an update, please carry out the following procedure:
1. Please ensure that ALL of the following prerequisites are satisfied:
1.1. You require a USB 2.0 or USB 3.0 flash drive. {USB 1.x flash drives are not supported).
1.2. The USB flash drive must be formatted with a FAT32 file system.
1.3. A minimum of 60 MByte free space is required on the USB flash drive.
2. Navigate to "C:\ProgramData\BMW\ISPI\data\TRIC\ICOMNext\ICOM-Image-03-14-08â€.
ProgramData folder is hidden by default. In that case, you have two options in order to access the file or the folder:
– change the settings directly in the Windows Explorer ("Tools => Folder Options => View => Show hidden files, folders or drivesâ€)
– or enter the whole path into the Windows Explorer’s address bar and press enter.
3. Copy "{ICOM_Next-rootfs-010002.tar.gz}†to the root directory of the {USB} flash drive.
4. Copy "{ICOM_Next-app-010008.tar.gz}†to the root directory of the {USB} flash drive.
5. Disconnect the {ICOM Next} from the power supply.
6. Plug the {USB} flash drive into the {ICOM NEXT}.
7. Press and hold the button pressed on the {ICOM Next} and connect the {ICOM NEXT} to the {OBD II} jack of a vehicle.
8. Keep the button pressed. The {ICOM NEXT} starts with all {LED}s glowing red. The {LED}s stay red; some may flicker orange/yellow. Keep the button pressed.
9. Keep the button pressed. After about 4 seconds, all {LED}s turn orange/yellow. All {LED}s now glow in the same colour.
10. Release the button and then press it three times within five seconds. The {LED}s glow or flash red and orange/yellow again.
11. Wait: This procedure may take several minutes. Do not disconnect the {ICOM NEXT} as long as any {LED} glows red.
12. After about 5 minutes the SYSTEM {LED} turns green again. The {ICOM NEXT} has been updated and is ready for use.
IMPORTANT: When the software update is complete, the {ICOM NEXT} needs to be connected to the dealer’s network in order to be reconfigured.
All previous settings are lost during the update. If there is a "{user.settings}†file on the {USB} flash drive, it will be applied after the firmware update.
BMW ICOM A2+B+C Diagnostic & Programming TOOL BMW Scanner 2020.08 Engineers Version Cheapest Price
If you want know more information about BMW ICOM, please click on it.
Posted by: youobd2 at
06:41 AM
| Comments (1)
| Add Comment
Post contains 535 words, total size 4 kb.
August 07, 2020
Autel Maxisys Elite (Upgraded Version of MS908P Pro) with Wifi Bluetooth OBD Full Diagnostic Scanner with J2534 ECU Programming
Coming from a snap on verus decided to look for a new diagnostic tool that would not break my wallet and decided to take it for a spin. I could do everything the verus can do and more since it comes with the passthrough, performs bi directional tests even turn on the wippers or honk the horn. Every test imaginable can be made with the maxisys pro or elite for 1/3 of the price of a new verus. Ive had a maxisys pro since it can out it has performed flawlessly , perfect. I own a small repair shop ranging from american to import vehicle from gas to diesel (ford powerstroke & dodge cummins) and have never had problems.
When you buy it new you will get 1 year of unlimited updates to new tests or new vehicle info after registering your scan tool on the autel pro page . After that year you will go to the pro autel page and simply pay the fee for another year update. For the pro its 1,299 yearly but its up to you. You dont have to pay it for the scan tool to continue to work. I havent updated mine in almost 2 years and performs neat everyday. Now i have acquired the new elite version of the pro with a new android better camera and with a faster processors. It just works. In all my 12 years as a tech ive used different scan tools and had never seen one as good as the maxisys pro and elite. Now that i have both i will be giving the pro to my employee and the elite for me. Thank Autel for making such great products.
So i received my elite scanner very quickly. Customer services contacted me by email to see if their product had met my expectation. I like the fact that they contacted me and i havent seen that before.
Now continuing on the scanner i post photos of the differences between the new Elite and the Pro (which i use everyday on my shop CnAutotool.com)
The screen is brighter because is retina display (much like an ipad).
The bootup process is very very faster than the pro. The pro aprox 30 secs of boot up and 5-8 secs on the elite.
It has one more usb that is very usefull for connecting a mouse or a keyboard.
On
the outside you will see is much thinner, lighter and rubber protection
(feels more like hard plastic but its rubber) on the sides not on the
corners like the pro (which are real rubber).
On the top right
corner there is a led light that indicates the battery life which is
great when you have the screen off. On the pro you have to turn the
screen on to see battery life.
The Autel Scanner elite come with a docking station where you can charge it of leave it out of harms way. Im very impressed with my purchase. I hope this helps because when i purchased my pro the lack of information made me hold of a little bit but tool a leap of faith.
MaxiSys UltraDescriptions :
1. Autel updates provide latest OE level coverage for more than 80 US Domestic, Asian and European vehicles, including supercar
2. Exceptional OE-Level functionality from comprehensive OBDII
diagnostics & services to advanced ECU coding and programming
3. Automatic system and software updates with real-time push message notifications via internet
4. Interactive Data Logging sessions enable direct contact with Autel
Support for first-hand troubleshooting of diagnostic bugs and errors
5. One-stop multitasking designed for ideal management of workshop
operations to keep all data files, customer info, and vehicle records
well organized
6. Cloud-based Data Manager saves customer and vehicle records, scanner data and technician notes
Posted by: youobd2 at
10:02 AM
| No Comments
| Add Comment
Post contains 662 words, total size 5 kb.
August 05, 2020
Launch X431 V+ is full system auto diagnostic scan tool which is the update version of X431 V Pro. It support all systems diagnostics, ecu coding, key programming,resetting services,active test (Bi-directional control) and more. Is it worth to buy one? Let’s check the reviews of Launch X431 V+ by the users.
Mickie:
I have Snap On, Matco, and other scanners, and when I was recommended to the Launch X431 V+ for doing module programming, I was at first hesitant. But as all of my other scanners couldn’t program a wireless module and keys, so I ordered this scanner. What a machine! The launch X431 V+ handled the programming in a flash. Easy to use, and understand. I am looking forward to using this as my go-to scanner.
Tolay: Really useful, easy to use
I need this scanner for my shop, and definitely is a great tool, it has a lot of features, I think I got the best value for my money, I was between buying this or a way more expensive Snapon scanner, Im glad I decided for the Launch, I definitely recommend this.
Levis: This scan tool will more than handle the challanges you run into on a day to day basis
like the bi-directional features, lets me do some programing, covers most manufacturers and models. I also bought the campanion HD Truck module with this scan tool since I do my own work on a 39 ft motorhome with CAT engine, also advise friends who have Cummins. Well worth the money, I can’t justify a really high end unit since I use it for a hobby.However, my expierence in Auto Electric class shows it will handle most scaning, re-sets, as well as some programing chors.
Kapita: Best bang for the buck
I was torn between the Autel vs the V+… being in the automotive business, I was fortunate to play with both models and decided to order myself the v+ due to what it offers. You cant beat the cost per satisfaction factor amd for what it does, its more than enough for a mid sized shop like mine. 2 years of free update and with the current updates including the current year models, this easily beats our snap-on solus and modus. For those reviews bashing "chinese made†well think again when you are using other brands because their programs are done so well.
Dilly: Does more than I even know how
I have only used this x431 v+ a few times so far. I can tell from the little I have dont that this Diagnostic Tools is very capable of doing everything I would ever need to do and then some. I just need to work through the learning curve.
Posted by: youobd2 at
08:57 AM
| No Comments
| Add Comment
Post contains 458 words, total size 3 kb.
38 queries taking 0.0262 seconds, 144 records returned.
Powered by Minx 1.1.6c-pink.

